Table of Contents
Advertisement
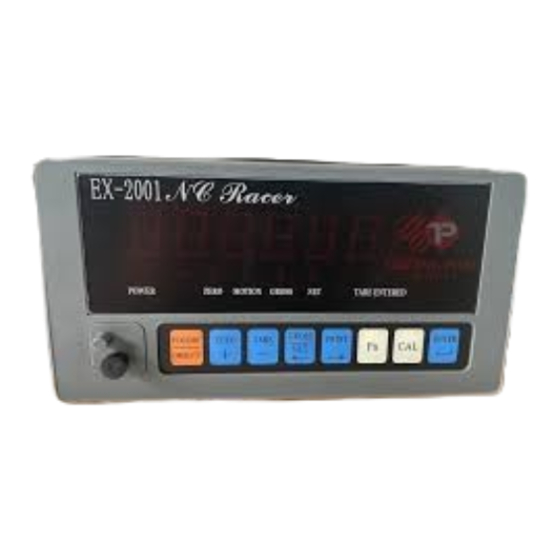
EXCELL PRECISION CO., LTD.
© EXCELL PRECISION CO., LTD 2008. All rights reserved Worldwide.
The information contained herein is the property of EXCELL PRECISION
CO., LTD and is supplied without liability for errors or omissions. No part
may be reproduced or used except as authorised by contract or other
written permission. The copyright and the foregoing restriction on
reproduction and use extend to all media in which the information may be
embodied.
Advertisement
Table of Contents

Subscribe to Our Youtube Channel
Related Manuals for Excell NC RACER EX-2001


Summary of Contents for Excell NC RACER EX-2001
- Page 1 EXCELL PRECISION CO., LTD. © EXCELL PRECISION CO., LTD 2008. All rights reserved Worldwide. The information contained herein is the property of EXCELL PRECISION CO., LTD and is supplied without liability for errors or omissions. No part may be reproduced or used except as authorised by contract or other written permission.
-
Page 3: Table Of Contents
EXCELL PRECISION CO., LTD. TABLE OF CONTENTS SAFETY............................3 CLEANNING TIPS........................4 CHAPTER 1 OPERATION GUIDE ....................5 CHARTER 2 SPECIFICATIONS....................7 CHAPTER 3 FRONT AND REAR PANEL................... 9 3-1 FRONT PANEL ........................9 3-2 REAR PANEL........................10 CHAPTER 4 INSTALLATION ....................11 4-1 LOAD CELL ........................ - Page 4 EXCELL PRECISION CO., LTD. 7-2 OP-02 PARALLEL BCD OUTPUT..................26 7-3 OP-03 ANALOGUE CURRENT / VOLTAGE OUTPUT INTERFACE........ 28 7-4 OP-05 PARALLEL PRINTER OUTPUT & RS-232 & CURRENT LOOP......29 7-5 OP-06 RS-232 & CURRENT LOOP.................. 32 7-6 OP-07 RS-232, CURRENT LOOP & DATA CLOCK OUTPUT.......... 33 7-7 OP-08 CONTROL I /O (2I /4O) INTERFACE..............
-
Page 5: Safety
EXCELL PRECISION CO., LTD. SAFETY Disconnect the main power supply before opening the indicator housing or disassembling the indicator. In the process of maintenance, please cut off the source if contacting to any electron, socket and groupware for fear of getting an electric shock、short current and shattering weight controller or error movement. -
Page 6: Cleanning Tips
EXCELL PRECISION CO., LTD. CLEANNING TIPS Please clean the indicator by alcohol and chemical medicament. Clean it with a wet cloth and gentle cleanser and dry it with a soft cloth. Do not swash the indicator. Do not breakout and maintain the indicator. -
Page 7: Chapter 1 Operation Guide
EXCELL PRECISION CO., LTD. CHAPTER 1 OPERATION GUIDE FUNCTION OPERATION PROCEDURE DESCRIPTION Press and hold the key, ENTER General function Refer to Chapter 9 Functions Table setting to set FUNC. 0 ~ FUNC. 7 then press the Switch the capacity calibration Set the parameter for decimal switch to “ON”... - Page 8 EXCELL PRECISION CO., LTD. Operation of Keys in the Setting Mode ZERO ⇒ Increase the number of the flashing digit by one TARE ⇒ Decrease the number of the flashing digit by one — GROSS ⇒ Shift the flashing digit one space to left ⇒...
-
Page 9: Charter 2 Specifications
EXCELL PRECISION CO., LTD. CHARTER 2 SPECIFICATIONS ANALOGUE : DC 5 V ± 5%,120 mA (up to 8 × 350 Ω load cells) ◆ Load cell excitation ◆ Maximum signal voltage : 20 mV : 0.3 μV / D (minimum) ◆... - Page 10 EXCELL PRECISION CO., LTD. INTERFACE ◆ OP-01 RS-422 / RS-485 ◆ OP-02-1 Parallel BCD output ( TTL ) ◆ OP-02-2 Parallel BCD output ( O.C. ) ◆ OP-03 Analog output ( 4 ~ 20 mA ) ◆ OP-05 Parallel Printer output / RS-232C & CURRENT LOOP ◆...
-
Page 11: Chapter 3 Front And Rear Panel
EXCELL PRECISION CO., LTD. CHAPTER 3 FRONT AND REAR PANEL 3-1 FRONT PANEL POWER ZERO MOTION GROSS NET TARE ENTERED GROSS STANDBY PRINT ZERO TARE ENTER C A L — OPERAE MAIN DISPLAY • Displays gross weight or net weight STATUS INDICATION LIGHTS ☼... -
Page 12: Rear Panel
EXCELL PRECISION CO., LTD. CAPACITY PARAMETER & CALIBRATION SWITCH Slide the switch to the left is “ON” and Slide the switch to the right is “OFF” 3-2 REAR PANEL DATA IN / OUT CONTROL IN / OUTPUT INPUT OUTPUT 1 C2 C1 4 AC 100V~240V FUSE/0.5A... -
Page 13: Chapter 4 Installation
EXCELL PRECISION CO., LTD. CHAPTER 4 INSTALLATION 4-1 LOAD CELL Load Cell Load cell Load cell cable Load Cell Cable EXC+ SEN+ SIG+ SIG- EXC- SEN- Shield Shield Four-wire (five-wire) load cell Six-wire (seven-wire) load cell Pin 1 & 2 short, connected to EXC+ Pin 1 connected to EXC+ Pin 3 &... - Page 14 EXCELL PRECISION CO., LTD. 2 INDICATOR DIMENSIONS (measurement unit: mm) EX-2001 NC RACER ZSME300000091...
-
Page 15: Chapter 5 Capacity Calibration
EXCELL PRECISION CO., LTD. CHAPTER 5 CAPACITY CALIBRATION 5-1 PARAMETER SETTING Switch the capacity calibration switch to “ON” and the display shows Press the key and the display shows then enter the setting mode. 5-1-1 Flow Diagram DISPLAY ENTER Setup completed... -
Page 16: Description
EXCELL PRECISION CO., LTD. 5-1-2 Description 1) Zero Tracking Display Division / Time 1 d / 1 s 2 d / 1 s 3 d / 1 s 4 d / 1 s 1 d / 2 s 2 d / 2 s... -
Page 17: Calibration Setting
EXCELL PRECISION CO., LTD. 5-2 CALIBRATION SETTING Please allow the indicator to warm up at least 15 to 30 minutes before calibration. Switch the capacity calibration switch to “ON” and the display shows Press the key and the display shows then enter the setting mode. -
Page 18: Linearity Calibration
EXCELL PRECISION CO., LTD. 5-3 LINEARITY CALIBRATION Before linearity calibration, make sure “Zero calibration” and “Weight Calibration” are properly performed. Set the calibration switch to ON position. Press C A L Five point linearity calibration. ZERO TARE Press key to Choosing from 1P ~ 5P by —... - Page 19 EXCELL PRECISION CO., LTD. Recall Linearity correction point Set the calibration switch to ON position. C A L Press Five point linearity calibration. Choosing from 1P ~ 5P by Choose linearity calibration pressing key. TARE ZERO — ⇒ No linearity...
- Page 20 EXCELL PRECISION CO., LTD. Clear a linearity correction point Set the calibration switch to ON position. C A L Press Five point linearity calibration. Choosing from 1P ~ 5P by Choose linearity calibration pressing key. ZERO TARE — ⇒ No linearity...
-
Page 21: Password Setting
EXCELL PRECISION CO., LTD. 5-4 PASSWORD SETTING Set the calibration switch to ON position. Set the new password ZERO Press * Enter “0 000” to skip password setting. ENTER Press Confirm the password (re-enter the password again) ENTER Press ⇒ Increase the number of... -
Page 22: Error Messages
EXCELL PRECISION CO., LTD. 5-5 ERROR MESSAGES The load cell and A/D are abnormal. The most capacity setting value is over the high limited value. When zero calibration, load cell inputs too much. If the load cell is not shattered, please connect a precision resistance (50 kΩ ~ 500 kΩ) -
Page 23: Chapter 6 Animal Scale Function Setting
EXCELL PRECISION CO., LTD. CHAPTER 6 ANIMAL SCALE FUNCTION SETTING FUNC. 8 = 1 (Animal scale function is active) “ ” is displayed, when there is no object on the weight panel: The weight of live stocks is measured and showed in the display, (20 kg in this example): The weight value will be held until removing all the objects on the weight panel. -
Page 24: Chapter 7 Interfaces
EXCELL PRECISION CO., LTD. CHAPTER 7 INTERFACES 7-1 OP-01 RS-422 & RS-485 INTERFACE OP-01 RS-422 / RS-485 With this interface up to 10 indicators can be connected together and data transferred to a host controller. FUNC. 70 should be set to “ 1 ”... - Page 25 EXCELL PRECISION CO., LTD. WIRING NOTICE Transmission wire Twisted pair is a must. The quality of the transmission has great effect on the transmission signal. Twisted pair with low quality (e.g. PVC wire) gives a really weak signal when the transmission rate is high.
- Page 26 EXCELL PRECISION CO., LTD. Refer to Chapter 9 Function Table to set FUNC. 60 ~ FUNC. 69 Transmit format Format 1 g CR LF Header 1 Header 2 Weight Data ( 8 digits ) Units Terminators Format 2 CR LF...
- Page 27 EXCELL PRECISION CO., LTD. Status Stable: display “blank” Unstable: display “M” Over load: display “O” Units Kg, g, t, lb or “blank” Terminators CR, LF is the data finish code. Command mode COMMAND FUNCTION READ, RW Reads weight ZERO, MZ...
-
Page 28: Parallel Bcd Output
EXCELL PRECISION CO., LTD. 7-2 OP-02 PARALLEL BCD OUTPUT Pin assignment REAR PANEL REAR PENAL DATA DATA BCD parallel output interface uses Centronic 50 PIN connector Pin number Function Pin number Function Gross/-NET 1×10⁰ 2×10⁰ 4×10⁰ 8×10⁰ 1×10¹ 2×10¹ Stable 4×10¹... - Page 29 EXCELL PRECISION CO., LTD. Refer to Chapter 9 Function Table to set FUNC. 80 ~ FUNC. 83 Output equivalent circuit Open Collector Output ﹢30 V (max.) Open Collector Output TTL Output TTL Output +30V(max.) Signal Out Signal out 30 mA (max.) Signal Out 30mA(max.)
-
Page 30: Analogue Current / Voltage Output Interface
EXCELL PRECISION CO., LTD. 7-3 OP-03 ANALOGUE CURRENT / VOLTAGE OUTPUT INTERFACE Connections DATA Interface specification D A TA O U T Analogue current output : 0 ~ 20 mA Load resister : 0 ~ 550 Ω A - A + A﹣... -
Page 31: Parallel Printer Output & Rs-232 & Current Loop
EXCELL PRECISION CO., LTD. 7-4 OP-05 PARALLEL PRINTER OUTPUT & RS-232 & CURRENT LOOP 2 Pin assignment Pin number Function Pin number Function STROBE ERROR INIT BUSY 2 Refer to Chapter 9 Functions Table to set FUNC 90 ~ FUNC 99... - Page 32 EXCELL PRECISION CO., LTD. 2 RS-232 Pin position Pin number Function Pin number Function C. LOOP1 C. LOOP2 2 Refer to Chapter 9 Functions Table to set FUNC 60 ~ FUNC 69 2 The function is only to transmit but not to receive.
- Page 33 EXCELL PRECISION CO., LTD. ( FUNC. 90=2 ) Format 3 DATE TIME GROSS ( ) TARE ( NET ( 2001/08/30 12:16:19 2001/08/30 12:16:31 SUB TOTAL 10.0 2001/08/30 12:17:00 12.0 2001/08/30 12:17:19 12.0 GRAND TOTAL 20.0 ( FUNC. 90=3 ) Format 4 EZ-2 print format ≠...
-
Page 34: Rs-232 & Current Loop
EXCELL PRECISION CO., LTD. 7-5 OP-06 RS-232 & CURRENT LOOP RS-232 / CURRENT LOOP RS-232C is a bi-directional output/input; CURRENT LOOP is one-way output only, and the output data format is the same as RS-232. CONNECTION 接線圖 CONNECTION C.LOOP C . LOOP... -
Page 35: Rs-232, Current Loop & Data Clock Output
EXCELL PRECISION CO., LTD. 7-6 OP-07 RS-232, CURRENT LOOP & DATA CLOCK OUTPUT RS-232 / CURRENT LOOP RS-232C is a bi-directional output/input; CURRENT LOOP is one-way output only, and the output data format is the same as RS-232. CONNECTION 接線圖... -
Page 36: Control I /O (2I /4O) Interface
EXCELL PRECISION CO., LTD. 7-7 OP-08 CONTROL I /O (2I /4O) INTERFACE External input and relay output CONTROL IN / OUTPUT Output Pin Function INPUT OUTPUT Zero Band Input / output connectors on the rear panel OUTPUT 1~ 4 30 VDC /250 VAC... - Page 37 EXCELL PRECISION CO., LTD. The Flow Chart of HI , OK , LO Setting ENTER Press and hold , followed by pressing , to enter the check weighing mode. C A L ENTER Press ZERO TARE Press key to select any value —...
- Page 38 EXCELL PRECISION CO., LTD. HI , OK , LO Output Procedure Start Check Weighing Mode Selected ( FUNC.53 setting) FUNC.53 = 0 FUNC.53 = 1 FUNC.53 = 2 ( One time weighing Comparison occurs Comparison ( One time weighing comparison...
- Page 39 EXCELL PRECISION CO., LTD. Zero band Zero band Zero band Zero band Zero band Zero band General Comparison Func54=0 Func54=0 General comparison Func54=0 Zero band Zero _ band Zero _ band high high Func54=1 Absolute Value Comparison Func54=1 Func54=1 Absolute value comparison...
-
Page 40: Chapter 8 Maintenance
EXCELL PRECISION CO., LTD. CHAPTER 8 MAINTENANCE 8-1 RESET ALL PARAMETERS BACK TO DEFAULT (1) Switch the capacity calibration switch to “ON”, press and hold keys ENTER together when the indicator is in the self-testing sequence. (2) The display shows... -
Page 41: Digit Display And Led Status Light Diagnosis
EXCELL PRECISION CO., LTD. Display Diagnosis Item 7 digits display and LED status lights Keyboard and calibration ON / OFF switch OP-06 RS-232 serial output / input interface OP-02 BCD parallel output interface OP-03 Analogue current output interface OP-05 Parallel printer interface... -
Page 42: Analogue Current Output Interface Diagnosis ( Op-03 )
EXCELL PRECISION CO., LTD. 8-3-5 Analogue Current Output Interface Diagnosis ( OP-03 ) (1) Use keys to select output current. TARE ZERO — 4 mA 12 mA 20 mA (2) If is displayed, this indicates that an interface has not been ⎯... -
Page 43: Chapter 9 Function Table
EXCELL PRECISION CO., LTD. CHAPTER 9 FUNCTION TABLE GENERAL FUNCTION SET VALUE FUNC.NO FUNCTION DEFAUT PARAMETER DESCRIPTION Tare and Zero function when FUNC. 0 the weight is unstable Tare function FUNC. 1 with negative gross weight 0 000 corresponding 0 ON... - Page 44 EXCELL PRECISION CO., LTD. SET VALUE FUNC.NO FUNCTION DEFAUT PARAMETER DESCRIPTION Unlimited 20 times/s A/D sampling FUNC. 7 10 times/s frequency 5 times/s 1 time/2s FUNC. 8 Animal scale Unlimited Animal scale 20 times/s FUNC. 9 sampling 10 times/s frequency...
- Page 45 EXCELL PRECISION CO., LTD. OP-01 RS-422 / RS-485 ,OP-06 / OP-07 RS-232 INTERFACE FUNCTION SET VALUE FUNC. NO. FUNCTION DEFAULT PARAMETER DESCRIPTION As displayed Gross FUNC. 60 Data type Tare Stream transmit Auto-transmit Press the key to transmit FUNC. 61...
- Page 46 EXCELL PRECISION CO., LTD. OP-02 BCD OUTPUT INTERFACE FUNCTION SET VALUE FUNC. NO. FUNCTION DEFAULT PARAMETER DESCRIPTION As displayed FUNC. 80 Data type Gross Stream transmit Auto-transmit FUNC. 81 Transmit mode Press the key to transmit PRINT Positive logic Output data FUNC.
- Page 47 EXCELL PRECISION CO., LTD. OP-05 PARALLEL PRINTER OUTPUT INTERFACE FUNCTION SET VALUE FUNC. NO. FUNCTION DEFAULT PARAMETER DESCRIPTION FUNC. 90 Data format Select print format Press the to transmit PRINT FUNC. 91 Transmit mode Auto / press to transmit PRINT FUNC.
-
Page 48: Appendix: 7-Segment Display Characters
EXCELL PRECISION CO., LTD. APPENDIX: 7-SEGMENT DISPLAY CHARACTERS Number Display Letter Display Letter Display EX-2001 NC RACER ZSME300000091...
Need help?
Do you have a question about the NC RACER EX-2001 and is the answer not in the manual?
Questions and answers