
Subscribe to Our Youtube Channel
Related Manuals for anko P90N28AP-S3


Summary of Contents for anko P90N28AP-S3
- Page 1 Microwave Oven P90N28AP-S3 User Manual PLEASE READ AND SAVE THESE INSTRUCTIONS FOR FUTURE REFERENCE...
-
Page 2: Table Of Contents
CONTENTS PRECAUTIONS TO AVOID POSSIBLE EXPOSURE TO EXCESSIVE MICROWAVE ENERGY ..2 IMPORTANT SAFETY INSTRUCTIONS ................2 SPECIFICATIONS ......................5 BEFORE YOU CALL FOR SERVICE ..................5 INSTALLATION ........................ 5 RADIO INTERFERENCE ....................6 MICROWAVE COOKING PRINCIPLES ................6 UTENSILS GUIDE ......................7 PART NAMES ........................ -
Page 3: Precautions To Avoid Possible Exposure To Excessive Microwave Energy
PRECAUTIONS TO AVOID POSSIBLE EXPOSURE TO EXCESSIVE MICROWAVE ENERGY Do not attempt to operate this oven with the door open since open door operation can result in harmful exposure to microwave energy. It is important not to defeat or tamper with the safety interlocks. Do not place any object between the oven front face and the door or allow soil or cleaner residue to accumulate on sealing surfaces. - Page 4 To reduce the risk of fire in the oven cavity: When heating food in plastic or paper container, keep an eye on the oven due to the possibility of ignition. Remove wire twist-ties from paper or plastic bags before placing bag in oven.
- Page 5 and knowledge, unless they have been given supervision or instructions concerning use of the appliance by a person responsible for their safety. Children should be supervised to ensure that they do not play with the appliance. The microwave oven is only used in freestanding. IMPORTANT! Do not install oven over a range cooktop or other heat-producing appliance.
-
Page 6: Specifications
SPECIFICATIONS Power Input Consumption 230-240V/50Hz, 1400W(Microwave) Power Output Consumption 900W Operation Frequency: 2450MHz Outside Dimensions: 300mm(H)×539mm(W)×398mm(D) Oven Cavity Dimensions: 220mm(H)×354mm(W)×358mm(D) Oven Capacity: 28Litres Net Weight: Approx.16.0 kg BEFORE YOU CALL FOR SERVICE If the oven fails to operate: Check to ensure that the oven is plugged in securely. If it is not, remove the plug from the outlet, wait 10 seconds, and plug it in again securely. -
Page 7: Radio Interference
Do not place the oven where heat, moisture, or high humidity are generated, or near combustible materials. For correct operation, the oven must have sufficient airflow. Allow 20cm of space above the oven, 10cm at back and 5cm at both sides. Do not cover or block any openings on the appliance. -
Page 8: Utensils Guide
UTENSILS GUIDE Microwave cannot penetrate metal. Only use utensils that are suitable for use in microwave ovens. Metallic containers for food and beverages are not allowed during microwave cooking. This requirement is not applicable if the manufacturer specifies size and shape of metallic containers suitable for microwave cooking. -
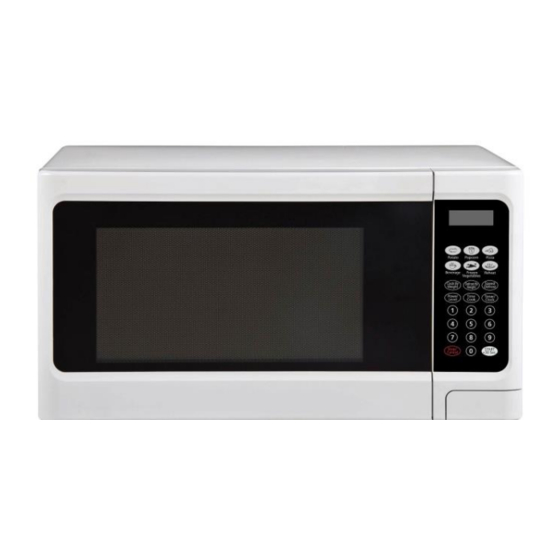
Page 9: Part Names
PART NAMES Door Safety Lock System Oven Window Roller Ring Shaft Door Release Button Control Panel Wave Guide (Please do not remove the mica plate covering the wave guide) Glass Tray... -
Page 10: Control Panel
CONTROL PANEL DISPLAY Cooking time, power, indicators and clock time are displayed. AUTO COOK MENUS There are 6 kinds of auto cook menus. Use to set auto cook program. NUMBER PADS (0-9) Use to adjust power level, set time or food weight. -
Page 11: How To Set The Oven Controls
HOW TO SET THE OVEN CONTROLS During cooking, if STOP/CANCEL pad is pressed once, the program will be paused and press START/+30 SEC pad to resume. But if STOP/CANCEL pad is pressed twice, the program will be canceled. After cooking has ended, the system will sound every two minutes to remind the user until the STOP/CANCEL pad is pressed or the oven door has been opened. -
Page 12: Quick Start/+30Sec
Use single digit to set a cooking power level: Number Cooking power Number Cooking power (Display) (Display) 100% (PL10) 50% (PL-5) 90% (PL-9) 40% (PL-4) 80% (PL-8) 30% (PL-3) 70% (PL-7) 20% (PL-2) 60% (PL-6) 10% (PL-1) NOTE: During cooking, the current power level can be seen by pressing the POWER LEVEL pad. -
Page 13: Multi-Stage Stage Cooking
Press START/+30SEC pad to start. Cook by weight code description CODE TYPE MAX WEIGHT Beef 2500g Mutton 2500g Pork 2000g NOTE: During cooking, the system will pause automatically and sound to remind users to turn food over. After that, press START/+30SEC to resume cooking. -
Page 14: Auto Cook Menu
AUTO COOK MENU For food or the following cooking mode, it is not necessary to program the duration and the cooking power. It is sufficient to indicate the type of food that you wish to cook as well as the weight of this food. In order to do that, press the corresponding menu pad to choose food weight or number of servings, the oven will start cooking. - Page 15 3). Pizza Pressing Cooking Weight(g) Power level times time :50 1: 20 PL10 1: 50 4). Beverage Pressing times 200ml/cup Cooking time Power level 1:30 2:40 PL10 3:50 5). Frozen Vegetables Pressing times Weight(g) Cooking time Power level 4:00 5:00 PL10 6:00 7:00...
-
Page 16: Cleaning And Care
CLEANING AND CARE Turn off the oven and remove the power plug from the wall socket before cleaning. Keep the inside of the oven clean. When food splatters or spilled liquids adhere to oven walls, wipe with a damp cloth. Mild detergent may be used if the oven gets very dirty. -
Page 17: 12 Month Warranty
12 Month Warranty Thank you for your purchase from Kmart. Kmart Australia Ltd warrants your new product to be free from defects in materials and workmanship for the period stated above, from the date of purchase, provided that the product is used in accordance with accompanying recommendations or instructions where provided.
Need help?
Do you have a question about the P90N28AP-S3 and is the answer not in the manual?
Questions and answers
I have a k mart microwave oven that ignores stop
The anko microwave oven model P90N28AP-S3 may ignore the STOP/CANCEL button if the child lock feature is activated. To disable the child lock, hold the STOP/CANCEL pad for 3 seconds until a beep sounds, allowing normal operation.
This answer is automatically generated
Hi I have just purchased a 32 l micro wave, the display is very dull ,is there a protective film over the door and controll panel. Thanks
I have a KMart microwave oven