
Related Manuals for Black Stone 1517


Summary of Contents for Black Stone 1517
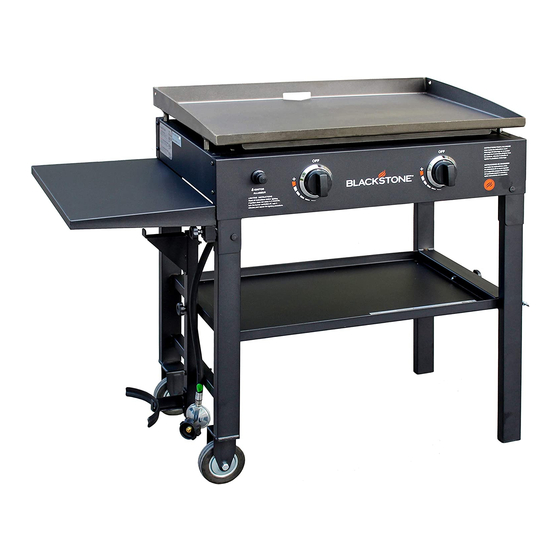
- Page 1 MODEL 1517 28" GRIDDLE COOKING STATION Parts & Assembly North Atlantic Imports LLC | 1073 West 1700 North Logan, UT 84321 | Blackstoneproducts.com...
- Page 2 28” Griddle Cooking Station | Parts & Assembly SAFE T Y ALERT KE Y Before proceeding, make certain that you read and understand the Read and follow all of the notices Owner’s Manual included with found throughout the manual. your griddle. Hazardous fire or explosion may result if instructions are ignored.
-
Page 3: Parts & Assembly
28” Griddle Cooking Station | Parts & Assembly PARTS & ASSEMBLY ILLUSTRATED PARTS LIST 01. Body (1 piece) 02. Griddle Top (1 piece) 03. Sides Self (1 pieces) 04. Knobs (2 pieces) 05. Grease Cup (1 piece) 06. Bottom Tray (1 piece) 07. - Page 4 28” Griddle Cooking Station | Parts & Assembly ASSEMBLY INSTRUCTIONS Please read all instructions thoroughly before proceeding. Make sure all the plastic packing material is removed before assembling Find a large, clean area to assemble your griddle. Please refer to the parts list and assembly diagrams as necessary.
- Page 5 28” Griddle Cooking Station | Parts & Assembly WA R N I N G ST EP 0 2 The manufacturer has made every effort to eliminate any sharp First, assemble the upper and lower tank hangers with four (4) M6x38 bolts edges.
- Page 6 28” Griddle Cooking Station | Parts & Assembly STEP 0 4 With the help of another person, place the griddle unit upright. Insert the side shelf into the slots on the griddle body. Secure the shelf with two (2) small thumbscrews. STEP 05 Add handle to the right side of the griddle body by inserting four (4) M6 Bolts from the outside of the body and then secure them with four (4) M6 Nuts...
- Page 7 28” Griddle Cooking Station | Parts & Assembly STEP 0 6 Install the control knobs by pushing them into place. Add a “AA” battery (not included) into the slot and then tighten on the igniter button. STEP 0 7 With the help of another person place the griddle top onto the griddle body by aligning the four pins to the holes on top of the body.
- Page 8 North Atlantic Imports LLC | 1073 West 1700 North Logan, UT 84321 | Blackstoneproducts.com...
- Page 9 MODELO 1517 ESTACIÓN DE COCINA CON PLANCHA DE 28" Piezas y ensamblaje North Atlantic Imports LLC | 1073 West 1700 North Logan, UT 84321 | Blackstoneproducts.com...
- Page 10 Estación de cocción a la plancha de 28" | Piezas y montaje LL AVE DE ALERTA DE Antes de continuar, asegúrese de leer y comprender el Manual SEGURIDAD del propietario incluido con su plancha. Lea y siga todos los avisos que se encuentran en el manual.
-
Page 11: Pie Z As Y Ensambl Aje
Estación de cocción a la plancha de 28" | Piezas y montaje PIE Z AS Y ENSAMBL AJE LISTA DE PIE Z AS ILUSTRADA 01. Cuerpo (1 pieza) 02. Plancha superior (1 pieza) 03. Lados Self (1 piezas) 04. Perillas (2 piezas) 05. -
Page 12: Instrucciones De Montaje
Estación de cocción a la plancha de 28" | Piezas y montaje INSTRUCCIONES DE MONTAJE Lea atentamente todas las instrucciones antes de continuar. Asegúrese de retirar todo el material de embalaje de plástico antes de ensamblarlo Encuentre un área grande y limpia para ensamblar su plancha. Consulte la lista de piezas y los diagramas de ensamblaje según sea necesario. - Page 13 Estación de cocción a la plancha de 28" | Piezas y montaje A D V E R T E N C I A PA SO 0 2 El fabricante ha hecho todo lo posible para eliminar los bordes Primero, ensamble las perchas superior e inferior del tanque con cuatro (4) afilados.
- Page 14 Estación de cocción a la plancha de 28" | Piezas y montaje PA SO 0 4 Con la ayuda de otra persona, coloque la unidad de la plancha en posición vertical. Inserte el estante lateral en las ranuras del cuerpo de la plancha. Asegure el estante con dos (2) tornillos pequeños.
- Page 15 Estación de cocción a la plancha de 28" | Piezas y montaje PA SO 0 6 Instale las perillas de control empujándolas en su lugar. Agregue una batería “AA” (no incluida) en la ranura y luego apriete el botón de encendido. PA SO 07 Con la ayuda de otra persona, coloque la parte superior de la plancha sobre el...
- Page 16 North Atlantic Imports LLC | 1073 West 1700 North Logan, UT 84321 | Blackstoneproducts.com...
- Page 17 MODÈLE 1517 GRIL DU CUISSON DE 28 PO PORTABLE Pièces et assemblage North Atlantic Imports LLC | 1073 West 1700 North Logan, UT 84321 | Blackstoneproducts.com...
- Page 18 Gril du cuisson portable de 28 po | Pièces et assemblage CLÉ D'ALERTE DE Avant de continuer, assurez-vous de lire et de comprendre le mode SÉCURITÉ d'emploi fourni avec votre gril. Lisez et suivez tous les conseils qui Le non-respect des instructions se trouvent dans ce manuel.
-
Page 19: Pièces Et Assembl Age
Gril du cuisson portable de 28 po | Pièces et assemblage PIÈCES ET ASSEMBL AGE LISTE DES PIÈCES ILLUSTRÉES 01. Corps (1 pièce) 02. Plaque de cuisson (1 pièce) 03. Côtés Self (1 pièces) 04. Boutons (2 pièces) 05. Coupe de graisse arrière (1 pièce) 06. Plateau inférieur (1 pièce) 07. -
Page 20: Instructions De Montage
Gril du cuisson portable de 28 po | Pièces et assemblage INSTRUCTIONS DE MONTAGE Veuillez lire attentivement toutes les instructions avant de continuer. Assurez-vous que tout le matériel d'emballage en plastique est enlevé avant de procéder à l'assemblage. Trouvez une grande surface propre pour assembler votre gril. Veuillez vous référer à... - Page 21 Gril du cuisson portable de 28 po | Pièces et assemblage AT T E N T I O N É TAPE 02 Le fabricant a tout mis en œuvre pour éliminer les bords Tout d’abord, assemblez les supports de réservoir supérieur et inférieur à tranchants.
- Page 22 Gril du cuisson portable de 28 po | Pièces et assemblage É TAPE 0 4 Avec l’aide d’une autre personne, placez la plaque chauffante à la verticale. Insérez la tablette latérale dans les fentes du corps de la plaque chauffante. Fixez l’étagère avec deux (2) petites vis à...
- Page 23 Gril du cuisson portable de 28 po | Pièces et assemblage É TAPE 0 6 Installez les boutons de commande en les poussant en place. Ajoutez une pile “AA” (non fournie) dans la fente, puis serrez le bouton de l’allumeur É...
- Page 24 North Atlantic Imports LLC | 1073 West 1700 North Logan, UT 84321 | Blackstoneproducts.com...
Need help?
Do you have a question about the 1517 and is the answer not in the manual?
Questions and answers