
Subscribe to Our Youtube Channel
Related Manuals for Jeio tech ON-02G


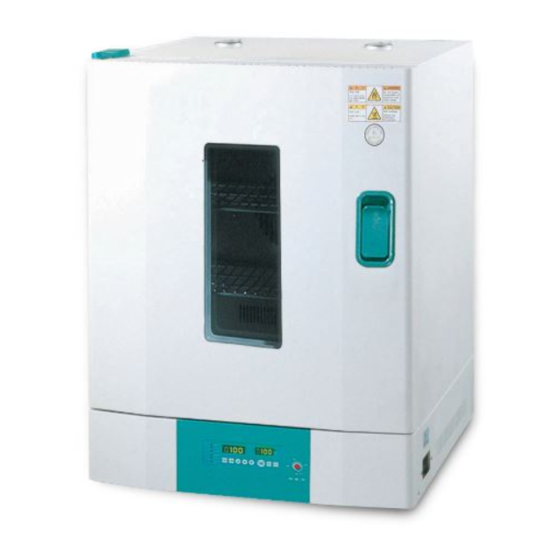
Summary of Contents for Jeio tech ON-02G
- Page 1 Operation manual [NATURAL CONVECTION OVEN] Model : ON-02G / 12G / 22G Manual No : 00HAA0001115 ( Version : 5.0 ) Page 1...
- Page 2 Page 2...
- Page 3 ¡Caution¡ means that the user may have not so serious damage and unit may have physical damage by wrong handling on this unit. Copyright 2002 Jeio tech Co,. LTD. ALL RIGHT RESERVED. Page 3...
-
Page 4: Table Of Contents
Contents 1. Purpose and specificity of this unit........2. Installation..............3. Matters that require attention..........4. Name of each part..............5. Operation..............6. Maintenance............... 7. Action for malfunction.............. 19 8. Warranty..............9. Specifications..............Page 4... -
Page 5: Purpose And Specificity Of This Unit
1. Purpose and specificity of this unit 1) Purpose (1) Natural convection oven is used for rapid dry for glassware test of thermal hardness and thermal variation. (2) Natural convection oven is used for preheating before heating test and test of dry for architecture component and electric component and thermal durability. -
Page 6: Installation
2. Installation (1) Scope of delivery. Main body(1set), Operation manual (1EA), Glass fuse (2EA), Shelf(2EA), Shelf guide(4EA) (2) This unit will work correctly on proper power supply. Please check power supply and ID Plate information are the same. User must use power supply connected earth and power cord must be connected to wall outlet supplying ground point. -
Page 7: Matters That Require Attention
It is dangerous and causing fire and electric shock. (7) Circuit and electric component used in this unit are developed by Jeio tech. Please don¡t try to repair by yourself. Wrong combination of electric part may cause fire. You must ask to official Jeio tech dealer or distributor in your region. -
Page 8: Name Of Each Part
(3) Shelf level adjustor Shelf level is easily adjustable by the size of sample. (ON-02G →8 levels, ON-12G →12 levels, ON-22G →12 levels) (4) Shelf It¡s made by Stainless steel wire. It¡s easy to clean and ventilation is good. The surface of it is electrically polished therefore it has beautiful face good anti-corrosion. - Page 9 (5) Door There are air barrier between door surface and insulation of the door. Therefore the surface of the door is cool. (6) Window (option) Observing glass is made by triple glass therefore it¡s easy to observe. (7) Door Handle It is Door handle for door opening.
- Page 10 (14) Foot This adjusts level of the instrument. (15) Door limit switch It¡s installed inside of the unit. The Logic IC of this switch put off the main switch. This cut off all 2 phase currency in the instrument therefore heater and blower stops for safety of user.
-
Page 11: Operation
5. Operation 1) CLS-Control System (1) CLS-Control System temperature and heater output are controlled in Main CPU which can do precise PID calculation. All control for safety is conducted by selective functional Logic IC which is installed separately. This is designed to conduct safety performance against any electric and electronic shock on the unit. - Page 12 (1) HEATER LED It shows Heating function is ¡ON¡ (2) Auto Tune LED Flickering begins on Auto-tuning. (3) Wait On Timer LED This is the LED indicating operation start time. The LED is blinking when the timer works and the LED off when the timer is in waiting condition. (4) Wait Off Timer LED This is the LED indicating operation stop time.
- Page 13 (13) Lock button. This is lock the controller buttons. (14) Auto Tune button. The auto tune begins if you press this button for 1 second. (15) RUN LED This LED indicates Work/Stop state of unit. It turns on when the unit runs and turns down when the unit stops.
- Page 14 4) Additional function of button (1) Favorite values can be stored at Sv.1, Sv2, Sv3 for each operation. Press 2 times and set temp. values by pressing , and conclude the setting by pressing Set temperature is saved on memory and set temperature varies Sv1, Sv 2, Sv 3 are applied the same.
- Page 15 5) Timer setting (1) Press button. Timer (On Timer / Off Timer) is shown on PV and time is shown on SV. Set time by pressing button and Save and finish by pressing button. (2) W/ON LED turns on with Beep sound after finishing wait on timer set. (3) Press button one more time.
- Page 16 T e m p e r a t u r e T i m e W a it o n T im e r W a it o ff T im e r ① Wait On Timer - The unit begins to work after time passed programmed on Wait On Timer. - Maximum is 99hr 59mim.
- Page 17 7) Auto Tuning Perform Auto Tuning in order to get precise and rapid temperature control. PID value saved automatically after Auto Tuning. (1) Set temperature you want. (2) Press button for a while(3seconds) then Auto Tune shown display like right hand side picture and A/T LED blinking.
-
Page 18: Maintenance
6. Maintenance (1) Turn off the main power switch and pull out a power plug from wall outlet. (2) Remove all liquid in the bath (3) Wash with soft cloth containing neutral detergent. (4) Wash with soft cloth containing distilled water. (5) Dry with dry cloth. -
Page 19: Action For Malfunction
7. Action for malfunction 1) Check points when the unit doesn¡t work. (1) Check out power supply. (2) Check out fuse if off. (3) Check out Run LED on display is off. Please press Start / Stop button if it is off. (4) Please check the power is out. -
Page 20: Warranty
1 year. Jeio Tech will replace faulty parts for a fee based on then current component acquisition costs after warranty period. Jeio Tech will, at its option, repair at no charge, replace or refund the purchase price of a defective product purchased through a Jeio Tech authorized sales outlet and at the applicable price during warranty period. -
Page 21: Specifications
9. Specifications Model ON-02G ON-12G ON-22G Chamber volume 135L Temperature 5℃ to 40℃ Permissible Maximum relative humidity 80% environmental condition Altitude up to 2,000m Range Amb.+15℃ ~ 250℃ Uniformity ¡ 4℃ at 100℃ Accuracy ¡ 1℃ at 100℃ Temperature Controller... - Page 22 Page 22...
- Page 23 Page 23...
Need help?
Do you have a question about the ON-02G and is the answer not in the manual?
Questions and answers