
Related Manuals for Dürr Medical iM3 CR 7 VET


Summary of Contents for Dürr Medical iM3 CR 7 VET
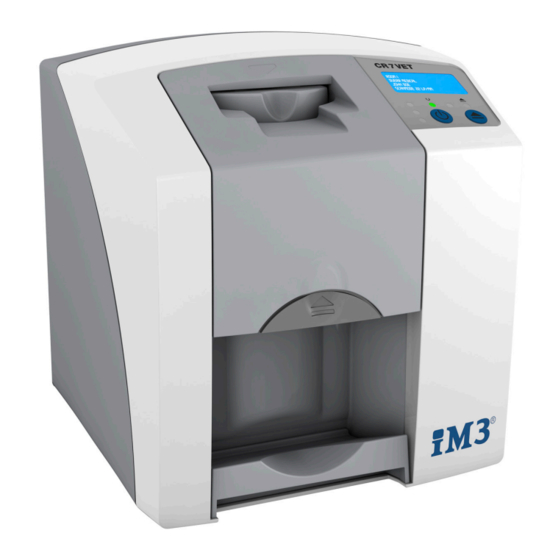
- Page 1 CR 7 VET Installation and Operating instructions 9000-608-67/02 ...
- Page 3 Contents Contents Important information Assembly About this document ....Requirements ....Warnings and symbols .
-
Page 4: Table Of Contents
Contents Troubleshooting 13 Tips for operators and service techni- cians ......13.1 Poor X-ray image ... . 13.2 Software error . - Page 5 Important information The signal word differentiates between four levels Important information of danger: – DANGER Immediate danger of severe injury or death About this document – WARNING Possible danger of severe injury or death These installation and operating instructions rep- resent part of the unit.
- Page 6 Important information Label Do not reuse DC current This way up / store and transport in an upright position Keep dry Fig. 1: Laser class 3B Stacking limits Fragile, handle with care Keep away from sunlight Lower and upper temperature limits Lower and upper humidity limits no condensation Fig.
- Page 7 Important information ETL certificate Safety This Class A device complies with Canadian DÜRR MEDICAL has developed and designed ICES-003. this unit in such a way that it does not pose any The equipment has been tested and found to danger to people or property provided it is prop- comply with the limits for a class A digital device, erly operated in accordance with the intended pursuant to Part 15 of the FCC rules.
- Page 8 Important information If you have any questions concerning the cor- Installation and repairs ❯ rect disposal of this appliance, please contact Installation, new adjustments, modifications, ❯ DÜRR MEDICAL directly or contact your local upgrades and repairs must be carried out by trader.
- Page 9 Product description Product description Overview CR 7 VET image plate scanner Image plate intraoral Light protection cover intraoral Data cable (USB network cable) Power supply unit with country-specific adapter 9000-608-67/02 2003V001...
- Page 10 Product description Light protection cover, size 4 Scope of delivery 5.7 x 7.6 cm (100 pcs.) ..2134-084-00 The following items are included in the scope of Light protection cover, size 5 delivery (possible variations due to country-spe- 5.7 x 9.4 cm (100 pcs.) .
- Page 11 Product description Technical data Image plate scanner Electrical data for the device Voltage V DC Max. current consumption 1.25 Output < 30 Type of protection IP20 Electrical data – power supply unit Voltage V AC 100 - 240 Frequency 50/60 Protection class Type of protection IP20...
- Page 12 Product description General technical data Max. theoretical resolution Line approx. 40 pairs/mm (Lp/mm) Network connection LAN technology Ethernet Standard IEEE 802.3u Data rate Mbit/s Connector RJ45 Type of connection Auto MDI-X Cable type ³ CAT5 Serial interfaces Standard USB 2.0 Connection (on the unit) Standard type B Ambient conditions during operation...
- Page 13 Product description Dimensions of intraoral image plates Size 0 22 x 35 0.87 x 1.38 Size 1 24 x 40 0.94 x 1.57 Size 2 31 x 41 1.22 x 1.61 Size 3 27 x 54 1.06 x 2.13 Size 4 57 x 76 2.24 x 2.99 Size 5...
- Page 14 Product description Type plate The type plate is located on the rear of the device. REF Order number Serial number 9000-608-67/02 2003V001...
- Page 15 Product description Declaration of conformity Name of manufacturer: DÜRR NDT GmbH & Co. KG Address of manufacturer: Höpfigheimer Straße 22 74321 Bietigheim-Bissingen Germany Name of product: CR 7 Image plate scanners We hereby declare that the above product meets all applicable requirements of the directives listed below: –...
- Page 16 Product description Operating elements Operation Image plate scanner Display Input unit Green operating LED Operating elements Blue communication indicator Release key Cleaning display yellow Collection tray Cleaning button The image plate scanner is used to read image On / off switch data stored on an image plate and transfer the Green status LED data to imaging software on a computer.
- Page 17 Product description When used properly, image plates can be Image plate currently being processed exposed, read and erased several hundred times Light protection cover can be removed provided there is no mechanical damage. The and the next image plate can be inserted image plate must be replaced if there are any signs of damage, e.g.
- Page 18 Product description Bite protector (optional) The bite protector protects the image plate size 4 as well as the light protection cover against heavy mechanical damage, e.g. if the patient bites down too hard during the X-ray exposure. 9000-608-67/02 2003V001...
- Page 19 Assembly Installation Assembly Carrying the unit Only qualified specialists or persons NOTICE trained by DÜRR MEDICAL are permitted Risk of damage to sensitive compo- to install, connect and commission the nents in the unit as a result of shocks unit. or vibrations Do not expose the unit to any strong ❯...
- Page 20 Assembly Electrical connections Remove the cover from the rear of the device. ❯ Safety when making electrical connections The device must only be connected to a cor- ❯ rectly installed power outlet. Do not operate any other systems using the ❯...
- Page 21 Assembly Combining devices safely Connecting the unit via the network cable Take care when connecting units together or to Purpose of the network connection parts of other systems as there is always an ele- The network connection is used to exchange ment of risk (e.g.
- Page 22 Assembly Connect the USB cable to the device. Commissioning ❯ NOTICE Short circuit due to the build up of condensation Do not switch on the unit until it has ❯ warmed up to room temperature and it is dry. The unit supports the following imaging pro- grams: –...
- Page 23 Assembly Configuring the unit in Vet- When the unit is first connected to a com- Exam Pro puter, it applies the language and time settings of the computer. Configuration is performed directly in Vet-Exam Pro. > Select the unit. ❯ Mark the connected unit in the list.
- Page 24 Assembly Configuring the unit in Vet- If necessary change the name. ❯ Click Apply to save the configuration. Exam Plus ❯ Configuration is carried out with CRNetConfig, Configuring the device with a network con- which is automatically installed during the instal- nection lation of Vet-Exam Plus.
- Page 25 Assembly Click on Apply. ❯ The configuration is saved. Testing the device You can scan in an X-ray image to check that the unit is properly connected. Select the Test tab. ❯ Select the unit from the Registered Units list. ❯...
- Page 26 Assembly X-ray unit settings The following table provides the standard values for the exposure time for a house cat (approx. 6 kg) to a medium-sized dog (approx. 20 kg). The exposure times listed in the table for a tube length of 20 cm were determined using a dental X-ray unit with a DC emitter (focal spot 0.7 mm;...
- Page 27 Usage Do not scratch the image plates. Do not sub- ❯ Usage ject the image plates to pressure from hard or pointed objects. Correct use of image plates CAUTION Image plates are toxic Image plates that are not packaged in a light protection cover can cause poison- ing when placed in the mouth of the ani- mal or if swallowed.
- Page 28 Usage 10 Operation Preparing the X-ray ü The image plate has been cleaned. ü The image plate is not damaged. CAUTION If using it for the first time or if it has been ❯ The image data on the image plate is stored for over a week: erase the image plate not permanent.
- Page 29 Usage Immediately before placing the image plate in Preparing for scanning ❯ the mouth of the animal, disinfect the light pro- CAUTION tection cover using a disinfection wipe (e.g. B 60 from Orochemie). Light erases the image data on the image plate Never handle exposed image plates ❯...
- Page 30 Usage Pull off the protective gloves, disinfect and Starting the image plate scanner and soft- ❯ clean the hands. ware with Vet-Exam Plus The process of reading out the data is NOTICE described here for the imaging software Powder from the protective gloves on Vet-Exam Plus.
- Page 31 Usage Click the Scan button. Do not remove the light protection cover, and ❯ The status LED illuminates green. do not insert a new image plate. When the green and yellow status LEDs light ❯ Scanning the image plate To avoid the mix up of X-ray images, only Remove the empty light protection cover.
- Page 32 Usage 10.4 Switch off the unit. 11 Cleaning and disinfection Press the on/off switch for 3 seconds. ❯ 11.1 Image plate scanner While the unit is shutting down the operating and communication LEDs flash. Unit surfaces As soon as the unit has shut down it switches The unit surface must be cleaned and disinfected off completely.
- Page 33 Usage Press the button. Clean the cover, fixing mechanism and inside ❯ ❯ parts with a moist, soft, lint-free cloth. The fixing mechanism moves into the cleaning position. Press the release button and remove the cover ❯ upwards at the same time. Disinfect the cover, fixing mechanism and ❯...
- Page 34 Usage 11.3 Image plate Use the following cleaning agents: ü IP Image Plate Cleaning Wipe NOTICE Heat or humidity will damage the image plate. Do not steam sterilise the image plate. ❯ Do not immersion-disinfect the image ❯ plate. Only use approved cleaning agents. ❯...
- Page 35 Usage 12 Maintenance 12.1 Recommended maintenance schedule Only specialist, trained staff or personnel trained by DÜRR MEDICAL are permitted to service the unit. Prior to working on the unit or in case of danger, disconnect it from the mains. The recommended maintenance intervals are based on using the device for 15 intraoral images per day on 220 working days per year.
-
Page 36: Troubleshooting
Troubleshooting Troubleshooting 13 Tips for operators and service technicians Any repairs exceeding routine maintenance may only be carried out by qualified personnel or our service. Prior to working on the unit or in case of danger, disconnect it from the mains. 13.1 Poor X-ray image Error... - Page 37 Troubleshooting Error Possible cause Remedy X-ray image is mirror-inverted Image plate exposed on the Insert the image plate cor- ❯ wrong side. rectly in the light protection cover. Position the image plate cor- ❯ rectly. Ghosting or double exposure Image plate exposed twice Only expose the image plate ❯...
-
Page 38: Software Error
Troubleshooting Error Possible cause Remedy Light strips in the scanning Too much incident ambient light Darken the room. ❯ during the scanning process window Turn the unit so that the light ❯ does not fall directly onto the input unit. Transport slipping Clean the transport mecha- Horizontal, grey lines on the... - Page 39 Troubleshooting Error Possible cause Remedy Imaging software does not Unit not switched on Switch on the unit. ❯ recognise the unit Connecting cable between Check the connecting cable. ❯ device and computer not cor- rectly connected Computer does not detect any Check the connecting cable.
-
Page 40: Fault On The Unit
Troubleshooting 13.3 Fault on the unit Error Possible cause Remedy Unit does not switch on No mains voltage Check the mains cable and ❯ plug connection and replace if necessary. Check the power supply unit. ❯ If the green status LED does ❯... - Page 41 Troubleshooting Error Possible cause Remedy Error code 1024 Internal data communication Switch the unit off and back ❯ fault on again. Update the firmware. ❯ Darken the room. ❯ Turn the unit so that no light ❯ can fall directly into the entry slot.
- Page 42 Troubleshooting Error Possible cause Remedy Error code 10000 Unit exposed to too much light Darken the room. ❯ Turn the unit so that no light ❯ can fall directly into the entry slot. Internal communication error Update the firmware. Error code 10009 ❯...
-
Page 43: Appendix
Appendix Appendix 14 Scanning times The scanning time corresponds to the time taken for complete scanning of image data and depends on image plate format and pixel size. The time to image will depend largely on the computer system used and its work load. Times stated are approximate. -
Page 44: File Sizes (Uncompressed)
Appendix 15 File sizes (uncompressed) The actual file size will depend on the image plate format and the pixel size. File sizes stated are approx- imate and have been rounded upwards. Suitable compression methods can considerably reduce the file size without loss of data. Theoretical resolution (LP/mm) Pixel size (μm) -
Page 45: Contact
Contact Contact 16 Addresses 16.1 iM3 Dental Limited Europe, Russia, CIS countries, United Arab Emirates, North Africa iM3 Dental Limited Unit 9, Block 4, City North Business Park Stamullen, Co. Meath. Ireland Tel.: +353 16911277 www.im3vet.com support@im3dental.com 16.2 iM3 Pty ltd Australia Southern Hemisphere including Asia iM3 Pty ltd Australia 21 Chaplin Drive... - Page 48 Vertreiber/Distributor: Europe: iM3 Dental Limited USA: iM3 Inc. Australia/Corporate: iM3 Pty Ltd www.im3vet.com Hersteller/Manufacturer: DÜRR NDT GmbH & Co. KG Höpfigheimer Str. 22 74321 Bietigheim-Bissingen Germany Division DÜRR MEDICAL www.duerr-medical.de info@duerr-medical.de...
Need help?
Do you have a question about the iM3 CR 7 VET and is the answer not in the manual?
Questions and answers