Table of Contents
Advertisement
WARNING! Assembled platform will have exposed motors moving parts. Neven operate it with the
small children around or use optional protection caver.
During initial assembly don't tighten bolts completely, rather do it at the end of the assembly.
Please First assemble the entire frame and tighten screws and bolts afterwards.
The following arrow highlights a location on the diagram or details where you need to pay extra
attention:
Please check the motor's power and sensors to ensure the plug colors match. This is very
important. Never change wiring. Mismatched connector colors can damage the motors and platform
controllers.
Our platform is very lightweight and simple due to its perfect weight balance. This allows us to
use affordable motors and gearboxes. If you plan to put something besides standard wheel, pedals,
yoke, gear shifter, throttle and HOTAS you need to plan and implement it properly. Each additional,
even light element on the moving platform should be well positioned and counterbalanced (same
weight X same arm length). You can't put even a lightweight screen/monitor on our simulator. It is
always better to consult us first, before installing any extra equipment on the platform.
Don't put ANY accessories (joystick, pedals etc) on the platform before it is completely tested
and proven to be working as desired. After assembly, attach the seat only. Nothing extra. When you
ensure proper behavior start adding controllers one by one, doing movement tests with a person
seating in the pilot seat after each new addion to the platform weight.
If your control box don't have colored motors plugs: left motor brown plug is Motor 1, right 2
black plug, rear Motor 3 white plug
1
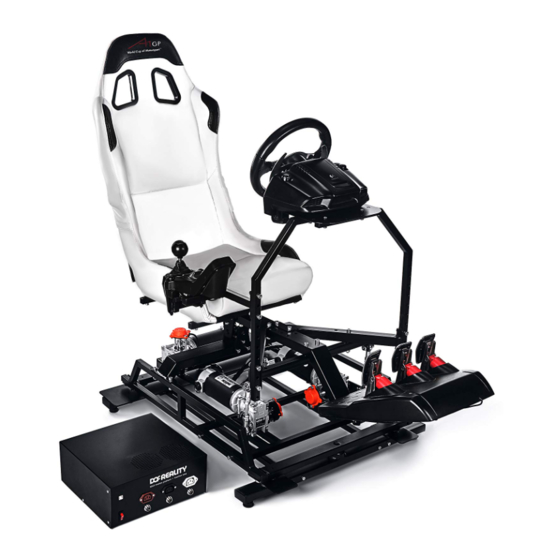
Assembly Instructions DOF Reality H3 and P3
Advertisement
Table of Contents


Need help?
Do you have a question about the H3 and is the answer not in the manual?
Questions and answers