
Related Manuals for Furrion Aurora Series


Summary of Contents for Furrion Aurora Series
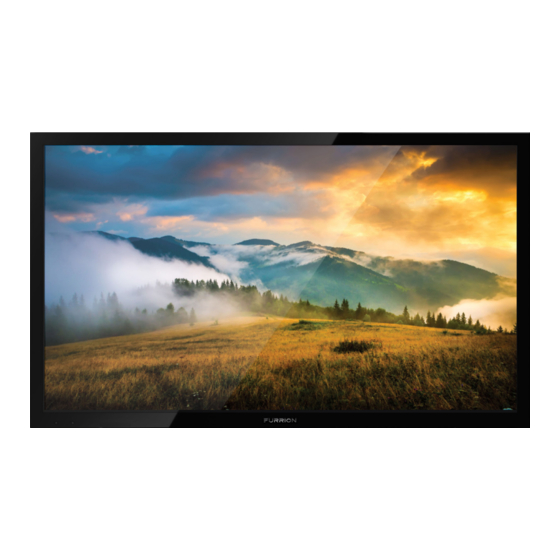
- Page 1 Furrion Aurora™ TV Series Instruction Manual *Product picture is for reference only. Model: FDUP43CBR / FDUP49CBR / FDUF55CBR / FDUP65CBR FDUF43CBR / FDUF49CBR / FDUP55CBR / FDUF65CBR...
- Page 2 Welcome Thank you and congratulations for purchasing this Furrion Aurora™ TV. Before placing your new appliance into operation, please read these operating instructions carefully. This instruction manual contains important information for safe use, installation and maintenance of the appliance. The manufacturer does not accept responsibility for any damages that may arise due to non-observation of these instructions.
-
Page 3: Table Of Contents
Contents Welcome ....................2 Contents ....................3 Safety Warnings ..................4 Function Overview ................8 Control Panel ............................8 Rear Panel ............................... 9 Connection ............................10 Remote Control........................... 12 Before Operation................. 14 What’s in the Box ..........................14 Prepare your Remote Control ...................... 14 Choose a Proper Location for your TV ..................15 Cable Management ...........................15 Mount on Wall ............................17... -
Page 4: Safety Warnings
Safety Warnings other. A grounding type plug has two blades CAUTION and a third grounding prong. The wide blade or the third prong are provided for your safety. RISK OF ELECTRIC SHOCK When the provided plug does not fit into your DO NOT OPEN outlet, consult an electrician for replacement of the obsolete outlet. - Page 5 EXAMPLE OF ANTENNA GROUNDING AS PER THE NATIONAL ELECTRICAL CODE expressly approved by Furrion could void the user’s warranty. 30. Do not submerge this TV in water or pressure ANTENNA wash it.
- Page 6 Safety Warnings HOW TO HANDLE THE LED PANEL residential installation. This equipment generates, ● Do not press hard or jolt the LED panel. It may uses and can radiate radio frequency energy and, cause the LED panel glass to break and injury if not installed and used in accordance with the instructions, may cause harmful interference to may occur.
- Page 7 Safety Warnings CARE OF THE ENVIRONMENT If your existing television set is being retained Disposal of your old product and battery and relocated, the same considerations as above Your product is designed and manufactured should be applied. with high quality materials and components, NOTES WHEN MOUNTING THE TV ON THE which can be recycled and reused.
-
Page 8: Function Overview
Function Overview Control Panel Item Button Function SOURCE Select the input source MENU Enter the main menu Skip to the next channel Skip to the previous channel VOL+ Increase volume VOL- Decrease volume POWER Switch the TV on/off * Please note that the button layout of the controls may vary from model to model. -
Page 9: Rear Panel
HDMI 1 (CEC) CEC (Consumer Electronics Control) ARC/CEC When connected to the CEC compatible Furrion Entertainment Systems or other CEC Compatible devices, the TV links USB(2.0) IN with the system to give extra functionality. DC 5V ARC (Audio Return Channel) Max. -
Page 10: Connection
Function Overview Connection Your Furrion Aurora™ TV offers multiple connection options. Please consult the manual of DVD player, Games Console or other devices to ensure proper connection and use. You can choose one or more of the connections below to operate. - Page 11 Function Overview Connection AUDIO L (White) R (Red) Y (Green) Pb (Blue) VIDEO Pr (Red) R (Red) Furrion model No.: FSBNN3MR-BL/ FSBNN3MSR-BL (sold separately) L (White) IR extender...
-
Page 12: Remote Control
Function Overview Remote Control... - Page 13 Function Overview Remote Control Button Function Button Function Turn the TV on/off ZOOM Enlarge screen images SLEEP Set time for the TV to turn off Select Stereo, Mono, or Second Audio Programming Display information about the INFO current input source Skip to the beginning of the next chapter/track/photo.
-
Page 14: Before Operation
Before Operation What’s in the Box Thanks for purchasing this Furrion Aurora™ TV. This manual will help you set up and begin using your TV. First, check the contents of your box with the parts checklist below: ● TV ● Weather proof remote with button battery (x1) and tool to open battery cover (x1) ●... -
Page 15: Choose A Proper Location For Your Tv
Before Operation ● Do not ingest the battery contained within Cable Management the remote control supplied with the unit as this battery represents a chemical burn WARNING: Do not connect the power source hazard. ● If the button battery is swallowed, it can before making connections. - Page 16 Before Operation Thumb Screws x 3 Cable Access Door Cables Drip Loop Figure 2 Tip: If a TV streaming stick is connected and stays inside the rear cable compartment, the RF/ Wifi signal will be reduced when passing through the closed cable door. Connect the Power Cord Connect the power cord to a GFCI protected AC outlet with an “in-use”...
-
Page 17: Mount On Wall
Before Operation POWER SOURCE NOTE: Please make sure to insert the cord securely at both the TV and the wall outlet. WARNING: ● DO NOT USE WITH A VOLTAGE OTHER THAN THE POWER VOLTAGE SPECIFIED. DOING SO MAY CAUSE FIRE, ELECTRIC SHOCK, OR DAMAGE. ●... - Page 18 Before Operation IMPORTANT: Connect all cables to the rear panel prior to mounting TV on wall. The cable access door in rear panel will be obstructed once the TV is mounted. ● Follow the installation guide supplied with the Wall-Mount Bracket (purchased separately) when installing the TV.
-
Page 19: Getting Started
Getting Started The Setup Wizard window appears only the Setup Wizard first time you turn on the TV. It will assist you to configure the TV and scan for available Menu Language English channels. Air/Cable IMPORTANT: Make sure the antenna or Cable System Auto cable connection is made. -
Page 20: Tv Settings
TV Settings Setup Settings 1. Press MENU button, the setup window will appear on the screen. to highlight Setup mode. 2. Use 3. Use to highlight the item you would like to reset, then press to select the settings. 4. Press MENU to return to the previous menu or press EXIT at any time to exit the setting. Setup Menu Menu Select the menu... - Page 21 TV Settings Setup Menu CC Mode Press to select Off, On or CC On Mute. to select CC1, CC2, CC3, CC4, Text 1, Press Basic Selection Text 2, Text 3 or Text 4. Press to select Service1, Service 2, Service 3, Advanced Service 4, Service 5 or Service 6.
- Page 22 TV Settings Setup Menu Press to select Off /On. Auto Standby In On mode, TV will shut down when there is no signal for several minutes. Press to select Off /On. Press to enter Auto TV on In On mode, TV will automatically turn on when the sub-menu, then connected CEC device is turned on.
-
Page 23: Picture Settings
TV Settings Picture Settings 1. Press MENU button, the setup window will appear on the screen. to highlight Picture mode. 2. Use 3. Use to highlight the item you would like to reset, then press to select the settings. 4. Press MENU to return to the previous menu or press EXIT at any time to exit the setting. Picture Menu Picture Select the display mode... -
Page 24: Audio Settings
TV Settings Audio Settings 1. Press MENU button, the setup window will appear on the screen. to highlight Audio mode. 2. Use 3. Use to highlight the item you would like to reset, then press to select the settings. 4. Press MENU to return to the previous menu or press EXIT at any time to exit the settings. For DTV mode For ATV mode... - Page 25 TV Settings Audio Menu Press to select Standard / Music / Movie / Sport / User mode. Standard: Optimizes a balanced sound in all environments. Music: Preserves the original sound clear and dynamic like that on a Sound Mode Select the sound mode concert.
-
Page 26: Time Settings
TV Settings Time Settings 1. Press MENU button, the setup window will appear on the screen. 2. Use to highlight Time mode. 3. Use to highlight the item you would like to reset, then press select the settings. 4. Press MENU to return to the previous menu or press EXIT at any time to exit the setting. -
Page 27: Lock Settings
TV Setting Lock Settings 1. Press MENU button, the setup window will appear on the screen. to highlight Lock mode. 2. Use 3. Use to highlight “Enter Password” and input “0000” to enter the sub menu. 4. Use to highlight the item you would like to reset, then press to select the settings. - Page 28 TV Setting Lock Menu Use the Number Buttons (0~9) to enter the password, the Lock menu will appear. Enter Input the password to access the Lock * Default password is 0000. Password menu. * If you forgot the password, use 8888 to enter any locked menu.
- Page 29 TV Settings Genre TV-Y All Children Fantasy Violence TV-Y7 Suitable for 7 years old or above Violence TV-G General Audience TV-PG Parental Guidance Language TV-14 Suitable for 14 years old or above Dialogue TV-MA Suitable for 17 years old or above Canadian Rating System (English) US Rating System Exempt from the ratings (All ages)
-
Page 30: Channel Settings
TV Settings Channel Settings 1. Press MENU button, the setup window will appear on the screen. to highlight Channel mode. 2. Use 3. Use to highlight the item you would like to reset, then press to select the settings. 4. Press OK to confirm your selections or settings and enter the sub menus. 5. -
Page 31: Pc Settings
TV Settings PC Settings The PC menu is only accessible when a PC is connected to the TV via the VGA connection. Press Source button to select VGA as the input source. 1. Press MENU button, the setup window will appear on the screen. 2. -
Page 32: Usb Operation
USB Operation 1. After connecting a flash drive, press SOURCE button and select MEDIA. Press OK or enter. 2. Use to select Photo or Music. Press OK to enter. 3. Use to navigate the files or folders on the USB drive. 4. -
Page 33: Troubleshooting
Troubleshooting Problem Solution/Issue ● Make sure the power cord is plugged in. ● Try another AC outlet. TV does not ● Power is off, check fuse or circuit breaker. operate ● Unplug unit for an hour, then plug it back in. ●... -
Page 34: Specifications
Specifications MODEL, DIMENSION & RESOLUTION Dimension without Stand TV Model Max Resolution (L x H x W) FDUP43CBR 39 3/4” x 23 7/8” x 3 3/4” (1010 x 605 x 96 mm) FDUF43CBR FDUP49CBR 44 11/16” x 26 13/16” x 3 7/8” (1135 x 680 x 98 mm) FDUF49CBR 3840 x 2160@ 60Hz UHD... -
Page 35: Care And Clean
● When the TV is not in use, keep it covered with the Furrion Weatherproof TV Cover. The fitted cover is designed to protect the LED panel from the harmful UV rays from direct sunlight, the ingress of water, and keeps wind-blown objects from scratching the surface of the TV. - Page 36 Furrion Innovation Center & Institute of Technology ● 52567 Independence Ct., Elkhart, IN 46514, USA ● Toll free:1-888-354-5792 ● Email: info@furrion.com ©2007-2019 Furrion Ltd. Furrion® and the Furrion logo are trademarks licensed for use by Furrion Ltd. and registered in the U.S. and other countries. FURRION.COM...
Need help?
Do you have a question about the Aurora Series and is the answer not in the manual?
Questions and answers
how to pair my FIOS remote to the Furrion 55" outdoor tv?