Advertisement
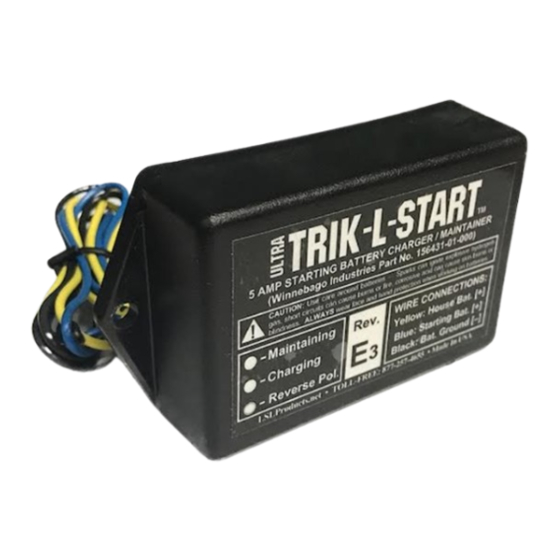
GENERAL INFORMATION — Mega TRIK-L-START™ is designed to keep your engine starting battery(s) fully charged during long periods of inactivity or
storage. Connected between the house and starting batteries, it diverts current from your existing house battery charger, sending it to the starting battery(s)
instead. Maximum charging current is 10 amps, automatically tapering to a small fraction of an amp after a full charge is reached. A set of indicator lights
display the charger's status, also warning of improper hookup. A Low Battery Alarm monitors battery voltage, warning if the batteries become excessively
discharged. A current backflow prevention circuit keeps the starting battery(s) fully charged, even if the house batteries are discharged during drycamping.
TRIK-L-START™ is compatible with solid-state or relay-type battery isolators and battery selector switches. Since it doesn't require any connections to AC
power, it also works well with solar panels. Battery clips and crimp-on ring terminals are both included, allowing for temporary or permanent installation.
Step-By-Step Instructions For TEMPORARY INSTALLATION
STEP 1: Pull the insulative boots off the battery
clips (supplied). Strip approx. 5/8" (16MM) of
insulation off the end of TRIK-L-START's blue
and yellow wires (see wire strip gauge at right),
twisting any frayed strands back together again.
Slide a RED insulative boot over the end of
each wire,then connect the stripped ends of the
wires to the screws on the battery clips.
5/8"
Wire
Insert Wire Under
Screw & Tighten
Next, use a pair of pliers to mash the battery clip's strain-relief tabs
over the insulated portion of the wire, so that tugging on it doesn't
separate the wire from the clip. Finally, slide the insulative boot down
over the clip, so that only the clip's jaws are exposed. Do the same
with the black wire,using the BLACK insulative boot instead.
Mash These Tabs
Over Wire
Step-By-Step Instructions For PERMANENT INSTALLATION
STEP 1: Identify a flat mounting surface,
preferably near the battery isolator, relay or
selector switch (see "Where's The Isolator?" on
next page). Check that drilling holes won't
interfere with any wiring, hoses or other parts
on the other side. Next, temporarily hold the
TRIK-L-START™ unit against the intended
mounting surface, and mark the hole locations
for the two mounting screws. Drill 1/8" (3MM)
holes at these locations. After bending thewires
so that they exit through the slot at thebottom
edge of the unit, use the 2 supplied screws to
mount the unit.
(mark for holes here)
Bend Wires To
FRONT VIEW
Determine how long the blue, yellow and black wires need to be in
order to reach their intended connection locations, and cut off any
excess wire. Strip approximately 1/4" (6 MM) of insulation off the
ends of each of these wires, twisting any frayed strands back
together again. Next, insert a ring terminal (supplied) into the end of
each of these wires, and crimp the terminal tightly.
Wire
1/4"
CAUTION!
!
USE CARE IN DRILLING HOLES NOT TO CONTACT ANY
ELECTRICAL WIRING — HAZARD OF SHOCK, FIRE, BURNS.
1
Battery Clip
Slide Boot
Over Clip
Boot
1
Mounting Screws
Exit Though
BOTTOM VIEW
This Slot
1/8" Holes
Mounting Surface
Crimp Here After
Inserting Wire
Ring Terminal
(side view)
REVISION
F1
(For Kits Sold With Battery Clips)
STEP 2: Attach the YELLOW wire battery clip
to the POSITIVE terminal of a HOUSE battery.
(If your house battery bank consists of 6 volt
golf-cart pairs, connect the YELLOW wire to
the POSITIVE terminal of which ever golf cart
battery that is NOT connected to the negative
terminal of the other golf cart battery.) Next,
attach the BLACK wire battery clip to the
NEGATIVE post on either the house or starting
batteries. Finally, attach the BLUE wire battery
clip to the POSITIVE terminal of a STARTING
battery.
This
process.
HOUSE
BATTERY
TIP: These connections can instead be made to terminals on the the battery
isolator, relay or selector switch — This helps avoid long wire runs and
corroded clips. If additional wire is required, use 18 Gauge or thicker.
CAUTION!
!
USE CARE AROUND BATTERIES — SPARKS CAN IGNITE
HYDROGEN GAS. SHORT CIRCUITS CAN CAUSE BURNS OR FIRE.
CORROSIVE ACID CAN CAUSE SKIN BURNS OR BLINDNESS.
(For All Kits)
STEP 2: Unplug from shore power, disconnect
any solar panels, and remove the negative
terminals of BOTH the house and starting
battery banks. Attach the ring terminal on the
YELLOW wire to the stud connected to the
HOUSE battery first; then connect the ring
terminal on the BLACK wire to chassis ground,
and finally attach the ring terminal on the BLUE
wire to the stud connected to the STARTING
battery. Reattach the HOUSE battery negative terminals, then the
STARTING battery negative terminal, reconnect any solar panels and
restore shore power. This completes the installation process.
To Lights,
Other
Accys.
HOUSE
BATTERY
To Lights,
Other
Accys.
HOUSE
BATTERY
Starting Battery
Charger/Maintainer
completes
the
installation
Yellow
Blue
Black
STARTING
BATTERY
Black
Blue
Yellow
BATTERY ISOLATOR
(Solid State-Type)
STARTING
BATTERY
Black
Blue
Yellow
BATTERY ISOLATOR
(Relay-Type)
STARTING
BATTERY
2
NOTE: Connect
YELLOW wire
first, then BLACK
wire, and finally
BLUE wire.
2
To Starter
NOTE: Connect
YELLOW wire first,
then BLACK wire, and
finally BLUE wire.
To Starter,
Alternator
NOTE: Connect
YELLOW wire first,
then BLACK wire, and
finally BLUE wire.
Advertisement
Table of Contents

Related Manuals for LSL Products Mega TRIK-L-START

Summary of Contents for LSL Products Mega TRIK-L-START
- Page 1 Charger/Maintainer GENERAL INFORMATION — Mega TRIK-L-START™ is designed to keep your engine starting battery(s) fully charged during long periods of inactivity or storage. Connected between the house and starting batteries, it diverts current from your existing house battery charger, sending it to the starting battery(s) instead.
- Page 2 LOW BATTERY ALARM — TRIK-L-START constantly measures the voltage from the house and starting battery banks. If either of these voltages drops below the point at which the battery has less than approx. 20 percent of its charge remaining (11.9 volts), the Low Batt. light illuminates, and a warning beeper sounds. This audible alarm can be disabled by disconnecting the TRIK-L-START from BOTH battery banks for a few seconds, and then RE-CONNECTING THE STARTING BATTERY FIRST (blue and black wires).
Need help?
Do you have a question about the Mega TRIK-L-START and is the answer not in the manual?
Questions and answers