Table of Contents
Advertisement
Available languages
Available languages
Quick Links
Elektrischer Eckkamin
Electrical Fireplace
Cheminée électrique
Chimenea eléctrica
Camino elettrico
100331 12
Hinweis: Dieses Produkt ist nur für gut isolierte Räume
oder für den gelegentlichen Gebrauch geeignet.
Note: This product is only suitable for well insulated
spaces or occasional use.
Advertencia: Este producto está indicado únicamente
en lugares abrigados o para una utilización punctual.
Remarque : Ce produit ne peut être utilisé que dans des
locaux bien isolés ou de manière occasionnelle.
Nota: Questo prodotto è adatto solo per spazi ben
isolati o uso occasionale.
Advertisement
Chapters
Table of Contents

Subscribe to Our Youtube Channel
Related Manuals for Klarstein 10033112


Summary of Contents for Klarstein 10033112
- Page 1 Hinweis: Dieses Produkt ist nur für gut isolierte Räume Elektrischer Eckkamin oder für den gelegentlichen Gebrauch geeignet. Note: This product is only suitable for well insulated spaces or occasional use. Electrical Fireplace Advertencia: Este producto está indicado únicamente Cheminée électrique en lugares abrigados o para una utilización punctual.
-
Page 3: Table Of Contents
Sehr geehrter Kunde, wir gratulieren Ihnen zum Erwerb Ihres Gerätes. Lesen Sie die folgenden Hinweise sorgfältig durch und befolgen Sie diese, um möglichen Schäden vorzubeugen. Für Schäden, die durch Missachtung der Hinweise und unsachgemäßen Gebrauch entstehen, übernehmen wir keine Haftung. Scannen Sie den QR-Code, um Zugriff auf die aktuellste Bedienungsanleitung und weitere Informationen rund um das Produkt zu erhalten. -
Page 4: Sicherheitshinweise
SICHERHEITSHINWEISE Lesen Sie die Sicherheitshinweise sorgfältig durch und bewahren Sie sie zum Nachschlagen auf. • Überprüfen Sie vor dem Betrieb, ob die Spannung des Netzanschlusses mit der Leistung des Gerätes übereinstimmt. • Stellen Sie sicher, dass das Gerät auf einer stabilen, ebenen und hitzebeständigen Oberfläche verwendet wird. - Page 5 • Decken Sie das Heizgerät nicht ab, da dies zu einer Brandgefahr führen kann. Keine der Öffnungen des Heizgerätes versperren. Führen Sie keine Gegenstände durch die Öffnungen des Heizgerätes. Überprüfen Sie das Heizgerät von Zeit zu Zeit auf angesammelten Staub. Verwenden Sie das Heizgerät nicht in Bereichen, in denen brennbare Flüssigkeiten gelagert werden oder in denen brennbare Dämpfe vorhanden sein können.
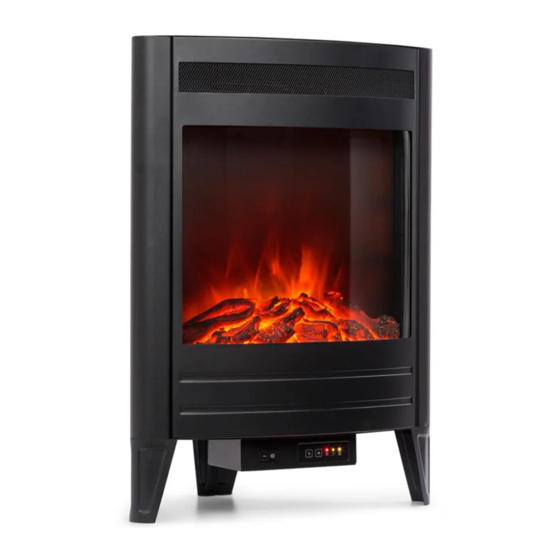
- Page 6 GERÄTEÜBERSICHT Korpus Ein/Aus-Schalter Bedienfeld Fernbedienung...
- Page 7 AUFSTELLUNG Warnung: Gefahr eines Stromschlag und anderer Verletzungen Setzen Sie das Gerät nur so zusammen, wie es in der Bedienungsanleitung beschrieben wurde. Aufstellung Um ein versehendtliches Fallen des Geräts zu verhindern, muss der elektrische Kamin befestigt werden. 1. Bohren Sie mindestens 40 mm von den Seiten der Wand entfernt ein Loch mit 8 mm Durchmesser.
-
Page 8: Verwendung Des Geräts
VERWENDUNG DES GERÄTS Die Funktionen sind über das Bedienfeld am Gerät und über die Fernbedienung einstellbar. Bedienfeld am Gerät Tasten Steuerung der Heizstufe 1x drücken:1900 W. Die Heizanzeige leuchtet rot. 2x drücken: 950 W. Die Heizanzeige leuchtet blau. 3x drücken: Heizfunktion wieder ausschalten. Steuerung der Dekobeleuchtung von Kohlen und Flamme 1x drücken: höchster Helligkeitsgrad. - Page 9 Fernbedienung Richten Sie die Fernbedienung bei der Benutzung in Richtung des Kamins. Die Fernbedienung darf nicht weiter als 6 m entfernt sein. Tasten Einschalten des Geräts. Die Flamme geht an. Im Display der Fernbedienung erscheinen standardmäßig das Flam- mensymbol, die Wochenzeit und die Temperatureinstellung. Bein einem erneuten Druck auf die Taste geht das Display der Fernbedienung aus.
- Page 10 Das Symbol mit den beiden Strichen ( ) zeigt an, dass die Zeitschaltuhr aktiv ist und die aktuell eingestellte Programm-Temperatur gleich mit der Temperatureinstellung ist. Ein Strich ( ) zeigen an, dass der Zeitschaltuhr aktiv ist und die aktuell eingestellte Temperatur die Temperatureinstellung minus 3 °C ist. Eine fehlende Anzeige bedeutet, dass die Zeitschaltuhr ausgeschaltet ist und die Heizelemente gegenwärtig nicht in Betrieb sind.
- Page 11 WARTUNG UND REINIGUNG Einsetzen der Batterien in die Fernbedienung Die Fernbedienung benötigt zwei Batterien des Typs LR03 (AAA) (nicht im Lieferumfang enthalten). Öffnen Sie das Batteriefach, indem Sie die Abdeckung runterschieben und die Batterien einlegen. Reinigung Warnung: Stromschlaggefahr Ziehen Sie vor der Reinigung den Netzstecker. Lassen Sie kein Wasser oder andere Flüssigkeiten ins Innere laufen.
-
Page 12: Abschaltsicherung
FEHLERBEHEBUNG Abschaltsicherung Um das Gerät vor eventuellen Schäden zu schützen, die durch die Abdeckung der Lüftungsöffnungen entstehen, ist dieses Gerät mit einer automatischen Überhitzungsabschaltung versehen. Wenn Sie aktiviert wird, ist das Gerät außer Betrieb gesetzt. Falls dies eintritt, kann das Geät mit folgenden Schritte wieder in Betrieb gesetzt werden: 1. -
Page 13: Hinweise Zur Entsorgung
HINWEISE ZUR ENTSORGUNG Befindet sich die linke Abbildung (durchgestrichene Mülltonne auf Rädern) auf dem Produkt, gilt die Europäische Richtlinie 2012/19/EU. Diese Produkte dürfen nicht mit dem normalen Hausmüll entsorgt werden. Informieren Sie sich über die örtlichen Regelungen zur getrennten Sammlung elektrischer und elektronischer Gerätschaften. Richten Sie sich nach den örtlichen Regelungen und entsorgen Sie Altgeräte nicht über den Hausmüll. - Page 14 Pflichtangaben für Einzelraumheizgeräte Modellkennung(en) 100331 12 Angabe Symbol Wert Einheit Angabe Einheit Wärmeleistung Nur bei elektrischen Speicher-Einzelraumheizgeräten: Art der Regelung der Wärmezufuhr Nennwärmeleistung Manuelle Regelung der Wärmezufuhr nein mit integriertem Thermostat Mindestwärmeleistung Manuelle Regelung der Wärmezufuhr nein (Richtwert) mit Rückmeldung der Raum- und/ oder Außentemperatur Maximale kontinuierliche Elektronische Regelung der Wärmezufuhr...
- Page 15 Dear Customer, Congratulations on purchasing this equipment. Please read this manual carefully and take care of the following hints to avoid damages. Any failure caused by ignoring the items and cautions mentioned in the instruction manual are not covered by our warranty and any liability.
-
Page 16: Safety Instructions
SAFETY INSTRUCTIONS When using any electrical appliance, basic safety precautions should always be followed including the following. • Check that the voltage of the main circuit corresponds with the rating of the appliance before operating. • Please ensure that the appliance is used on a stable, level, and heat resistant surface. - Page 17 • DO NOT obstruct any of the openings of the heater. • DO NOT insert any object through any openings on the heater. • Check the heater from time to time for accumulated dust. • DO NOT use the heater in areas where flammable liquids are stored or where flammable fumes may be present.
-
Page 18: Product Description
PRODUCT DESCRIPTION Main body Control panel Power switch Remote control... -
Page 19: Positioning
POSITIONING Warning: Danger of electric shock and other injuries This product must be be installed as depicted in this instruction manual. Placement In order to prevent accidental dumping machine, the heater needs to be fixed. 1. At least 40mm away from the sides of the wall,Drill a 8mm diameter hole, Pressure expansion screws into the holes. -
Page 20: Operation
OPERATION The appliance can be operated either by the switches located on the bottom left hand side of the heater body .or by supplied remote control as shown in the photo below. Operation panel Keys Heating level control Press 1x :1900 W. Indicator light lights red. Press 2x : 950 W. - Page 21 Remote control Turn on the main power switch, the buzzer beeps once to indicate that the machine is powering on, then the machine is in a standby state. Keys Turn on the appliance. The flame lights up. The flame icon appears on the LCD screen of the remote control. Week, time (24h system), and temperature setting are displayed nor- mally.
- Page 22 indicates that the timing is on currently and the control temperature is the temperature setting. indicates that the timing is on currently and the control temperature is the temperature setting minus 3 °C, No display indicates timing is off current and the heating elements do not work.
-
Page 23: Maintencance And Cleaning
MAINTENCANCE AND CLEANING Inserting the batteries into the remote control The remote control requires 2x AAA size batteries (not included) Open the battery compartment by sliding the cover down and insert the batteries noting the polarity indicated in the battery compartment. Cleaning Warning: Danger of electric shock Pull the plug before cleaning. -
Page 24: Troubleshooting
TROUBLESHOOTING Safety Cut-Out device To ensure against the potential hazard caused by blockage of the air outlet, this unit is equipped with an automatic overtemperature safety cut-out device. When the device is activated the heater will not operate. If this occurs, the unit can be reset using the following procedure: 1. -
Page 25: Disposal Considerations
DISPOSAL CONSIDERATIONS According to the European waste regulation 2012/19/EU this symbol on the product or on its packaging indicates that this product may not be treated as household waste. Instead it should be taken to the appropriate collection point for the recycling of electrical and electronic equipment. - Page 26 Information requirements for electric local space heaters Model identifier(s): 100321 12 Item Symbol Value Unit Item Unit Heat output Type of heat input, for electric storage local space heaters only Nominal heat output manual heat charge control, with integrated thermostat Minimum heat output manual heat charge control with room (indicative)
- Page 27 Chère cliente, cher client, Toutes nos félicitations pour l’acquisition de ce nouvel appareil. Veuillez lire attentivement et respecter les instructions de ce mode d’emploi afin d’éviter d’éventuels dommages. Nous ne saurions être tenus pour responsables des dommages dus au non-respect des consignes et à...
-
Page 28: Consignes De Sécurité
CONSIGNES DE SÉCURITÉ Lisez attentivement les consignes de sécurité et conservez-les pour référence ultérieure. • Avant la mise en marche, vérifiez que la tension de votre secteur correspond à la puissance de l‘appareil. • Assurez-vous que l‘appareil est utilisé sur une surface stable, plane et résistante à la chaleur. - Page 29 entreposés et là où des vapeurs combustibles peuvent être présentes. • Ne pas recouvrir le câble avec un tapis. Ne pas recouvrir avec un plaid, un tapis de passage ou similaires. Faites passer le câble loin des zones de passage et des endroits où...
-
Page 30: Aperçu De L'appareil
APERÇU DE L'APPAREIL Corps de l'appareil Bouton de marche/ Panneau de arrêt commande Télécommande... -
Page 31: Installation
INSTALLATION Mise en garde : risque de choc électrique et autres blessures N'assemblez l'appareil que de la façon décrite dans le mode d'emploi Installation Pour éviter une chute accidentelle de l'appareil, la cheminée électrique doit être fixée. 1. Percez un trou de 8 mm de diamètre à 40 mm au moins des côtés du mur. Installez des vis à... -
Page 32: Utilisation De L'appareil
UTILISATION DE L'APPAREIL Les fonctions de réglage sont accessibles par le panneau de commande de l'appareil Panneau de commande de l'appareil Touches Contrôle du niveau de chauffage 1x appuis:1900 W. Le témoin de chauffage s'allume en rouge. 2x appuis: 950 W. Le témoin de chauffage s'allume en bleu. 3 x appuis : éteindre le radiateur. - Page 33 Télécommande Pour utiliser la télécommande, dirigez-la toujours vers la cheminée. La télécommande ne doit pas se trouver à plus de 6 mètres. Touches Allumage de l'appareil. Les flammes s'allument. L'écran de la télécommande affiche l'icône de flammes standard, la se- maine et le réglage de température.
- Page 34 L‘icône avec les deux tirets ( ) indique que la minuterie est active et que la température programmée actuellement est la même que la température ambiante. Un tiret ( ) indique que la minuterie est active et que la température actuelle est égale à...
-
Page 35: Maintenance Et Nettoyage
MAINTENANCE ET NETTOYAGE Installation des piles dans la télécommande La télécommande requiert deux piles de type LR03 (AAA) (non fournies). Ouvrez le compartiment des piles en faisant glisser le cache vers le bas et installez les piles. Nettoyage Mise en garde : risque d'électrocution Avant le nettoyage, débranchez la fiche de la prise. -
Page 36: Résolution Des Problèmes
RÉSOLUTION DES PROBLÈMES Disjoncteur de sécurité Pour protéger l'appareil des dommages éventuels causés par l'obstruction des ouvertures de ventilation, cet appareil est équipé d'un arrêt de sécurité en cas de surchauffe. Lorsqu'il est activé, l'appareil s'éteint. Si cela se produit, l'appareil peut être redémarré... -
Page 37: Informations Sur Le Recyclage
INFORMATIONS SUR LE RECYCLAGE Vous trouverez sur le produit l’image ci-contre (une poubelle sur roues, barrée d‘une croix), ce qui indique que le produit se trouve soumis à la directive européenne 2012/19/UE. Renseignez-vous sur les dispositions en vigueur dans votre région concernant la collecte séparée des appareils électriques et électroniques. - Page 38 Données obligatoires pour les radiateurs de pièce individuelle Référence (s) du produit 100331 12 Donnée Symbole Valeur Unité Donnée Unité Puissance calorifique Uniquement pour les radiateurs électriques à accumulation : Type de régulation de l'apport de chaleur Puissance calorifique Régulation manuelle de l'apport de nominale chaleur avec thermostat intégré...
-
Page 39: Datos Técnicos
Estimado cliente, Le felicitamos por la adquisición de este producto. Lea atentamente el siguiente manual y siga cuidadosamente las instrucciones de uso con el fin de evitar posibles daños. La empresa no se responsabiliza de los daños ocasionados por un uso indebido del producto o por haber desatendido las indicaciones de seguridad. -
Page 40: Indicaciones De Seguridad
INDICACIONES DE SEGURIDAD Lea las indicaciones de seguridad cuidadosamente y consérvelas para el futuro. • Antes de su uso, compruebe que la tensión de la conexión de red coincida con la tensión del aparato. • Asegúrese de que el aparato se coloque sobre una superficie estable, plana y resistente al calor. - Page 41 donde existan vapores inflamables. • No coloque el cable por debajo de alfombras ni moquetas, felpudos o similar. Coloque el cable fuera de las zonas de tránsito y en zonas donde alguien pudiera tropezar. • Este aparato tiene piezas en su interior que generan chispas. No lo utilice en zonas en donde se utilice o almacene gasolina, pinturas o líquidos inflamables.
-
Page 42: Visión General Del Aparato
VISIÓN GENERAL DEL APARATO Estructura Interruptor on/off Panel de control Mando a distancia... -
Page 43: Colocación
COLOCACIÓN Advertencia: riesgo de descarga eléctrica y de otras lesiones Monte el aparato solamente tal y como se muestra en las instrucciones de uso. Colocación Para evitar una caída accidental del aparato, deberá fijar la chimenea eléctrica. 1. Realice dos perforaciones de 8 cm de diámetro a al menos 40 mm de los lados en la pared. -
Page 44: Uso Del Aparato
USO DEL APARATO Las funciones se pueden regular a través del panel de control del aparato y también con el mando a distancia. Panel de control del aparato Botones Control de nivel de calefacción Pulsar 1 vez: 1900 W. El indicador de calefacción se ilumina en color rojo. - Page 45 Mando a distancia Oriente el mando a distancia hacia la chimenea cuando lo utilice. El mando no debe situarse a una distancia superior a 6 m. Botones Encender el aparato. Las llamas se encienden. En el display del mando a distancia aparece por defecto el símbolo de la llama, el día de la semana y la regulación de temperatura.
- Page 46 El símbolo con ambas rayas ( ) indica que el temporizador está activo y que la temperatura del programa configurado actualmente es igual al ajuste de temperatura. Una raya ( ) indica que el temporizador está activo y que la temperatura configurada actualmente es 3 °C inferior al ajuste de temperatura.
-
Page 47: Mantenimiento Y Limpieza
MANTENIMIENTO Y LIMPIEZA Colocación de las pilas en el mando a distancia El mando a distancia necesita dos pilas del tipo LR03 (AAA) (no incluidas en el envío). Abra el compartimento de las pilas, desplazando la cubierta e introduciendo las pilas Limpieza Advertencia: riesgo de descarga eléctrica Antes de la limpieza, desconecte el enchufe. -
Page 48: Resolución De Problemas
RESOLUCIÓN DE PROBLEMAS Protección de apagado Para proteger al aparato de posibles daños generados por cubrir los orificios de ventilación, el aparato está equipado por una protección automática contra el sobrecalentamiento. Si se activa, el aparato se apaga. Si esto ocurre, el aparato se puede volver a poner en marcha con los siguientes pasos: 1. -
Page 49: Indicaciones Para La Retirada Del Aparato
INDICACIONES PARA LA RETIRADA DEL APARATO Si el aparato lleva adherida la ilustración de la izquierda (el contenedor de basura tachado) entonces rige la normativa europea, directiva 2012/19/UE. Estos productos no pueden depositarse en los contenedores destinados a la basura común. Infórmese sobre las leyes territoriales que regulan la recogida separada de aparatos eléctricos y electrónicos. - Page 50 Datos obligatorios para calentadores de ambiente individuales Denominación del modelo 100331 12 Dato Símbolo Valor Unidad Dato Unidad Potencia térmica Solo con disposítivos de acumulación de calor eléctricos para abastecimiento local: Tipo de regulación del abastecimiento de calor Potencia térmica nominal Regulación manual del abastecimiento de calor con termostato integrado: Potencia térmica mínima...
-
Page 51: Dati Tecnici
Gentile Cliente, La ringraziamo per aver acquistato il dispositivo. La preghiamo di leggere attentamente le seguenti istruzioni per l’uso e di seguirle per evitare possibili danni tecnici. Non ci assumiamo alcuna responsabilità per danni scaturiti da una mancata osservazione delle avvertenze di sicurezza e da un uso improprio del dispositivo. -
Page 52: Avvertenze Di Sicurezza
AVVERTENZE DI SICUREZZA Leggere attentamente il manuale d’uso e conservarlo per future consultazioni: • Controllare prima dell’utilizzo che la tensione della rete elettrica corrisponda alla potenza del dispositivo. • Assicurarsi di posizionare il dispositivo su una superficie stabile, piana e termoresistente. - Page 53 Non utilizzare il dispositivo in locali in cui vengono conservati liquidi infiammabili o in cui potrebbero essere presenti vapori. • Non coprire il cavo con moquette, tappeti o passatoie. Far passare il cavo lontano da zone di passaggio in cui ci si potrebbe inciampare. •...
-
Page 54: Descrizione Del Dispositivo
DESCRIZIONE DEL DISPOSITIVO Corpo Interruttore On/Off Pannello di controllo Telecomando... -
Page 55: Installazione
INSTALLAZIONE Attenzione: pericolo di folgorazione e altre lesioni Montare il dispositivo seguendo le indicazioni del manuale. Installazione Per evitare che il dispositivo cada, è necessario fissarlo. 1. Realizzare un foro di 8 mm di diametro ad almeno 40 mm dal bordo della parete. Inserire viti di pressione. -
Page 56: Utilizzo Del Dispositivo
UTILIZZO DEL DISPOSITIVO Le funzioni sono impostabili sul pannello di controllo del dispositivo o sul telecomando. Pannello di controllo sul dispositivo Tasti Gestione del livello riscaldante Premendo 1 volta: 1900 W. L’indicazione di riscaldamento illumina di rosso. Premendo 2 volte: 950 W. L’indicazione di riscaldamento ) si illumina di blu Premendo 3 volte: la funzione riscaldante viene spenta. - Page 57 Telecomando Indirizzare il telecomando verso il camino. Il telecomando non deve trovarsi a oltre 6 m di distanza. Tasti Accendere il dispositivo. La fiamma si accende. Sul display del telecoman- do compaiono il simbolo della fiamma, il tempo settimanale e la temperatu- ra impostata.
- Page 58 Il simbolo con i due trattini ( ) indica che il timer è attivo e che il programma di temperatura impostato corrisponde con l’impostazione della temperatura. Un trattino ( ) indica che il timer è attivo e la temperatura attualmente impostata è...
-
Page 59: Pulizia E Manutenzione
PULIZIA E MANUTENZIONE Inserire le batterie nel telecomando Il telecomando funziona con due batterie tipo LR03 (AAA) (non incluse nel volume di consegna). Aprire il vano per le batterie facendo scorrere la copertura verso il basso e inserire le batterie. Pulizia Attenzione: pericolo di folgorazione Staccare la spina prima della pulizia. -
Page 60: Risoluzione Dei Problemi
RISOLUZIONE DEI PROBLEMI Spegnimento di sicurezza Per proteggere il dispositivo da eventuali danni che possono risultare dalla copertura delle aperture di ventilazione, è presente una funzione di spegnimento automatico in caso di surriscaldamento. Una volta attivato, il dispositivo è fuori servizio. Per riattivare il dispositivo, seguire questi passaggi: 1. -
Page 61: Smaltimento
SMALTIMENTO Se sul prodotto è presente la figura a sinistra (il bidone dei rifiuti con le ruote), si applica la direttiva europea 2012/19/UE. Questi prodotti non possono essere smaltiti con i rifiuti normali. Informarsi sulle disposizioni vigenti per la raccolta di dispositivi elettrici ed elettronici. Attenersi alle disposizioni vigenti e non smaltire i vecchi dispositivi con i rifiuti domestici. - Page 62 Indicazioni obbligatorie per riscaldatori per stanze singole Identificazione del modello (i) 100331 12 Indicazione Simbolo Valore Unità Indicazione Unità Potenza termica Solo per gli apparecchi per il riscaldamento d'ambiente locale elettrici ad accumulo: Tipo di controllo dell´apporto termico Potenza termica nominale Pnom Controllo manuale del carico termico con termostato integrato...
Need help?
Do you have a question about the 10033112 and is the answer not in the manual?
Questions and answers