Advertisement
Quick Links
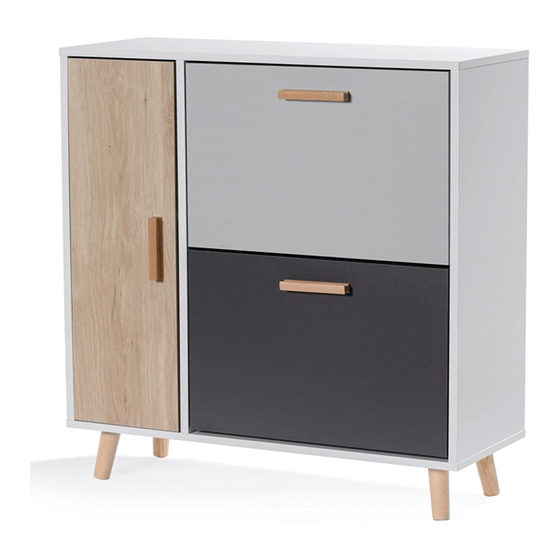
DELTA SHOE AND BOOT CABINET
ASSEMBLY INSTRUCTIONS
Thank you for purchasing the MULTI SHOE AND BOOT CABINET.
Please read the instructions carefully to ensure safe operation of the p
Size: (W)750 x (D)290 x
(H)860mm
Colour : White / L.Grey / Taupe / D.Grey
1
1/2
Batch No : PO# xxxx
Page
Page 1 of 14
V1 3/19
Advertisement

Related Manuals for BIG FURNITURE WAREHOUSE DELTA SHOE AND BOOT CABINET


Summary of Contents for BIG FURNITURE WAREHOUSE DELTA SHOE AND BOOT CABINET
- Page 1 DELTA SHOE AND BOOT CABINET ASSEMBLY INSTRUCTIONS Thank you for purchasing the MULTI SHOE AND BOOT CABINET. Please read the instructions carefully to ensure safe operation of the p Size: (W)750 x (D)290 x (H)860mm Colour : White / L.Grey / Taupe / D.Grey...
- Page 2 The maximum load capacity for each drawer is 5kg. Do not exceed this weight. Due to the size of this product we recommend that is assembled in the room intended for use. When you ready to start, make sure that you have the right tools, plenty of space and a clean, dry area for assembly Unwrap all packaging materials and place the components on top of the carton box or not on a clean floor to prevent it from scratching.
- Page 3 Side Panel (L) (15 x 298 x 710mm) Door Panel (15 x 217 x 702mm) Side Panel (R) (15 x 298 x 710mm) Front Panel (Top) (15 x 345 x 474mm) Center Panel (15 x 289 x 710mm) Front Panel (Bottom) (15 x 345 x 474mm) Top Panel (15 x 290 x 750mm) Shoe Rack Panel (Mid) (12 x 138 x 470mm) Bottom Panel (15 x 290 x 750mm)
- Page 4 M6 x 40mm D6.3 x 40mm M4 x 38mm D8 x 30mm M5 x 29mm M4 x 25mm Unitar Screw JCBC Screw CSK Screw Wooden Dowel Minifix Bolt Csk Screw M6 x 20mm 19mm M4 x 25mm M3.5 x 15mm D15 x 12mm Handle Screw Tapping...
- Page 5 STEP 1 10 x Parts Required Qty Parts Required Qty Panel (A) Panel (B) Panel (H) Panel (C) Panel (G) Page 5 of 14 V1 3/19...
- Page 6 STEP 2 10 x Parts Required Qty Panel (B) Panel (C) Panel (D) STEP 3 STEP A STEP C Parts Required Qty Panel (J) Panel (M) STEP B Panel (N) Page 6 of 14 V1 3/19...
- Page 7 STEP 4 STEP A STEP C Parts Required Qty Panel (K) STEP B Panel (M) Panel (N) STEP 5 Parts Required Qty Panel ( B ) Panel ( G ) Panel ( H) Page 7 of 14 V1 3/19...
- Page 8 STEP 6 Parts Required Qty Panel (C) STEP 7 Parts Required Qty Panel (E ) Page 8 of 14 V1 3/19...
- Page 9 STEP 8 Parts Required Qty Parts Required Qty Panel (A) Panel (E) STEP 9 Parts Required Qty Panel ( D ) Page 9 of 14 V1 3/19...
- Page 10 STEP 10 Parts Required Qty Parts Required Qty Panel (F) STEP 11 2 set Parts Required Qty Panel ( I ) Page 10 of 14 V1 3/19...
- Page 11 STEP 12 Lateral adjustment Front-to-Back adjustment Parts Required Qty Parts Required Qty Panel (I) Vertical Adjustment STEP 13 26 x Parts Required Qty Parts Required Qty Panel (Y) Page 11 of 14 V1 3/19...
- Page 12 STEP 12 WALL NOTE : The wall fixing plug supplied with this product is suitable for solid and brick walls . For hollow and stud type walls fixing devices suitable for those type of walls must be obtained separately. Please ensure the fixing is safe and secure before use and that the area to be drilled is free from hidden wires ,water &...
- Page 13 STEP 14 p p p f Parts Required Qty Panel ( L ) Page Page 13 of 14 V1 3/19...
- Page 14 Your DELTA SHOE AND BOOT CABINET is now completely assembled Page 14 of 14 V1 3/19...
Need help?
Do you have a question about the DELTA SHOE AND BOOT CABINET and is the answer not in the manual?
Questions and answers