Table of Contents
Advertisement
Quick Links
Advertisement
Table of Contents

Related Manuals for Siren Marine SM-WLS-BATT

Summary of Contents for Siren Marine SM-WLS-BATT
- Page 1 Wireless Sensor Guide...
-
Page 2: Table Of Contents
Entry Sensor ..........6 Battery Sensor ..........8 High-Water Sensor ........10 Temperature Sensor ........12 Battery Installation ........14 Pair Wireless Sensors to Siren Marine MTC ..16 Wireless Sensor Installation ......17 Mounting with a Bracket ......18 Mounting with Adhesive Strip ....19 Battery Replacement ........20... -
Page 3: Siren Marine Wireless Sensors
Meet The Wireless Sensors Siren Marine Wireless Sensors are easy to install and ideal for hard-to-access areas. Easy to Install Peel & Stick Mounting Monitor Temperature IP67 Waterproof 2-Year Battery Life Up to 200 Foot Range... -
Page 4: Bilge Pump Sensor
Bilge Pump Sensor Monitor bilge-pump activity and receive alerts if your boat is taking on water. There are two ways for the wireless sensor to monitor bilge pump activity: 1. Connect the Positive(+) and Negative(-) leads from the sensor directly to the Positive(+) and Negative(-) leads off your bilge pump. -
Page 6: Entry Sensor
Adhesive Strip. Pair the Wireless Module to the MTC unit. Note: When the hatch, locker or entry point is opened, a notification will be sent to the Siren Marine app and an audible alarm can be triggered. -
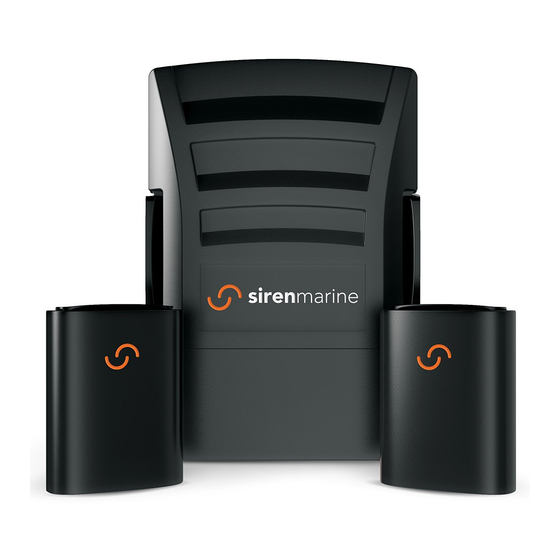
Page 8: Battery Sensor
Plug the Battery Tail into the wireless module and tighten the two hex screws. Pair the Wireless Module to the MTC unit. Note: This sensor is polarity sensitive. Notifications will be sent to the Siren Marine app if the voltage drops below or exceeds present levels. -
Page 10: High-Water Sensor
High-Water Sensor Detects if there is water in the bilge. Mount the High-Water Wireless Module in an area above the High-Water Line in the bilge. Secure the High-Water Sensor at the desired height in the bilge using the supplied Adhesive Strip. Plug the High-Water Tail into the wireless module and tighten the two hex screws. -
Page 12: Temperature Sensor
Temperature Sensor Monitor the temperature of your cabin, engine room, bait locker or fridge. The Wireless Temperature Sensor works with and without the detachable Temperature Probe. To monitor temperature without the Temperature Probe, simply mount the Wireless Module in the area to be monitored and link to the MTC unit. -
Page 14: Battery Installation
Battery Installation Important: Your wireless sensor comes with a CR2430 internal battery which will need to be installed prior to pairing the wireless sensor with the MTC unit. Please be sure to follow the steps below: Remove the four screws on the back of the wireless module. -
Page 16: Pair Wireless Sensors To Siren Marine Mtc
(See instructions on page 14) Pair the wireless sensor prior to mounting in it’s permanent location. Go to the Settings page on the Siren Marine app and select Add Wireless Sensor. Scan the QR Code on the back of your wireless sensor to proceed. -
Page 17: Wireless Sensor Installation
The wireless sensors should be installed on a smooth flat surface. Siren Marine adhesive strips are very strong and cannot be easily repositioned. Before you press and hold it for 30 seconds, be sure the wireless sensor is aligned correctly and is communicating with your Siren Marine MTC. -
Page 18: Mounting With A Bracket
Wireless Sensor Installation Mounting with a Bracket: If your surfaces are rough, dirty or prone to high heat or humidity, install your wireless sensor with the supplied bracket and screws. Remove the wireless sensor from its supplied mounting bracket to expose the screw holes. Align the mounting bracket in the desired location. -
Page 19: Mounting With Adhesive Strip
Wireless Sensor Installation Mounting with Adhesive Strip: Make sure the surface is clean and dry. Peel the protective cover off the adhesive strip on the back of the mounting bracket. Align the mounting bracket in the desired position and press evenly with your palm. Hold in place for at least 30 seconds. -
Page 20: Battery Replacement
Battery Replacement The wireless sensor will notify you via the Siren Marine App when the internal battery voltage is low. If a sensor (e.g. high-water probe) is attached to the wireless module, it must be removed before the module can be removed from the mounting bracket. - Page 21 Battery Replacement Remove the four screws from the back of the sensor and open the sensor. Slide the old battery out of the battery holder and replace with a new CR2430 3V lithium battery, Positive(+) side up. Close up the wireless module and tighten down the four screws without over tightening.
-
Page 22: Technical Specifications
Technical Specifications Model Numbers: Battery Sensor: SM-WLS-BATT Bilge Pump Sensor: SM-WLS-BILG Entry Sensor: SM-WLS-ENTR High Water Sensor: SM-WLS-HIWS Temperature Sensor: SM-WLS-TEMP Wireless Sensor Module: 2.0in x 2.7in x 0.6in Wireless Connection: 900MHz radio frequency Range: Up to 200 feet Battery:... - Page 23 Technical Specifications Warranty: 2-Year Limited Warranty Mounting: Mounting bracket with adhesive mounting strip and mounting screws included Requirements: Requires MT, MTC, or MTC-Pro and Siren Marine Service Plan Certifications: IP67 Waterproof, FCC, EU...
- Page 24 sirenmarine.com Technical Support: 401.619.4774 855.75.SIREN (855.757.4736) 221 Third St., Suite 200, Newport, RI 02840...
Need help?
Do you have a question about the SM-WLS-BATT and is the answer not in the manual?
Questions and answers