
Related Manuals for Audio Excellence V1

Summary of Contents for Audio Excellence V1
- Page 1 V1/V2 Speaker wall installation instructions Paul Baxter Screen Excellence Ltd.| 136 Bentwaters Parks, Rendlesham, Suffolk, IP12 2TW, UK, Version 1.0, Mar 2017...
-
Page 2: Table Of Contents
As with any speaker installa on work - Audio Excellence places great emphasis on your Personal Safety. Please adhere to all recommenda ons. Table of Contents: Brick or block walls ................................. 3 Basic equipment required ............................3 Fitting the speaker bracket ............................3 Fitting speakers to an interior wall ......................... -
Page 3: Brick Or Block Walls
Brick or block walls (For plasterboard walls, please refer to the second half of this publication: “In-Wall Kits”) Basic equipment required Electric drill (capable of hammer action) Small spirit level Masonry drill bit (approx. 5.5mm) Medium cross point or “Philips” screwdriver ... -
Page 4: Fitting Speakers To An Interior Wall
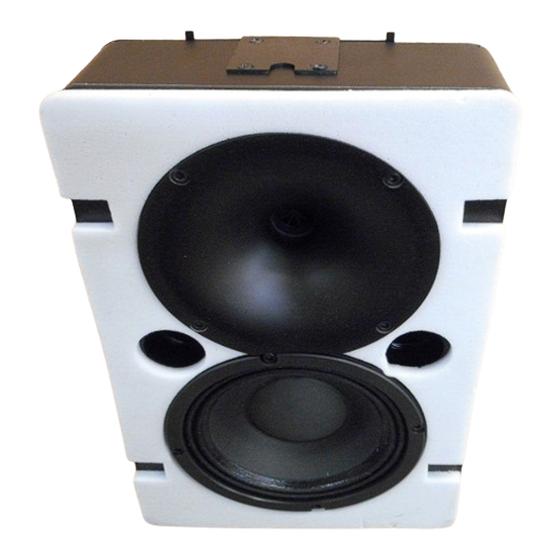
Fitting speakers to an interior wall After finding the ideal speaker location required (not covered in this publication – maybe we should say which publication?). Using the electrical cable and pipe detector, scan the area immediately around the speaker location. If no audible warning is indicated, it is then safe to proceed with the installation. -
Page 5: Optional Extras
With the wall bracket securely in place, gently lower the speaker onto the wall bracket as shown below. Optional Extras Included with the speaker kit are self-adhesive feet so when placed under the speaker, it allows for it to be free standing on a level surface (as illustrated below). Alternatively, these self-adhesive feet can be placed on the inside edge, between the speaker and the wall (when wall mounted), to help partially isolate the vibrations. -
Page 6: The Finishing Touches
The Finishing Touches With the speaker (V1 / V2) fitted on the wall bracket, the grille frame with black speaker cloth (fitted as standard) is simply offered up to the speaker front plate until the magnets “click” into place. The frame should then be held firmly. - Page 7 These examples show artwork printed on the acoustically transparent cloth. With the grille fitted the speaker takes on the form of a painting: Side view of a Vertex 2 speaker with an art cloth fitted as an option: Screen Excellence Ltd. 136 Bentwaters Parks, Rendlesham, Suffolk, IP12 2TW, UK Version 1.0 Mar...
-
Page 8: Plasterboard Or Stud Wall Fixing
For clients who have plasterboard or stud walls and wish to blend in their speaker system with the room décor, Audio Excellence provides the option to install and hide the speakers into the partition wall with the relevant “In-Wall Kit”. Each kit is specific to each type of speaker that can be installed In-Wall (Vertex 1, Vertex 2 and Raijuu 1) The low profile of the Audio Excellence speakers enable them to fit easily into most spaces. -
Page 9: Installation Instructions
Place the Vertex 1 or 2 surround speakers in the Audience area; this is in accordance to Dolby recommendations, but also please refer to the Congard Code from Audio Excellence for the best set up to achieve a realistic sound stage for enhanced listening pleasure. - Page 10 With the frame temporarily removed, the marked screw holes are drilled. If using “Molly” bolts the drill bit required would be 8mm. The below photo illustrates fitted “Molly” bolts. “Molly Bolts” and insertion tool. Screen Excellence Ltd. 136 Bentwaters Parks, Rendlesham, Suffolk, IP12 2TW, UK Version 1.0 Mar...
- Page 11 Rear view of frame showing one of the anchor bolts in position. Each bolt has a hold weight of 25Kg. The frame is inserted back into the opening and secured to the plaster board using the counter sunk screws. The photo below illustrates a Vertex 2 in position. Before a speaker is fitted into the frame ensure the signal cable is securely fitted to the binding posts, noting the correct polarity.
- Page 12 The speaker is fitted to the frame via 4 screws. Install the grille. The clips are going to secure it in place. Screen Excellence Ltd. 136 Bentwaters Parks, Rendlesham, Suffolk, IP12 2TW, UK Version 1.0 Mar...
- Page 13 Below is the view of a fabric covered metal grille covering all the drivers of a V2 speaker. The grille lies flat on the surface of the wall covering the frame. Screen Excellence Ltd. 136 Bentwaters Parks, Rendlesham, Suffolk, IP12 2TW, UK Version 1.0 Mar...
- Page 14 For in-ceiling installation please note! Please ensure that the ceiling is properly reinforced to sustain the weight of the speaker. Please use the security cable provided: Attach it to the frame and secure it in solid structure at the other end This is to prevent the speaker to fall in case the ceiling fails! Screen Excellence Ltd.
- Page 15 Now you can now enjoy the Excellent Quality of your new V1/V2 Speaker wall installation! Screen Excellence Ltd. 136 Bentwaters Parks, Rendlesham, Suffolk, IP12 2TW, UK Version 1.0 Mar...
Need help?
Do you have a question about the V1 and is the answer not in the manual?
Questions and answers