Advertisement
Quick Links
IMPORTANT! Keep this instruction sheet
for future reference, as it contains
important information.
• Please read these instructions before
assembly and use of this product.
• Adult assembly is required. Tool needed
for assembly: Phillips screwdriver
(not included).
• Assembly instructions on back side of
this sheet.
• Requires two, C (LR14) alkaline batteries
(not included).
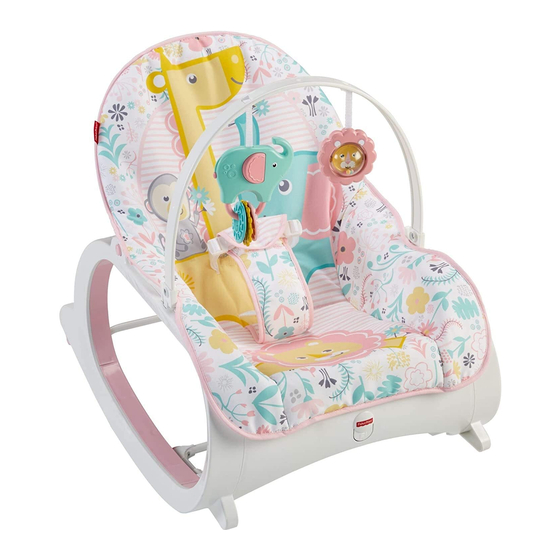
• Use the product from birth until child weighs
40 lb (18 kg).
DTH00
DTH00
fi sher-price.com
¡IMPORTANTE! Leer y guardar estas
instrucciones para futura referencia, ya que
contienen información de importancia acerca
de este producto.
• Leer estas instrucciones antes de ensamblar
y usar este producto.
• Requiere ensamblaje por un adulto.
Herramienta necesaria para el montaje:
desatornillador de cruz (no incluido).
• Ver el dorso de esta hoja para las
instrucciones de montaje.
• Funciona con 2 pilas alcalinas C (LR14) x 1,5V
(no incluidas).
• Usar el producto a partir del nacimiento hasta
que el bebé pese 18 kg (40 lb).
1
Advertisement

Subscribe to Our Youtube Channel
Related Manuals for Fisher-Price DTH00


Summary of Contents for Fisher-Price DTH00
- Page 1 DTH00 DTH00 IMPORTANT! Keep this instruction sheet ¡IMPORTANTE! Leer y guardar estas for future reference, as it contains instrucciones para futura referencia, ya que important information. contienen información de importancia acerca • Please read these instructions before de este producto.
- Page 2 Consumer Information Información al consumidor WARNING: Prevent serious injury or death: • Never leave child unattended. • This product is not intended for unsupervised or prolonged periods of sleep. • Fall Hazard – Never use on any elevated surface, since child’s movement may cause the product to slide or tip over.
- Page 3 Consumer Information Información al consumidor IMPORTANT! Before assembly and each use, • Usar un paño humedecido en una solución inspect this product for damaged hardware, limpiadora neutra para limpiar el armazón, loose joints, missing parts or sharp edges. Do barra de juguetes y juguetes. No usar not use the product if any parts are missing, blanqueador.
- Page 4 Battery Installation Colocación de las pilas Hint: We recommend using alkaline batteries Battery Safety Information for longer battery life. In exceptional circumstances, batteries may leak fluids that can cause a chemical burn Atención: Se recomienda usar pilas alcalinas injury or ruin your product. To avoid para una mayor duración.
- Page 5 Securing Your Child Sistema de sujeción Restraint Belt Anchored End Anchored End Restraint Belt Cinturón de Extremo fijo Extremo fijo Cinturón de sujeción sujeción Free End Free End Extremo libre Extremo libre TIGHTEN LOOSEN APRETAR AFLOJAR To tighten the belts: •...
- Page 6 CONSUMER ASSISTANCE CO SU SS S ATENCIÓN AL CLIENTE 1-800-432-5437 (US) Fisher-Price, Inc., 636 Girard Avenue, East Aurora, NY 14052. Hearing-impaired consumers/Clientes con problemas auditivos 1-800-382-7470. Centro de Servicio en México: 59-05-51-00 Ext. 5206 ó 01-800-463-59-89 MÉXICO COLOMBIA Importado y distribuido por Mattel de México, Mattel Colombia, S.A., Calle 123#7-07 P.5,...
- Page 7 Parts Piezas IMPORTANT! Please remove all parts from the package and identify them before assembly. Some parts may be packed in the pad. ¡IMPORTANTE! Sacar todas las piezas del empaque e identificarlas antes de ensamblarlas. Quizá algunas piezas estén en la almohadilla. Seat Back Tube S t B k T b Toy Bar...
-
Page 8: Back View
Assembly Montaje Montaje Soothing Unit Unidad relajante Side Rail Barandilla lateral Rear Cross Brace Barra transversal trasera BACK VIEW VISTA DE ATRÁS • Fit the soothing unit onto a side rail. • Fit the cross brace (attached to the pad) between the side rails. - Page 9 Assembly Assem Montaje Kickstand Pie de apoyo o • Insert an M4,5 x 25 mm screw into each end of BOTTOM BACK VIEW the cross brace and tighten. VISTA INFERIOR DE ATRÁS Hint: You may want to tip the assembly on its side to assemble the screws.
-
Page 10: Front View
Assembly Montaje Pad Upper Pocket Funda superior de la almohadilla SIDE VIEW SIDE VIEW VISTA DEL LADO STA DEL LADO SIDE VIEW VISTA DEL LADO • Fit the upper pocket on the back of the pad onto the seat back tube. •... - Page 11 Seat Position Toy Bar Posición de asiento Barra de juguetes LIFT OR LOWER LIFT OR LOWER SUBIR O BAJAR SUBIR O BAJAR PRESS PRESS PRESIONAR PRESIONAR PRESS PRESS PRESIONAR PRESIONAR Upright: While pressing the button on each • Fit the plugs on each end of the toy bar into side rail, lift the seat back.
- Page 12 Soother Toddler Mode Unidad relajante Modalidad de niño pequeño • Insert the restraint belts back through the small slots in the pad. • Insert the restraint pad down through the Power Button large slot in the pad. Botón de encendido •...
Need help?
Do you have a question about the DTH00 and is the answer not in the manual?
Questions and answers