
Related Manuals for Wurlitzer Vintage 850 Peacock


Summary of Contents for Wurlitzer Vintage 850 Peacock
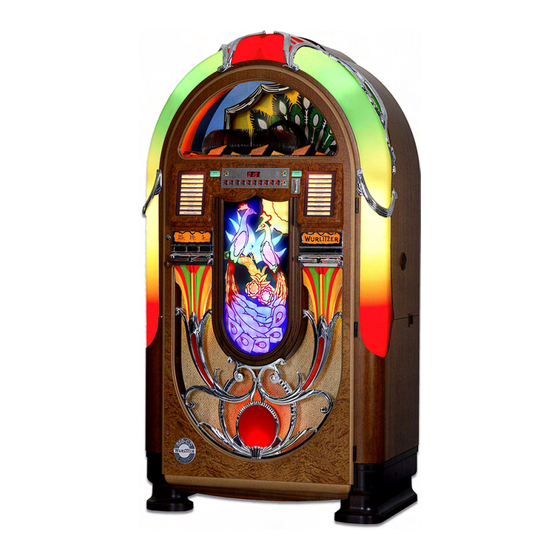
- Page 1 To Purchase This Item, Visit BMI Gaming | www.bmigaming.com | (800) 746-2255 | +1.561.391.7200 Vintage 850 Peacock Classic 850 Peacock...
- Page 2 To Purchase This Item, Visit BMI Gaming | www.bmigaming.com | (800) 746-2255 | +1.561.391.7200 Warning CLASS LASER PRODUCT 3122 110 03420 Although the beam emitted by the laser diodes is nearly invisible, it may cause damage to the human eye. When the laser is being operated, the emitting surface must not be viewed either directly or through a lens, fiber or mirror.
-
Page 3: Table Of Contents
The subwoofer amplifier............19 Vintage 850 Peacock / Classic 850 Peacock – Edition: 02.10.2007... - Page 4 Index ............35 Vintage 850 Peacock / Classic 850 Peacock – Edition: 02.10.2007...
-
Page 5: Unpacking
Remove plastic holder securing CD player chassis (3). Remove foam (4), laser cover (5) securing laser head in CD player and instruction plate (6). Remove foam between magnetic pressure disc and black plastic cover (7). Vintage 850 Peacock / Classic 850 Peacock – Edition: 02.10.2007... -
Page 6: Setting The Jukebox Into Operation
1, button 5 (see chapter "Programming number of CDs in the carrier", see page lever ATTENTION! The position ’00’ is the 100th CD. Vintage 850 Peacock / Classic 850 Peacock – Edition: 02.10.2007... -
Page 7: Programming Number Of Cds In The Carrier
Enter the number of inserted CDs (without BGM CDs) with two digits followed by 00, example: 50 for 50 discs (exception: 100. CDs = 00). To check the new settings, press selection button 5 again. Vintage 850 Peacock / Classic 850 Peacock – Edition: 02.10.2007... - Page 8 Press ‘LT’ button. Service GP+6 The changer starts an initialisation run. After this the jukebox is ready to operate. Selection & Credit Computer CDM 4I / CDM 12 Memory 0040264 Vintage 850 Peacock / Classic 850 Peacock – Edition: 02.10.2007...
-
Page 9: Coin Operation Or Free Play
In between two to six plays are selectable by setting an additional jumper in the row ‘BS’ (Bonus Step) from 0 to 2 or from 0 to 6. Up to 47 tracks are pre-selectable by setting a jumper in the row ‘BS' from 0 to 7. Vintage 850 Peacock / Classic 850 Peacock – Edition: 02.10.2007... -
Page 10: Test Credit
In jukeboxes with an electronical coin validator you can find the test credit button on the coin validator interface board. In jukeboxes with mechanical coin validator the test credit button is mounted over the return lever inside. Vintage 850 Peacock / Classic 850 Peacock – Edition: 02.10.2007... -
Page 11: Track Selection
Example: CD 03 contains 17 tracks. But selected track is 0 - 3 - 1 - 9. The jukebox plays track 02 of CD 03. A maximum of 25 tracks per CD can be selected! Vintage 850 Peacock / Classic 850 Peacock – Edition: 02.10.2007... -
Page 12: I Do Not Like This Track - The Button Cancel
Exit the service program: Set the slide switch ‘service’ at the SCC unit to OFF. Press ‘LT’ button. The changer starts an initialisation run. After this the jukebox is ready to operate. Vintage 850 Peacock / Classic 850 Peacock – Edition: 02.10.2007... -
Page 13: Volume, Sound And Balance Control - Amplifier K99
(RH) and 2 (LH) are controllable separately. The pots Vol. 1 and Vol. 2 on the amplifier are not effective if the volume control unit volume control unit is connected. Vintage 850 Peacock / Classic 850 Peacock – Edition: 02.10.2007... -
Page 14: The Infrared Remote Control
You can connect the wire remote control box as well. The power-on volume level is always set by the volume control unit. Batteries will be delivered in the additional bag. Part no. of the hand transmitter: 0059745. Vintage 850 Peacock / Classic 850 Peacock – Edition: 02.10.2007... -
Page 15: Treble And Bass Control
“AVC” the 3rd swich of the 6 switch XTENSION ERNREGLER EMOTE- ONTROL group. Default is AVC disabled. With the second DIP of the 6 switch group you can reduce the intensity of volume correction. Vintage 850 Peacock / Classic 850 Peacock – Edition: 02.10.2007... -
Page 16: External Amplifier Connection
If it is impossible (e.g. receivers with cable supply) you can separate both amps by means of the ground isolator part no. 0053300. The signal of the RCA terminals is also controlled by the settings of bass, treble, BGM, AVC and Mute. Vintage 850 Peacock / Classic 850 Peacock – Edition: 02.10.2007... -
Page 17: Position Of Fuses And Plug Connectors On The K99
SCC unit 1P06A option 1P06B option 2LP04 external speakers, LH 2P04 external speakers, ground 2RP04 external speakers, RH 2P12 internal speakers 1P04 CD sub transformer, CD player 1P03 bubble tubes Vintage 850 Peacock / Classic 850 Peacock – Edition: 02.10.2007... -
Page 18: External Speaker Connection
On an overload it switches itself off. After a certain cool down time it switches itself on. So if you do not eliminate the reason for the overload the amplifier produces continuously volume dropouts. Vintage 850 Peacock / Classic 850 Peacock – Edition: 02.10.2007... - Page 19 Terminal R-extern than their rating. Make sure that all Mono “Mode” speakers are connected in correct polarity. 4 Ohms 2channel- DIP switch load stereo internel slide switch speakers Vintage 850 Peacock / Classic 850 Peacock – Edition: 02.10.2007...
-
Page 20: Technical Data
4ohm Transmission range 20cps - 20000cps Distorsion factor < 1% Noise level depending on the adjusted volume of the jukebox loudness levels of more than 70dB (A) can be reached Vintage 850 Peacock / Classic 850 Peacock – Edition: 02.10.2007... -
Page 21: The Subwoofer Amplifier
POWER Transmission range 50 up to 120cps Distorsion factor 0.05% Noise level depending on the adjusted volume of the jukebox loudness levels of more than 70dB (A) can be reached Vintage 850 Peacock / Classic 850 Peacock – Edition: 02.10.2007... -
Page 22: The Internal Clock
Press selection button 1. The display shows the current date. If the displayed date is not correct: Press selection button 1 -hold down- and press selection button R. Release both buttons. Enter the right date with four digits. month Vintage 850 Peacock / Classic 850 Peacock – Edition: 02.10.2007... -
Page 23: Set Year And Weekday
Exit the service program: Set the slide switch ‘service’ at the SCC unit to OFF. Press ‘LT’ button. The changer starts an initialisation run. After this the jukebox is ready to operate. Vintage 850 Peacock / Classic 850 Peacock – Edition: 02.10.2007... -
Page 24: Automatic Random Select (Playstimulator)
Both RH digits show whether Playstimulator is enabled (01-99) or disabled (00). The numbers 01 up to 98 show repeat time between two random tracks in minutes, 99 means continuous play without any break. Vintage 850 Peacock / Classic 850 Peacock – Edition: 02.10.2007... -
Page 25: Programming Start And Stop Time
4 -hold it- and press selection button R. Then press selection button 8. The display shows at first a flashing ’1’. This means ’start time’. Then the time will be displayed, here 14.05 o’clock (2.05 p.m.). Vintage 850 Peacock / Classic 850 Peacock – Edition: 02.10.2007... - Page 26 Exit the service program: Set the slide switch ‘service’ at the SCC unit to OFF. Press ‘LT’ button. The changer starts an initialisation run. After this the jukebox is ready to operate. Vintage 850 Peacock / Classic 850 Peacock – Edition: 02.10.2007...
-
Page 27: Back Ground Music (Bgm)
You also can switch “BGM” on by means of the DIP switch “BGM” for test purposes. The RH bottom segment of the status display on the amplifier indicates “BGM active”. You can adjust the volume attenuation with the pot “BGM”, as long it is active. Vintage 850 Peacock / Classic 850 Peacock – Edition: 02.10.2007... -
Page 28: Number Of Bgm Cds And Repeat Time
= start position + number of BGM CDs - 1 To reprogramme press selection button 8 - hold - and press selection button R. The digital display goes dark. Enter start position and the selection option with 4 digits! Vintage 850 Peacock / Classic 850 Peacock – Edition: 02.10.2007... -
Page 29: Bgm Time Zones At Different Weekdays
3 means start time two, then the time will be displayed, here 20.00 o’clock. Press selection button 0 again, the display shows flashing: 0 (LH) = Sunday 4 means stop time two, Vintage 850 Peacock / Classic 850 Peacock – Edition: 02.10.2007... - Page 30 Exit the service program: Set the slide switch ‘service’ at the SCC unit to OFF. Press ‘LT’ button. The changer starts an initialisation run. After this the jukebox is ready to operate. Vintage 850 Peacock / Classic 850 Peacock – Edition: 02.10.2007...
-
Page 31: Further Programming Options
Exit the service program: Set the slide switch ‘service’ at the SCC unit to OFF. Press ‘LT’ button. The changer starts an initialisation run. After this the jukebox is ready to operate. Vintage 850 Peacock / Classic 850 Peacock – Edition: 02.10.2007... -
Page 32: Selective Disabling Of Tracks
To enable a disabled track: When a track is displayed, press button 4 - hold - and press selection button R and enter first the number of the CD followed by 0 0. To enable all disabled tracks enter 0 0 0 0 (4 times 0). Vintage 850 Peacock / Classic 850 Peacock – Edition: 02.10.2007... -
Page 33: Selection And Credit Memory Reset By Power Off
Exit the service program: Set the slide switch ‘service’ at the SCC unit to OFF. Press ‘LT’ button. The changer starts an initialisation run. After this the jukebox is ready to operate. Vintage 850 Peacock / Classic 850 Peacock – Edition: 02.10.2007... -
Page 34: Player And Cd Cleaning
The cleaning solution must not run into the focus unit. Keep away metal parts from the lens unit. A strong magnet is located underneath the lens. It attracts also small metal parts and this can block the complete unit. Vintage 850 Peacock / Classic 850 Peacock – Edition: 02.10.2007... -
Page 35: Technical Data
For Household Appliance...Part 1: Emission - Product Family Standard EN 55014-2 Elektromagnetische Verträglichkeit; Anforderungen An Haushaltgeräte, Elektrowerkzeuge...Teil 2: Störfestigkeit - ProduktfamiliennormElectromagnetic Compatibility; Requirements For Household Appliance, Electric Tools...Part 2: Immunity - Product Family Standard Vintage 850 Peacock / Classic 850 Peacock – Edition: 02.10.2007... - Page 36 MeasurementTechnical Section 3: Radiated, Radio-Frequency... Unterschrift/Signature/ Signature Gedruckter Name/Print Jürgen Obermeier name/ nom Position/Position/Position Chief Engineer/Technischer Leiter/Directeur Technique Datum/Date/Date 10. September 2007 / 10. September 2007 / 10. Septembre 2007 Vintage 850 Peacock / Classic 850 Peacock – Edition: 02.10.2007...
-
Page 37: Index
Internal clock ......20 Laser lens cleaning ..... . . 32 Vintage 850 Peacock / Classic 850 Peacock – Edition: 02.10.2007... - Page 38 To Purchase This Item, Visit BMI Gaming | www.bmigaming.com | (800) 746-2255 | +1.561.391.7200 Germany Deutsche Wurlitzer GmbH Wurlitzerstraße 6 D-32609 Hüllhorst Tel.: +49 (0) 57 44 - 941-0 Fax: +49 (0) 57 44 - 941 220 contact@deutsche-wurlitzer.de Part no.: 0078135 Edition 4710 Wurlitzer® A Registered Trademark of the Gibson Guitar Corporation...
Need help?
Do you have a question about the Vintage 850 Peacock and is the answer not in the manual?
Questions and answers