Table of Contents
Advertisement
Advertisement
Table of Contents

Related Manuals for Wurlitzer PRINCESS


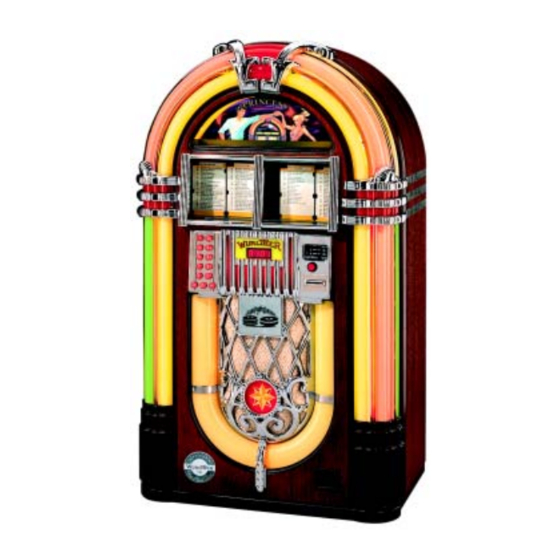
Summary of Contents for Wurlitzer PRINCESS
- Page 2 WARNING! Although the beam emitted by the laser diodes is nearly invisible, it may cause severe damage to the human eye. Use an infrared indicator to check the laser beam. CLASS LASER PRODUCT 3122 110 03420 ATTENTION! The CD mechanism and many ICs are extremely susceptible to electrostatic discharges. The photo diodes and the laser diode are more sensitive to discharges than MOS ICs.
-
Page 3: Table Of Contents
Disabling single tracks ............35 PRINCESS – Edition: 17.02.2005... - Page 4 Light gate tests ..............68 PRINCESS – Edition: 17.02.2005...
- Page 5 Declaration of Conformity ......... . 78 PRINCESS – Edition: 17.02.2005...
-
Page 6: Unpacking - Installation
D-32351 Stemwede-Levern tact your dealer to set the voltage according CD-K-99 version number 62792 to your mains. Mod. O M T PRINCESS serial number CDV - K99 In case of standard UL-versions (for USA) it 43104113 Hz 50 is impossible to adjust another voltage. -
Page 7: Wall Mounting
Caution: To reduce the risk of fire replace only with same type and rating fuses. to 12Ω it is about 57 Watts. Achtung! Vor Abnahme der Kappe den Netzstecker ziehen! Leuchtstofflampen/ Attention! Flourescent Lamps Pull power plug before opening protective 230V / 117V lid! PRINCESS – Edition: 17.02.2005... -
Page 8: Power On
"6 1 6 1" for short time. After all the sledge stops in its home position. The digital display shows the most played track. If the box is brandnew and the selection me- mory empty the display shows "0 0 0 0”. power switch o.k. PRINCESS – Edition: 17.02.2005... -
Page 9: Loading Compact Discs
CD into compartment 02 which belongs to the RH one etc.. The CD label has to face upwards. ATTENTION! Always push the magazine into its frame until the latch bar clicks into place properly! latch bar handle bar PRINCESS – Edition: 17.02.2005... -
Page 10: Cd Handling Precautions - Cd And Player Cleaning
Take care that the cleaning solution will not run into the focus unit. Keep away metal parts from the lens unit. A strong magnet is located underneath the lens. It at- tracts also smallest metal parts and so can block the complete unit. PRINCESS – Edition: 17.02.2005... -
Page 11: Inserting Title Cards
3x - RH light gate indicates an error, or is defective 4x - no or to slow page transport red LED 5x - no zero page identification LED blinks continuously: BCD-switch adjustment out of range 0 to 120. PRINCESS – Edition: 17.02.2005... -
Page 12: Programming Number Of Cds In The Magazines
To check the new settings, press button 5 again. Exit the service program: Set the slide switch ‘service’ at the SCC unit to OFF. Press ‘LT’ button. " The changer starts an initialisation run. After this the jukebox is ready to operate. PRINCESS – Edition: 17.02.2005... -
Page 13: Adjustment Of The
60. This equals 12. Adjust this number at BCD2 as „C“ (=12) ac- cording to the hexadecimal character set. Pages BCD1 BCD2 Pages BCD1 BCD2 Pages BCD1 BCD2 Pages BCD1 BCD2 Pages BCD1 BCD2 PRINCESS – Edition: 17.02.2005... -
Page 14: Coin Operation Or Free Play
From two to six tracks are selectable by setting an additionally jumper in the row ‘BS’ (Bonus Step) from 0 to 2 up to 0 to 6. Up to 47 tracks are pre-selectable by setting a jumper in this row ‘BS from 0 to 7. PRINCESS – Edition: 17.02.2005... -
Page 15: Test Credit
In jukeboxes with an electronic coin validator you can find the test credit button on the coin validator interface board. In jukeboxes with mechanical coin validator the test credit button is mounted above the return lever inside. PRINCESS – Edition: 17.02.2005... -
Page 16: Track Selections
Example: CD 03 contains 17 tracks. But selected track is 0 - 3 - 1 - 9. The jukebox plays track 02 of CD 03. Maximum 35 tracks per CD can be selected! PRINCESS – Edition: 17.02.2005... -
Page 17: I Do Not Like This Track - The Button Cancel
0058407 NTERN HANNEL 1 ANCEL XTERN HANNEL 2 0058407 NTERN HANNEL 1 ANCEL XTERN HANNEL 2 button CANCEL K99 PRINCESS – Edition: 17.02.2005... -
Page 18: Albumplay - Playing A Whole Cd
CD will be played. Exit the service program: Set the slide switch ‘service’ at the SCC unit to OFF. Press ‘LT’ button. " The changer starts an initialisation run. After this the jukebox is ready to operate. PRINCESS – Edition: 17.02.2005... -
Page 19: Automatic Random Select
On jukeboxes with F91 amplifier or without remote con- trols you can switch on CONTINUOUS PLAY with the continuous play switch. Part number is 0034410. It has to be connected to P8 of the SCC unit. continuous play switch PRINCESS – Edition: 17.02.2005... -
Page 20: Volume, Sound And Balance Control
LED Balance lights BALANCE CANCEL: Rejects a playing track. If album play is se- lected the next track will be played. Press MODE button once MUTE: As long as this button is activated, the amplifier output is muted. PRINCESS – Edition: 17.02.2005... - Page 21 (AAA). To open the battery compartment move the cover like IEC LR03 (AAA) shown in the picture. Needed battery type and position of the batteries in the hand transmitter are shown on the casing. Part no. of the hand transmitter: 0040443. position of the batteries PRINCESS – Edition: 17.02.2005...
-
Page 22: Volume, Sound And Balance Control - Amplifier K99
You can enable the correction with the DIP switch “AVC” (the 3rd DIP swich of the 6 sw. group). Default is AVC disabled. With the second DIP switch of the 6 sw. group you can reduce the intensity of volume correction. PRINCESS – Edition: 17.02.2005... - Page 23 The infrared remote control An infrared remote control is installed from factory in every Princess. It can also be delivered as conversion kit (part no. 0058809). If it has been installed the hand trans- mitter is located in the cash box.
-
Page 24: Coin And Price Settings
2 plays 1 $ 3 plays $ 1.00 3 plays $ 1.00 Free Play 2 plays 50 p 3 plays 2 $ 5 plays 2 $ 18 plays $ 5.00 21 plays $ 5.00 5 plays £ 1 PRINCESS – Edition: 17.02.2005... -
Page 25: Free Play Programming
Color codes of coin input mechanical coin validator electronical coin validator off - on 10 ct Cash- 20 ct flow mechanical 50 ct coin validator electronical coin validator electronical coin validator EURO Interface Interface Credit Credit PRINCESS – Edition: 17.02.2005... -
Page 26: Selecting, Displaying And Programming Of Top Tunes
9998. At first the most played track will be displayed. Then you have to enter 9998 again and the jukebox shows the second most played track etc. To display the tracks the SCC unit needs about 2-3 sec for calculation. If the display starts to flash press the selection button R once. PRINCESS – Edition: 17.02.2005... - Page 27 Selecting, displaying and programming of top tunes PRINCESS – Edition: 17.02.2005...
-
Page 28: Programming Short View
2. Spiele 2. Spiele 2. Spiele 2. Spiele 2. Spiele PREVIOUS new level level 5. Programming: Press according button - hold down - and press selection button R , release both buttons and enter the new value. PRINCESS – Edition: 17.02.2005... -
Page 29: Jukebox Programming
Press LT button Enter the number of the desired service le- vel. Service level 5 Exit: Test functiones Display: CDM12 player Set the slide switch ‘SERVICE’ to OFF and press the LT button once. Press LT button PRINCESS – Edition: 17.02.2005... -
Page 30: Programming Of Time Functions
Enter the correct year with two digits, then enter a 0 followed by the number of the weekday. Exit the service program: Set the slide switch ‘service’ at the SCC unit to OFF. Press ‘LT’ button. # The changer starts an initialisation run. After this the jukebox is ready to use. PRINCESS – Edition: 17.02.2005... -
Page 31: Programming Of The Playstimulator (Random Selections Without Coin Insertion)
By means of an optional installed switch you can also switch the box to CONTINUOUS PLAY MODE without any need of ente- ring the service program. Part number of this switch is 0034410. It has to be connected to P8 of the SCC unit. CONTINUOUS PLAY switch PRINCESS – Edition: 17.02.2005... - Page 32 Then press selection button R. The display shows 2 _ _ _ . To check the start time: Press selection button 8. To check the stop time: Press selection button 8 again. NOTE: You can not programme the playstimulator over 24.00 o’clock (e.g. 23.00 to 2.00 o'clock) ! PRINCESS – Edition: 17.02.2005...
-
Page 33: Background Music (Bgm), Level 3
Set the slide switch ‘service’ on the SCC-unit to ON. Press ‘LT’ button. Press selection button R -hold down- and press selection button 0 than release both buttons. Press selection button 3. Service level 3 is reached. Display shows: 3_ _ _. PRINCESS – Edition: 17.02.2005... - Page 34 = start position + number of BGM-CDs - 1. NOTE: If a wall box is connected the BGM selection option must be set to 0. PRINCESS – Edition: 17.02.2005...
- Page 35 If the jukebox should play BGM on Wednesday from 17.00 to 19.55 only, then program on selection button 3 as described: 1-7-0-0-1-9-5-5-0-0-0-0-0-0-0-0 . The second time zone has to be filled with zeros. Also this programming is possible: 0-0-0-0-0-0-0-0-1-7-0-0-1-9-5-5. Repeat this procedure until all weekdays are programmed (selection buttons 0 to 6). PRINCESS – Edition: 17.02.2005...
-
Page 36: Happy Hour Pricing (Additional Bonus Plays)
R. The digital display goes dark. Enter the new happy hour pricing with 4 digits. To check the new setting, press selection button 7 again. To exit the service program set the slide switch ‘SERVICE’ to OFF and press button LT on the SCC unit. PRINCESS – Edition: 17.02.2005... -
Page 37: Number Of Tracks Played Successively On The Same Disc, Level 2 Button 3
Set the slide switch ‘service’ at the SCC-unit to ON. Press ‘LT’ button. Press selection button R -hold down- and press selection button 0 than release both buttons. Press selection button 2. Service level 2 is reached. Display shows: 2_ _ _. PRINCESS – Edition: 17.02.2005... -
Page 38: Location Or Identification Number, Level 1 Button 8
Press selection button 1. Service level 1 is reached. Display shows: 1_ _ _. Press selection button 8, the display shows flashing: # 1 means higher digits # Then the four higher digits will be displayed. PRINCESS – Edition: 17.02.2005... -
Page 39: Album Selection And Memory Reset By Power Off, Level 1 Button 9
R. The digital display goes dark. Enter the desired setting with two digits. To check the settings: Press selection button 9 again. To exit the service program set the slide switch ‘service’ at the SCC unit to OFF and press the LT button. PRINCESS – Edition: 17.02.2005... -
Page 40: Data Retrieval
Press button 0 again, the display shows the CD with the second lowest number of plays etc. If the calculation needs a little longer a ‘1’ scrolls starting from RH. digit over the display. To cancel the procedure press selection button R. PRINCESS – Edition: 17.02.2005... - Page 41 The sequence of top LH magazine discs is for the time being 01, 02, 03, 04 etc. RH magazine To exit the service program first set service switch to OFF and then press the LT button. PRINCESS – Edition: 17.02.2005...
- Page 42 To CLEAR this memory press selection button 6 - hold - and press selection button R. To exit the service program, first set service switch to OFF and then press LT button. PRINCESS – Edition: 17.02.2005...
-
Page 43: Amplifier F91
1 - 8 = 230V vi/gy wt/bk change the ballast according to the used voltage (e.g. br/r or/y for 230V). gn/bl to flourescent lamps The power consumption in standby is approx. 146W. With max. volume it is approx. 540W. PRINCESS – Edition: 17.02.2005... -
Page 44: Position Of Fuses And Plug Connectors On The Power Amp Board
CD will placed on turntable but is not spinning. Af- ter about one minute the CD is taken back.. If no credits in memory, no CD will be taken to turntable, the display is flashing. PRINCESS – Edition: 17.02.2005... -
Page 45: The First Power On
2-Kanal mike kit socket Tape Mic.-Kit Input Volume Input selector CD / tape Gain BGM Level line output Line Out terminals BGM active indicator LED yellow Volume preset DIP switches BGM level pots Gain pre pots PRINCESS – Edition: 17.02.2005... - Page 46 Preset volume level 60 61 - switch position ON high 11.4.2 Pre-settings for bass and treble Like wise the values for bass and treble can be set. recommended However for both channels together. DIP switches settigs treble bass PRINCESS – Edition: 17.02.2005...
-
Page 47: Speaker Connections
(R.H. channel) can be controlled with the mode ‘VOLUME’ and the volume of speakers connected to the screwing ter- minals on the amplifier (LH channel) with the mode ‘BALANCE’. The preset volume can be set separately. PRINCESS – Edition: 17.02.2005... - Page 48 S1 Example 2: 2 times 4 Ω speaker connected in se- R.H. ries and in parallel with one 8Ω spea- terminal 100W +/- Volume monitor speaker L.H. terminal 2-channel / Stereo 100W slide switch S1 PRINCESS – Edition: 17.02.2005...
-
Page 49: Connecting External Speakers In Operating Mode 2-Channel
Example 2: 1st room a speaker of 4Ω 200W, 2nd room 4speaker of screwing terminals +/- Balance 16Ω 50W connected in parallel +/- Volume monitor speaker normal terminal 2-channel / 200W stereo slide switch PRINCESS – Edition: 17.02.2005... -
Page 50: Bgm Mode - Volume Attenuation
Input Tape duce the volume. Remote Mode Stereo 2-Kanal Tape Mic.-Kit Input Volume Also speakers with an impedance lower than 4Ω (in STEREO mode) may cause an overload and BGM Level the LEDs will light. Line Out PRINCESS – Edition: 17.02.2005... -
Page 51: Overload Protection
Input Tape input work with a magnetic pick up Remote Mode (RIAA). Set the ‘input’ DIP Stereo 2-Kanal Tape Mic.-Kit Input switch to tape position to select the tape input. BGM Level Line Out input switch PRINCESS – Edition: 17.02.2005... -
Page 52: Amplifier K99
12.1 Device description of the amplifier K99 The amplifier K99 is optimised for universal use in Deutsche Wurlitzer GmbH music machines. Great importance had been attached for an easy handling and stand alone function without the S&CC unit. The output power is designed for the typical used internal speakers at Deutsche Wurlitzer GmbH machines, under normal circumstances reaching an impeccable volume level. -
Page 53: Verification Of Power Voltage
Deutsche Wurlitzer GmbH tage for a higher voltage (e.g. from 117V to 230V) it is better to use a subtransformer for the fluorescent lamps or change the ballast according to the used voltage (e.g. for 230V). PRINCESS – Edition: 17.02.2005... -
Page 54: Position Of Fuses And Plug Connectors
SCC unit dead - digital display dark (except red LED M still lighting up on coin insertion). The LEDs K and Z on the SCC unit are dark. No initialisations run after power ON. The status display on the amplifier is dark. PRINCESS – Edition: 17.02.2005... -
Page 55: The First Power On
RCA outputs for an optional external amplifier. In DIP switch position ”2 Channel” the channels 1 (RH) and 2 (LH) are controlled separately. ATTENTION! The pots Vol. 1 and Vol. 2 on the amplifier are not effective if the wire control box is connected. PRINCESS – Edition: 17.02.2005... -
Page 56: The Infrared Remote Control
To open the battery compartment move the cover like shown in the picture. Needed battery type and position of the batteries in the hand transmitter are shown on the casing. Part no. of the hand transmitter: 0059745. PRINCESS – Edition: 17.02.2005... -
Page 57: Treble And Bass Control
“BGM active”. You can adjust the volume atte- AUTO MUTE AUS/OFF RS232 SERVICE NORMAL nuation with the pot “BGM”, as long as it is active. PARALLEL SEPARATE VOLUME HIGH E /O MODE TEREO ANAL HANNEL INPUT E /O RWEITERUNG XTENSION ERNREGLER EMOTE- ONTROL PRINCESS – Edition: 17.02.2005... -
Page 58: External Speaker Connection
Note that speaker groups like in hi-fi boxes may have, at certain fre- Terminal R-extern quencies, impedance much lower than their rating. Make sure that all spea- DIP switch 2channel- kers are connected in correct polarity. stereo slide switch PRINCESS – Edition: 17.02.2005... -
Page 59: External Amplifier Connection
If it is impossible (e.g. receivers with cable supply) you can separate both amps by means of the ground isolator part no. 0053300. The signal of the RCA terminals is also controlled by the settings of bass, treble, BGM, AVC and Mute. PRINCESS – Edition: 17.02.2005... -
Page 60: Disabling The Internal Mute Circuit
2 sw. group “Mute” to OFF. RS232 ICRO For more information order the Deut- CHALTER WITCHES AUTO MUTE AUS/OFF RS232 SERVICE NORMAL sche Wurlitzer GmbH technical infor- SEPARATE VOLUME PARALLEL HIGH E /O mation leaflets TI-MA-116 (for F91). TEREO MODE ANAL HANNEL INPUT... -
Page 61: 70V Output Transformer (0043157)
(i.e. 200 W) than the maximum remai- ning power outlet of the amplifier. If the power consumption is lower (i.e. 10 W) than the maximum remaining power outlet of the amplifier, it can be adapted by means of the output transformer. PRINCESS – Edition: 17.02.2005... -
Page 62: Determination Of The Connectable Speaker Power
200/57.2 20/10.7 30/8.7 40/11.6 61/17.4 81/23.2 121/34.8 22/11.8 36/10.4 48/13.9 72/20.8 96/27.7 144/41.6 24/12.9 HIGH 49/14.1 65/18.8 98/28.1 131/37.5 196/56.25 28/15 56/16.2 75/21.6 113/32.4 150/43.2 30/16.1 59/17.4 79/23.2 119/34.9 158/46.5 30.8/16.7 67/19.4 90/25.8 134/38.7 179/51.6 32.8/17.6 PRINCESS – Edition: 17.02.2005... -
Page 63: Connection Of 70V Systems
The primary (input-)side of this transformer has to be connected in cor- rect polarity with the 70V terminals of the Deutsche Wurlitzer GmbH output transformer. It is not allowed to consume more power than the amplifier is able to supply (23W or 45W), minus the additi- onal speakers eventually connected to the output transformer. -
Page 64: Technician Statistics
Press selection button 8 once more to display the next error code etc. After displaying the 10th code, special values will be displayed (ref to the following chapters). DELETE this data: Press selection button 8 - hold - and press button R. Exit: Press button R. PRINCESS – Edition: 17.02.2005... - Page 65 # 12 = next displayed value are the 4 low value digits of the mecha- nism counter then e.g. # value, means 3 467 In this example the machine has placed and replaced the CDs 1,603,467 times. PRINCESS – Edition: 17.02.2005...
- Page 66 Press selection button 8 again, display shows flashing: # 18 = next displayed value are the 4 low value digits of the operating time counter then e.g. # value. In this example the total operating time is 241453 minutes (ap- prox. 4024 h). PRINCESS – Edition: 17.02.2005...
-
Page 67: Function Tests
Each button operation makes the sledge move one step upwards and the display will be increased by 2. Last position is 120. If both magazines exist, the left one will be used as reference. If the L.H. magazine is missing the other one is used. PRINCESS – Edition: 17.02.2005... - Page 68 The just running step runs to its end. The machine waits. Single step - NEXT: Press selection button 5 again. Only the next one step runs. Press button 5 again etc. Single step - OFF: Press selection button 6. PRINCESS – Edition: 17.02.2005...
- Page 69 CD2 mechanism (e.g. after ’battery off opera- tion) error while error was handed errors total error, e.g. defective RAM or CPU... PRINCESS – Edition: 17.02.2005...
-
Page 70: Light Gate Tests
‘1’. This value adds itself. The RH digit is always 0. RH digit is always 0 To exit the test: Press selection Example: button R. open inter- open open rupted interrupted PRINCESS – Edition: 17.02.2005... - Page 71 Test: VLC (Center). State is displayed in the RH digit (INT1). 1=gate is interrupted, button 4 (6) 0=gate is open. Button 3 (5) makes the selec- tion sledge move downwards, button 4 (6) up- wards. button 3 (5) test 2 PRINCESS – Edition: 17.02.2005...
-
Page 72: Cd-Pro Function Tests, Level 5
WARNING! Showing the play time in this test is an important indicator for the serial comunication between the SCC unit and the CD control- PLAY TIME ler! (here: 8sec.) PRINCESS – Edition: 17.02.2005... - Page 73 Press selection button 3. CD stops playing. Display shows 4 _ _ _ (service level 4). NOTE: To terminate all the tests and return to normal operation: Set slide switch ‘SERVICE’ on the SCC unit to OFF. Press ‘LT’ button also on the SCC unit. PRINCESS – Edition: 17.02.2005...
-
Page 74: Integrated Test Program Of The Cd-Pro Player
(display shows “8”), the pro- version number gram version number of the Deutsche Wurlitzer CD control unit Wurlitzer GmbH CD control unit will be 01.20 displayed with four digits followed by the version number of the CD-PRO servo processor with two digits. - Page 75 While the table of contents (TOC) is read an 8 flas- hes in the display. In this way, the necessary time to read the TOC can be prolonged. So bad CDs can be recognised and taken out. PRINCESS – Edition: 17.02.2005...
-
Page 76: Special Test Functions Of The Cd-Pro Player
Test 95: The turntable motor must spin. Test 98: The sledge moves itself from inside to outside and back again. If this test is successful the speed of the disc must change to lower speed at the outside of the disc. PRINCESS – Edition: 17.02.2005... -
Page 77: Accessories
Player Tape Player is playing. The hook-up for this adapter is the same as the microphone. Ext. Tape BGM connector kit, part no. 0048130. +7,5V Ampl. Time -7,5V Micro Music/BGM Connector PRINCESS – Edition: 17.02.2005... -
Page 78: Steps To Solve Mechanical Problems
# The sledge has to be at least 1,3 ‘’ (3 cm) over the housing bottom. Therefore move the sledge up and down by hand using the toothed belt wheel on the top LH. side of gear group. Insert the left magazine. PRINCESS – Edition: 17.02.2005... - Page 79 # program options as desired 15. Switch to normal operation mode # Set the slide switch ‘SERVICE’ on the SCC unit to OFF. # Press ‘LT’ button on the SCC unit once. 16. Close the jukebox. PRINCESS – Edition: 17.02.2005...
-
Page 80: Declaration Of Conformity
Grenzwerte Und Meßverfahren Für Funkstörungen Von Informationstechnischen Einrichtungen Limits And Methods Of Measurement Of Radio Interference Characteristics Of Information Technology Equipment. Unterschrift/Signature/ Signature Gedruckter Name/Print Jürgen Obermeier name/nom Position/Position/Position Chief Engineer/Technischer Leiter/Directeur Technique Datum/Date/Date 2. Januar 1998/2. January 1998/2. Janvier 1998 PRINCESS – Edition: 17.02.2005... - Page 82 Germany Deutsche Wurlitzer GmbH Niederdorf 5 D-32351 Stemwede-Levern Tel.: 0 57 45 - 28-0 Fax: 0 57 45 - 2 82 20 contact@deutsche-wurlitzer.de Part no.: 0071126 - Edition 4502 Wurlitzer® Registered Trademark of The Wurlitzer Company...
Need help?
Do you have a question about the PRINCESS and is the answer not in the manual?
Questions and answers