Table of Contents
Advertisement
Quick Links
Advertisement
Table of Contents

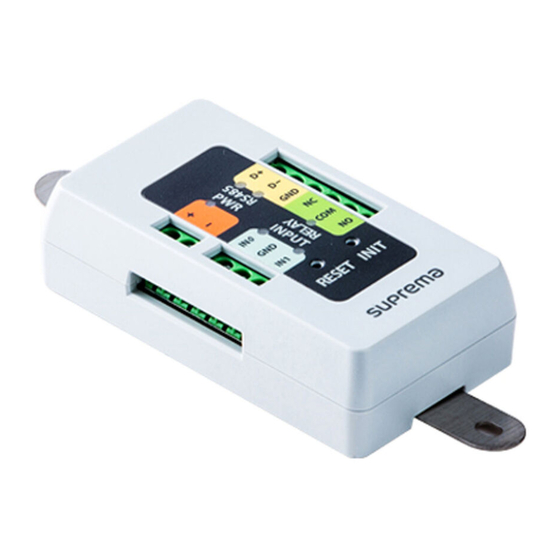
Summary of Contents for suprema Secure I/O 2
- Page 1 Secure I/O 2 INSTALLATION GUIDE Version 2.11 English EN 101.00.SIO2 V2.11A...
-
Page 2: Table Of Contents
Contents Safety Instructions ................3 Components ..................... 4 Front Side ....................5 Installation Example ................6 Dimensions ....................7 Connections ..................... 8 Power ................................8 RS-485 ................................8 Relay ................................9 Fail Safe Lock ............................9 Fail Secure Lock ............................9 Door button .............................. -
Page 3: Safety Instructions
This can cause a failure. • Secure I/O 2, the electrical locking device and access controller must use independent power source. Operating Instructions Do not drop the product or subject it to shock or impact during use. This can cause a failure. -
Page 4: Components
Components Components Mounting screws for Bracket Secure I/O 2 bracket (2 pcs) (2 pcs) 120Ω resistor Diode (1 pc) (1 pc) NOTE Components may vary according to the installation environment. •... -
Page 5: Front Side
External IN 2+ Relay Output Normally Open LED status indicator for External IN 2 INIT button: RESET button Relay status indication LED NOTE Press INIT button to reset Secure I/O 2 interworking with a device and then connect to another device. •... -
Page 6: Installation Example
Installation Example Secure I/O 2 is connected with RS-485 and can be installed anywhere due to its small size. It can be installed with a junction box or onto a wall control box already installed. It can be installed at the rear side of an Exit button. -
Page 7: Dimensions
Dimensions Dimensions (Unit: mm) -
Page 8: Connections
Connections NOTE • Cable should be AWG22~AWG16. To connect the cable to Secure I/O 2, strip off approximately 5~6 mm of the end of the cable and connect them. • Power Do not share the power with the access controller. -
Page 9: Relay
Connections Relay Fail Safe Lock • To use fail safe lock, connect NC terminal as shown below. Normally, there is a current flowing through the relay and the door is opened when the relay is activated by blocking current flow. The door will also be opened when there is a blackout or power failure caused by external conditions. -
Page 10: Door Button
Connections Door button RTE button Door button Door Door sensor Door sensor Door... -
Page 11: Product Specifications
Product Specifications Product Specifications Item Specification Cortex M 32 MHz Memory 128 KB Flash + 20 KB RAM 6 LEDs (PWR, RS-485 TX/RX, IN1, IN2, Relay) Input/Output terminal Input 2 channels, Relay 1 channel, RS-485 1 channel Dimensions 36mm x 65mm x 18mm (Width x Height x Depth) Power •... -
Page 12: Fcc Compliance Information
FCC Compliance Information FCC Compliance Information THIS DEVICE COMPLIES WITH PART 15 OF THE FCC RULES. Operation is subject to the following two conditions: (1) This device may not cause harmful interference, and (2) This device must accept any interference received, including interference that may cause undesired operation. Note: This equipment has been tested and found to comply with the limits for a Class B digital device, pursuant to part 15 of the FCC Rules. -
Page 13: Appendix
Suprema are exempt from liability even when it is claimed that there is a significant fault in the design or production process, and also they are not liable for any direct or indirect cost or expenditure including legal costs. - Page 14 Tel: +82 31 783 4502 I Fax: +82 31 783 4503 I Inquiry: sales_sys@supremainc.com ©2020 Suprema Inc. Suprema and identifying product names and numbers herein are registered trade marks of Suprema, Inc. All non-Suprema brands and product names are trademarks or registered trademarks of their respective companies. Product appearance, build status and/or specifications are subject to change without notice.


Need help?
Do you have a question about the Secure I/O 2 and is the answer not in the manual?
Questions and answers