Table of Contents
Advertisement
Advertisement
Table of Contents

Related Manuals for ProBreeze PB AC04


Summary of Contents for ProBreeze PB AC04
- Page 1 MODEL PB AC04 7000 BTU Portable Air Conditioner...
- Page 2 Portable Air Conditioner Thank you for choosing to purchase a product from Pro Breeze. Please read the entire manual carefully prior to first use and keep in a safe place for future reference. Contents Safety Warning Specific Information Regarding R290 Refrigerant Gas Caution ┃...
- Page 3 aerosol cans) or other flammable • Cleaning and user maintenance shall not be substances near the appliance. made by children without supervision. • Do not use the appliance near petrol, Keep the appliance and all parts out of the flammable gases, ovens, or other heating reach of children.
- Page 4 Specific Information Regarding R290 Refrigerant Gas • The appliance must be installed, used and CAUTION stored in an area that is greater than 4m • This appliance contains 135g of R290 RISK OF FIRE refrigerant gas. • R290 is a refrigerant gas that complies with the European directive on the environment.
- Page 5 Caution • Do not operate the appliance if the room temperature is greater than 32°C in cooling mode or lower than 5°C in dehumidifying mode. Specification • Size: 31cm x 31cm x 64cm • Net Weight: 19.5kg • Input Voltage: 220V-240V~ •...
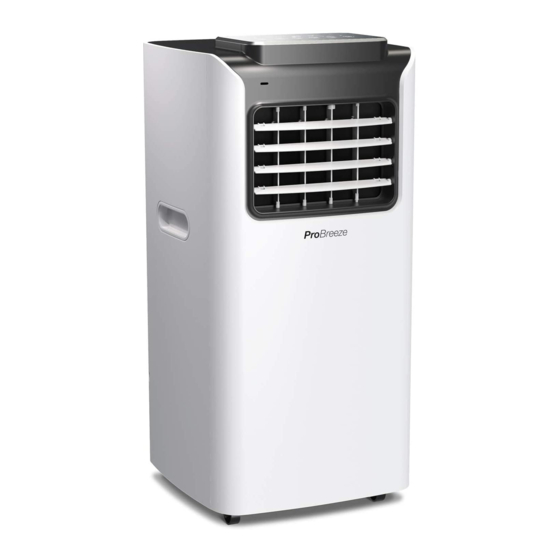
- Page 6 Parts Front View Control panel Horizontal louvre Vertical louvre Body Wheels Handle Handle Rear View Body Evaporator filter Radiating filter Heat exhaust hose connector Heat exhaust hose connector locking clip Condenser filter Wheels Drainage plug / water outlet Accessories Remote control Rectangle heat exhaust hose connector Heat exhaust hose Heat exhaust hose short connector...
- Page 7 Control Panel Buttons moving from right to left Remote Control • Power button • Fan speed button • Down button • Mode button • Timer button Power button Oscillation button • Up button • Oscillation button • Sleep / Lock button Up button Mode button Indicator light symbols moving...
- Page 8 Installation Prior to and after installation adhere to the below: • When moving the appliance to the chosen location ensure it is kept in an upright position. • Do not place or use the appliance, power cord, or any accessories in a bathroom, wet, or damp place.
- Page 9 Heat Exhaust Hose Installation Align the left-hand short side of the rectangle heat exhaust hose connector with the right-hand short side of the heat exhaust hose connector. Slide the rectangle heat exhaust connector to the left fully into the heat exhaust hose connector.
- Page 10 Hinged Window Sealing Fabric Assembly Installation Frame Open window and clean frame and Side A casement surfaces of dust and particles. Stick the velcro tape around the entire window frame. Never stick to the window seal as doing so will prohibit the window Casement from closing fully.
- Page 11 Controls Dehumidifying Mode - Ideal for reducing • room humidity in humid and damp times of year. The appliance will dehumidify the room if Power Button the room temperature is greater than or equal to 15°C or less than or equal to 35°C and the Turn the appliance on and off.
- Page 12 Lock Button Select the desired settings prior to turn-off. To check the remaining time till turn-off Locks the chosen settings whilst in cooling mode. press the timer button. To cancel the turn-off timer set the time until To activate long press the lock button. turn-off to 0 hours or turn the appliance on and off.
- Page 13 Emptying the Water Tank When the water tank is full the appliance will beep 20 times, the warning E4 will show on the display and the appliance will pause operation to prevent the water tank from overflowing. To empty the water tank: Turn off the appliance and unplug it from the wall socket.
- Page 14 Connecting the Water Hose for Continuous Drainage For long-term use, it is recommended to connect a water hose for continuous drainage. To attach the water hose: Unplug the drainage plug. Insert the water hose into the water outlet pipe. Ensure the water hose end has a suitable drainage outlet (e.g a drain or bucket).
- Page 15 Heat Exhaust Pipe Cleaning: Remove the heat exhaust pipe from the rear of the appliance and the respective window sealing assembly. Use a soft, dry cloth to clean away any dust, or debris. Return the heat exhaust pipe. Storage For long-term storage: Empty the water tank and leave the drainage plug out.
- Page 16 Safety Features Compressor Delay Protection To protect the compressor, apart from when the appliance and compressor are activated for the first time after being turned on via the power button, there will be a three minute delay between every occurrence of the compressor turning off and on.
- Page 17 other heat sources. other heat sources. Dirty filters. Clean filters. Air inlet or air outlet clogged. Remove the obstruction. Noisey. Appliance not on a flat surface. Place the appliance on a flat surface. The compressor does not Wait three minutes until the temperature Initiation of overheat protection.
- Page 18 One Retail Group Ryland House, 24A Ryland Road, Kentish Town, NW5 3EH, UK © Copyright 2020...
Need help?
Do you have a question about the PB AC04 and is the answer not in the manual?
Questions and answers
My air conditioner is showing a number 73 what is the problem?