Table of Contents
Advertisement
Copyright © 2008-2019 AURALIC LIMITED (AURALiC) and licensors.
All rights reserved. No part of this publication including but not limited to,
graphics, text, code or interactive features, may be reproduced without the
express written permission from AURALiC or its licensors. The content of this
manual is provided for information use only, is subject to change without notice,
and should not be construed as a commitment by AURALiC. AURALiC assumes
no responsibility or liability for any errors or inaccuracies that may appear in this
manual. AURALiC, inspire the music, Lightning Streaming, Purer-Power,
ORFEO and their graphic logos are trademarks or registered trademarks of
AURALiC in the United States and/or other countries. AURALiC's trademarks
may not be used in connection with any product or service that is not
AURALiC's, in any manner that is likely to cause confusion among customers or
in any manner that disparages or discredits AURALiC. All other trademarks not
owned by AURALiC that appear on this site are the property of their respective
1
Advertisement
Table of Contents

Related Manuals for Auralic ALTAIR G1


Summary of Contents for Auralic ALTAIR G1
- Page 1 AURALiC's, in any manner that is likely to cause confusion among customers or in any manner that disparages or discredits AURALiC. All other trademarks not owned by AURALiC that appear on this site are the property of their respective...
- Page 2 AURALiC. ...
-
Page 3: Table Of Contents
........................Lightning Web Control Interface ..............Lightning DS for iOS ..................Use with Other Software ................. Use ALTAIR G1 as USB DAC ................Use ALTAIR G1 as a Streamer ................ Network Setup ....................Connecting to your network via Ethernet ............. - Page 4 IMPORTANT SAFETY INSTRUCTIONS ● All safety and operating instructions must be read before actual operation, and retained for future reference. ● This product should be connected only to the type of power source indicated on the back of the unit. If you are not sure of the type of your mains power supply, please consult your dealer or local power company.
-
Page 5: Declaration Of Conformity
Declaration of Conformity AURALiC (Beijing) Technology Co., Ltd. Room 101, Building No.17, 1A Chaoqian Road Beijing, 102200, China declares under our sole responsibility as the manufacturer of the product: ALTAIR G1 Digital Audio Streamer is compliant with Directive 2011/65/EC (RoHS) Restriction on Hazardous Substances,... - Page 6 This product that carries the CE Mark, which was first affixed in 2019.
-
Page 7: Warranty
Warranty AURALiC offers a 90-day factory warranty from the date of purchase that can be extended to a 3-Year limited warranty. This non-transferable warranty is available to the original owner by completing the product registration form including the original sales information from your authorized AURALiC dealer within 30 days from purchase. -
Page 8: Placement And Cabling
Placement and Cabling Placement ALTAIR G1 should be placed on a solid and stable surface with good ventilation. Do not install this product near any heat sources such as radiators or other products (such as amplifiers) that produce heat. Place the product so that its location or position does not interfere with its proper ventilation. -
Page 9: Cabling
AURALiC. Do not defeat the safety purpose of the grounded plug. ALTAIR G1 MUST BE USED WITH CORRECT MAINS VOLTAGE AND PROPERLY EARTHED! Cabling The I/O ports on the rear of ALTAIR G1: •... - Page 10 Home Menu>Settings>Network>Connection Type>Wired>Join Network to switch to Ethernet. • ATN1 and ATN2 Wi-Fi antennas for ALTAIR G1. The Wi-Fi antennas also work as Bluetooth receiver antennas. Go to Home Menu>Settings>Network>Connection Type>Wireless and select the Wi-Fi network you want to join.
-
Page 11: Front Panel
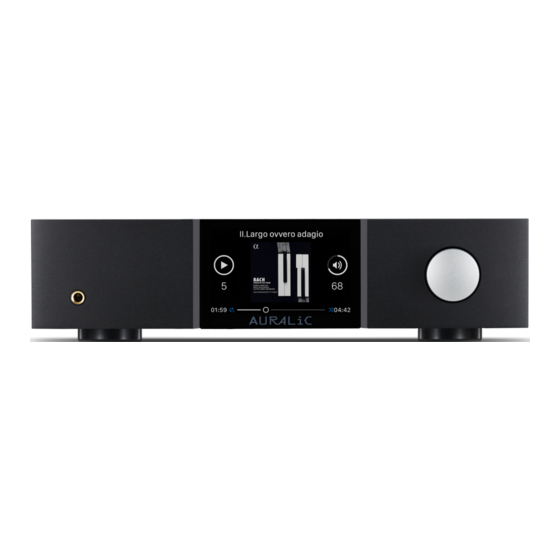
• Headphone Output There is a 6.35mm headphone jack on the front panel for monitor use. The jack is not individually buffered and are connected inside ALTAIR G1. • Front Panel Display The 4-inch high-resolution true color display on the front panel gives you full access to ALTAIR G1 settings as well as displaying enriched metadata. -
Page 12: Using Your Altair G1
Using your ALTAIR G1 Power Up and Sleep ALTAIR G1 will power up automatically after the main power on the back of the unit is switched on. To put the device into sleep mode, please press and hold the rotary knob for a couple of seconds till you see confirmation message, select yes and press the knob to confirm your operation. -
Page 13: Home Menu
You may press the rotary knob to leave the Welcome Screen and go to the Home Menu. If you select a track to play using control software, ALTAIR G1 will jump to the ‘Now Playing’ screen automatically. • Using ALTAIR G1 with all other input channels... -
Page 14: Playing
The Home menu is the root level menu of your ALTAIR G1. There are seven destinations available from the Home Menu: 1. ‘Playing’: This interface will be available for access when ALTAIR G1 uses its streaming input channel. The Now Playing interface displays track information and status, playback mode (shuffl... -
Page 15: Queue
Now Playing interface. Queue The ALTAIR G1 playback Queue is stored in device memory. Rotate the rotary knob clockwise or counter-clockwise to select a track and press the rotary knob to activate ‘Select Operation’ popup menu:... -
Page 16: Input
The Input menu allows you to select the physical input channel of the ALTAIR G1. Rotate the rotary knob clockwise or counter-clockwise to highlight a destination, and press the rotary knob to select it. The Streaming input channel will only be available to select when ALTAIR G1 is connected to your home network. -
Page 17: System
System The System menu contains all interface and hardware related settings. Rotate the rotary knob clockwise or counter-clockwise to highlight a destination, and press the rotary knob to select it. To exit the System menu, please rotate the rotary knob clockwise to the last and select ‘Back to Menu’. - Page 18 IP address, Wi-Fi network, etc. c. Start Wi-Fi Hotspot: Your device will create a Wi-Fi hotspot named 'AURALiC-Lightning'. You can use your computer, iPhone or iPad to connect to this Wi-Fi network and set up the device’s network settings. You cannot play music while in Wi-Fi Hotspot mode.
-
Page 19: Streamer
100 to ensure full-level pass-through of the signal.) 4. ‘Decoding Method’: AURALiC streaming devices are capable of decoding MQA files using AURALiC’s proprietary resampling and de- blurring method. -
Page 20: Processor
MQA files at 88.2 kHz or 96 kHz depending on the original file’s sampling rate. " c. ‘4x Sampling Rate’: Your streaming device will always decode MQA files at 176.4 kHz or 192 kHz depending on the original file’s sampling rate. d. -
Page 21: Library
Use the rotary knob to highlight a menu item, and press the knob to select. 1. ‘Resampler Configuration’: Adjust resampler frequency of each sampling rate manually. 2. ‘Parametric Equalizer’: The parametric equalizer allows you to fine-tune the sound of your streamer and to compensate for acoustic imperfections in the listening environment. - Page 22 The Library interface allows users to set up the ALTAIR G1’s Lightning Server, and to browse the music library created by the Lightning software. Rotate the rotary knob clockwise or counter-clockwise to move highlight menu items and press the rotary knob to select.
- Page 23 Select ‘Play Now’ to stop the currently playing track, remove all previously added tracks in the queue, and add all tracks from the current folder. Playback begins immediately. Select ‘Play Next’ to add all tracks from the current folder, and play them when the current track ends. Select ‘Play Later’...
- Page 24 • Status: Refl ects the current working status of the Lightning Server system. Scanning progress and any potential scanning errors are displayed. • Library Paths: The total number of user-defi ned music storage locations recognized by Lightning Server. Includes attached USB drives, network shared folders and internal storage.
- Page 25 • Additional Operations: Lightning Server operations not listed elsewhere, including the creation of multiple library paths. • Always On: When enabled this feature keeps Lightning Server running as a background service on your streaming device even if the device is asleep. Turn the feature on if you use the Scheduled Re- Scan feature or if you use Lightning Server to stream content to other devices on your home network.
-
Page 26: Lightning Web Control Interface
Put the device’s IP address into the address bar of a compatible web browser (Google Chrome & Safari are recommended) to access the Lightning Web Interface. Your ALTAIR G1 IP address is visible on the Welcome Screen (see “Using your ALTAIR G1.”) -
Page 27: Lightning Ds For Ios
Lightning DS for iOS Lightning DS is a free music control app developed by AURALiC for iOS. It is compatible with iPad, iPhone, and even the latest generation of iPod touch, and is available for download from the App Store. A user’s guide for Lightning DS may be found on our support website: support.auralic.com... -
Page 28: Use Altair G1 As Usb Dac
The ALTAIR G1 is also a RoonReady endpoint, and may be set up as a zone or as an output. (Note: ALTAIR G1 cannot act as a Roon Core or Roon server — a separate Roon server is required on your home network to use Roon.) -
Page 29: Connecting To Your Network Via Ethernet
Home Menu and press the rotary knob to select ‘System’. Select ‘Network’ > ‘Connection Type’ > ‘Wired’ > ‘Join Network’. Your ALTAIR G1 will display a loading symbol while it attempts to establish a network connection. When the connection is successful the Home Menu is displayed, now with the ALTAIR G1’s IP address shown instead of the ‘Wi-Fi... - Page 30 ALTAIR G1 has connected to your home network.) Once connected to ‘AURALiC-Lightning’, open a web browser and enter ’10.5.5.1’ into the address bar. The Lightning web control interface is now available: Select ‘Hardware Setup’...
-
Page 31: Connecting To Your Network Via Wi-Fi
Right: Side menu activated Your ALTAIR G1 will display a loading symbol while it attempts to establish a network connection. When the connection is successful the Home Menu is displayed, now with the ALTAIR G1’s IP address shown instead of the ‘Wi-Fi Hotspot’... - Page 32 Your ALTAIR G1 will display a loading symbol while it searches for local Wi- Fi networks. The network list refreshes every 10 seconds, so wait a few moments if your Wi-Fi network isn’t immediately visible. Select the Wi-Fi network you would like to use from the list, then ‘Network Password’, and enter the network password:...
- Page 33 Your ALTAIR G1 will display a loading symbol while it attempts to establish a Wi-Fi connection. When the connection is successful the Home Menu is displayed, now with the ALTAIR G1’s IP address shown instead of the ‘Wi-Fi Hotspot’ information as before.
- Page 34 Wi-Fi network list on Lightning web control interface Select the network you’d like to use with your ALTAIR G1 and select ‘Next’ (once the button has turned blue.) Provide the network password in the popup window the appears, and select ‘Join’ on the following window.
-
Page 35: Getting Started With Lightning Ds
Right: Side menu activated Your ALTAIR G1 will display a loading symbol while it attempts to establish a Wi-Fi connection. When the connection is successful the Home Menu is displayed, now with the ALTAIR G1’s IP address shown instead of the ‘Wi-Fi Hotspot’... - Page 36 ‘Agree’. If you do not agree with the EULA, please return your unit to the seller immediately. Left: Language selection interface Right: EULA interface If no device has been set up for use with Lightning DS, the app provides the opportunity to set one up now.
- Page 37 Lightning DS searches for and displays available streaming devices on your network. Select ALTAIR G1, and select ‘Next’:...
-
Page 38: Smart-Ir Remote Control
Right: selected device with information Lightning DS is now connected to and able to control your ALTAIR G1. If you would like to add a music library now you can choose ‘Add Music Library’ and follow the setup guide that appears. You can also skip the setup guide by selecting ‘I will Set Up Later’, and Lightning DS will continue to its main... -
Page 39: Maintenance & Service
Disconnect ALTAIR G1 from mains power when it will be left unattended or unused for an extended period. If your ALTAIR G1 encounters a problem, contact your dealer or AURALiC. Do not void the warranty by allowing unauthorized personnel to attempt to repair. - Page 40 Knowledge Center: support.auralic.com Community: community.auralic.com ...
-
Page 41: Specifications
S t r e a m i n g F i l e WV Formats Lossy: AAC, MP3, MQA and WMA AURALiC Lightning DS for iOS AURALiC Lightning DS for web interface (device settings only) Control Software OpenHome compatible control software (BubbleUPnP, Kazoo) Roon (Roon Core required separately) Power Consumption Playback: ... -
Page 42: Auralic Product Registration Form
AURALiC Product Registration Form Owner Information Your Name Address City Zip Code Country Email Telephone Product Information Product Name Serial Number Dealer Name Purchase Date Purchase Price...
Need help?
Do you have a question about the ALTAIR G1 and is the answer not in the manual?
Questions and answers