
Subscribe to Our Youtube Channel
Related Manuals for ROBINHOOD RHFS60WE

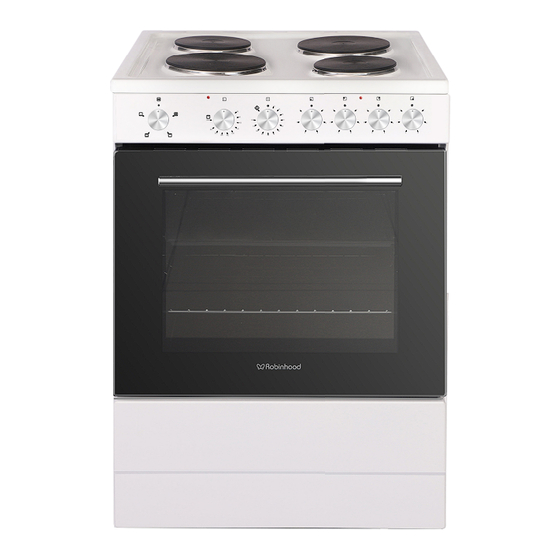
Summary of Contents for ROBINHOOD RHFS60WE
- Page 1 Installa on and Op ng Instruc ons Issue 1 Robinhood Freestanding Cooker 60cm White Description: Model Number: RHFS60WE Model pictured: RHFS60WE...
- Page 2 It is important that you retain these instructions and your proof of purchase along with any other important documents about th product for future reference. Due to continual product development, Robinhood reserves the right to alter specifications or appearances without notice.
-
Page 3: Important Safety Instructions
IMPORTANT SAFETY INSTRUCTIONS 1. This appliance is not intended for use by persons (including children) with reduced physical, sensory or mental capabilities, or lack of experience or knowledge, unless they have been given supervision or instruction concerning the use of the appliance by a person responsible for their safety. Children should be supervised to ensure that they do not play with the appliance. - Page 4 IMPORTANT SAFETY INSTRUCTIONS 21. All cabinetry and materials used in the installation must be able to withstand a minimum temperature of 50°C above the ambient temperature of the room it is located in, whilst in use. Certain types of vinyl or laminate kitchen furniture are particularly prone to heat damage or discolouration at temperatures below the guidelines given above.
- Page 5 7099-8450 W 43.15 894.88...
-
Page 6: Electrical Connection
ELECTRICAL CONNECTION Local Authority Requirements Installation is only permitted by an authorized person, and carried out according to instructions provided by the manufacturer. Incorrect installation might cause harm and damage which the manufacturer accepts no responsibility. Electrical Installation Before carrying out the connection to the power supply, the voltage rating of the appliance (stamped on the appliance identification plate) must be checked for correspondence to the available mains supply voltage, and the mains electric wiring should be capable of handling the oven’s power rating (also indicated on the identification plate). -
Page 7: Lamp Replacement
LAMP REPLACEMENT Disconnect the oven from the power supply before attempting to replace the lamp. Remove the glass cover of the lamp-holder by rotating anti-clockwise. Remove the lamp and replace with a lamp resistant to high temperatures (300°C), with the following characteristics: •... -
Page 8: Installation Steps
INSTALLATION Any adjacent furniture must be able to withstand a minimum temperature rise of 85°C above the ambient temperature of the room it is located in, during periods of use. The power supply to the appliance must be switched off before any adjustments or maintenance work is done on it. Preparation for Installation and Use Manufactured with best quality parts and materials, this modern, functional and practical oven with cooktop will meet your needs in all respects. - Page 9 INSTALLATION Choosing a Location for the Appliance There are several points to pay attention to when choosing a location for your freestanding oven. Make sure to take into account our recommendations below in order to prevent any problems or dangerous situations. ...
-
Page 10: Accessories Installation
ACCESSORIES - INSTALLATION OVEN SHELVES – Installing and removing wire racks 1. Check the oven is cool and switched off. 2. Open the oven door. 3. Remove all shelves for main oven. 4. Slightly squeeze the bottom two rows of the runner under the screw. 5. -
Page 11: Control Panel
OPERATING INSTRUCTIONS Description of Oven 1. Hob panel 2. Cast iron hotplate 3. Control Panel 4. Guide Bracket 5. Wire rack 6. Baking Tray 7. Oven Door 8. Oven Element 9. Door Seal Oven Element Hinge 12. Drawer panel 13. Anti-slip Feet Control Panel 1. -
Page 12: Setting The Time
OPERATING INSTRUCTIONS Setting the Time automatically shut down the oven after the set minutes and the timer will ring at the same time. -
Page 13: Oven Functions
OPERATING INSTRUCTIONS Oven Functions Off Oven function is Off, no function is selected. Lamp This function turns the oven lamp on, but n o heating elements are on. Grill This function turns the grill (top) element on for a more powerful grill function. Conventional Cooking (Bake) This function turns on the upper &... -
Page 14: Using The Hotplates
OPERATING INSTRUCTIONS Using the Hotplates Safety warnings Do not use pots or pans which are unsteady, as these can tip over. Do not use mats, heat diffusers or wok stands. These will cause a temperatre build-up which can damage the cook top. -
Page 15: Oven Cooking Guide
OPERATING INSTRUCTIONS Oven Cooking Guide The following is intended as a rough guide. It is often required to set the oven 10-20 degrees above or below the guide to get the result you want. Also, adjustments are needed for the cooking time to suit personal expectations. -
Page 16: Cleaning The Oven
CLEANING NOTE: Cleaning and maintenance operations must only be carried out when the oven and cooktop are cool. The appliance should be isolated from your mains supply before commencing any cleaning process. Before starting to clean your oven or cooktop, be sure that all control buttons are off and your appliance is cooled off. -
Page 17: Troubleshooting
TROUBLESHOOTING If you have a problem with your appliance, check the table below before calling service. You may be able to avoid a service call unnecessary inconvenience and expense. Problem Causes What to do Power not turned on Switch on electricity No spark obtained when Household fuse blown Check fuses... - Page 18 The following conditions apply in respect of the warranty given in this certificate: 1. Monaco Corporation Limited (“Monaco”) warrants the following Robinhood products against manufacturing defects and faulty materials, under normal use and subject to the exclusions in this certificate, for a period of: ...
- Page 19 The product was used outdoors. 2. All Robinhood Rangehoods are suitable for indoor use only and not suitable over BBQs or charcoal cookers designed for outdoor use. 3. In addition, this warranty does not extend to damage or defects which in our opinion, directly or indirectly arise from or are due to: exposing the product to acidic or corrosive materials or chemicals such as dyes, solvents, denture cleaner or acetone;...
Need help?
Do you have a question about the RHFS60WE and is the answer not in the manual?
Questions and answers
What is the conventional bake setting symbol?