Table of Contents
Advertisement
Advertisement
Table of Contents

Related Manuals for Love N Care SLEIGH HK25


Summary of Contents for Love N Care SLEIGH HK25
- Page 1 SLEIGH COT HK25 PLEASE KEEP THESE INSTRUCTIONS FOR FUTURE REFERENCE...
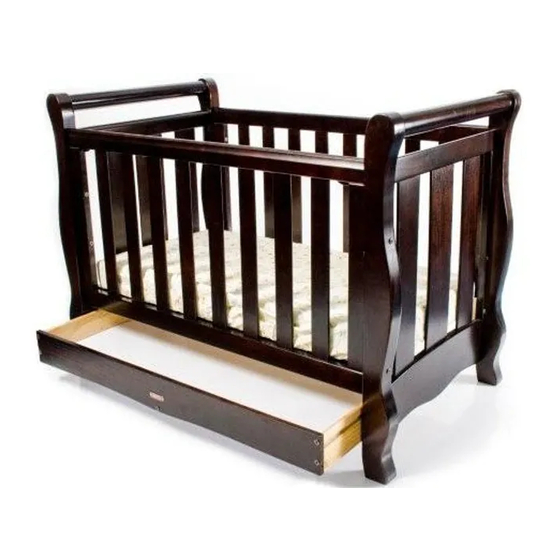
- Page 4 Parts List Left End Drawer Front Right End Drawer Side Left Drawer Side Right Fixed Side Drop Side Drawer Back Drawer Bottom Mattress Base F Front Top Cap Drawer Bottom Rail G Support Rail 2pcs...
- Page 5 Hardware Kit (1) Knob Bolt step1 (3) Nail (4) M6x25mm step2 (5) M6x50mm step3 (6) M6x70mm (6) M6x70mm step4 (7) Nut (8) Iron Plate step6 6x44mm Metal Dowel Screw step7 (10) 15x12mm Cam Lock (5) M6x50mm step8 (7) Nut (5) M6x50mm step10 (7) Nut (6) M6x70mm...
- Page 6 Step 1 Setting up the ends fig 1. fig 3. fig 2. 1. Attach the dropside catch (2) and insert bolt (1) into cot ends A and B as shown in Fig 1. Please make sure the dropside catch is attached correctly. Tighten with screwdriver (14).
- Page 7 Step 3 Attaching the fixed side fig 5. To Attach the ends (A & B) to the fixedside (C) use 4pc bolts (6) and tighten with allen key (13). See Fig 5. Step 4 Attaching the base fig 6. Attach the mattress base (E) to the Left End (A) and fig 7.
- Page 8 Step 5 Attaching the dropside fig 8. fig 9. To attach the dropside (D) the assembled dropside catch on the end should be fed through the bottom of the top rail (shown in fig 8) and the bottom screws from the sides should feed into the bottom rail (shown in fig 9).
- Page 9 Step 7 Attaching side on the drawer fig 11. Attach the drawer bottom rail (M) to drawer front (H) and drawer back (K) with 2pcs cam locks (10) and tighten with screwdriver (14) See fig 11. Step 8 Attaching ends on the drawer fig 12.
- Page 10 Step 9 Inserting the drawer base Insert the drawer bottom (L) to drawer front (H) and drawer back (K) along the inner rails. Step 10 Attaching the ends to the drawer base fig 13. Attach the drawer side left (I) to drawer front (H) and drawer back (K) using 2 bolts (5) and nuts (7) and tighten with allen key (13) see fig 13.
- Page 11 Step 11 Inserting the drawer to the cot Attach the drawer on the runners located under the base.
- Page 12 Using the dropside...
- Page 13 How to adjust the Mattress level fig 14. fig 15. fig 16. Before raising the mattress base to the highest position, take out the bolts (11 and 12) that are inside the holes as shown in fig 14. Attach 4pc bolts (6) to the left and right sides to fix the mattress fig 17.
- Page 14 Convert cot to sofa fig 18. fig 19. fig 20. fig 21. 1. Loosen the bolts on the left and right sides. Remove the dropside. Tighten the bolts. 2. Remove the Bolts (1,2 and 3) then insert bolts (1 and 11) as shown in Fig 18-21.
- Page 15 Convert Sofa to junior bed. fig 22. 1. Remove the fixed side. 2. Attach the (11) bolts to fill in the holes and tighten with allen key (13)
Need help?
Do you have a question about the SLEIGH HK25 and is the answer not in the manual?
Questions and answers