Advertisement
Quick Links
Advertisement

Related Manuals for Wilko 0464172


Summary of Contents for Wilko 0464172
- Page 1 KETTLE CHARCOAL GRILL Assembly instruction (0464172)
-
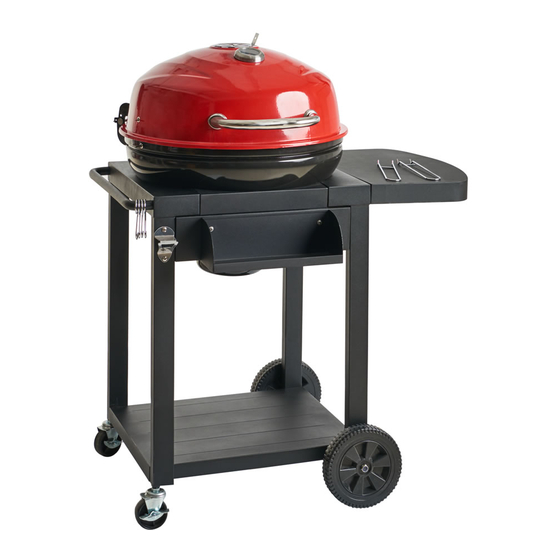
Page 2: Expanded View
Expanded View... -
Page 3: Parts Supplied
Parts Supplied Please check parts against the list below before assembling your Barbecue Grill. Take a few moments to familiarise yourself with the contents. Check that all holes are clear of paint before assembly, if you find a blockage, please use a screw driver to clear the blocked hole. Air vent Cart front panel Temperature gauge... - Page 4 Fittings Supplied Screw M4x10 Screw M5x18 Screw M6x14 Wing nut M4 Wing nut M6 Nut M10 Washer 6 Washer 22 Lock Washer Pin 8x110mm Cotter Pin 1.4x30mm Wrench M10 Screwdriver (not included) and wrench (included) are required to assemble the Barbecue. .
- Page 5 Assembly Please read all instructions thoroughly before proceeding. Find a large, clean area in which to assemble your barbecue. Please refer to parts list and assembly diagram as necessary. Assembly of the barbecue involves many large components, it is advisable to have two people assemble the unit. STEP 1: A: Attach cart frame support (11) to left cart frame (19) ((C) Screw 4Pcs).
- Page 6 STEP 3: A: Attach cart front panel (15) to left cart frame and right cart frame ((C) Screw 4Pcs). (15) (C) (C) STEP 4: A: Attach bottom panel (25) to left cart frame and right cart frame ((C) Screw 4Pcs). (C) (C) (25)
- Page 7 STEP 5: A: Attach axle (23), wheels (24) to right cart frame ((F) Nut 2Pcs). B: Insert locking caster (26) into hole of left cart frame. (24) (26) (26) (23) (24) STEP 6: A: Attach cart handle (17) to left cart frame ((C) Screw 4Pcs). B: Attach bottle opener (16) to left cart frame ((C) Nut 2Pcs).
- Page 8 STEP 7: A: Attach condiment tray (20) to front panel ((C) Screw 2Pcs). Note: Pre-assemble 2 screws to front panel, leave 5mm exposed. B: Hang the hooks (18) onto cart handle. (18) (20)
- Page 9 STEP 8: A: Attach side shelf (12) onto right cart frame ((B) Screw 4Pcs). (12)
- Page 10 STEP 9: A: Attach firebowl (9) to cart frames ((C) Screw 4Pcs / (I) Lock washer 4Pcs / (G) Washer 4Pcs). B: Attach bottom hinge (8) to firebowl (9) ((C) Screw 4Pcs / (G) Washer 4Pcs / (I) Lock Washer 4Pcs / (E) Wing nut 4Pcs).
- Page 11 STEP 11: A: Attach firebowl air vent (14) to firebowl ((A) Screw 1Pc / (D) Wing nut 1Pc). (14) STEP 12: A: Attach lid handle (3) to lid (4) ((H) Washer 2Pcs / (I) Lock Washer 2Pcs / (C) Screw 2Pcs). B: Attach top hinge (7) to lid (4) ((C) Screw 4Pcs / (G) Washer 4Pcs / (I) Lock Washer 4Pcs / (E) Wing nut 4Pcs).
- Page 12 STEP 13: A: Attach lid air vent (1) to lid ((A) Screw 1Pc / (D) Wing Nut 1Pc) B: Attach temperature gauge (2) to lid. STEP 14: A: Place the lid on firebowl. B: Insert the Pin (J) into all these hinge holes. C: Insert the Cotter Pin (K) at the end of Pin (J) ((J) Pin 2Pcs / (K) Cotter Pin 2Pcs).
- Page 13 STEP 15: A: Place the Charcoal grid (10) inside the firebowl. B: Place the Cooking grid (6) on the firebowl. (10) STEP 16: A: Slide warming rack (5) into holes in lid and firebowl. Note: Look for corresponding holes on side of lid, insert short wire end into lid hole one side at a time. Position warming rack legs into slots on firebowl sides.
- Page 14 STEP 17: A: Attach ash receiver (21) onto ash receiver support. (21) STEP 18: WARNING! For your safety, always make sure the CHAIN PIN (27) must be inserted to secure the opened lid to prevent the lid fall back down accidentally or under strong wind. A: Open the lid and make sure all holes at the back of upper &...
- Page 15 Instructions for use Important: Read all the assembly instructions and safety warnings before use and keep these instructions in a safe place for future reference. 1. Make sure the assembly instructions have been followed correctly. 2. Set the barbecue up in a suitable position, on a level surface away from areas likely to catch fire. 3.
-
Page 16: General Safety Warnings
General Safety Warnings Important: Read all the safety warnings and assembly instructions before use and retain all information for future reference. 1. WARNING! BARBECUES SHOULD NEVER BE USED INDOORS. Only use the barbecue in the open air. Risk� to life from fumes when used in an enclosed space. 2. -
Page 17: Barbecue Safety Hints
Barbecue safety hints 1. Outdoor use only. 2. Always stand your barbecue on firm, level and heat-resist surface, well away from wooden fences, overhanging trees and other flammable materials. 3. The barbecue must always be under the control of a competent adult. Keep young children and pets at a safe distance once the charcoal has ignited. - Page 18 6. To clean your barbecue soak the cooking grill and tools in hot soapy water as soon as possible after use. Dry thoroughly and store in a dry place. Do not leave your barbecue outside unprotected. Produced in China for Wilko, Roebuck Way, Manton Wood, Worksop, Nottinghamshire, S80 3EG...
Need help?
Do you have a question about the 0464172 and is the answer not in the manual?
Questions and answers