
Related Manuals for Murphy SBF-M


Summary of Contents for Murphy SBF-M
- Page 1 $15.00 SUPREME Steel Bed Frame & Mechanism Models SBF-M and SBF INSTRUCTIONS Established in 1975 TOLL FREE 1-800-667-6336 PHONE: (604) 576-7880 • FAX: (604) 576-7867 E-mail: info@murphybeds.com Websites: murphybeds.com...
-
Page 2: Table Of Contents
Residential & Commercial Term Murphy Wall-Beds has been proudly doing business since 1975 under the names Tilt-Away Beds of America®, Tilt-Away Beds of Canada® and Murphy Wall-Beds of Canada®, which are all registered trademarks of Murphy Wall-Beds Hardware Inc. Copyright © by Murphy Wall-Beds Hardware Inc. - Page 3 Mechanism & Steel Bed Frame Equipment Checklist Package Contents ¼″ or 6 mm Allen key Qty. Item 72″ bar clamps Lift Mechanisms, Left/Right (L/R) Countersink bit ″ - ″ Lift Mechanism Springs Drill Bits ", ", " (5mm), " (7mm), "...
- Page 4 Bag #7 – Mechanism Mounting mechanism to Bed Frame: For Mounting Mechanism to Side Panel: Qty. Item Qty. Item " x 18 x ¾" hex bolt " x 1¼" flathead machine screws " x ¾" carriage bolts " plain hexagon nuts "...
- Page 5 CUT LIST - Steel Bed Frame REGULAR LEGS Single Twin Bed (Mattress size 39" x 75" x 10" thickness) Overall Cabinet Dimension: 44½"W x 80 "H x 15 " D Protrusion from wall to foot bed: 84½" # of pieces Description Width Length...
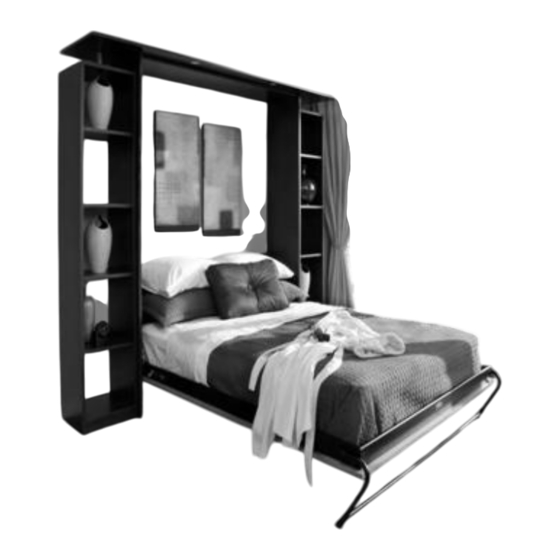
- Page 6 Figure 1. Parts of the Bed Cabinet.
-
Page 7: Bed Cabinet Assembly Instructions
Bed Cabinet Assembly Instructions Helpful Hint Please Note: Be sure to use the section of the Bed Frame Cut List Before you begin, you may wish to visit our website at that corresponds to the size of the bed that you are www.murphybeds.com to view the Quick Time constructing. - Page 8 For use with SUPER SPRINGS (optional) Figure 2. Laying IMPORTANT NOTICE: EXTENDED LEG See Page #21 for mechanism drill instructions when using the option. LONG LEG See Page #22 for mechanism drill instructions when using the option. the Lift Mechanism mounting holes. Take horizontal measurements from finished front edge. Attach Bottom Stretcher, Kick and Headboard using #8 x 5/8″...
-
Page 9: Securing Bed Cabinet
Securing the Bed Cabinet Attention! You must secure the Cabinet to solid structural members and not merely to the wall finish. If you are not attaching your bed to a wood stud wall, see your local hardware retailer for metal stud screws or concrete 1¾″... -
Page 10: Installing Springs In Lift Mechanisms
Installing Springs in Lift Mechanisms Please Note: After you have completed installing and checking the operation of your Murphy® Wall-Bed, you may find it necessary to add or remove springs to achieve the correct lift effort of between five and 10 lbs. Please refer to additional notes for tips on how to correctly balance your mattress. - Page 11 (see Figure 5). Re-install the Bed Panel Unit. If you have installed the number of springs as suggested in Table 3a and you find the Murphy Bed slowly closes back into place (only a few pounds are needed to keep your Murphy Bed down), we suggest you consider the following options: a) Remove only one additional spring from one of the mechanisms (see above instructions).
-
Page 12: Mounting Lift Mechanisms
Mounting Lift Mechanisms 1. Insert a " x 1¼" flathead slot machine screw through countersunk hole "C" from the outside of the Right Side Panel. Position the corresponding Right Lift Mechanism hole (see Figure 6 for location) over the screw. Loosely thread on a "... - Page 13 (over-torque) the screw holes. We recommend that you power-drive screws only part way and then tighten by hand. Stripping the holes will automatically void the Lifetime Warranty on the Supreme Steel Bed Frame System. Murphy Wall-Beds will not accept any liability for any accidents resulting from improper assembly or installation.
-
Page 14: Installing The Bed Panel Unit
Installing the Bed Panel Unit Note: The Bed Panel Unit connects to 1. Insert the two 5/16” x ¾” Carriage bolts from the outside of the Cabinet via the Lift Mechanism the Side Frames through the #1 holes at the head end of the Bed Panel Unit. - Page 15 4. Sitting on the floor facing the bed cabinet, brace one foot against the front edge of the Side Panel. Using the 13” length of PVC tubing provided, lever the Lift Mechanism Tension Arm straight down in-line with the Side Panel until you can secure the Arm Lock to the hexagon nut that you installed at Hole “A”.
-
Page 16: Attaching Handles & Legs
7. Continue to tilt the Bed Panel Unit outward to an angle of about 45º, during which action you will hear a click as the Arm Locks disengage. With your assistant holding the bed at roughly this angle, install the #2 bolts and Nylock nuts. -
Page 17: Installing Mattress & Mechanism Covers
Lift Mechanism in the manner described in Step 2 above. Failure to do so could result in serious injury and will render the warranty for this product null and void. Murphy Wall-Beds Hardware Inc. is not responsible for any injuries resulting from a failure to complete this important step. -
Page 18: Extended Leg
”) CUT LIST EXTENDED LEG (+ 2 All cut lists and drilling dimensions provided on page 5 are based on the height of our Regular Leg. If using the Extended Leg, you have 2 options: Option #1 If you have used the instruction booklet dimensions on page 5 you must install a sturdy platform base that raises all of the cabinetry a further 2 3/8”... -
Page 19: Long Leg
”) CUT LIST LONG LEG (+ 6 All cut lists and drilling dimensions provided on page 5 are based on the height of our Regular Leg. If using the Long Leg, you have 2 options: Option #1 If you have used the instruction booklet dimensions on page 5 you must install a sturdy platform base that raises all of the cabinetry a further 6 1/8”... - Page 20 30 DAYS from receipt of purchase. DAMAGED or MISSING PARTS: In the event of a missing or broken piece, simply call the Murphy Wall-Beds Hardware customer service line at 1-800-667-6336 within 14 days of your purchase. It is our commitment to you to mail replacement parts, free of charge, within 10 business days of this notification.
Need help?
Do you have a question about the SBF-M and is the answer not in the manual?
Questions and answers