Advertisement
Quick Links
instructions
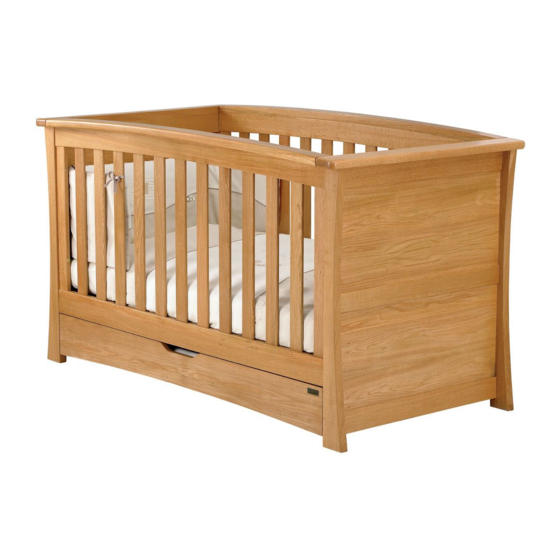
ocean cot-bed
CBR295:V4/04/07
© Mamas & Papas (Holdings) Ltd. 2007
IMPORTANT: Please read instructions carefully
and keep for future reference
Important: please read
these InstructIons
carefully before
startIng to assemble
your product.
Important: the
assembly of thIs
product requIres
two people.
Advertisement

Related Manuals for Mamas & Papas Ocean cot-bed


Summary of Contents for Mamas & Papas Ocean cot-bed
- Page 1 CBR295:V4/04/07 © Mamas & Papas (Holdings) Ltd. 2007 IMPORTANT: Please read instructions carefully and keep for future reference Important: please read Important: the these InstructIons assembly of thIs carefully before product requIres startIng to assemble two people.
- Page 2 Cot-bed before assembling your product... Do not discard any packaging until you are certain you have all the correct components and fittings. If any items are damaged or missing, please contact your retailer or Mamas & Papas on 0870 8307700. Allow plenty of time and space when beginning the construction of your product. Components Item Description Part no. Qty. Item Description Part no. Qty. Left drawer side 311397900001 Head end 311397900101 Right drawer side 311397900002 Foot end 311397900102 Drawer back 311397900003 Cot sides 311397900103 Centre rail 311397900004 Back rail 311397900107 Drawer bases 311397900005 Base 311397900100 Drawer front 311397900006...
- Page 3 Fittings Cams Screws Cam studs Short bolts Long bolts Base brackets Base bracket nuts Rail inserts Blanking nuts Allen key Flat head screwdriver tooLs required cross head screwdriver Important: The use of powered screwdrivers is not recommended for assembling this product.
- Page 4 Slot four cams (a) into the large holes in the inside faces of the two drawer sides (1&2). Ensure the arrows on the cam heads are pointing towards the connecting holes in the edges of the drawer sides. Ensure that the slots in the drawer back and sides face into the drawer and are correctly aligned, see diagram. Screw four long assembly screws (b) through the holes in drawer sides (1&2) and into the holes in the side edges of the drawer back (3). Screw two long assembly screws through the holes in the centre of the drawer back and into the holes in the centre rail (4). Tighten the screws using a cross-head screwdriver.
- Page 5 Slot the drawer bases (5) into the grooves in the drawer sides and centre rail. Push the drawer bases along the grooves and into the recess in the drawer back. The drawer bases are rectangular. Ensure that the short edges of the drawer bases are connected to the drawer sides and centre rail. Screw six cam studs (c) into the metal inserts in the inside face of the drawer front (6). Use a cross-head screwdriver to tighten the cam studs into the drawer front.
- Page 6 Slot the drawer front (6) onto the drawer sides, centre rail and drawer bases, see diagram. Align the cam studs in the drawer front with the connecting holes in the drawer sides and centre rail. Ensure that the drawer bases slot into the recesses in the drawer front. Secure the drawer front in position by tightening the four cams in the drawer sides. Lock the cams by turning them clockwise with the thick end of the allen key (J). Turn the assembled drawer upside down and slot two cams (a) into the large holes in the centre rail (4). Ensure the arrows on the cam heads are pointing towards the connecting holes in the front edge of the centre rail. Lock the cams by turning them clockwise using the thick end of the allen key (J).
- Page 7 Slot the back rail (10) onto the head end (7) as shown. Fasten the back rail to the head end by slotting one of the rail inserts (h) into the hole in the rail. Push one of the short bolts (d) through the hole in the rail insert and back rail. Tighten the short bolt into the head end using the long end of the allen key (J). Important: Only half tighten the bolts into the cot end. Slot one of the cot sides (9) onto the head end as shown in the diagram. Fasten the cot side in place by inserting two long bolts (e) through the end rail of the cot side. Screw the bolts half way into the head end using the long end of the allen key (J). Important: Do not fully tighten the bolts of fasten the cam in the bottom rail of the cot side until the remaining cot side has been fitted.
- Page 8 Fasten the foot end (8) to the other end of the cot side using two long bolts (e) and the thin end of the allen key (J). Slot one of the rail inserts (h) into the bottom rail. Slot one of the short bolts (d) through the hole in the insert and tighten into the foot end using the thin end of the allen key (J). Important: Only half tighten the bolts until the other cot side is fitted. Attach the remaining cot side (9) to the cot ends. Fasten the cot side to the cot ends by screwing in four long bolts (e). Fully tighten the bolts into the cot ends using the long end of the allen key (J).
- Page 9 Tighten all of the four long bolts in the side fitted first using the long end of the allen key (J). Tighten the two long bolts in the bottom back rail with the long end of the allen key. Slot the four base brackets (f) into the holes in the cot sides, see diagram. Select one of the three base heights that you require. Ensure they are all at the same height. See ‘Instructions For Safe Use and Maintenance’ on page 19 for more information on base heights.
- Page 10 Attach the base (11) (with the information label facing upwards) by lowering it onto the base brackets. Ensure that the threaded ends of the base brackets fit into the holes in the corners of the base. Push the base bracket nuts (g) into the holes in the corners of the base and screw them onto the threaded ends of the base brackets using the flat head screwdriver supplied. Slot the runners on the drawer into the runners on the cot ends and push the drawer into the cot. -10-...
- Page 11 The cot is now fully assembled. Check that all the fittings are fully tightened before use. Before the day bed can be assembled you will need to partially dismantle the cot. Remove the drawer, the front cot side (9) and the base (11). Store all unused fittings and components in a safe place. -11-...
- Page 12 Half loosen the four long bolts in the cot side using the long end of the allen key (J). Half loosen the two short bolts in the back rail using the allen key. Gently spread the cot ends until the dowels on the front rail (12) will slot into there relevant holes in the cot ends. Slot two of the rail inserts (h) into the front rail. Slot two of the short bolts (d) through the holes in the inserts and tighten into the cot ends using the long end of the allen key (J). -12- -12-...
- Page 13 Fully tighten the four long bolts in the cot side using the long end of the allen key (J). Tighten the two short bolts in the back rail using the allen key. Slot the ends of the four base brackets (f) into the holes in the cot side and front rail. Only use the bottom base height holes in the cot side. Ensure the base brackets are all at the same height. -13-...
- Page 14 Attach the base (11) (with the information label facing upwards) by lowering it onto the base brackets. Ensure that the threaded ends of the base brackets fit into the holes in the corners of the base. Push the base bracket nuts (g) into the holes in the corners of the base and screw them onto the threaded ends of the base brackets using the flat head screwdriver supplied. There are four screw holes in the cot ends that are used for the construction of the cot only. These must be plugged using the blanking bolts (I). Screw the four blanking bolts into the holes in the cot ends from the inside, see diagram. Tighten the blanking bolts into the cot ends using the long end of the allen key (J). -14-...
- Page 15 Slot the runners on the drawer into the runners on the cot ends and push the drawer into the day bed. The day bed is now fully assembled. Check that all the fittings are fully tightened before use. -15-...
- Page 16 instruCtions For saFe use & maintenanCe • When using the cot the bottom base height position is the safest. You should use the cot in this position as soon as your baby is old enough to sit up. • Never leave anything in the cot/bed which could provide a foothold for your child to climb out or would present a danger of suffocation or strangulation. • All assembly fittings should be tightened properly and care should be taken to ensure that no screws are loose, a child could trap parts of the body, or clothing (e.g. ribbons, drawstrings, necklaces) this could pose a risk of strangulation. • Regularly check that all fittings and components of the cot/bed are fully tightened and in working order. If any parts have become worn or damaged then do not use the cot/ bed, seek advice from your retailer or by calling our Customer Services Helpline on: 0870 8307700. Do not use replacement parts that are not recommended or supplied by Mamas & Papas. Non-approved parts may render the repair or cot/bed unsafe. • Do not place your cot/bed in the close proximity of an open fire and other sources of heat, such as radiators, electric or gas fires. • For reasons of safety we only recommend the use of the Mamas & Papas size 400 mattress for this cot/bed. • The mattress should be no more than 40mm shorter or narrower than the internal length or width of the cot/bed. • The thickness of the mattress chosen should be such that the internal height (the distance between the surface of the mattress to the upper edge of the cot side) is a minimum of 500mm when the base is set in the lowest position and a minimum of 200mm when the cot base is set in the highest position. • Wood is a natural product and as such one of its charms is occasional variation in colour or marking. These marks are not defects and do not detract from the strength or performance of your cot-bed. •...
Need help?
Do you have a question about the Ocean cot-bed and is the answer not in the manual?
Questions and answers
Hello, my daughter just bought a **** and Papa Ocean cot from a friend. It is in great condition but a number of the bolts are missing. I'm needing 8 x long bolts 4 x base brackets and 4 x base bracket nuts Could I buy them through your company or would you be able to tell me what thread they are, as they aren't metric Many thanks Steve
Please can I have sizes of each part ?