Sign In
Upload
Download
Table of Contents
Contents
Add to my manuals
Delete from my manuals
Share
URL of this page:
HTML Link:
Bookmark this page
Add
Manual will be automatically added to "My Manuals"
Print this page
×
Bookmark added
×
Added to my manuals
Manuals
Brands
AllPondSolutions Manuals
Aquariums
EF1+
Manual
AllPondSolutions EF1+ Manual
Aquarium external filters
Hide thumbs
1
2
3
4
5
6
7
8
9
10
11
12
13
14
15
16
17
18
19
20
page
of
20
Go
/
20
Contents
Table of Contents
Bookmarks
Table of Contents
Installation and Use
Setup Diagram
Maintenance
Filter Maintenance
Filter Media
Priming Problems
Advertisement
Quick Links
1
Installation and Use
2
Setup Diagram
Download this manual
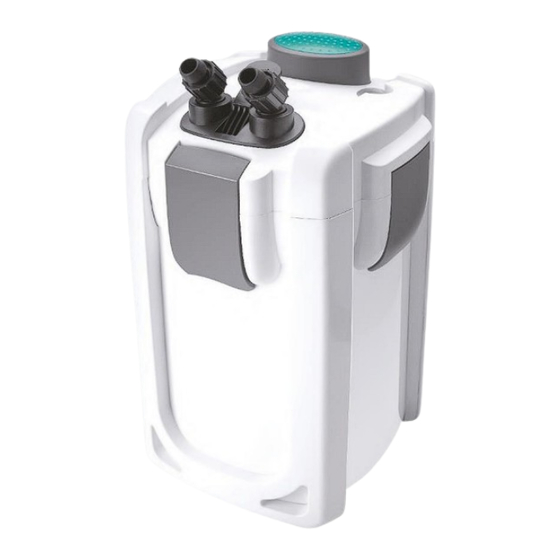
AQUARIUM EXTERNAL FILTERS
EF1+ / EF2+ / EFX+
BUILT IN UV CLARIFICATI
ON
EASY PRIMING SYSTEM
MULTI LAYER FILTRATION
TAP SHUT OFF SYSTEM
QUIET OPERATION
EASY TO MAINTAIN
Table of
Contents
Previous
Page
Next
Page
1
2
3
4
5
Advertisement
Table of Contents
Need help?
Do you have a question about the EF1+ and is the answer not in the manual?
Ask a question
Questions and answers
Related Manuals for AllPondSolutions EF1+
Aquariums AllPondSolutions EF2+ Manual
Aquarium external filters (20 pages)
Aquariums AllPondSolutions EFX+ Manual
Aquarium external filters (20 pages)
Aquariums AllPondSolutions EF1 Manual
Aquarium external filters (37 pages)
Aquariums AllPondSolutions FW-7 Manual
Freshwater aquarium (9 pages)
Aquariums AllPondSolutions SKIM-2 Manual
Aquarium surface skimmer (9 pages)
This manual is also suitable for:
Ef2+
Efx+
Table of Contents
Print
Rename the bookmark
Delete bookmark?
Delete from my manuals?
Login
Sign In
OR
Sign in with Facebook
Sign in with Google
Upload manual
Upload from disk
Upload from URL


Need help?
Do you have a question about the EF1+ and is the answer not in the manual?
Questions and answers