Table of Contents
Advertisement
Quick Links
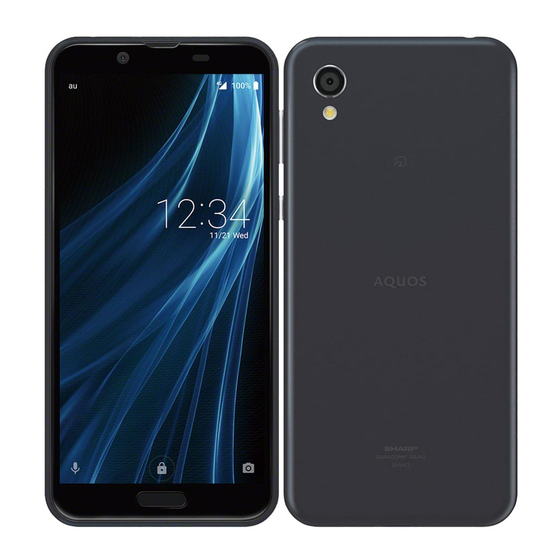
SH-M08
User Guide
Thank you for using our service. This document includes
information on a selection of basic operations you'll want to
know including the various settings, how to acquire a Google™
account, how to install apps, and how to use the camera.
* In order to use the handset safely, download the "Notes and
Precautions" from the website below and thoroughly read
the contents so you have a good understanding of it before
you start using the handset.
http://k-tai.sharp.co.jp/rental/index.html
* The screens and menus may change if the version of the
Android™ OS is updated.
Set Rental
Ver. 1.1
Advertisement
Table of Contents

Related Manuals for Sharp AQUOS sense2


Summary of Contents for Sharp AQUOS sense2
- Page 1 Precautions” from the website below and thoroughly read the contents so you have a good understanding of it before you start using the handset. http://k-tai.sharp.co.jp/rental/index.html * The screens and menus may change if the version of the Android™ OS is updated.
-
Page 2: Before Using The Handset
Before Using the Handset Part Names and Functions 1 Front camera 2 nanoSIM card and microSD card tray 3 Earphone/Microphone terminal 4 Earpiece/Speaker - 1 -... - Page 3 5 Proximity sensor/Brightness sensor z The proximity sensor detects the distance to the face and prevents inadvertent operation of touch panel during a call. z The brightness sensor detects the brightness of the surrounding area and adjusts the brightness of the backlight. z Do not cover the sensor area with your hand or paste a sticker etc.
- Page 4 Inserting/Removing the Card Display side nanoSIM card microSD card Insert in the tray z When inserting/removing a nanoSIM card or microSD card, make sure to insert/remove the card into/from the correct location in the correct direction after you turn off the power. z The tray is installed in the handset.
- Page 5 Charging The internal battery is not fully charged. Be sure to charge the battery before use. Cautions while charging „ z The battery can also be charged with the handset turned on (While charging, the battery icon appears with [ ] superimposed). z Do not charge for a long time with the power left turned on.
-
Page 6: Turning Power On/Off
Turning Power On/Off Turning power on „ 3(Power key) (for at least 3 seconds) Turning power off „ 3(Power key) (for at least 2 seconds) [Power off] Turning display on/off „ The display is turned off when 3(Power key) is pressed or the handset is not in use for a set length of time. - Page 7 AQUOS Home AQUOS Home is a home app that consists of a home screen (Desktop Sheet and Favorites Tray) and an app list screen. On the Desktop Sheet of the home screen, you can register shortcuts for apps, functions, and widgets, while on the Favorites Tray of the home screen, you can register shortcuts for apps and functions.
-
Page 8: Navigation Bar
Touch „ Touch a key or an item displayed on the screen and then release your finger from it to select or set it. Touch and hold „ When you keep your finger on the touch panel, a menu may appear depending on the function and screen in use. Slide (Swipe)/Drag „... -
Page 9: Screen Display/Icons
Screen Display/Icons Icons displayed on the status bar at the top of the screen give you various kinds of information, such as the status of the handset or the presence of missed calls. You can check the detailed information by displaying the status panel. - Page 10 : Available space on the handset memory being run out Bluetooth : Receiving registration/connection request from Bluetooth device : Data reception request Data transmission and reception : Transmission : Reception Application : App update available : Finished installing app : Open network Tethering : [USB tethering] enabled : [Portable Wi-Fi hotspot] enabled...
- Page 11 Main status icon list „ : Alarm set z The icon color becomes light while the manner mode is set to [Total silence]. Battery level : Approx. 100 to 6% : Approx. 5% or less z While charging, the battery icon appears with [ ] superimposed. z Percentage of the remaining battery level appears on the left side of the battery icon.
- Page 12 HSPA data communication status : HSPA available : Sending data via HSPA : Receiving data via HSPA : Sending and receiving data via HSPA : International roaming : NFC/Osaifu-Keitai lock is set : [Reader/Writer, P2P] enabled Manner mode : Standard manner : Total silence : Alarms only : Priority only...
- Page 13 App list z You can check functions, operation procedures, etc. in Help depending on the app. z A separate paid subscription will be required for using some apps. z The following apps are installed. Icon Description Album You can sort images and videos by event and location and use them.
- Page 14 Icon Description Clock You can use the alarm, world clock, timer and stopwatch. Drive Save images, videos, etc. on Google Drive™ or share them. Photos Manages images and videos. Maps You can measure your present location, use the navigation function to check how to get to your destination in detail, etc.
-
Page 15: Useful Apps
Play Store etc. Useful apps You can download useful apps from the following website. http://k-tai.sharp.co.jp/rental/index.html * The URL and contents are subject to change without prior notice. * Note that Sharp does not handle inquiries regarding useful apps. - 14 -... -
Page 16: Users & Accounts
Users & accounts Setting up Google account etc. z You can use Google services such as Gmail and Google Play if you set up Google account. Home screen [ ] [Users & accounts] [Add account] Select an account type Set up an account z In the home screen, select [ ... - Page 17 Deleting your account „ Home screen [ ] [Users & accounts] Select an account [REMOVE ACCOUNT] [REMOVE ACCOUNT] z Operation methods may differ depending on the account. Retrieving your Google account password „ If you forget your Google account password, retrieve it. Home screen [ ...
-
Page 18: Email/Web Browser
Email/Web Browser You can send and receive messages using SMS, Gmail, etc., and display websites using Chrome. You can send and receive text messages with mobile phone numbers serving as destinations. Home screen [ ] [ ] Enter the destination and message [ ... -
Page 19: Setting Up Email Account
Email You can send and receive email by setting up an email account provided by a service provider. Setting up email account z Setting items may differ depending on the account to use. Home screen display the “app list screen” [Email] z Only when an account is not set up, the account setup screen appears. -
Page 20: Displaying Email
Sending email Home screen display the “app list screen” [Email] [ ] Compose an email File attachment (Up to approx. 5 MB) Account Destination Add destinations Subject Text [ ] Displaying email z The screen may appear different depending on the account to use. Home screen display the “app list screen”... - Page 21 Check the email Delete Set to unread Subject Star icon Menu of each email Sender/Destination Date and time Reply of reception Text Attached file Replying/Forwarding email Home screen display the “app list screen” [Email] Select an email [ ] z To reply to all: [ ...
- Page 22 Compose an email Reply type Destination Subject Text Quote text Inline reply Email of sender [ ] Deleting email Home screen display the “app list screen” [Email] Select an email [ ] [OK] Setting email Home screen display the “app list screen” [Email] [ ...
-
Page 23: Displaying Websites
Chrome You can display websites via packet communication or Wi-Fi function. Displaying websites In the home screen, [ ] Some websites may not appear properly. Searching websites „ Touch the URL entry field Enter a keyword select a keyword z Keywords that include the entered characters are displayed as a list. -
Page 24: Play Store
Be sure to check the security of app, then install it at your own risk. The handset may be infected with a virus, data may be damaged, etc. Note that Sharp shall not be liable for each malfunction, or any disadvantage brought to you or any third party due to the user-installed app etc. - Page 25 Uninstalling apps „ In the Google Play screen, [ ] [My apps & games] [INSTALLED] Select an app to uninstall [UNINSTALL] [OK] Using SNS (Facebook etc.) You can use SNS by installing Facebook and other SNS apps from Google Play. z Set up a Google account in advance.
- Page 26 Camera You can shoot still pictures and videos. Also, you can switch settings of the camera according to the object to shoot. Shooting screen layout Still pictures Video shooting shooting screen screen 1 Brightness adjust 8 Shooting menu 2 Zoom 9 Switching front/back camera 3 Recognition icon a Mobile light...
- Page 27 Shooting screen (Manual) „ The operating method is same as the shooting screen. Operations that differ are explained here. Still pictures Video shooting shooting screen screen 1 Clipped whites/Crushed shadows z When [Clipped whites/Crushed shadows] is set to ON, stripes are displayed in the part that clipped whites or crushed shadows occur.
-
Page 28: Iso Sensitivity
ISO Sensitivity If you set ISO Sensitivity to high sensitivity, the shutter speed becomes fast. Therefore, it is possible to reduce object shake and camera shake, or shoot clear images of an object in a dark place. However, the quality deteriorates. - Page 29 Turn the camera of the handset (back camera) to an object z To adjust the brightness: Slide your finger up/down z To zoom: Pinch out/in [ ] z Touch [ ] or press 1/2 to shoot still pictures when recording videos.
- Page 30 GPS/Navigation You can display Street View and search for routes using Maps. You can also search for facilities near a location on the displayed map. z GPS is a function to retrieve location information of devices by receiving radio wave from GPS satellites. It is necessary to set [Location] to On to measure the present location.
-
Page 31: Handset Settings
Handset Settings Setting menu In the menus displayed from selecting the home screen [ ] , you can make various settings for the handset. z In the top, recommended settings are displayed as suggestions. z Display Settings on the handset and enter a keyword in the search entry field to search the setting items. - Page 32 Google You can make settings for various Google services collectively. System Make settings for system settings such as the language displayed on the screen, settings for the date, etc. Troubleshooting Use a collection of functions available for troubleshooting, such as a function to check “Frequently Asked Questions”...
- Page 33 Sound You can make settings for the ringtone, notification sound, etc. Home screen [ ] [Sound] Select an item Media volume: Set the volume of the media sound (music, video, etc.). „ Alarm volume: Set the volume of the alarm. „...
- Page 34 Wi-Fi If you use Wi-Fi function of the handset, you can use email or Internet by connecting to access points of your home, corporate network or public wireless LAN service. Home screen [ ] [Network & Internet] [Wi-Fi] Set to On Select an access point z If you select an access point protected by security, enter the password (security key) and select [CONNECT].
- Page 35 The registration process using WPS takes a few minutes. After completion of the registration of the access point, confirm that the connection to the access point has been properly acquired. Deleting access point settings „ Home screen [ ] [Network &...
-
Page 36: Select An Item
Location Make settings for measuring location information. Home screen [ ] [Security & location] [Location] Set to On z The confirmation screens for the use of location information are displayed. The mode to be set may differ depending on whether you select [NO]/[YES]. - Page 37 Security of the Handset Make settings for security lock. Home screen [ ] [Security & location] Select an item Google Play Protect: Make settings for the scan function which detects „ unauthorized operations on apps and the handset. Find My Device: Detect the location information of this handset and „...
- Page 38 Apps with usage access: Set apps that can access the data of app „ usage history item. [Screen lock] The following items can be set. „ None: The lock screen of the touch panel is not displayed. „ Swipe: Slide [ ...
- Page 39 “1234”. Keep a separate memo of the security codes. z Keep security codes private. If the security codes become known by a third party and are misused, Sharp shall not be liable for any damages incurred by the users. PIN code „...
-
Page 40: Face Recognition
Face recognition Face recognition is an authentication function to recognize the face of the owner. You can unlock the touch panel, etc. Registration of face „ Only one face can be registered for face recognition. z Set Screen lock to other than [None] or [Swipe]. Home screen [ ... -
Page 41: Fingerprint Authentication
Fingerprint authentication Fingerprint authentication is an authentication function that is operated by touching the fingerprint sensor with a finger. You can unlock the touch panel, etc. Registration of fingerprint „ You can register up to five fingerprints to use for fingerprint authentication. z If the fingerprint sensor fails to read a fingerprint, try again using another finger. -
Page 42: Languages & Input
Using fingerprint authentication function „ While the display is turned off/In the lock screen of the touch panel/In the fingerprint authentication screen, touch the fingerprint sensor with your finger ball z When you operate it while the display is turned off, the touch panel is unlocked and the display is turned on. -
Page 43: Data Transfer
Backup You can back up data using a Google account. z Be sure to back up the data on your handset before you have it repaired or replaced. Home screen [ ] [System] [Backup] Select an item Back up to Google Drive: Set whether to back up to Google Drive by „... - Page 44 Saving backup file „ Home screen [ ] [System] [Data transfer] [Save data to SD card] Select the data categories to save z If you select [Address Book] or [Schedule], the screen for selecting which account to save is displayed. Follow the instructions on the screen.
- Page 45 Reset Home screen [ ] [System] [Reset options] Select an item Reset Wi-Fi, mobile & Bluetooth: Reset all settings related to Wi-Fi, „ mobile data, and Bluetooth. Reset app preferences: Reset all contents set in each app. „ Erase all data(factory reset): Reset all data in the handset memory.
-
Page 46: Using Bluetooth Function
Bluetooth function You can connect the handset to Bluetooth devices, such as headphones, wirelessly. z Wireless communications with all the Bluetooth devices are not completely guaranteed. Using Bluetooth function z To register/connect a Bluetooth device, the Bluetooth passkey may need to be entered. - Page 47 Bluetooth device to be used. Instruction Manual User manual (in PDF format) The latest User manual (Japanese) can be downloaded. http://k-tai.sharp.co.jp/support/other/shm08/manual/index.html * The URL and contents are subject to change without prior notice. - 46 -...
- Page 48 Business hours: 9:00 a.m. to 5:40 p.m. (Monday through Friday) (excluding public and company holidays) * Only available in Japanese. * Please have the person in charge of the corporate contract contact us. Sharp Corporation Head Office: 1 Takumi-cho, Sakai-ku, Sakai City, Osaka 590-8522, Japan...
Need help?
Do you have a question about the AQUOS sense2 and is the answer not in the manual?
Questions and answers