Table of Contents
Advertisement
Quick Links
Advertisement
Table of Contents

Related Manuals for JUMAR REG-03 Mini

Summary of Contents for JUMAR REG-03 Mini
- Page 1 Mini JUMAR REG-03 MICROPROCESOR CONTROLLER OF THE PELLET'S BURNER REG-03 Mini JUMAR REG-03 Mini REG-03 Mini MODE INFO MENU INSTRUCTION OF INSTALLING AND THE MAINTENANCE FAN SPEED IGNITER CH PUMP FEEDER REGULATOR ºC CLOCK ROOM ALARMS LANGUAGES /TIMER THERMOSTAT IN-BUILD...
- Page 2 Mini JUMAR REG-03 - 2 -...
-
Page 3: Table Of Contents
Mini JUMAR REG-03 TABLE OF CONTENTS SAFETY OF OPERATIONAL USE................5 INSTALLATION GUIDANCE.................5 TECHNICAL DATA....................6 THE IMPLEMENTATION..................7 THE PRICIPLE OF WORKING................7 THE CONNECTION DIAGRAM................8 OPERATION CONTROLLER................11 BUTTON'S DESCRIPTION.................11 THE DRIVER'S HANDLING................12 MEASURE PANEL DESCRIPTION................13 ALARMS......................14 WORKING MODES..................15 TEMPERATURE SETTING..................17 MENU STRUCTURE..................18 SETTINGS' TABLES..................19... - Page 4 Before installing please read the instruction carefully and get to know the functioning of the driver. Any questions occur, contact with the JUMAR company. P.P.U.H JUMAR Jerzy Podhajski ul. Opawska 112 47-400 Racibórz...
-
Page 5: Safety Of Operational Use
Mini JUMAR REG-03 SAFETY OF OPERATIONAL USE Before using read carefully the instruction. Installing and connecting the regulator should be done by a professional staff. All available safety requirements should be taken into consideration. Before switching the regulator on, the accuracy of all connections ought to be checked. -
Page 6: Technical Data
Mini JUMAR REG-03 TECHNICAL DATA Burner handling: 250kW / 500kW* Sensors: KTY-210 / PT1000** Measurement range: -20 – 120°C / -20 – 400°C** Measurement resolution: 0.1 °C Time of measurements: Data's reading: Graphics OLED display 16x100px Control outputs: Igniter (relay): ~230V 3A (2A) •... -
Page 7: The Implementation
Mini JUMAR REG-03 THE IMPLEMENTATION REG – 03Mini controller is a modern microprocessor device controlling the work of the pellet's burner. Implementation of advanced driver's algorithm and the flame sensor ensures the simplicity of maintenance and the full automatization of the burning process. -
Page 8: The Connection Diagram
Mini JUMAR REG-03 THE CONNECTION DIAGRAM The figure above shows a scheme demonstrating connection of sensors and controlling elements to the controller. Before connecting the regulator to network, it is necessary to check all the connections carefully. One has to take particular note of not placing ~230V power supply cables instead of the sensor. - Page 9 Mini JUMAR REG-03 CONNECTION DESCRIPTION Terminal Input/ Designation Description Output input Main fuse connector input input Power supply connector input output Igniter connector output output Feeder connector output output Fan connector output Central heating pump connector output input ° STB fuse connector (bimetal 95...
- Page 10 Mini JUMAR REG-03 In the picture below, illustrates an example of placing sensors: Sensor Designation Name Description STB sensor (securing sensor) has to be places in Sensor the boiler along with the CH sensor. Central heating water sensor (CH). Sensor...
-
Page 11: Operation Controller
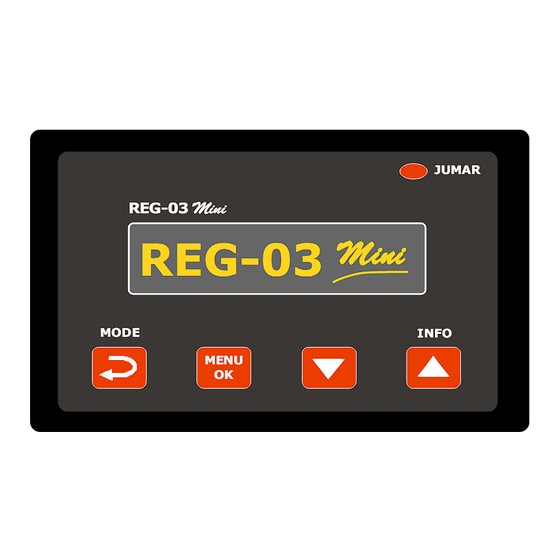
Mini JUMAR REG-03 OPERATION CONTROLLER In the picture below, illustrates a controller panel with descriptions: JUMAR REG-03 Mini REG-03 Mini OLED DISPLAY MODE INFO MENU BUTTONS BUTTON'S DESCRIPTION Button Function 1 Function 2 Function 3 Type (MENU 1 sec) (MENU 2 sec) -
Page 12: The Driver's Handling
Mini JUMAR REG-03 THE DRIVER'S HANDLING After switching the driver on, on the LCD screen appears the programme's logo defining the type of the driver and the manufacturer's logo. Mini REG-03 JUMAR After a few seconds controller show measurement panel. The following figure shows an example of the appearance of LCD screens. -
Page 13: Measure Panel Description
Mini JUMAR REG-03 MEASURE PANEL DESCRIPTION In the picture below, illustrates description of the icons on measurement panel. °C STOP ICONS: ICON ICON DESCRIPTION Temperature icon (1). Burner state (2). STOP Icon indicating the fan operation (3). If fan working icon will be animated. -
Page 14: Alarms
Mini JUMAR REG-03 ALARMS If the sensor is damaged or it is not connected, the temperature display will show a "–-" image and "ALARM" text, along with giving sound alarm. The alarm is switched off automatically after failure removal (connecting the sensor or replacing it with a new one). -
Page 15: Working Modes
Mini JUMAR REG-03 WORKING MODES The controller may work in two working modes („STOP”, „AUTO ”). The change of MODE the working mode happens when the button is pressed for 3 seconds. on the regulator's panel. The „STOP” mode activates procedures connected with the burner's MODE putting out i.e. - Page 16 Mini JUMAR REG-03 While activating the driver for the first time, the „STOP” mode is activated. Every next time, its status is saved in the regulator's non-volatile memory. Activating the driver again, automatically causes switching on of the lately used working mode.
-
Page 17: Temperature Setting
Mini JUMAR REG-03 TEMPERATURE SETTING The controller has an ability to set heating temperature in the range of 35°C to 85°C (KTY sensor) or up to 300°C (PT1000 sensor). After reaching the set temperature, the controller switches into stand by mode or completely turns the burner off. -
Page 18: Menu Structure
Mini JUMAR REG-03 MENU STRUCTURE MENU Use the button to go into the settings menu (press by 2 seconds). The driver would switch into the settings mode and would show the first group of settings - „SET HEATING”. To change the group, use the buttons . -
Page 19: Settings' Tables
Mini JUMAR REG-03 SETTINGS' TABLES ➢ SET HEATING: PARAMETER PARAMETER UNIT SETTING DEFAULT NAME RANGE VALUE CH HYSTERESIS °C 30°C 2°C CH PUMP TEMPERATURE °C 20 - 80°C 35°C ➢ SET BURNER: PARAMETER PARAMETER UNIT SETTING DEFAULT NAME RANGE VALUE... - Page 20 Mini JUMAR REG-03 ➢ SYSTEM LOGS: PARAMETER PARAMETER UNIT SETTING DEFAULT NAME RANGE VALUE BOOTING IGNITIONS NO FUEL STB ALARM BURNER ALARM SENSOR ALARM AVERAGE CONSUMPTION TOTAL CONSUMPTION *Only in >V2.0 firmware CAUTION!! The manufacturer's settings are only the suggestions. All values depend on the kind of solid fuel, installation, the user's requirements, etc.
-
Page 21: Menu Description
Mini JUMAR REG-03 MENU DESCRIPTION Given below are detailed descriptions of specific setting groups the controller menu consists of. There are seven groups which are looped. If you are in the last group and would like to switch lower, then the first group will be selected again. Similarly, when you are in the first group and would like to switch to a higher one - you will switch to the last group. -
Page 22: Parameters
Mini JUMAR REG-03 PARAMETERS SET HEATING HEATING In this group of adjustments, the user has the ability to set the adjustments related to temperature. Given below are the parameters you can change. Parameter's description: Parameter Description name The value of the furnace's temperature has to decline to start the working mode of the boiler or ignite the pellets again. -
Page 23: Set Burner
Mini JUMAR REG-03 SET BURNER BURNER In this group of adjustments, the user has the ability to set the adjustments related to the burner. Given below are the parameters you can change. Parameter's description: Parameter Description name The power of the burner in the working function (the temperature of the heating water is lower than the pre- set). -
Page 24: Set Timer
Mini JUMAR REG-03 SET TIMER TIMER 24H TIMER WEEK TIMER MO-TU 02-03 MO-MO 06-23 In this group of adjustments, the user has the ability to set the time programs determining the burner's operation time. In "SET MENU”, the user can select the type of timer (24H, WEEKLY, °C+24H, °C+WEEKLY). - Page 25 Mini JUMAR REG-03 The following figure shows exemplary setting of time interval for 24-hour timer. After entering the sub menu, the first hour interval (0-1) will start pulsating. MENU Pressing the "MENU" button will cause switching to another hour interval (1-2).
- Page 26 Mini JUMAR REG-03 The following figure shows exemplary setting of time interval for weekly timer. Pressing the "MENU" button results in MO-TU 02-03 MO-TU switching to the first parameter program MO-MO 06-23 beginning day (the parameter is blinking). MENU MO-TU 02-03 Pressing the "MENU"...
-
Page 27: Set Clock
Mini JUMAR REG-03 SET CLOCK 09:37 NASTAWY CZASU CLOCK In this group of settings, the user has ability to set current day of the week and time. It is very important to set these parameters, e.g. in order to ensure correct function of time programs. -
Page 28: Set Service
Mini JUMAR REG-03 SET SERVICE NASTAWY * * * SERVICE CZASU Controller service settings are available in this group, selected once when fitting the controller to the device. These settings are not deleted when restoring default (factory) settings. SYSTEM LOGS... -
Page 29: Terms Of Warranty
3. JUMAR will repair or replace equipment in possibly short time, appropriate to the damage complication degree (maximum of 14 working days or 31 if this requires shipping of hardly available parts). - Page 30 6. In order to avoid unnecessary complications and inconveniences, prior to contacting the service, we suggest reading the INSTRUCTION MANUAL carefully or contacting JUMAR. JUMAR's responsibility is limited to the value equalling the price of faulty product. P.P.U.H JUMAR Jerzy Podhajski ul. Opawska 112 47-400 Racibórz...
-
Page 31: Notes
Mini JUMAR REG-03 NOTES - 31 -...
Need help?
Do you have a question about the REG-03 Mini and is the answer not in the manual?
Questions and answers