Table of Contents
Advertisement
Mounting instruction for
conversion kit Monster models 2WD/RTR to 4WD
Item N°. 68500
Mounting instruction for
conversion kit Marder 2WD/RTR to 4WD
Item N°. 68501
Mounting instruction for
conversion kit Baja Buggy 2WD/RTR to 4WD
Item N°. 68502
Please thoroughly keep this construction
manual for your spare parts orders!
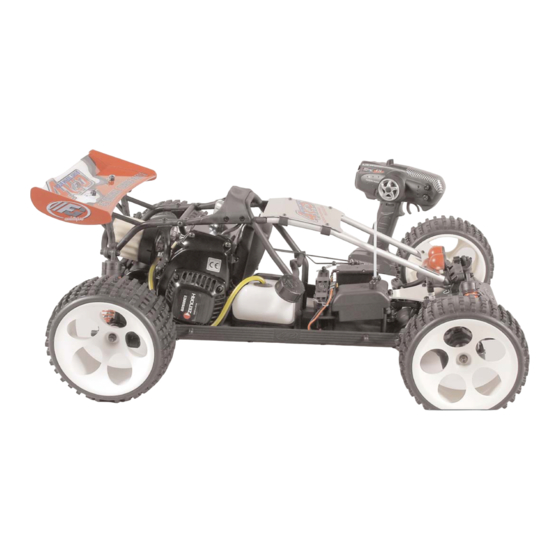
Monster models
FG Modellsport GmbH
Spanningerstr. 2
73650 Winterbach-Germany
Phone: +49 7181 9677-0
Fax: +49 7181 9677-20
info@fg-modellsport.de
www.fg-modellsport.de
A.68500-68502-D-200309
Advertisement
Table of Contents

Related Manuals for FG Modellsport 68500


Summary of Contents for FG Modellsport 68500
- Page 1 Mounting instruction for conversion kit Monster models 2WD/RTR to 4WD Item N°. 68500 Mounting instruction for FG Modellsport GmbH conversion kit Marder 2WD/RTR to 4WD Spanningerstr. 2 Item N°. 68501 73650 Winterbach-Germany Phone: +49 7181 9677-0 Mounting instruction for Fax: +49 7181 9677-20 info@fg-modellsport.de...
- Page 2 The handling with fuels requires circumspective and careful hand- Comments regarding the construction manual: ling. Imperatively observe the security advices. Before starting the assembly please see through this construction manual. This way you will get an overview of the whole execution. -Refuel only if the engine is switched off! -Take off the body.
- Page 3 All metric screws need to be secured with thread lock fluid. Reusable parts from your 2WD model have to be checked carefully on their condition, defective and worn parts should be replaced. Diff. bevel gearwheel B Differential Diff. driving axle Diff.
- Page 4 Front differential mounted 2. Mount front differential gear, deflection roller Position 3 Parts are in 16mm, toothed belt wheel 12 teeth in the left bag C front axle housing as described in position 3. Front axle housing left 3. Now put the toothed belt on the front dif- ferential gear, also deflection roller 16mm, toothed belt wheel with 12 teeth as descri- bed in position 3.
- Page 5 Front axle hou- sing left Position 5a Parts are in bag B+C Fix the belt channel from underneath to the alloy chassis with the 4,2x16 countersunk screws. Alloy chassis Front axle Upper part housing belt channel right Toothed belt Lower part belt channel Position 6 Parts are in...
- Page 6 1. Push the rear axle cover between the left Position 8 and right rear axle mounts and fix it with the Parts are in Stabilizer alloy connection brace, M4x20 pan-head bag D screw and disk Ø4,3. Screw 2. Disassemble the rear lower wishbone with 4.
- Page 7 Rear damper 1. Mount the 4WD damper plate rear to the left and right plate 4WD rear axle mounts using 4,2x22 pan-head screws. 2. Push the stabilizer (only Monster/Stadium models) into Position 10 the rear damper plate and fasten it with 4,2x9,5 pan-head Parts are in bag D screws and disks Ø4,3.
- Page 8 Position 12 Parts are in bag D 1. Disassemble the rear upper wishbone pin and the ball-and-socket joint with steel ball from your existing 2WD model. 2. Screw the rear wishbone thread rods M10/M8 84mm into Rear damper plate the rear upper wishbones and in the ball-and-socket joints to the size of approx.
- Page 9 Mounting of rear shock absorbers Marder/Baja Position 14e Position 14 1. Mount o-rings 13x2,5 on the top of shock absorber locking M5 and lower Marder/Baja Parts are in shock absorber locking A (position 14/14a). bag E 2. Push retaining washer Ø3,2 in the first slot of the long damper piston rod, then mount the damper piston with the recess facing towards the retaining washer and fix it with a second retaining washer Ø3,2 (position 14b).
- Page 10 Position 15 Parts are in Stop bag E nut M5 Screw M5x25 Rear damper plate Rear shock absor- ber mounted Screw M5x25 cylinder screws into the rear damper plate and counter with M5 nuts, then fix the top of the shock absorber with M5 stop nuts.
- Page 11 Fixing nut for Position 17 front upright Front upright Position 18 Parts are in 4WD right Front upright Parts are in bag F 4WD left bag F Ball bearing 17x26x7 Ball bearing 8x22x7 1. Impress mounting nuts for front uprights from the Fixing nut for front upright inside into the left and right uprights.
- Page 12 Baja Buggy Position 20+21 Stop nut M4 Position 20 Screw 1. Fix the front shock mount 4WD to Parts are in M4x16 Disk the reinforcing plate for the front axle bag G Ø4,3 by using M4x16 countersunk screws, Baja Buggy Screw Ø4,3 disks and M4 stop nuts.
- Page 13 Position 24 Front shock Plastic part for Parts are in mount 4WD reinforcing plate bag G Monster/Stadium Headless pin M5x45 Nut M5 Screw 4,2x16 Screw 4,2x32 Reinforcing plate for front axle Body mount short, 80mm, adjustable Body support Screw 4,2x13 Body clip Screw 4,2x16...
- Page 14 Position 30 1. Cover the outlet port of the engine Parts are in with an adhesive tape. bag H 2. Saw off the housing part with an metal hand saw, see Position 31a also illustration in position 31. Parts are in bag H Clutch spring Clutch blocks...
- Page 15 Make sure that driving gearwheels, driving shafts Position 32 a.s.o. can be turned easily without any resistance. Foam filter Parts are in Screw bag I Screw 4,2x16 4,2x13 Basic Airfilter body adapter Filter cover O-ring for airfilter adapter Insert the o-ring for the airfilter Screw adapter in the basic body and 4,2x13...
- Page 16 3. Dismount tank from your existing 2WD model. Fix the tank (tank cap facing the right Position 35 side) with tank mount on the tank base using Parts are in bag I 4,2x16 countersunk screws (longer side of tank base must face the right side). 4.
- Page 17 1. Dismount the rc-plate from your existing 2WD Hint: Fill the bottom part of the receiver box Flexible aerial Position 37 model, remove battery mount, servos and receiver with some foam to protect the receiver Parts are in bag J box.
- Page 18 Position 41 Steering servo Screw Parts are in M5x16 bag J Disk Front axle Ø5,3 stiffening Servo saver Plastic rc-plate 4WD Servo rods Track rod Alloy chassis Screw 4,2x16 Screw Screw Front upright 2,9x16 4,2x16 left 1. Mount the plastic rc-plate 4WD underneath the front axle stif- fening to the alloy chassis using 4,2x16 countersunk screws.
- Page 19 Position 44 Parts are in bag K Position 45 Parts are in bag K 1. Mount the throttle rods to the carburetor arm using collets and M3x3 headless pins as described in positi- on 45. Keep some clearance between the collets and Carburetor the carburetor arm.
- Page 20 Monster/Stadium models Position 47 1. Dismount roll bar and reinforcing brace from your existing 2WD Parts are in model. bag K 2. Mount the plastic parts for the reinforcing braces at the roll bar again using 4,2x32 pan-head screws as pictured. Push the reinforcing Spoilerhalter braces into the plastic parts for the braces at the front shock mount and fix them using 2,9x9,5 pan-head screws.
- Page 21 Position 49 Plastic Plastic part for Parts are in Plastic brace short reinforcing brace bag K brace long only for Baja Spoiler mount Screw Rear body 4,2x22 mount only for Baja Roll bar Screw 4,2x13 Screw M4x8 Marder/ Rocker panel left Baja Buggy Screw M4x8...
- Page 22 Position 52 Hummer Drill 9mm hole for aerial Cut out the left and right wheel cases of the rear bodyshell a little more with a scissors to prevent the bodyshell from rubbing against the wheels. Even the cut borders slightly with an emery cloth.
- Page 23 Position 55 Jeep Jeep Drill new 9mm hole for aerial Cut out the left and right wheel cases of the front and rear bodyshell a little more as pictured by using a scissors or a model knife to prevent the bodyshell from rubbing against the wheels.
- Page 24 Exploded view for 1:6 BAJA BUGGY 4WD 1:6 MARDER OFF-ROAD BUGGY 4WD 06087/01 06087 08523 Set/Kit 06093 66305 66304 06086 06089 06445 68140/02 06088 06421/05 68140/01 68150/01 06093 06732/03 06093 06088 06092 07087/01 68155 06714/19 06022/01 60215/05 06714/13 06714/09 06714/09 06540 60236 60237...
- Page 25 06712/13 06712/16 06451/03 06464/04 07384 66218/01 06464/05 06465/01 06465-Set 06451/04 FG Modellsport GmbH Spanningerstr. 2 06038 06712/16 73650 Winterbach-Germany Phone: +49 7181 9677-0 06723/16 Fax: +49 7181 9677-20 07332 info@fg-modellsport.de 66217 06728/03 www.fg-modellsport.de 08345 06020 06730/05 06726/40 06716/32 07331/06 06734/04...
- Page 28 1:6 MONSTER/STADIUM TRUCK/ HUMMER/ JEEP 4WD Exploded view for 1:6 Monster Truck, Monster Hummer, Monster Jeep 4WD 1:6 Stadium Truck, Stadium Hummer, Stadium Jeep 4WD 26100/01 36110 46120 26110/01 36130 46130 26150/01 36150 46150 26100/02 26110/02 36155 26155 26150/02 46155 06183/03 06734/04 06230/07...
- Page 29 08523 Set 06087/01 06712/13 06712/16 07384 06093 66218/01 06464/04 66305 66304 06465/01 06451/03 06464/05 06451/04 06465-Set 06086 06712/13 06738/05 06089 06726/40 06445 06716/13 06134/01 06723/16 06734/04 66217 08345 06088 07331/07 06730/05 06093 07331/08 66211 07331/03 06716/32 06732/03 06734/04 06092 06728/03 06036/05 06093 06020...
Need help?
Do you have a question about the 68500 and is the answer not in the manual?
Questions and answers