
Related Manuals for Dickey-John INTELLIAG ISO6

Summary of Contents for Dickey-John INTELLIAG ISO6
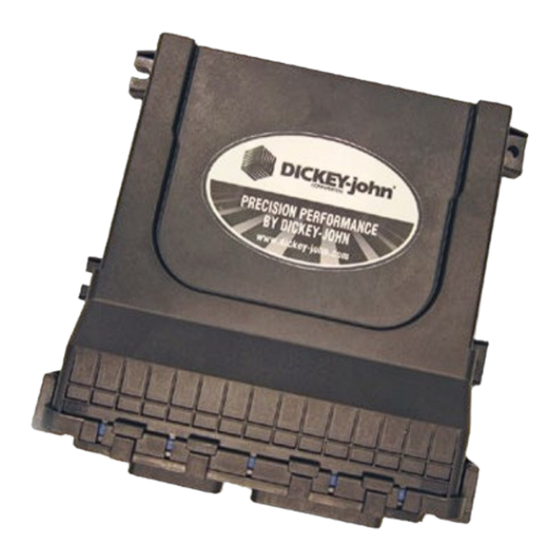
- Page 1 ® S I N C E 1 9 6 6 INTELLIAG ™ ® PLANTER DRILL CONTROL VERSION 4 QUICK START GUIDE Add ISO6 WSMT Module here (from spec sheet 2nd page)
-
Page 2: Table Of Contents
OPERATOR’S MANUAL Safety Notices ..................... 3 Disclaimer ..........................3 Basic Setup ......................4 User Level 2 (Dealer) ........................ 4 Basic Setup Steps ........................5 Modules ....................... 7 Harness Select ....................8 Identify Harness Style ........................ 8 Selecting a Harness: ......................8 Row Setup ...................... - Page 3 OPERATOR’S MANUAL Clutch Sections ....................30 Identify Sections and Outputs....................30 Multiple Output Module Assignment ................. 30 To Enter # of Outputs per Module: ..................30 Assign Channels/Rows/ Outputs/Switches ............ 31 To Assign Clutch Sections: ...................... 31 Geometry ......................32 To Enter X/Y Coordinates: .......................
-
Page 4: Safety Notices
DISCLAIMER DICKEY-john reserves the right to make engineering refinements or procedural changes that may not be reflected in this manual. Material included in this manual is for informational purposes and is subject to change without notice. -
Page 5: Basic Setup
OPERATOR’S MANUAL BASIC SETUP The ISO Quick Start Guide provides the basic steps for user level 2 and 3 administrators to setup a system. The IntelliAg system is accessed by pressing the ISO button in the UT object pool selection box (location will vary with UT mfg). Figure 1 Accessing IntelliAg IS06 Screens USER LEVEL 2 (DEALER) -
Page 6: Basic Setup Steps
OPERATOR’S MANUAL To Unlock to Dealer Access: 1. At the Version screen, Record the serial number of the ISO module. Press the PASSWORD button. 2. On the Password screen, enter the 6-digit password as follows: Enter the first digit as 2. For the next five digits, enter the last five digits of the serial number taken from the ISO module found on the... - Page 7 OPERATOR’S MANUAL 9. Sensors (assign sensor type) 10. Accessory sensors 11. Work Screen layout setup NOTE Recommended Setup order is using the System Setup buttons from left to right. Figure 3 Home Menu Screen 6 / BASIC SETUP Version 4 Quick Start Guide 6011662 Rev B...
-
Page 8: Modules
OPERATOR’S MANUAL MODULES The Modules screen displays what modules are currently detected on the CAN bus. When a new module is added to the system, the module appears as the last module and must be placed in its correct position as installed on the implement. To Add a New Module: 1. -
Page 9: Harness Select
OPERATOR’S MANUAL HARNESS SELECT IDENTIFY HARNESS STYLE IMPORTANT A harness style must be selected prior to channel setup. The system default is set to “Monitor Only” with no control channels enabled. IMPORTANT Harness selection changes the system configuration and should only be done when changing physical harnesses. It is recommended to perform a complete system setup after changing the harness type. -
Page 10: Row Setup
OPERATOR’S MANUAL ROW SETUP Row Setup will allow the user to define the number of rows on the implement and also set the row spacing. Total implement width is calculated from these parameters. TO ACCESS ROW SETUP: 1. Press the ROWS button to access the Row Setup screen. 2. -
Page 11: Controls
OPERATOR’S MANUAL CONTROLS NOTE It is recommended that materials are created before configuring control channels. Up to eight control channels are available to control material application based on the purchased feature set and installed harness type. ASSIGN A CONTROL CHANNEL The Controls screen on initial setup is blank. -
Page 12: Enter Channel Parameters
OPERATOR’S MANUAL Figure 7 Select a Control Channel Type ENTER CHANNEL PARAMETERS Enter in the desired channel parameters for each control type. For more information on channel parameters please see the Operators Manual. Version 4 Quick Start Guide CONTROLS / 11 6011662 Rev B... -
Page 13: Valve Calibration
OPERATOR’S MANUAL Figure 8 Enter Channel Parameters VALVE CALIBRATION Performing a valve calibration is required for most channel types to set system parameters and should be performed for best results. A VALVE CAL button appears on the control channel screen if this step is appropriate for the assigned channel type. -
Page 14: Perform A Valve Calibration (Figure 9)
OPERATOR’S MANUAL CAUTION CAUTION Hoppers are assumed to be empty for this calibration. If loaded, material may dispense onto the ground. PERFORM A VALVE CALIBRATION (FIGURE 9) 1. At the Controls screen, press the VALVE CAL button to access the Valve Calibration screen. 2. -
Page 15: Limit Output (Granular)
OPERATOR’S MANUAL Figure 9 Valve Calibration LIMIT OUTPUT (GRANULAR) In certain instances, it is necessary to limit the output of the control channel before running a valve calibration. System capacities are greater than the actual desired capacities. These features allow setting the maximum output of the channel to prevent machine damage. -
Page 16: Granular Spreader Calibration
OPERATOR’S MANUAL 8. Press the START button and the valve calibration immediately begins. The calibration runs using the new max flow value. Figure 10 Limit Output (Granular) GRANULAR SPREADER CALIBRATION NOTE Refer to the System Tests section for using a remote test switch during a spreader calibration. - Page 17 OPERATOR’S MANUAL 8. Press the SHAFT TURN button to fill seed/fertilizer metering system before starting calibration. 9. At the Calibration screen, enter the following values: Density - Enter product weight per volume in lbs/ft Target Meter RPM - Enter the RPM at which the output meter shaft will turn during the calibration.
-
Page 18: Spreader Constants Defined
OPERATOR’S MANUAL Figure 11 Spreader Calibration-Granular SPREADER CONSTANTS DEFINED DENSITY Relative granular density as represented by the weight of product per volume (lbs/ft , lbs/bu.) If not known, enter a value of 1 lb/ft SPREADER CONSTANT Determines how many pulses the application rate sensor produces per volume of material discharged. -
Page 19: Target Meter Rpm
OPERATOR’S MANUAL TARGET METER RPM The speed at which the output meter shaft turns while the calibration is performed. NOTE If performing a Spreader Calibration on a box type drill, catch the output of a few seed meters, average the weight measured from these meters, and multiply this average weight by the total number of meters on the drill. -
Page 20: Limit Output
OPERATOR’S MANUAL Figure 12 Liquid Flow Valve Calibration LIMIT OUTPUT In certain instances, it is necessary to limit the output of the control channel before running a valve calibration. System capacities are greater than the actual desired capacities. These features allow setting the maximum output of the channel to prevent machine damage. -
Page 21: K-Factor Calibration
OPERATOR’S MANUAL 7. To change the valve position, press the Increment or Decrement buttons repeatedly until the desired minimum or maximum output value is reached. 8. Press the START button and the valve calibration immediately begins. The calibration runs using the new max flow value. -
Page 22: Perform A Liquid Flow Catch Test
OPERATOR’S MANUAL 1. Fill the tank and weigh the load. 2. Activate the calibration routine. 3. After spraying a few hundred gallons, but before the load is empty, stop the calibration. 4. Weigh the load again. 5. Calculate gallons dropped. PERFORM A LIQUID FLOW CATCH TEST CAUTION CAUTION... -
Page 23: Operations
OPERATOR’S MANUAL OPERATIONS The Operations screen groups together a series of similar channels or similar channels in parallel formation along the width of the implement and communicates the overall channel width to the Task Controller. A total of 6 operations are possible. The system does automatically assign similar channels to an operation but these assignments can be changed to user- specific requirements. -
Page 24: Configurations
OPERATOR’S MANUAL Figure 15 Enter an Operation CONFIGURATIONS Configurations are the assignment of materials to channels. The system can store up to 4 different configurations. Changing configurations may require a system restart. Configurations also contain the row pattern for the operations/channels. TO ACTIVATE/CHANGE A CONFIGURATION: 1. -
Page 25: To Edit A Configuration
OPERATOR’S MANUAL Figure 16 Configuration Screen TO EDIT A CONFIGURATION: 1. Press the MATERIALS button. 2. Press and highlight the Configuration to edit. 3. Press the EDIT softkey. 24 / OPERATIONS Version 4 Quick Start Guide 6011662 Rev B... -
Page 26: To Change The Operation Product Class
OPERATOR’S MANUAL Figure 17 Configuration Edit Screen The configuration is organized first by operation then by individual channels if it is not on an operation. Use the Up and Down arrows to select an operation/channel. You can re-name the configuration by editing the configuration name text box. TO CHANGE THE OPERATION PRODUCT CLASS: Select the desired product class from the product class list. -
Page 27: Materials
OPERATOR’S MANUAL MATERIALS A Materials table stores up to 16 materials that provide an overview of all materials assigned and configured for a control channel. The Materials page also stores Configurations which set up the assignments of materials to channels. For more information about Configurations see the Configurations section. -
Page 28: Setup Parameters For Planter Control
OPERATOR’S MANUAL SETUP PARAMETERS FOR PLANTER CONTROL Figure 19 Planter Control / 27 Version 4 Quick Start Guide MATERIALS 6011662 Rev B... -
Page 29: Setup Parameters For Liquid Control
OPERATOR’S MANUAL SETUP PARAMETERS FOR LIQUID CONTROL Figure 20 Liquid Control 28 / MATERIALS Version 4 Quick Start Guide 6011662 Rev B... -
Page 30: Setup Parameters For Granular Control
OPERATOR’S MANUAL SETUP PARAMETERS FOR GRANULAR CONTROL Figure 21 Granular Control / 29 Version 4 Quick Start Guide MATERIALS 6011662 Rev B... -
Page 31: Clutch Sections
OPERATOR’S MANUAL CLUTCH SECTIONS IDENTIFY SECTIONS AND OUTPUTS MULTIPLE OUTPUT MODULE ASSIGNMENT Output module addresses are a critical parameter used to identify a module’s position on the implement that controls row shutoff switches. There is a 24 clutch maximum. IMPORTANT If a planter uses more than one output module, modules MUST be installed in increasing serial number order starting on the left side and proceeding to the right so that row... -
Page 32: Assign Channels/Rows/ Outputs/Switches
OPERATOR’S MANUAL ASSIGN CHANNELS/ROWS/ OUTPUTS/SWITCHES Rows, channels, outputs, and switches require assignment to sections. As rows are assigned to each section, row numbers automatically populate. TO ASSIGN CLUTCH SECTIONS: 1. At the Clutch Sections screen, press the Arrow button. 2. Enter the total number of switches. 3. -
Page 33: Geometry
OPERATOR’S MANUAL GEOMETRY Physical layout of the implement is required to determine the position of a channel in the field. Configuring an implement identifies the implement type, area the implement covers, and any implement offset. Exact distances are required for physical layout of the implement. -
Page 34: And Y Coordinate Example
OPERATOR’S MANUAL 4. At the Geometry Setup screen, enter the X and Y coordinates for the implement type selected. Measurements for each implement type defined below. X AND Y COORDINATE EXAMPLE A) Enter the distance from the hitch to the pivot point axle center of the implement. - Page 35 OPERATOR’S MANUAL Figure 26 Enter Control Channel Positions “X” Coordinate 34 / GEOMETRY Version 4 Quick Start Guide 6011662 Rev B...
-
Page 36: Row Sensors
OPERATOR’S MANUAL ROW SENSORS A setup wizard provides steps to assign sensors to modules and operations. TO ASSIGN SENSORS: 1. Press the SENSORS button. 2. Set Sensors to Enabled. 3. Press the SETUP button. 4. Take note of the Module type to ensure the right amount of sensors are entered for that module. - Page 37 OPERATOR’S MANUAL Figure 27 Assigning Sensors to ISO Module 11. Repeat steps 4-10 until all sensors on all modules are assigned. 12. After all sensors are entered, press the Arrow button. A sensor’s position is indicated in the channel/row it is assigned to with an “X” indicating the sensor is off (Figure 26).
- Page 38 OPERATOR’S MANUAL Figure 28 Assigning Sensors to WSMB 11. Press the AUTO CONFIG button to assign sensors to the operations. 12. Press the checkmark button to begin auto configuration. Channel/sensor assignment does not become active until an auto configuration occurs. 13.
- Page 39 OPERATOR’S MANUAL Figure 29 Performing an Auto Configuration 38 / SENSORS Version 4 Quick Start Guide 6011662 Rev B...
-
Page 40: Accessories
OPERATOR’S MANUAL ACCESSORIES ACCESSORY SUMMARY The Accessory Sensor screen displays the optional sensors installed i.e. an RPM sensor to monitor shaft/fan speeds or an air pressure sensor. Supported Accessory sensors include: Hopper Pressure Digital The landing page shows currently configured sensors. Pressing the ACC SETUP button enters setup to configure sensors for each available ACC module on the system. - Page 41 OPERATOR’S MANUAL Performing a Sensor Detect checks the system configuration to verify that sensors configured match the actual number of sensors connected to a module. Sensor Detect is performed on all modules. Sensor Detect only detects Pressure and Hopper accessory sensors. ...
-
Page 42: Accessory Alarm Setup
OPERATOR’S MANUAL After a sensor has been added to the selected module, press the created sensor row to find the REMOVE, COPY and EDIT softkeys. Pressing REMOVE deletes the sensor from the module. Pressing COPY will create a new sensor with the same properties as the highlighted sensor on the selected module as long as the maximum number of that sensor type has not been reached for the selected module. -
Page 43: High/Low Alarm Behavior
OPERATOR’S MANUAL HIGH/LOW ALARM BEHAVIOR Select how often high/low alarms should display: No Alarms: Accessory alarms cannot display. Repeatedly: Accessory alarms can display continuously. Pressing CANCEL when the alarm comes up will temporarily disable the alarm until the alarm state is re-entered. ... -
Page 44: Hopper Sensor Setup
OPERATOR’S MANUAL FREQUENCY AT MIN/MAX PRESSURE Enter a frequency value for the minimum/maximum pressure range of the sensor. MIN/MAX PRESSURE Enter a pressure value for the minimum/maximum pressure range of the sensor. Refer to Accessory Alarm Setup for details on alarm setup for Pressure Sensors. -
Page 45: Rpm Sensor Setup
Use this setting if the connected sensor outputs a low condition when active. NOTE For a DICKEY-john Hopper Level Sensor, this value should be set to ACTIVE LO. Logic Level Table SENSOR... -
Page 46: Digital Sensor Setup
OPERATOR’S MANUAL Figure 33 RPM Setup Screen DIGITAL SENSOR SETUP SENSOR NAME Pressing the Sensor Name field at the top right can change the desired name for the sensor. LOGIC LEVEL Sets the active state of the sensor and allows flexibility to connect sensors that have different active outputs. - Page 47 OPERATOR’S MANUAL Active Low No Alarm Refer to Accessory Alarm Setup for details on alarm setup for Digital Sensors. Figure 34 Digital Sensor Setup 46 / ACCESSORIES Version 4 Quick Start Guide 6011662 Rev B...
-
Page 48: Task Controller
OPERATOR’S MANUAL TASK CONTROLLER The Task Controller screen provides the active state of the task controller and the current operations communicating with the task controller. Anytime changes to the system setup occurs the Task Controller momentarily disconnects. Some instances require performing a power cycle. TASK CONTROLLER COMPATIBILITY To further refine an operation, such as when the task controller is not communicating properly with the implement, adjustments can... -
Page 49: To Refine An Operation
OPERATOR’S MANUAL NOTE When restarting the system the ISO control module will shut down and drop off of the terminal ISOBUS screen. The ISO will automatically restart and load back up. TO REFINE AN OPERATION: 1. Press to highlight the Operation to change. 2. -
Page 50: Ground Speed
OPERATOR’S MANUAL GROUND SPEED The default ground speed source is set to CAN Ground. Other sources include: CAN Wheel Digital Frequency Reluctance Frequency Manual CAN GPS Performing a ground speed calibration is required for digital and reluctance frequency settings. -
Page 51: User Levels
OPERATOR’S MANUAL USER LEVELS LOCK TO USER LEVEL 1 (OPERATOR) When setup parameters are complete, locking down to Operator User Level 1 prevents parameters from being changed. All Setup screens are viewable in Level 1 mode with non-selectable constants in a gray tone. TO SET USER LEVEL 1 MODE: 1. -
Page 52: Frame Fold/Working Hydraulics
OPERATOR’S MANUAL FRAME FOLD/WORKING HYDRAULICS Frame Fold/Working Hydraulics can be enabled in the ISO Master Module by unlocking the specific feature key in the ISO master module. It will also require an FCOM (Frame Control Output Module) and harnessing to properly function. Frame Fold/Working Hydraulics, or a FPOM (Frame Power Output Module), are designed to provide output/input connection to sensors and solenoid valves to open/close hydraulic circuit... - Page 53 OPERATOR’S MANUAL If applicable, select an input source if a feedback sensor is provided. Inputs are used to confirm a fold action is complete, or to confirm position before a fold step will operate (pre/post). If no input is used please leave input source dropdown blank (See Figure 41).
- Page 54 OPERATOR’S MANUAL Figure 40 Fold Sequence Function Setup Example 6. Once all FOLD FUNCTIONS are setup navigate back 1 page to the FOLD SEQUENCE Menu and you should see the button chosen populated on the screen (See Figure 34). Figure 41 Fold Sequence Main Page with one Fold Function and One Working Hydraulic Set Up 7.
-
Page 55: Setting Up Working Hydraulics Functions
OPERATOR’S MANUAL Figure 42 Activating a Fold Function NOTE If a post feedback sensor is being used a COMPLETE message will be displayed and the button will change colors once the feedback sensor is closed. A feedback sensor timeout limit can be set by pressing the TIMEOUT SETUP softkey. SETTING UP WORKING HYDRAULICS FUNCTIONS: 1. -
Page 56: Adding Work Functions To The Work Screen
OPERATOR’S MANUAL NOTE If a post feedback sensor is being used a COMPLETE message will be displayed and the button will change colors once the feedback sensor is closed. A feedback sensor timeout limit can be set by pressing the TIMEOUT SETUP softkey. ADDING WORK FUNCTIONS TO THE WORK SCREEN: To setup WORK function on the work screen you must add the... -
Page 57: Virtual Section Switches
OPERATOR’S MANUAL VIRTUAL SECTION SWITCHES Virtual section switches can be unlocked in the ISO module via the appropriate feature key, Virtual section switches eliminate the need for RSM or BSM module hardware by placing virtual switch buttons on the work screen of the UT. NOTE Other hardware must be present to utilize the Virtual Section Switches such as an output module and proper wiring. - Page 58 OPERATOR’S MANUAL 9. Next select the desire section type. Press DONE once complete. 10. Navigate to the WORK SCREEN. You should see the tile populated with the section switch instrument. You can have up to 3 switches per instrument, and up to 8 instruments for a total of 24 virtual switches.
- Page 59 DICKEY-john WARRANTY DICKEY-john warrants to the original purchaser for use that, if any part of the product proves to be defective in material or workmanship within one year from date of original installation, and is returned to DICKEY-john within 30 days after such defect is discovered, DICKEY-john will (at our option) either replace or repair said part.
- Page 60 800-637-2952 here (from spec sheet 2nd page) agsales@dickey-john.com DICKEY-john Technical Support 800-637-3302 service@dickey-john.com is a trademark, and DICKEY-john, the DICKEY-john Logo, and IntelliAg are 5200 Dickey John Road 1-217-438-3371 ® registered trademarks of DICKEY-john. Auburn, IL 62615 1-217-438-6012 fax S I N C E 1 9 6 6 www.dickey-john.com...
Need help?
Do you have a question about the INTELLIAG ISO6 and is the answer not in the manual?
Questions and answers