
Related Manuals for enphase IQ7-B1200-LN-I-INT01-RV0


Summary of Contents for enphase IQ7-B1200-LN-I-INT01-RV0
- Page 1 INSTALLATION MANUAL Enphase AC Battery (IQ7-B1200-LN-I-INT01-RV0) 2019-03 141-00037, Rev 01...
- Page 2 Product information is subject to change without notice. All trademarks are recognised as the property of their respective owners. enphase.com/en-uk/warranties For warranty text, refer to User documentation is updated frequently; Check the Enphase website enphase.com/en-uk/support/solar- professionals for the latest information.
-
Page 3: Table Of Contents
Table of Contents SAFETY ..............................4 In Case of Fire or Other Emergency ...................... 4 Safety Instructions ..........................4 The Enphase AC Battery ........................7 Planning ..............................8 Preparation ............................8 Installing the AC Battery ........................10 1. Choose a Location for the AC Battery .................... 10 2. -
Page 4: Safety
(enphase.com/en-uk/warranties). Follow all of the instructions in this manual. These instructions are key to the installation and maintenance of the Enphase AC Battery™. These instructions are not meant to be a complete explanation of how to design and install an energy storage system. All installations must comply with national and local electrical codes and standards. - Page 5 Do not work alone. Someone should be within hearing distance or close enough to come to your aid when you work with or near electrical equipment. Do not use the CAN port on the AC Battery. It is intended to be used by Enphase technicians only. WARNINGS: Install the AC Battery only on a structurally suitable wall using an Enphase wall-mount bracket.
- Page 6 When replacing an Enphase AC Battery, you must replace it with an AC Battery of the same type, with the same AC current rating. When stored, the AC Battery is not connected to the grid and no automatic charge of the battery is possible.
-
Page 7: The Enphase Ac Battery
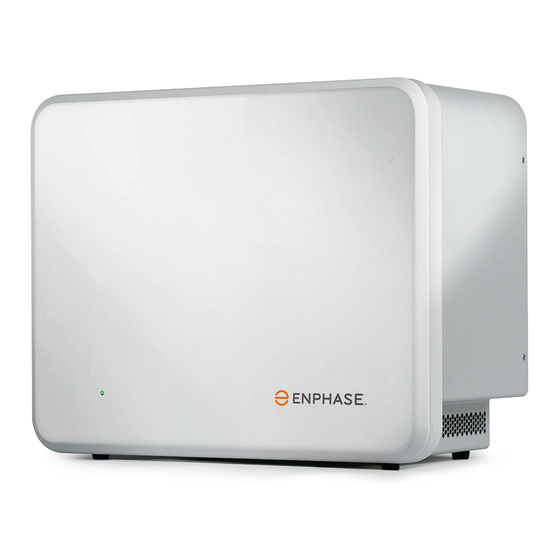
The Enphase AC Battery The Enphase AC Battery™ is the heart of the Enphase Storage System. The AC Battery is simple to install, safe, very reliable, and provides a low lifetime energy cost for customers with both, new solar installations and retrofitted installations. -
Page 8: Planning
Planning The Enphase AC Battery is controlled by the Enphase Envoy-S Metered gateway. The AC Battery cannot function without receiving commands from the Envoy-S. It is, therefore, critical that the Envoy-S and AC Battery(ies) are located as close as possible to each other. The Envoy should be located within 20m (electrically) from the AC Battery(ies). - Page 9 To record the location(s) of the AC Battery(ies), peel the removable serial number label from each battery and affix it to the respective location on a paper installation map. You will scan this map later using the Enphase Installer Toolkit™ and your mobile device. © 2019 Enphase Energy Inc.
-
Page 10: Installing The Ac Battery
This determines which knockouts to use in the junction box. Check if an AC isolator is needed. Plan the location for the AC isolation switch, if needed. If you are installing more than one AC Battery, continue to maintain minimum required clearances as shown in Step 2. © 2019 Enphase Energy Inc. -
Page 11: Install The Wall-Mount Bracket
You may install another row of wall-mount brackets above the one already installed. Maintain at least 300 mm (one foot) clearance between rows. Brackets are available in two widths to accommodate 450mm and 600mm stud-spacing. Bracket types and dimensions are shown. © 2019 Enphase Energy Inc. -
Page 12: Install The Ac Isolator (If Required)
WARNING! Risk of equipment failure. Size the conductor gauge to account for voltage rise for both the branch circuit and all upstream conductors leading back to the PCC (point of common coupling). Refer to the technical brief on voltage rise at enphase.com/support. © 2019 Enphase Energy Inc. -
Page 13: Wire The Junction Box
DANGER! Risk of electric shock. Check that the dedicated circuit breaker protecting the branch where the AC Battery is to be connected is turned off before wiring. WARNING! Risk of equipment damage. Never connect an Enphase AC Battery junction box to two active conductors. Always connect to one Line (active) and one Neutral. -
Page 14: Mount The Ac Battery On The Wall
WARNING: Risk of injury and equipment damage. Avoid dropping the AC Battery. Doing so may create a hazard, cause serious injury, and/or damage the equipment. WARNING: Before mounting the Enphase AC Battery, ensure that the junction box cover is secured! WARNING: Take care when lifting the AC Battery. -
Page 15: Energise And Commission The System
The AC Battery LED should flash yellow for the duration of the start-up process. If the LED does not flash yellow, see the corresponding section under Troubleshooting. d. Use the Enphase Installer Toolkit to commission the AC Battery(ies). Once connected to the Envoy, refer to the Installer Toolkit help topics for more information. -
Page 16: Operation
(up to 30 minutes). After the AC Battery boots up, the LED glows blue or green depending on the charge level. If the LED flashes yellow after one hour or changes to flashing red, contact Enphase Customer Support enphase.com/en-us/support/global-contact... -
Page 17: Troubleshooting
The following sections describe possible problems and solutions. During installation, use the Enphase Installer Toolkit mobile app to verify AC Battery operation. The Installer Toolkit, when used with Envoy-S provides information about the AC Battery status, PV production, and home energy consumption. -
Page 18: Ensure That Meters Are Properly Configured
Enable force charge, and set the time, to charge the batteries irrespective of other priorities. Battery LED is Off or Flashing Red If the AC Battery is not working correctly, perform the following steps. If the issue persists, contact Enphase Customer Support at enphase.com/en-us/support/global-contact. -
Page 19: Battery Led Is Solid Yellow
Check that the front, top, and sides of the AC Battery array have at least 300 mm of unobstructed • clearance. NOTE: If the AC Battery registers a high temperature event, it responds by reducing operation to correct internal temperature. © 2019 Enphase Energy Inc. -
Page 20: Removing Or Replacing An Ac Battery
DANGER! Risk of electrocution! Do not disconnect the consumption CT leads from the terminal block while the sensed circuit is energised. DANGER! Risk of electric shock. Risk of fire. Do not attempt to repair the Enphase AC Battery; it contains no user-serviceable parts. Tampering with or opening the Enphase AC Battery will void the warranty. -
Page 21: Re-Installing The Ac Battery
10. If additional AC batteries are installed, re-energise the system at the main switchboard. 11. If an Enphase Customer Support has authorised an AC Battery replacement (RMA), follow the instructions provided by Enphase Customer Support for arranging the collection and transportation of the AC Battery. -
Page 22: Replacing The Ac Battery
Replacing the AC Battery NOTE: When replacing an Enphase AC Battery, you must replace it with an AC Battery of the same type, with the same AC current rating. Follow the steps in “5. Mount the AC Battery on the Wall” starting on page 14. After installing the new AC Battery, do the following: 1. - Page 23 The Device Communications LED flashes green during the scan. Device Communications LED Device Scan button 4. Log in to Enlighten to use Enlighten’s Array Builder to add the newly detected device to the virtual array. © 2019 Enphase Energy Inc.
-
Page 24: Technical Data
Natural convection: No active or passive cooling infrastructure required Grid configuration TN-C-S Features and Compliance Compatibility Compatible with grid-tied PV systems using the Enphase Envoy-S™ Metered gateway. Communication Power Line Communication (PLC), TCP/IP through Envoy-S Services Maximising self-consumption of solar, time-of-use bill management, power export...
Need help?
Do you have a question about the IQ7-B1200-LN-I-INT01-RV0 and is the answer not in the manual?
Questions and answers