
Related Manuals for NUTRIBULLET Nutricook AF9204S


Summary of Contents for NUTRIBULLET Nutricook AF9204S
- Page 1 AIR FRYER OVEN User guide. Please make sure to read this User Guide prior to using your unit.
- Page 4 Find delicious recipes online at: nutricookworld.com nutricookworld...
- Page 5 Contents. Welcome. Before you begin. Important safeguards & cautionary information. What's included. Air fryer oven parts overview. Getting started. Control panel details. Control panel setting. How to use. Cooking chart. Care & maintenance. Troubleshooting. Warranty. Thank you for purchasing the NutriCook.
- Page 6 Find delicious recipes online at: nutricookworld.com nutricookworld...
- Page 7 Welcome to team NutriCook ™ Life is complicated. Eating healthy doesn’t have to be. There’s really no easier way to streamline your healthy lifestyle than with this mighty appliance. We are constantly working to create recipes that are EASY. DELICIOUS. NUTRITIOUS. You can find these recipes online at nutricookworld.com We can’t wait to see how you make...
- Page 8 Find delicious recipes online at: nutricookworld.com nutricookworld...
- Page 9 Before you begin. • Remove all packaging materials from in and around the air fryer oven and verify that all parts are accounted for. • Place the air fryer oven on a stable, level surface, away from external heat sources. •...
- Page 10 Building a smoothie. Find delicious recipes online at: nutricookworld.com nutricookworld...
- Page 11 Important safeguards & cautionary information. Warning! This appliance generates heat and escaping steam during use. To avoid the risk of serious injury, carefully read all instructions before operating this appliance. When using any electrical appliance, basic safety precautions should always be observed, including the following critical information. GENERAL SAFETY •...
- Page 12 • Do not use appliance other than its intended use. For household use only. • Do not place on or near a hot gas, electric burner and or in a heated oven. • Never put the appliance against the wall or other appliances. There should be at least 3 inches of free space for the back side, left/right sides and the upper side of the appliance.
- Page 13 • Do not move the unit while in operation. Only after the unit has completely cooled down should you attempt to move it. Always wait for the unit to cool down prior to handling it. • Never use a towel to block the vent. Do not cover the air inlet and outlet opening while the appliance is operating.
- Page 14 ELECTRICAL SAFETY CAUTION: To avoid risk of electric shock, never immerse the cord, plug, or power base of this unit in water or other liquids. • DO NOT use this product in locations with different electrical specifications or plug types. Do not operate with any type of plug adapter or voltage converter device, as these may cause electrical shorting, fire, electric shock, personal injury or product damage.
- Page 15 ELECTRICAL INFORMATION: For safety reasons, the cord length of this appliance was selected to reduce Safety Hazards that may occur with a long cord. Extension cords are available and may be used if care is exercised in their use. If an extension cord is used: (1) the marked electrical rating of the extension cord should be at least as great as the electrical rating of the appliance, and (2) the longer cord should be arranged so that it does not drape over the counter or table top where it could be accidentally...
- Page 16 What's included. • 1800 WATT AIR FRYER OVEN • ROTATING BASKET • ROTISSERIE SHAFT • 2 ROTISSERIE FORKS • 10 SKEWERS • 2 SKEWER RACKS • 3 WIRE RACKS • DRIP TRAY • FETCH TOOL • PROTECTIVE COVER Product Specification: MODEL CAPACITY POWER...
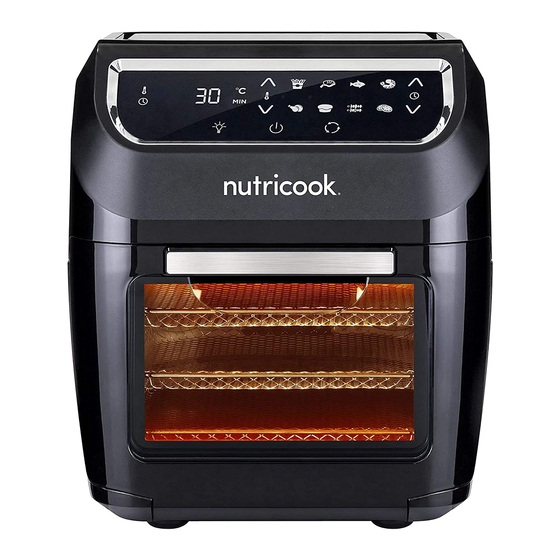
- Page 18 Air fryer oven parts overview. air outlet (located at the back of air fryer oven) air inlet control panel rotating connector upper/ middle/ lower rack removable glass *NOTE: Images are for visual representations only. Always refer to actual product.
- Page 19 rotating basket 3 pcs wire racks 1 set skewer racks (L/R) drip tray 10 pcs skewers fetch tool 1 set rotisserie forks rotisserie shaft *NOTE: Images are for visual representations only. Always refer to actual product. 19 19...
- Page 20 Find delicious recipes online at: nutricookworld.com nutricookworld...
- Page 21 Getting started.
- Page 22 Control panel details. temperature digital adjustable cooking adjustable control button display temperature control preset s time control cooking timer control internal light power/start rotation indicator lights button button button button Power/Start button ( Once unit is plugged in, the POWER ( ) button will light up.
- Page 23 Timer control button ( Selecting the timer control button, increase or decrease the cooking time using ( ) or ( ). This enables you to increase or decrease the cooking time in 1 minute interval except for Dehydrate ( ). Keeping the ( ) or ( ) buttons held down will rapidly change the time.
- Page 24 Rotation button ( Press this button when using the Rotisserie ( ) function. The icon will blink while in use. Internal light ( Selecting this button will help you check and view cooking progress. Note: Opening the door during the cooking process will pause cooking. Internal light ( ) button will blink in the control panel when the door is opened.
- Page 25 Control panel setting. Menu food. Temp. Air fry Time. Fries 200°C 15 min Meat 185°C 25 min Fish 200°C 15 min Shrimp 160°C 12 min Chicken 185°C 40 min Bake 175°C 30 min Rotisserie 200°C 30 min Dehydrate 30°C Note: Times and temperatures listed are pre-programmed. You can manually adjust the cooking time and temperature using ( ) or ( according to your recipe.
- Page 26 Find delicious recipes online at: nutricookworld.com nutricookworld...
- Page 27 How to use. Accessories. Wire racks. Note: Use wire racks to make dried vegetables or jerky, cook fried snacks, or reheat small food items such as pizza. Slide up to 3 wire racks into the air fryer oven. Drip tray. Note: Use to catch oil and food debris.
- Page 28 How to use. Rotisserie shaft and forks. Note: Use with rotisserie shaft to cook roasts or whole chicken. Slide the rotisserie shaft through the meat. Secure the meat with two rotisserie forks, one on each side. Rotating basket. Note: Use to cook fries or small snacks. Open and place ingredients into the basket.
- Page 29 Protective cover. Note: : Use protective cover to protect food and avoid touching the heating coil. Insert and slide protective cover into top of the unit. Glass door. • Note: : The glass door is an essential part of product safety. Check for any damage before inserting in the main door of the Air Fryer Oven.
- Page 30 How to use. Preparing. Read all important safeguards and cautionary information in this user guide including warning stickers/labels on the product. 2. Remove all packing materials, labels and stickers. Check that there is no packaging underneath and around the unit. 3.
- Page 31 How to use. Cooking. Place ingredients in the desired accessory according to your recipe. CAUTION: Do not overload the accessories with food to ensure proper cooking and air circulation. CAUTION: Use oven mitts/pot holders to insert the accessory into the air fryer oven. Close the door securely.
- Page 32 How to use. Cooking. 4. When the desired cooking temperature and time has been set and appear on the digital display, press POWER ( ) button to begin cooking. The cooking indicator lights will run in sequence while Air Fryer Oven is in operation. The preset time will begin to countdown.
- Page 33 TIME 6. When remaining reaches 00:00, the Air Fryer automatically turns OFF. Oven The cooking indicator light will continue to run in sequence within 20 seconds and unit will sound 10 audible beeps. Note: If needed, open the door to pause cooking, or press and hold the power button to turn appliance OFF.
- Page 34 Cooking chart. Note: • Cooking times and temperatures are estimated and based on average sizes and weight. ALWAYS use a meat thermometer to ensure that the meat, poultry and fish are cooked thoroughly before serving. • Frying smaller batches will result in shorter cooking times and higher food quality.
- Page 35 Food Item Min-Max Time Temperature Comments Meat and poultry. Steak 0.50 kg 180°C 8-12 min. Hamburger 0.50 kg 180°C 7-14 min. Sausage roll 0.50 kg 200°C 13-15 min. Chicken 0.50 kg 180°C 18-22 min. drumsticks Chicken breast 0.50 kg 180°C 10-15 min.
- Page 36 Care & maintenance. WARNING: To avoid electric shock or damage to your air fryer oven, always unplug the power cord from the power supply outlet before cleaning. Make sure that all parts of your air fryer oven have cooled down completely CAUTION: Do not immerse the power cord or your air fryer oven in water or any other liquids.
- Page 37 Cleaning Methods Part Cleaning Tip Dishwasher Hand Wash Wipe Clean Safe (submerged) (damp cloth) • Wipe the outer part of the body with soft and barely damp cloth. • To clean the oven door, remove it by lifting it to a 45°angle while gently pulling upward.
- Page 38 Troubleshooting. Possible Problem Solution Cause The unit is not Plug in air fryer oven. Check and verify that plugged in. there is no damage on the plug and cord. After setting the desired time and Air fryer oven does not The POWER ( temperature, press the POWER ( ) button...
- Page 39 Warranty. LIMITED WARRANTY FOR NUTRICOOK Nutricook’s limited warranty obligations are confined to the terms set forth below: Nutricook warrants this product against defects in materials and workmanship for a period of two years from the date of original retail purchase. This limited warranty is valid only in the country in which the product is purchased and comes with the product at no extra charge, however shipping and processing fees will be incurred for returns, replacements and or refunds.
- Page 40 Warranty. Normal wear and tear is not covered by this limited warranty. This limited warranty applies to consumer use only, and is void when the product is used in a commercial or institutional setting. This limited warranty extends only to the original consumer purchaser and is not transferable.
- Page 41 NUTRICOOK IS NOT RESPONSIBLE FOR DIRECT, SPECIAL, INCIDENTAL OR CONSEQUENTIAL DAMAGES RESULTING FROM ANY BREACH OF WARRANTY OR CONDITION, OR UNDER ANY OTHER LEGAL THEORY, INCLUDING BUT NOT LIMITED TO LOST PROFITS, DOWNTIME, GOODWILL, DAMAGE TO OR REPLACEMENT OF EQUIPMENT AND PROPERTY.
- Page 42 NutriCook | www.nutricookworld.com | All rights reserved. Illustrations may differ from the actual product. We are constantly striving to improve our products, therefore the specifications contained herein are subject to change without notice.