Table of Contents
Advertisement
Advertisement
Table of Contents

Related Manuals for RockJam RJ461


Summary of Contents for RockJam RJ461
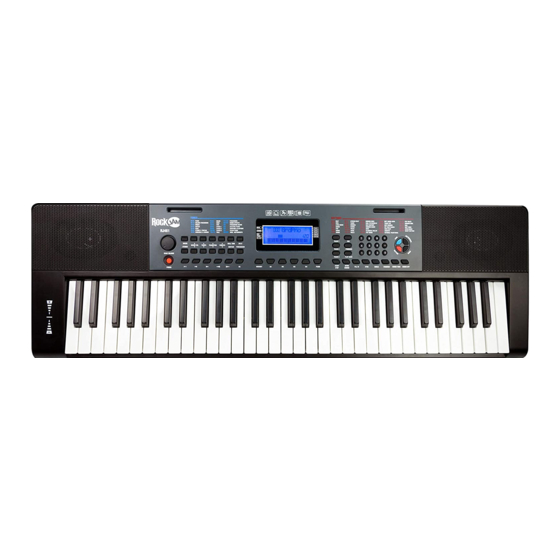
- Page 1 RJ461 61 Key Full Size Musical Keyboard User Guide...
-
Page 2: Important Information
Important Information Be sure to obey the following information so as not to harm yourself or others or damage this instrument or other external equipment. Power adapter: Please use only the specified AC adapter supplied with the product. An incorrect or faulty •... -
Page 3: Table Of Contents
Contents Important Information ............................2 Controls, Indicators and External Connections ....................5 Front Panel ..............................5 External Connections ..........................6 LCD Display ..............................6 Preparation Before First Use ..........................7 Power ................................7 Use of AC/DC power adapter: ........................ 7 Battery operation: ........................... - Page 4 Rhythm ..............................16 Selecting the rhythm: ..........................16 Start / Stop:............................16 Sync:..............................16 Fill in: ..............................17 Tempo Adjustment: ..........................17 Chord Accompaniment ..........................18 Single Finger Chords: ........................... 18 Multi Finger Chords: ..........................18 Chord Tones: ............................19 Intro / Ending: ............................
-
Page 5: Controls, Indicators And External Connections
Controls, Indicators and External Connections Front Panel 9 10 12 13 14 15 16 17 18 19 36 37 38 39 32 33 34 35 1. Speaker 17. Music Volume - 34. Fill In 2. Power Switch 18. Music Volume + 35. -
Page 6: External Connections
External Connections MicroSD PHONES DCIN 1. Micro SD Card Slot (MP3 Playback) 2. USB Input (MP3 Playback) 3. MIC Input (Electret type) 4. AUX Input 5. Headphone Output 6. DC Input LCD Display 1. Playing chord indication 2. Volume level display 3. -
Page 7: Preparation Before First Use
Preparation Before First Use Power Use of AC/DC power adapter: Please use the AC/DC power adapter that came with the electronic keyboard or a power adapter with DC 9V output voltage and 500mA output current with a centre positive plug. Connect the DC plug of the power adapter into the DC IN power socket on the rear of the keyboard and then connect the other end into the mains wall socket and switch on. -
Page 8: Connecting An Amplifier Or Hi-Fi Equipment
Connecting an Amplifier or Hi-Fi Equipment: This electronic keyboard has a built in speaker system but it can be connected to an external amplifier or other hi-fi equipment. First turn off the power to the keyboard and any external equipment you are looking to connect. -
Page 9: Connecting A Microphone
Connecting a Microphone: Connect the 3.5mm microphone plug into the [MIC] jack on the rear of the keyboard. The microphone should be an electret or condensor type. Connecting a USB Flash-drive or MicroSD card: To play MP3s through the Keyboard Speakers, place files onto either a USB flash-drive or MicroSD card. Insert the card or USB drive into the input slot at the rear of the Keyboard. -
Page 10: Keyboard Operation
Keyboard Operation Power and Volume Power control: Press the [POWER] button to turn the power on and again to turn the power off. The LCD screen will light up to indicate power on. Adjustment of the Master Volume: To change the volume, turn the MAIN VOLUME dial. -
Page 11: Adjustment Of Mixer Volume
Adjustment of Mixer Volume: To change the CHORD, BASS CHORD or PERCUSSION volume, touch the MIXER button first to select the desired volume to be adjusted and then press the MIXER VOL [+ / -] buttons to change the volume. Tone Tone Selection: When the keyboard is switched on the default TONE is ‘’00’’... -
Page 12: Dual Tone Keyboard
Dual Tone Keyboard: Dual Tone mode allows the keyboard to mix two tones and play them at the same time. To switch on Dual Tone Keyboard mode touch the [DUAL TONE] button. The LCD display will show that Dual tone mode is active by showing a flag indicator on the LCD. -
Page 13: Sound Output Mode
Sound Output Mode: Press the [STEREO] button repeatedly to select the sound output mode [STERE1] [STERE2] [MONO] or [NORMAL]. Sustain: Touch the [SUSTAIN] button to enter Sustain mode. The LCD display will display a flag to show that [SUSTAIN] is on. Once this mode is selected the sound of each note played is prolonged. Touching the [SUSTAIN] button again will turn the sustain feature off and exit this mode. -
Page 14: Vibrato
Vibrato: The [VIBRATO] function adds a wavering quality to the note being played. You can adjust the amount of vibrato applied between 000 (Off) and 007 (Maximum). Pressing both the [VIBRATO] buttons at the same time will reset the level to 000 (Off). The Vibrato level is reset to 000 (Off) after power off and on . Transpose: Touching the [TRANSPOSE] buttons alters the musical scale of the note being played. -
Page 15: Metronome
Metronome: Touch the [METRONOME] button to start the tick-tock beat. There are four beats to choose from. Depending on what the performance needs, you can touch the [TEMPO] buttons to speed up or slow down the beat. Press the [METRONOME] button repeatedly to cycle through to the available beat patterns. The LCD display will indicate the beat you have chosen. -
Page 16: Rhythm
Rhythm Selecting the rhythm: You can choose from any of the 300 built in rhythms. Please refer to Appendix II. for the detailed rhythm table. Touch the [RHYTHM] button to enter the rhythm selection function. The LCD display will show the current rhythm number. -
Page 17: Fill In
Fill in: While playing a rhythm you can add a rhythmic fill if you touch the [FILL IN] button during playback. After the fill-in section the rhythm will continue playing as normal. Tempo Adjustment: Touch the [TEMPO ] buttons to adjust the tempo of the rhythm, metronome, or demo songs up or down. Press and hold to adjust the tempo quickly. -
Page 18: Chord Accompaniment
Chord Accompaniment Single Finger Chords: Touch the [SINGLE] button to activate the single finger chord function. The LCD screen will flag which function is activated. Chords are played by pressing a key in the chord area on the left hand side of the keyboard (keys 1-19). -
Page 19: Chord Tones
Chord Tones: There are 5 chord accompaniment tones to choose from. To select a chord tone, touch the [CHORD TONE] button repeatedly to cycle through the available chord tones. To stop the chord accompaniment touch the [CHORD OFF] button. Intro / Ending: With a rhythm selected, touch the [Intro / Ending] button to initiate an intro section. -
Page 20: Recording Function
Recording Function Touch the [REC] button to enter the recording mode. The LCD will show a flag on the left side to indicate that recording mode is on. Press any key to start recording. The maximum recording capacity is limited to 118 notes. -
Page 21: Demo Songs
Demo Songs Touch the [DEMO] button to play a demo song. The LCD display will show SONG followed by a number indicating the song being played. By pressing the digits or [+] and [-] buttons on the numerical keypad you can choose the demo song you require. -
Page 22: Teaching Modes
Teaching Modes Single Key Course: Touch the [TEACH 1] button to enter the Single Key teaching mode. The LCD screen will flag Teach 1 on the right of the display area. This mode is suitable for beginners to familiarise themselves with the rhythm and tempo of a song. -
Page 23: Appendix I. Percussion Instruments
Access the same song in SYNC COURSE mode and play along by pressing the correct keys as • indicated. When mastered move onto the next stage. Access the same song in CONCERT COURSE mode and play along by pressing the correct keys •... -
Page 24: Appendix Ii. Rhythm Table
Appendix II. Rhythm Table Rhythm Name Rhythm Name Rhythm Name 8 Beat Jazz Samba Reggae-Pop 1 16 Beat March 1 Reggae-Pop 2 Pop 8 Beat March 2 European Traditions Rock Beat March 3 Tango Pop 1 Pop 16 Beat March 4 Tango Pop 2 Soul Beat Polka 1... - Page 25 Love Ballad 1 Soul Psychedelic 1 Chinese Traditional 1 Love Ballad 2 Soul Psychedelic 2 Chinese Traditional 2 Love Ballad 3 Soul Psychedelic 3 Chinese Traditional 3 Love Ballad 4 Soul Psychedelic 4 Thailand Rhythm Euro Beat Soul Psychedelic 5 Modern Waltz 1 House 1 Soul Psychedelic 6...
-
Page 26: Appendix Iii. Tone Table
Bachata 2 Soft Bossanova 1 Rock Dance 1 Bachata 3 Soft Bossanova 2 Rock Dance 2 Samba 1 Soft Bossanova 3 Middle East Pop Samba 2 Soft Bossanova 4 Soul Blues Pop Samba 1 Soft Bossanova 5 Glam Rock Pop Samba 2 Mento Hard House Pop Samba 3... - Page 27 Electric Bass (Pick) Traditional Piano Distortion Oboe Fretless Bass Aluminium Jean English Horn Ensemble Slap Bass 1 Rock Grand Piano Pizzicato English Horn Slap Bass 2 Electronic Organ Diplophonia English Horn Synth Bass 1 Psychedelic Electronic Bright English Horn Synth Bass 2 Water Jean Synth English Horn Violin...
-
Page 28: Appendix Iv. Demo Song Table
Lead 5 (Charang) Large Violin Electronic Bagpipe Lead 6 (Voice) Rhythm Orchestra Wind Bagpipe Lead 7 (Fifths) Pizzicato Violin High Bagpipe Lead 8 (Bass+Lead) Pizzicato Ensemble 1 Bright Bagpipe Pad 1 (New Age) Pizzicato Ensemble 2 Orchestra Bagpipe Pad 2 (Warm) Percussion Band Baritone Bagpipe Pad 3 (Polysynth) -
Page 29: Appendix V. Troubleshooting
Appendix V. Troubleshooting Problem Possible Reason / Solution A faint noise is heard when turning the power on This is normal and nothing to worry about. or off. After turning the power on to the keyboard there Check the master volume is set to the correct was no sound when the keys were pressed. -
Page 30: Appendix Vi. Chord Tables
Appendix VI. Chord Tables Single Finger Chords... -
Page 31: Fingered Chords
Fingered Chords... -
Page 32: Appendix Vii. Technical Specification
Appendix VII. Technical Specification Display • LCD Display with staff and key Indication 61 Full-size keys • Tone • 300 tones Rhythm • 300 rhythms Demo • 40 different demo songs Effect and Control • Dual tone, Split keyboard, Sustain, Vibrato, Transpose, Pitch controller Recording and Programming •... -
Page 33: Fcc Compliance Statement
FCC Compliance Statement FCC Class B Part 15 This device complies with Part 15 of the Federal Communications Commission (FCC) Rules. Operation is subject to the following two conditions: This device may not cause harmful interference. This device must accept any interference received, including interference that may cause undesired operation.
Need help?
Do you have a question about the RJ461 and is the answer not in the manual?
Questions and answers
Midi out there any