Table of Contents
Advertisement
Advertisement
Table of Contents

Related Manuals for RockJam RJ361


Summary of Contents for RockJam RJ361
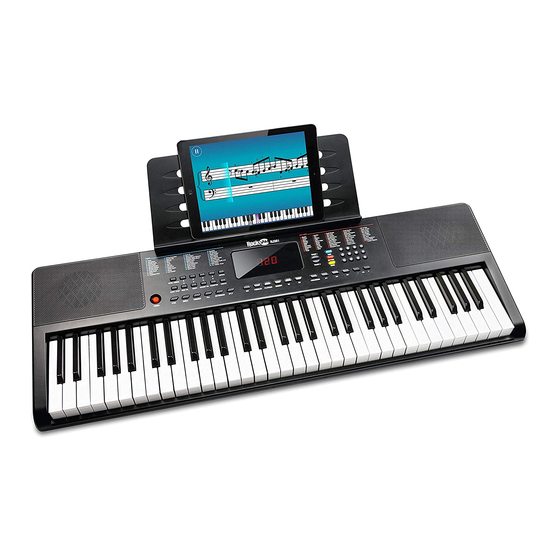
- Page 1 RJ361 61 key Multi-function Keyboard User Guide...
-
Page 2: Important Information
Important Information Be sure to obey the following information so as not to harm yourself or others or damage this instrument or other external equipment. Power adapter: Please use only the specified AC adapter supplied with the product. An incorrect or faulty •... -
Page 3: Table Of Contents
Contents Important Information ........................... 1 Controls, Indicators and External Connections .................... 4 Front Panel .............................. 4 External Connections ..........................5 LED Display ............................. 5 Preparation Before First Use ........................6 Power ............................... 6 Use of AC/DC power adapter: ......................6 Battery operation: .......................... - Page 4 Sync: ..............................13 Fill in: ..............................14 Accompaniment Volume Adjustment: ....................14 Tempo Adjustment: ........................... 15 Chord Accompaniment .......................... 15 Single Finger Chords: ........................15 Fingered Chords: ..........................16 Intro / Ending ............................16 Recording Function ..........................16 Rhythm Programming ..........................17 Demo Songs: ............................
-
Page 5: Controls, Indicators And External Connections
Controls, Indicators and External Connections Front Panel 12 13 14 15 16 1. Stereo Speakers 14. Accompaniment Volume +/- 27. Music Volume - 2. Power Switch 15. Transpose 28. Music Volume + 3. Sync 16. Sustain 29. Number Pad 4. Single Finger Chords 17. -
Page 6: External Connections
External Connections AUX IN PHONES DC IN 9V 1. USB Input (For MP3 Playback) 2. MIC Input (For Electret Microphone) 3. AUX IN (For Music Playback) 4. Headphone Output 5. DC 9V Power Input LED Display 1. 3-Digit LED Display Page | 5... -
Page 7: Preparation Before First Use
Preparation Before First Use Power Use of AC/DC power adapter: Please use the AC/DC power adapter that came with the electronic keyboard or a power adapter with DC 9V output voltage and 500mA output current with a centre positive plug. Connect the DC plug of the power adapter into the DC 9V power socket on the rear of the keyboard and then connect the other end into the mains wall socket and switch on. -
Page 8: Connecting An Amplifier Or Hi-Fi Equipment
3.5 mm PLUG PHONES HEADPHONES Connecting an Amplifier or Hi-Fi Equipment: This electronic keyboard has a built in speaker system but it can be connected to an external amplifier or other hi-fi equipment. First turn off the power to the keyboard and any external equipment you are looking to connect. -
Page 9: Connecting A Microphone
Connecting a Microphone: Connect the 3.5mm microphone plug into the [MIC] jack on the rear of the keyboard. Note that the keyboard requires an electret or condenser microphone, not supplied. Playing MP3 Music Files from a USB Memory Stick: Insert the USB memory stick into the USB input at the rear of the keyboard. Press the PLAY/PAUSE key to start and stop the music playback. -
Page 10: Keyboard Operation
Keyboard Operation Power and Volume Power control: Press the [POWER] button to turn the power on and again to turn the power off. The LED display will light to indicate power on. Adjustment of the Master Volume: The keyboard has 16 levels of volume from V00(off) - V15. To change the volume, touch the [MAIN VOL +/-] buttons. -
Page 11: Tone
Tone Tone Selection: When the keyboard is switched on the default TONE is ‘’000’’ Grand Piano. To change the tone, touch the TONE button first and then directly put in the number code on the keypad by pressing the corresponding digits 0-9. -
Page 12: Sustain
Sustain: Touch the [SUSTAIN] button to enter Sustain mode. The LED display will briefly display [SUS] to indicate sustain is on. Once this mode is selected the sound of each note played is prolonged. Touching the [SUSTAIN] button again will turn the sustain feature off and exit this mode. NOTE: In order to use the sustain pedal included then make sure that the sustain mode is switched off then press the sustain pedal to sustain individual notes as required. -
Page 13: Metronome
Metronome: Touch the [METRONOME] button to start the tick-tock beat. There are four beats to choose from. Depending on what the performance needs, you can touch the [TEMPO + / -] buttons to speed up or slow down. Press the [METRONOME] button repeatedly to cycle through to the required beat pattern. The LED display will indicate the beat you have chosen. -
Page 14: Rhythm
Rhythm Selecting the rhythm: You can choose from any of the 200 built in rhythms. Please refer to the Appendix II. for the detailed rhythm table. Touch the [RHYTHM] button to enter the rhythm selection function. The LED display will show the current rhythm number. -
Page 15: Fill In
CHORD AREA Fill in: You can fill in a length of interlude if you touch the [FILL] button during the rhythm playback. After the fill in, the rhythm will continue playing as normal. Accompaniment Volume Adjustment: The Accompaniment Volume can be adjusted by pressing the [ACCOMP VOLUME +/-] buttons. The LED display will show the volume as you are adjusting it. -
Page 16: Tempo Adjustment
Tempo Adjustment: Touch the [TEMPO +/-] buttons to adjust the playing tempo of the rhythm, metronome and demo song. The adjustment range is 30-240 bpm. Pressing both the [TEMPO +/-] buttons at the same time will make the tempo revert to the default tempo for the rhythm selected. At power on the tempo will revert to 120 bpm. -
Page 17: Fingered Chords
Fingered Chords: Touch the [FINGERED] button to activate the fingered chord function. The LED screen will display [C-2] Chords are played by pressing certain keys in the chord area on the left hand side of the keyboard (keys 1-19). The finger patterns required are shown in Appendix VI. Touch the [START / STOP] button to start or stop the chord accompaniment. -
Page 18: Rhythm Programming
Rhythm Programming Press the [PROGRAM] button to activate the Rhythm Program mode. The LED will indicate that the rhythm program function is on by showing [Pr9]. You can then play the keyboard and record your percussion track (up to 46 percussion beats). To listen to your piece touch the [PLAYBACK] button and the keyboard will playback your edited percussions. -
Page 19: Teaching Modes
Teaching Modes Beginner Course: Touch the [TEACH 1] button to enter the Beginner Course teaching mode. This mode is suitable for beginners to familiarise themselves with the rhythm and tempo of the song The LED display will show [dXX] where XX is the number of the song selected, from 00 to 39 (refer to Appendix IV for the list of songs). -
Page 20: Appendix I. Percussion Instruments
Appendix I. Percussion Instruments PERCUSSION KEYBOARD AREA 61 Percussion Sounds Page | 19... -
Page 21: Appendix Ii. Rhythm Table
Appendix II. Rhythm Table Rhythm Name Rhythm Name Mambo Lieder Mambo 16 Beat Hard 8 Beat Waltz Country Bossanova Rhumba Hard Mambo Reggae Bluegrass Tango Rock South Country Slow Rock Lieder Pop Bossanova Bluegrass Beguine Disco Rock Latin Tango Slow March Polka Country Europe Samba Jazz Swing... -
Page 22: Appendix Iv. Demo Song Table
Flute Lyric Crystal Lead1 Reed Organ2 Alto Sax Electronic Crystal Crystal FX Sweet Crystal Rotary Organ Psychedelic Synth Lead String Rock Organ Soft Crystal 39-199 Popular Tones Appendix IV. Demo Song Table Name of Song Name of Song The cherry tree Fur Elise Brown Mary had a little lamb... - Page 23 Sound is distorted or interrupted and the Use of incorrect power adapter. Use the power keyboard is not working properly. adapter supplied or the batteries may need replacing. There is a slight difference in timbre of some This is normal and is caused by the many notes.
-
Page 24: Appendix Vi. Chord Tables
Appendix VI. Chord Tables Single Finger Chords Page | 23... -
Page 25: Fingered Chords
Fingered Chords Page | 24... -
Page 26: Appendix Vii. Technical Specification
Appendix VII. Technical Specification Display • LED Display, 3-Digit Tone • 200 tones Rhythm • 200 rhythms Demo • 40 different demo songs Effect and Control • Split keyboard, Sustain, Vibrato, Transpose Recording and Programming • 46 Note record memory, Playback, 46 Beat rhythm programming Percussion •... -
Page 27: Fcc Compliance Statement
FCC Compliance Statement FCC Class B Part 15 This device complies with Part 15 of the Federal Communications Commission (FCC) Rules. Operation is subject to the following two conditions: This device may not cause harmful interference. This device must accept any interference received, including interference that may cause undesired operation.
Need help?
Do you have a question about the RJ361 and is the answer not in the manual?
Questions and answers
Hi I have the rj361.keyboard and never had any issues until today.nthw volume.buttons aren't responsive. Wouldn't be an issue except by default it is super loud. This hasn't been played much at all, kind of intermittent. I can't seem to find any info, there is no dust anywhere in amongst the keys. All other keys work fine except for the volume buttons
@Mrs Tina Helyer
@Mrs Tina Helyer I have the same issue, did you ever find a fix?
The cause of unresponsive volume buttons on the RockJam RJ361 keyboard could be a malfunction in the [MAIN VOL +/-] buttons, an internal hardware issue, or problems related to power supply, such as low battery power or issues with the power cord.
This answer is automatically generated
I have the RJ361 and I **** not sure how to connect my iPhone to it? The MIDI output is covered and I **** not sure why the keyboard doesn’t come with it.
To connect your iPhone to the RockJam RJ361 keyboard for playing music through its speakers, follow these steps:
1. Get a stereo audio cable (not included).
2. Plug one end of the cable into the AUX IN socket on the back of the keyboard.
3. Connect the other end into the headphone jack or use a Lightning-to-3.5mm adapter if your iPhone lacks a headphone jack.
4. Turn on the keyboard.
5. Control the music volume using your iPhone.
This allows the keyboard's built-in speakers to play audio from your iPhone.
This answer is automatically generated
My keyboard (Rj361) keeps turning off and on by itself. I've tried to check the power components and it seems fine. Can you offer any suggestions to fix this issue