Advertisement
Quick Links
NFINITY DOCK
ons and Safety Tips
Part #: 1004425
n
Part #: 1004214
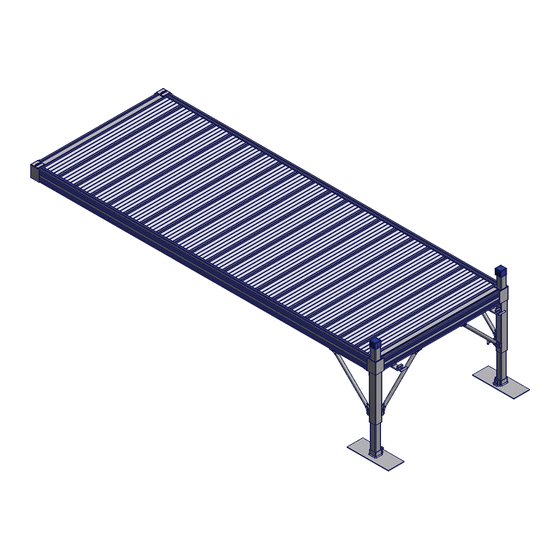
InfInIty RS4 Dock SyStem
on
Part #: 1005986
on
Part #: 1005987
n
Part #: 1005989
ner Part #: 1005990
Dock Part #: 1003953
RS4 INFINITY DOCK
Dock Part #: 1003954
Instructions and Safety Tips
Bolt Bag
4 x 4 Section
4 x 10 Section
4 x 12 Section
6 x 8 Section
3ft Dock Corner Part #: 1005990
45° Curved Dock Part #: 1003953
90° Curved Dock Part #: 1003954
UTION - PUT SAFETY FIRST
CAUTION - PUT SAFETY FIRST
ing to install or use this dock, study and fully understand the proper operating procedures and safety precautions
Before attempting to install or use this dock, study and fully understand the proper operating procedures and safety precautions
owner's manual. If you have any questions about assembly, installation, use or suitability of this product, contact
outlined in this owner's manual. If you have any questions about assembly, installation, use or suitability of this product, contact
dealer.
an authorized dealer.
YING WITH THE PROCEDURES AND PRECAUTIONS OUTLINED IN THIS MANUAL WILL INVALIDATE THE
▪ NOT COMPLYING WITH THE PROCEDURES AND PRECAUTIONS OUTLINED IN THIS MANUAL WILL INVALIDATE THE
WARRANTY AND MAY RESULT IN PERSONAL INJURY OR DEATH.
AND MAY RESULT IN PERSONAL INJURY OR DEATH.
▪ Be sure your dock can be installed on a firm and stable foundation. If lake bottom does not allow for a secure installation, this
dock can be installed on a firm and stable foundation. If lake bottom does not allow for a secure installation, this
product may not be suitable. ShoreMaster builds a wide variety of docks. Call your dealer for suggestions or other options.
▪ Install high enough above water surface, so waves do not contact Dock Frames or Panels.
ot be suitable. ShoreMaster builds a wide variety of docks. Call your dealer for suggestions or other options.
▪ Do not dropped parts in the water. Please remove any Leg Caps or other parts from lake bottom to avoid injury.
nough above water surface, so waves do not contact Dock Frames or Panels.
▪ Do not run on dock. Running on dock could result in a falling injury. Use caution, especially when surface is wet.
ed parts in the water. Please remove any Leg Caps or other parts from lake bottom to avoid injury.
▪ Do not dive off dock. Diving off dock could result in a severe head, neck, or back injury or death.
▪
n dock. Running on dock could result in a falling injury. Use caution, especially when surface is wet.
Read and fully understand each step before proceeding with that step.
▪
Wear protective gloves, clothing and eyewear when assembling and installing the dock.
ff dock. Diving off dock could result in a severe head, neck, or back injury or death.
▪
Do not assemble, install or use this product if items are missing or damaged.
understand each step before proceeding with that step.
e gloves, clothing and eyewear when assembling and installing the dock.
ble, install or use this product if items are missing or damaged.
P RO D U CT A S S E M B LY I N S T R U CT I O N S
Part #: 1004425
Part #: 1004214
Part #: 1005986
Part #: 1005987
Part #: 1005989
CAUTION - PUT SAFETY FIRST
Advertisement

Subscribe to Our Youtube Channel
Related Manuals for Shoremaster Infinity RS4


Summary of Contents for Shoremaster Infinity RS4
- Page 1 If lake bottom does not allow for a secure installation, this product may not be suitable. ShoreMaster builds a wide variety of docks. Call your dealer for suggestions or other options.
- Page 2 Lift Side as shown. Use one 3/8 x 2 3/4 Hex Bolt, two 3/8 Flat Washers and one 3/8 Brass Nut for each Leg Post. Lift Opposite Side Lift Side Blue Cap 3/8 Flat Washer 3/8 Brass Nut 3/8 x 3.0 Hex Bolt Leg Post 3/8 Brass Nut 3/8 x 2 3/4 Hex Bolt 2 | SHoRemASteR.com V-Side DETAIL A...
- Page 3 Nut 3/8 Brass 1001956 Bolt Carriage 3/8 X 1.0 1003808 Frame 6 x 8 1006523 Foot Pad 1001802 Nut Flange 3/8 1001815 Blue Cap 1004425 Bolt Bag - Listed at Left 1006591 Infinity Dock Pocket 1000875 Corner Cap SHoRemASteR.com | 3...
- Page 4 T Handle 3/8-16 x 1.5x2.5 w/ Cup Point 1001802 Nut Flange 3/8-16 Alum 1001803 Nut Hex 3/8-16 Brass 1004651 QC Dock Connector - 1.5 1001956 Bolt Carriage 3/8-16 x 1.0 SS 304 1000875 Plastic Cap w/ Logo - for Dock Pockets 4 | SHoRemASteR.com...
- Page 5 Place the Corner Frame into the Connector Clips and tighten each 2 1/2 - 3/8 x 1 1/4 T-Handle against the Corner Frame until it is secure against the supporting dock frames. Place Corner Panel in frame. SHoRemASteR.com | 5...
- Page 6 NOTICE: A Rail six feet or less requires two Connector T-Handle Clips. Rails greater than Six feet need a third connector in the middle of the connection. Corner CAUTION: Make sure the Connector Clip assembly is fully clear of the Opening in the slot. DETAIL B f | SHoRemASteR.com...
- Page 7 Note: Make sure there is enough clearance for water flucuation and wave action. Fully tighten all Nuts and Bolts. Note: Do not over tighten set screws. Over tightening of set screws will result in bending or breaking of parts. SHoRemASteR.com | g...
- Page 8 ▪Inspect frames, panels, connections, nuts, and bolts at least once every six months for damage, wear or loose connections. Tighten or replace parts as needed. ▪ShoreMaster dealers usually offer service visits. Please contact them if you are unable or unwilling to perform service to docks.
- Page 9 - QC Fishing Rod Holder - QC Cleat Kit - QC Vertical Roto Bumper - QC Canoe/Kayak Rack - Wheel/Axle Adapter for 2 x 2 Dock Legs - Single Leg Pocket - QC Leg Pocket Add-On Bracket SHoRemASteR.com | 9...
- Page 10 3/8" x 3" Hex Bolt and 3/8" Hex Nut. (adjust height of legs after connecting stairs to dock frame.) Step 4 . Connect stairs to QC accessory brackets using Carriage Bolts and Nuts. (see QC accessory bracket instructions) 10 | SHoRemASteR.com...
- Page 11 Washers, and one 3/8 Nyloc Nut - as shown. Quick-Connect Bracket (Sold Separately) Note: While the ladder is in use, secure it 1006706 - RS4 1006708 - RS7 down with two Snap Pins - as shown. 1006730- TS9 SHoRemASteR.com | 11...
- Page 12 - as shown. Step 2 . Insert plastic push-in caps into off-deck bench frames as shown. Rear View Step 3 . Attach off-deck bench frames to dock accessory connectors (sold separately) according to accessory connector instructions. 12 | SHoRemASteR.com...
- Page 13 4-1/2" Hex Bolts, 3/8" Flat Washers, Backer Plates and 3/8" Nyloc Nuts. Step 5. Secure dock panel to dock using 1/4" x 1-3/4" Phillips Pan Wood Screws. Note: Failure to secure dock panel to dock could result in causing bodily injury or possible death. SHoRemASteR.com | 13...
- Page 14 Attach armrest tan poly to armrest bent arm using 1/4" x 1-1/2" Carriage Bolts and 1/4" Hex Nuts. Note: Make sure to position armrest tan poly correctly, as shown. Step 3. Insert cupholder into hole in armrest tan poly. Lakeview Dock Bench 14 | SHoRemASteR.com...
- Page 15 1006608 Connect Furniture Hardware Pocket to accessory bracket (Sold Separately) according to accessory bracket instructions. Note: On ShoreMaster Infinity Dock Accessory Connectors Two T-Handles are required to clamp each Chair or Table to the dock frame. Step 3. Insert one Pedestal Post into the Chair Pocket and secure with two 3/8 Nuts and two T-Handles - as shown.
- Page 16 Step 2. Screw the 3/8 Thumb Screws a few turns into 3/8 Square Nuts, just enough to hold in place. Step 3 . Insert Umbrella pole into Umbrella Holder to desired height and tighten 3/8 Thumb Screws. 16 | SHoRemASteR.com...
- Page 17 Flagpole Holder pipe. Step 2. Screw the 3/8 Thumb Screws a few turns into 3/8 Square Nuts, just enough to hold in place. Step 3 . Insert Flagpole into QC Flagpole Holder and tighten 3/8 Thumb Screws. SHoRemASteR.com | 17...
- Page 18 3/8 x 1 Carriage Bolts and 3/8 Flange Nuts. Step 2. Slide handle of fishing rod into tube. Note: Not all fishing rods will work. Rod holder is about 32" from deck surface and will accept up to a 1-3/8" diameter rod handle. 18 | SHoRemASteR.com...
- Page 19 Attachment Groove Step 2. Set the Plastic Cleat 8.0 on the two Cleat Attachement Brackets 4.0 and secure with two 5/16 x 2 1/4 Screws using a Torx bit driver - as shown in Detail "B". DETAIL B SHoRemASteR.com | 19...
- Page 20 RS7 Dock 1006708 RS9 Dock 1006730 Poly Dock 1006608 Note: In order to attach vertical dock bumper to a dock not listed above use two 3/8 x 3-1/2 Carriage Bolts and two 3/8 Flange Nuts (provided). 20 | SHoRemASteR.com...
- Page 21 Note: Use a bungee cord to secure canoe or kayak to rack. Use the holes in the bottom of QC canoe / kayak rack arm to secure the bungee cord. SHoRemASteR.com | 21...
- Page 22 1/2 x 1 1/2 Set Screw and one 1/2 Square Nut - as shown. Step 2. Slide one Bushing onto the axle, then the Poly Tire followed by another Bushing. Secure with one 1/4 x 2 1/2 Cotter Pin - as shown. Poly Tire 22 | SHoRemASteR.com...
- Page 23 Step 3. Insert leg post (sold separately) into leg pocket, adjust to desired height, and tighten set screws to hold in place. SHoRemASteR.com | 23...
- Page 24 Screws in the channel of the Leg Pocket and two 1/2 Square Nuts- as shown. Step 4. Slide the 2 x 2 Blue Cap over the exposed Leg Post. Note: A foot pad is required for the bottom of the Leg Post. 24 | SHoRemASteR.com...
- Page 25 Failure to attach and maintain the sacrificial anodes or “zincs” constitutes “abuse” as used herein. (p) Products that are noted with a “(p)” are Prorated. Prorated means that ShoreMaster will provide a Credit, as defined herein, toward your purchase of a replacement product or part.
- Page 26 If you discover within the Parts Warranty Period a defect in material or workmanship, you must promptly notify your local ShoreMaster dealer or distributor of any claim under this Limited Warranty. Any claim must be in writing with proof of purchase and provided to your local ShoreMaster dealer or distributor within fifteen (15) days of the discovery of the defect.
- Page 27 1025 International Drive Fergus Falls, MN 56537 For questions or inquires please call our customer service center, Monday through Friday 8:00am- 5:00pm CST 1-877-998-2314 IMPORTANT: DO NOT ENLARGE, REDUCE OR MOVE the FIM and barcodes. They are only valid as printed! Special care must be taken to ensure FIM and barcode are actual size AND placed properly on the mail piece to meet both USPS regulations and automation compatibility standards.
Need help?
Do you have a question about the Infinity RS4 and is the answer not in the manual?
Questions and answers