Table of Contents
Advertisement
Quick Links
Advertisement
Table of Contents

Related Manuals for Spartan 81


Summary of Contents for Spartan 81
- Page 1 Record the Serial Number of your Model 81 and give the number to the factory when ordering parts. Serial Number ........... SPARTAN TOOL L.L.C. 8 0 0 . 4 3 5 . 3 8 6 6 www.spartantool.com © 2020 Spartan Tool LLC 44298200 4-9-2020...
-
Page 2: Warning
Warning ― Read the safety and operating instructions before using any Spartan Tool products. Drain and sewer cleaning can be dangerous if proper procedures are not followed and appropriate safety gear is not utilized. ― Before starting unit, be sure to wear personal protective equipment such as safety goggles or face shield and protective clothing such as gloves, coveralls or raincoat, rubber boots with metatarsal guards, and hearing protection. -
Page 3: Table Of Contents
Operating Instructions ......................5 How to Repair 1/4” and 5/16” Cables ..................6 Operating a Power Driven Cleaning Tool ................6 How to Install Cable in Model 81 ..................... 7 Safety Instructions .......................8-11 PARTS & ACCESSORIES SECTION Model 81 Cables......................... 12-13 Power Unit -04703300- ...................... -
Page 4: Specifications & Features
Specifications & Features Specification: Pipe sizes: ....................1-1/14" to 3" diameter Weight ..........................35 lbs. Cable capacity: ............50 feet of 1/4 or 5/16 inch diameter cable Size: ....................... 18" W x 16" H x 16" D Motor: ......................115 Volt / 1.85 Amp RPM: ........................... -
Page 5: How To Assemble
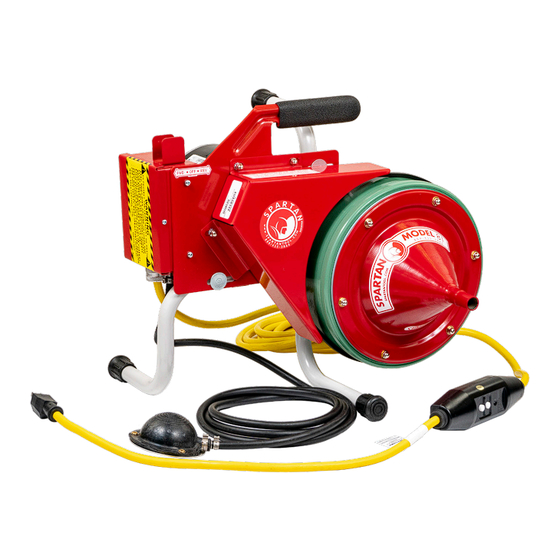
How to Assemble Remove drum and power unit from cartons. Step 1 Set power unit in vertical position. (See picture on front page) Step 2 Mount drum on power unit. Lock drum to power unit by tightening (2) thumb screws. (Thumb screw shoulder must enter hole in collar before tightening.) Step 3 Loosen (3) wing nuts on motor mount plate. -
Page 6: How To Repair 1/4" And 5/16" Cables
How to Repair 1/4” and 5/16” Cables All 1/4” and 5/16” cables can be repaired with a replacable end. If you kink your cable, cut the cable off at the kinked portion. Grind the end of same to provide a lead thread. Now, pick up your repair end and thread same on the regular cable, as you would a nut on a bolt, turning same about three turns, which will fasten it to the cable securely. -
Page 7: How To Install Cable In Model 81
How to Install Cable in Model 81 Fig 1 Fig 2 Position drum unit in a vertical position. Remove (6) nuts, washers, drum cover, drum cover spacer, and (2) drum cover seals. Assemble drum cover spacer and (2) seals to outer drum as required for various cables. See Figure 1 and Figure 2. -
Page 8: Safety Instructions
Know Your Drain Cleaning Machine. Read this Operator’s Manual carefully. Learn the operation, applications and limitations of this machine. Grounding Instructions. Before using your Spartan equipment, make sure that a properly grounded, (three hole) electrical outlet is available. If not, as in older homes, use a three-prong adapter and connect the green pigtail or grounding lug to a known ground, such as a (metallic) cold water pipe. - Page 9 Safety Instructions (cont.) Extension Cords. DANGER- Improper use of an extension cord will cause death or severe injury. The GFCI on the machine’s power cord does not protect the operator from electrical shock along the extension cord. If an extension cord must be used, it must be of an approved, three-wire construction, equipped with a three-pronged plug, and in good condition.
- Page 10 11. Dress properly. Do not wear loose clothing or jewelry. They can be caught in moving parts. Wear protective hair covering to contain long hair. Wear standard equipment. (Spartan riveted gloves). Never grasp a rotating cable with a cloth or loose fitting glove which would get wrapped around cable. Replace gloves if rivets or staples start to pull out.
- Page 11 Follow instructions for lubricating and changing accessories. Never use damaged power cords. Inspect tool cords periodically and if damaged, repair with proper Spartan replacement parts. Inspect extension cords periodically and replace if damaged. Keep handles dry, clean, and free from oil and grease.
-
Page 12: Model 81 Cables
Model 81 Cables Spartan Cables Without Inner Core Flexible open hook end enables operator to thread cable through cross bars - eliminating necessity of removing trap - to do a thorough job quickly. One repair hook furnished with each cable. - Page 13 Model 81 Cables (cont.) Repair Bulbs For 5/16" Inner-Core Cables: 02885200 Repair Bulb Repair Hooks How to Use Repair Hook or Repair Bulbs If cable is kinked, simply remove kinked portion by cutting it off at a point about 1" back of bent section.
-
Page 14: Power Unit -04703300
Power Unit -04703300- Page 14... - Page 15 04714900 LABEL, SWITCH DIRECTION 04703600 DECAL, 81 BELT COVER 04702810 WELDMENT, MODEL 81 FRAME 04702401 MOTOR, MODEL 81 (included in 44002400 assembly) 04702200 PLATE, MOTOR MOUNTING 04700700 SPACER, 3/8 OD X 1/4 ID X 5/8 04700600 SHEAVE, MODEL 81 04700400...
-
Page 16: Electrical Assembly -44002400
ASSY AIR FT SWTCH TRANSMIT 44216100 DISCONNECT, .250 FEMALE 16-14 44003000 ASSY, WIRE JUMPER BLACK 5" 44002800 ASSY, PRESSURE SWITCH (WM) 44002200 WELDMENT, MODEL 81 CONTROL BOX 06517743 TERMINAL, FLAG SILP ON 04702401 MOTOR, MODEL 81 04652700 CLAMP, STEPLESS EAR 1/2 04234400 JUMPER WIRE16GA YELLOW 5"... -
Page 17: Wiring Diagram
Wiring Diagram TOGGLE SWITCH BLACK BLUE ORANGE NOTE: KEYWAY FACING FORWARD (F) YELLOW MOTOR ON CONTROL BOX BLACK _ i ^ ` h BLACK t efq b WHITE m o b p p r o b = p tfq ` e PRESSURE SWITCH m l i ^ o f q v POLARITY... -
Page 18: Drum Assembly -04722600
Drum Assembly - 04722600 - ITEM# PART # NUMBER DESCRIPTION 04726900 81 Outer D rum & Flange 04727000 81 D rum C over 04720400 Drum C over Spacer 04720300 Drum C over Seal 44280500 81 C able C lamp Assembly... -
Page 19: Warranty Information
Spartan Tool will direct where to take or send the equipment for service. If the defect is covered by the warranty, Spartan Tool will repair or replace, at its option, the defective equipment, without charge for labor or materials.
Need help?
Do you have a question about the 81 and is the answer not in the manual?
Questions and answers