
Related Manuals for Hercules Bosworth LEAN-TO


Summary of Contents for Hercules Bosworth LEAN-TO
- Page 1 8FT DEEP LEAN-TO External Frame Dimensions (for base sizes see page 3) Size Range A (mm) B (mm) C (mm) D (mm) 2036 8’5” x 6’8” 2656 8’5” x 8’8” 2570 2635 1985 8’5” x 10’9” 3276 8’5” x 12’9” 3896...
- Page 2 Guarantee Your new Hercules greenhouse is guaranteed for 10 years against faulty manufacture of the framework. This does not include glass, moving parts, accidental damage or wind damage. Look out for part...
- Page 3 Slab Base Sizes (Recommended) Note: The base should always be larger than your building. The measurements given should only be used as a guide. Building A (mm) B (mm) C (mm) Size 2600 8’5” x 6’8” 3200 8’5” x 8’8” 2500 2500 8’5”...
- Page 4 Part Size Part Size Section Profile Section Profile (mm) 6 10 12 (mm) 6 10 12 300 Base Bracket Cantilever Front Cill 3748 Roof Brace 3128 2508 Roof Brace 1888 Gutter 3748 944 Roof Purling 3128 2566 2508 Roof 1888 Glazing Bar Front 3736...
- Page 5 Profile Part Profile Size Part Size Section Section (mm) 6 10 12 (mm) 6 10 12 Door Stile 540 Vent Bottom Without Lock 1880 Vent Side 381 Door Stile Male 1880 Vent Top 384 Door Handle Slam Bar Door Stop Casement Stay Door Track 2508...
- Page 6 Part Size Quantity Number (mm) 2038 Front 1888 1797 1876 1888 576 (M6) 579 (M6) 576 3 576 3 588 (M6) 588 1 588 1 Part Size Quantity Number (mm) 2038 2508 1797 2496 2508 576 (M6) 579 (M6) 576 4 576 3 576 3 588 (M6)
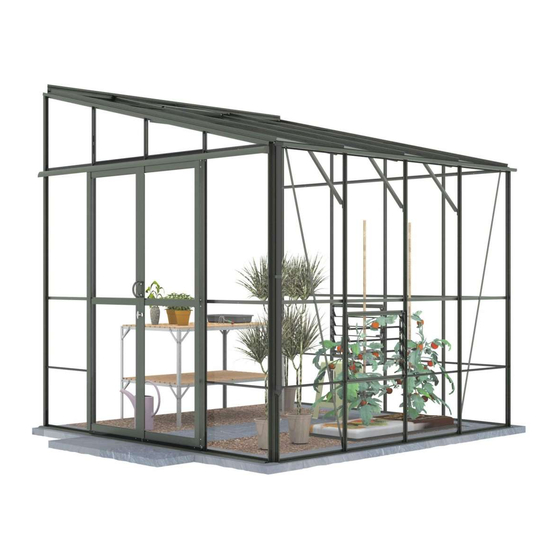
- Page 7 Internal View...
- Page 8 Left Gable Right Gable Door Option Internal View Internal View 576 4 576 4 576 1 576 1 588 1 588 1 588 1 576 2 576 2 576 2 588 1 588 1 576 3 576 1 576 1 Part Size Number...
- Page 11 Left Gable Right Gable Internal View Internal View 576 4 576 4 576 3 576 3 576 3 588 1 588 1 588 1 588 1 576 2 576 3 Part Size Number (mm) Quantity 1876 1888 1979 2557 2125 2275 2415 1935...
-
Page 14: Frame Assembly
Frame Assembly Internal View IMPORTANT Do not fix the greenhouse to the base untill the greenhouse is fully glazed. - Page 16 Roof Internal View 588 4 Roof Purling Remember to insert extra bolts (588- 15mm) into the roof glazing bars for the roof purling (944)
- Page 17 Internal View External View...
- Page 19 Attach foam strip to the back of the ridge and the wall bars. IMPORTANT Do not fix the greenhouse to the base until the greenhouse is fully glazed.
- Page 20 Fix the greenhouse to the wall using 2 inch screws and rawl plugs. The table below suggests how many you will need for your size of greenhouse. Ensure the greenhouse is level and the uprights are vertical before fixing. IMPORTANT Do not fix the greenhouse to the base until the greenhouse is fully glazed.
- Page 21 Drill 5mm weep holes every 300mm in the gutter...
- Page 22 Cut all the bar capping to length. Start with the longest length of bar capping and work your way round the greenhouse until you get to the smallest piece. A hacksaw is the ideal tool for the job. (To make it easier, try grouping capping of the same length when cutting.) Once you have cut all the capping distribute it around the greenhouse.
- Page 23 (2 ‘Z’ Clips per overlap) IMPORTANT Drill weep holes in the gutter before fitting the roof glass. See page 19. IMPORTANT Do NOT glaze above the door untill you have it set up and sliding nicely. IMPORTANT Do not fix the greenhouse to the base untill the greenhouse is fully glazed.
- Page 24 Louvre Internal View Internal View Louvre Internal View Frame...
- Page 25 Internal View 1070 Internal View There are two ways of installing the bar capping. Option 1: Cut the capping above and below the louvre. Option 2: Insert a full length of bar capping. You have to push the bottom edge in first between the louvre and the glazing bar. Once in position, push the top edge under the arrow head of the glazing bar.
- Page 26 Remember the door can Door Track and Runner be fitted on the other end or on the front. Part Size Number (mm) Quantity IMPORTANT 2508 Do not fix this support untill you are happy 2508 with the final possition of the door track (403). 1232 You will need to drill a pilot hole using a 3mm...
- Page 27 Internal View External View Internal View Section View Section View...
-
Page 28: Door Assembly
Door Assembly Start by fixing the door middle in place (373). Make sure this is the correct way up (the channel should face down). Slide the edgign strips into place (558), then slide the glass into the edging strips. Then slot the top and bottom into place. Troubleshooting If the top and bottom don’t line up with the pre drilled holes in the door stiles:... - Page 29 Internal Internal View View Internal View External View Internal View...
- Page 30 Door Instillation on Gable Door To locate the door wheels and the door guide you will probably have to adjust the height of the door track, you do this by loosening the bolts that join the door track sup- port bracket to the glazing bars. Section View If you find that the door doesn’t run very well at first, try adjusting...
- Page 31 Door Instillation on Front It is possible to fit the door to the front of your building. This will involve slight modifications to some components. The purling will need to be cut (using a hacksaw) where the door is being posi- tioned.
- Page 32 Part No. Size (mm) Quantity Vent M6 X 10 M6 X 10 M4 X 10 Internal View M3.5 X 19 610 X 610 Internal View Internal View...
- Page 33 External View Internal View External View Internal View...
- Page 34 XL Autovent Attachment to Hercules Greenhouses Internal View CLAMP...
- Page 35 Rotate to adjust the position of your vent. You should take the weight of the vent in one hand while doing this. CLAMP Section View GLASS CLAMP Section View The autovent clamps in place. NO holes are used.
- Page 36 Internal View Fix the greenhouse to the floor using 2 inch screws and rawl plugs. Ensure the greenhouse is level and the uprights are vertical before fixing. IMPORTANT Do not fix the greenhouse to the base untill the greenhouse is fully glazed.
- Page 37 Downpipe Instillation Firstly you need to decide which end you want your downpipe. The gutter outlet and stop end simply push into the gutter. For an even better seal you could run a bead of silicone around the inside edge of the gutter be- fore inserting the outlet and stop end.
- Page 38 Choose one of the options for attaching Downpipe Attachment your downpipes. It is entirely your preference, either method is as good as the other. Option 1 Option 2...
- Page 40 The Greenhouse People Unit 19, Blythe Park Cresswell Stoke-on-Trent Staffordshire ST11 9RD 01782 388811...
Need help?
Do you have a question about the Bosworth LEAN-TO and is the answer not in the manual?
Questions and answers