DURAVIT B 1 Series Instructions For Mounting And Use
Single lever basin and bidet mixer
Hide thumbs
Also See for B 1 Series:
- Instructions for mounting and use (40 pages) ,
- Mounting instructions (36 pages) ,
- Instructions for mounting and use (40 pages)
Advertisement
Available languages
Available languages
Quick Links
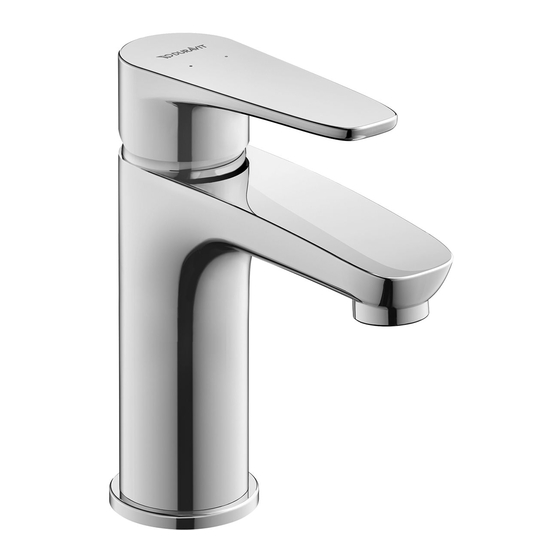
B.1, B.2
Instructions for mounting and use
Notice de montage et d'utilisation
Instrucciones de montaje y uso
# B11010 001U 10, # B11010 002U 10, # B11020 001U 10, # B11020 002U 10
# B21010 001U 10, # B21010 002U 10, # B21020 001U 10, # B21020 002U 10
# B12400 001U 10, # B22400 001U 10
Single lever basin and bidet mixer
Mitigeur de lavabo et bidet monocommande
Grifería monomando de lavabo y bidé
Advertisement

Related Manuals for DURAVIT B 1 Series


Summary of Contents for DURAVIT B 1 Series
- Page 1 B.1, B.2 Instructions for mounting and use Single lever basin and bidet mixer Notice de montage et d’utilisation Mitigeur de lavabo et bidet monocommande Instrucciones de montaje y uso Grifería monomando de lavabo y bidé # B11010 001U 10, # B11010 002U 10, # B11020 001U 10, # B11020 002U 10 # B21010 001U 10, # B21010 002U 10, # B21020 001U 10, # B21020 002U 10 # B12400 001U 10, # B22400 001U 10...
- Page 2 MAL_57158/18.09.2...
- Page 3 Important information Installation Operation Care & maintenance Remarques importantes Montage Commande Entretien & maintenance Información importante Montaje Manejo Conservatión y mantenimiento MAL_57158/18.09.2...
-
Page 4: Safety Instructions
These instructions are part of the Duravit Safety instructions product and must be read carefully and kept available at all times. Cut and crush injuries > Wear gloves when installing the product. Target readership and qualifications Product and/or property damage The product may only be installed by a qualified >... - Page 5 # B11010 001U 10, # B11020 001U 10 # B21010 001U 10, # B21020 001U 10 # B11010 002U 10, # # B11020 002U 10 # B21010 002U 10, # B21020 002U 10 # B12400 001U 10 # B22400 001U 10 MAL_57158/18.09.2...
- Page 6 > Inspect the faucet for any damages. CAUTION Cut and crush injuries > Wear gloves during installation. > Install the pull rod into opening on the top of the spout. > Install the cover ring plate. > While holding lift rod, insert faucet body through sink.
- Page 7 „M“ > Push the faucet down until fully sealed. > Install metal rings. „M“ SW 12 3 Nm / 2.2 ft-lbs. > Tighten the tension screws Leakage through wrong NOTICE installed hoses (Max Torque 2.2 ft-lbs.). > Make sure that hoses are not kinked or twisted during installation.
- Page 8 8 Nm 5.9 ft-lbs. 19 mm The hot valves can cause CAUTION CAUTION Cut and crush injuries scalding > Avoid contact. > Wear gloves during installation. NOTICE > Attach the other ends of supply lines to shut Likelihood of confusion off stop.
- Page 9 > Slide the pull rod onto lift rod. > Push the waste seat through sink opening. > Tighten the bolt with a flat head > Install the pop-up drain. screwdriver. 22 mm > Turn on hot and cold water supply. >...
- Page 10 00:02:00 > Flush the hot and cold supplies for at least > Check for leaks. 2 minutes. 22 mm > Reinstall the aerator using 22mm wrench. MAL_57158/18.09.2...
- Page 11 Adjustments of the water flow. Check the position of the handle. 2,5 mm > Remove the small cap on the back side of > Remove the handle. the handle. > Using 2.5 mm Allen wrench, unscrew the handle. MAL_57158/18.09.2...
- Page 12 > Remove the top faucet cover > Using flat head screwdriver, adjust the flow. > Check the flow. > Attach the top faucet cover. > Attach the handle. MAL_57158/18.09.2...
- Page 13 2,5 mm Temperature adjustments. > Remove the small cap on the back side of the handle. > Using 2.5 mm Allen wrench unscrew the handle. > Remove the handle. > Remove the top faucet cover. MAL_57158/18.09.2...
- Page 14 > Remove the sclad guard and adjust the > Reinstall the scald guard. scald guard clockwise or counterclockwise to achieve correct temperature setting. > Check the water temperature. > Attach the top faucet cover. > Attach the handle. MAL_57158/18.09.2...
- Page 15 > Turn on the handle. > Turn on the handle to the right and check cold water. > Turn on the handle to the left and check hot > Turn of the handle. water. MAL_57158/18.09.2...
- Page 16 22 mm > To flush debris from the plumbing system > Flush the aerator on both sides. remove the aerator using 22mm wrench. 22 mm > Reinstall the aerator using 22mm wrench. MAL_57158/18.09.2...
- Page 17 Chemical/Cleaners to avoid: Cleaning tools to avoid: • Abrasives and polishes, including bleach • Abrasive cleaning pads based cleaners • Scraping tools • Scrubbing bubbles and Lysol basin tub • Abrasive cleaning tools • Soft scrub, tile cleaner and Windex original Cleaning tools recommended: •...
- Page 18 77 °F Spray mist can ingress and > Ensure that temperature exceed NOTICE cause damage to the faucets 59 – 77 °F. and fittings > Spray cleaner onto the cleaning cloth. > Rinse cleaner and dirt with water. > Dry off faucet with the clean leather cloth. MAL_57158/18.09.2...
-
Page 19: Instructions Sur La Sécurité
Instructions sur la sécurité Ces instructions font partie du produit Duravit et doivent être lues attentivement et conservées en Blessures et coupures tout temps. > Portez des gants lorsque vous installez le produit. Lectorat ciblé et compétences Endommagement d'un produit et/ou d'une Le produit peut seulement être installé... - Page 20 # B11010 001U 10, # B11020 001U 10 # B21010 001U 10, # B21020 001U 10 # B11010 002U 10, # # B11020 002U 10 # B21010 002U 10, # B21020 002U 10 # B12400 001U 10 # B22400 001U 10 MAL_57158/18.09.2...
- Page 21 > Assurez-vous que les robinets ne sont pas MISE EN GARDE Blessures et coupures endommagés. > Portez des gants pendant l'installation. > Installez la tige de traction dans l'ouverture supérieure du bec verseur. > Installez la plaque du couvercle de l'anneau. >...
- Page 22 „M“ > Poussez le robinet vers le bas jusqu'à ce qu'il > Installez les anneaux de métal. soit entièrement scellé. „M“ SW 12 3 Nm / 2.2 ft-lbs. > Serrez les vis de tension Fuite entraînée par une ATTENTION mauvaise installation des (couple maximal de 2,2 pi-lb).
- Page 23 8 Nm 5.9 ft-lbs. 19 mm Les valves chaudes peuvent MISE EN GARDE MISE EN GARDE Blessures et coupures entraîner des brûlures > Évitez le contact. > Portez des gants pendant l'installation. ATTENTION > Attachez les autres extrémités des conduites Possibilité...
- Page 24 > Faites glisser la tige de traction dans la tige de > Poussez le raccord à déchet dans l'ouverture levage. du lavabo. > Serrez les boulons avec un tournevis à tête > Installez la bonde mécanique. plate. X 16 22 mm >...
- Page 25 00:02:00 > Rincez les robinets chaud et froid pendant au > Vérifiez qu'il n'y a pas de fuites. moins 2 minutes. 22 mm > Réinstallez l'aérateur à l'aide de l'outil de 22 mm. MAL_57158/18.09.2...
- Page 26 Ajustements du débit d'eau. Vérifiez la position de la poignée. 2,5 mm > Enlevez le petit couvercle sur le côté arrière de > Enlevez la poignée. la poignée. > Utilisez une clé Allen de 2,5 mm pour dévisser la poignée. MAL_57158/18.09.2...
- Page 27 > Enlevez le couvercle du haut du robinet > Utilisez un tournevis à tête plate, ajustez le débit. > Vérifiez le débit. > Attachez le couvercle du haut du robinet. > Attachez la poignée. MAL_57158/18.09.2...
- Page 28 2,5 mm Ajustements de la température. > Enlevez le petit couvercle sur le côté arrière de la poignée. > Utilisez une clé Allen de 2,5 mm pour dévisser la poignée. > Enlevez la poignée. > Enlevez le couvercle du haut du robinet. MAL_57158/18.09.2...
- Page 29 > Enlevez le protecteur anti-brûlure et ajustez- > Réinstallez le protecteur anti-brûlure. le dans le sens horaire ou anti-horaire pour régler la température adéquate. > Vérifiez la température de l'eau. > Attachez le couvercle du haut du robinet. > Attachez la poignée. MAL_57158/18.09.2...
- Page 30 > Tournez la poignée. > Tournez la poignée vers la droite et vérifiez l'eau froide. > Tournez la poignée vers la gauche et vérifiez > Fermez l'eau avec la poignée. l'eau chaude. MAL_57158/18.09.2...
- Page 31 22 mm > Pour rincer les débris du système de > Rincez l'aérateur des deux côtés. plomberie, enlevez l'aérateur à l'aide d'une clé de 22 mm. 22 mm > Réinstallez l'aérateur à l'aide de l'outil de 22 mm. MAL_57158/18.09.2...
- Page 32 Produits chimiques/nettoyants à éviter : Outils de nettoyage à éviter : • Des produits abrasifs et polissant, dont des • Tampons nettoyants abrasifs nettoyants à base de javellisant • Grattoirs • Scrubbing bubbles et Lysol pour la baignoire • Outils de nettoyage abrasifs •...
- Page 33 77 °F La fine brume peut > Assurez-vous que la température dépasse les ATTENTION s'infiltrer et endommager 15 à 25 °C (59 – 77 °F). les robinets et les raccords > Vaporisez le nettoyant sur le linge. > Rincez le nettoyant et la saleté avec de l'eau. >...
-
Page 34: Instrucciones De Seguridad
Instrucciones de seguridad Estas instrucciones de montaje forman parte del producto Duravit y es necesario leerlas Lesiones por corte y aplastamiento detenidamente antes del montaje. > Llevar guantes durante la instalación del producto. Lectores destinatarios y cualificaciones Daños materiales y/o en el producto >... - Page 35 # B11010 001U 10, # B11020 001U 10 # B21010 001U 10, # B21020 001U 10 # B11010 002U 10, # # B11020 002U 10 # B21010 002U 10, # B21020 002U 10 # B12400 001U 10 # B22400 001U 10 MAL_57158/18.09.2...
- Page 36 Lesiones por corte y > Inspeccionar la grifería por si hubiera daños. ATENCIÓN aplastamiento > Llevar guantes durante la instalación. > Instalar el varillaje en la abertura de la parte superior del llenado. > Instalar la placa anular de cubierta. >...
- Page 37 „M“ > Apretar la grifería hasta que quede totalmente > Instalar los anillos metálicos. estanca. „M“ SW 12 3 Nm / 2.2 ft-lbs. > Apretar los tornillos tensores (par máximo: Fuga en mangueras instaladas AVISO incorrectamente 2,2 ft-lb). > Asegurarse de no retorcer ni doblar las mangueras durante la instalación.
- Page 38 8 Nm 5.9 ft-lbs. 19 mm Las válvulas calientes pueden Lesiones por corte y aplasta- ATENCIÓN ATENCIÓN causar quemaduras miento > Llevar guantes durante la instalación. > Evitar el contacto. Existencia de riesgo de > Fijar los otros extremos de las líneas de AVISO confusión suministro al tope de cierre.
- Page 39 > Deslizar el varillaje por la varilla de elevación. > Empujar el asiento de desagüe a través de la > Apretar el perno con un destornillador de abertura del lavabo. cabeza plana. > Instalar la válvula de desagüe automática. 22 mm >...
- Page 40 00:02:00 > Descargar los suministros de agua caliente y > Comprobar por si hubiera fugas. fría durante al menos 2 minutos. 22 mm > Volver a instalar el aireador utilizando la llave de 22 mm. MAL_57158/18.09.2...
- Page 41 Ajustes del flujo de agua. Comprobar la posición del mando. 2,5 mm > Retirar el tapón pequeño del lado posterior del > Retirar el mando. mando. > Utilizando una llave Allen de 2,5 mm, desenroscar el mando. MAL_57158/18.09.2...
- Page 42 > Retirar la cubierta de la grifería superior. > Utilizando un destornillador de cabeza plana, ajustar el flujo. > Comprobar el flujo. > Fijar la cubierta de la grifería superior. > Fijar el mando. MAL_57158/18.09.2...
- Page 43 2,5 mm Ajustes de temperatura. > Retirar el tapón pequeño del lado posterior del mando. > Utilizando una llave Allen de 2,5 mm, desenroscar el mando. > Retirar el mando. > Retirar la cubierta de la grifería superior. MAL_57158/18.09.2...
- Page 44 > Retirar la protección contra temperatura > Volver a instalar la protección contra excesiva y girarla en sentido de las agujas del temperatura excesiva. reloj o en sentido contrario al de las agujas del reloj para ajustar la temperatura correcta. >...
- Page 45 > Abrir el mando. > Abrir el mando girándolo a la derecha y comprobar el agua fría. > Abrir el mando girándolo a la izquierda y > Cerrar el mando. comprobar el agua caliente. MAL_57158/18.09.2...
- Page 46 22 mm > Para descargar los restos del sistema de > Descargar el aireador en ambos lados. tuberías, retirar el aireador utilizando una llave de 22 mm. 22 mm > Volver a instalar el aireador utilizando la llave de 22 mm. MAL_57158/18.09.2...
- Page 47 Productos químicos/limpiadores que se deben Herramientas de limpieza que se deben evitar: evitar: • Esponjas limpiadoras abrasivas • Productos abrasivos y abrillantadores, inclui- • Raspadoras dos los productos de limpieza con base de lejía • Herramientas de limpieza abrasivas • Burbujas de limpieza y Lysol para lavabos Herramientas de limpieza recomendadas: •...
- Page 48 77 °F La neblina de spray puede > Asegurarse de que la temperatura no sea AVISO penetrarse en la grifería y los superior a 59-77 °F. accesorios y dañarlos > Aplicar el producto de limpieza en el paño. > Aclarar con agua para eliminar el producto de >...
- Page 52 DURAVIT NYC DURAVIT USA, INC. 105 Madison Avenue 2635 North Berkeley Lake Rd., Ste. 100 New York, NY 10016 Duluth, GA 30096 Toll Free 888-DURAVIT Toll Free 888-DURAVIT Phone 212-686-0033 Phone 770-931-3575 212-686-8033 770-931-8454 info@us.duravit.com info@us.duravit.com www.duravit.nyc www.duravit.us...
Need help?
Do you have a question about the B 1 Series and is the answer not in the manual?
Questions and answers