Advertisement
WARNING
● Operation of children under the age of 16 may increase the risk of severe
injury or death!!! Drive properly for not sliding!!!!
● Adult supervision is always required.
● Children under the age of 16 may NOT operate this UTV.
● Overloading may affect the handling of the vehicle.
● Operator use only, Excess passengers prohibited.
● This vehicle is designed and manufactured for OFF-ROAD use only.
● Driving Off Road Vehicles on public streets, roads, or highways is illegal.
● All Riders MUST wear helmet and other protective equipment.
● Do NOT operate this vehicle during/after consuming Alcohol or Drugs.
● Don't do drugs. It's not healthy for you.
● When refueling, you must shut off the engine to avoid spark or fire risk.
● Read owner's manual carefully before operating this vehicle.
- 1 -
Advertisement
Table of Contents

Related Manuals for ODES UTV Series


Summary of Contents for ODES UTV Series
- Page 1 WARNING ● Operation of children under the age of 16 may increase the risk of severe injury or death!!! Drive properly for not sliding!!!! ● Adult supervision is always required. ● Children under the age of 16 may NOT operate this UTV. ●...
- Page 2 INTRODUCTION Dear Valued ODES Customer, Congratulations and thank you for choosing to become apart of our ODES family with the purchase of your new UTV. We have designed this vehicle for you, the customer in mind, providing you with great power, stability, and functionality with your UTV.
- Page 3 Important safety information Your UTV can provide many years of service and fun if you take responsibility for your own safety, others around you, and understand the challenges you can meet while riding. Throughout this owner’s manual, you will find many helpful recommendations to protect yourself and others while riding.
- Page 4 and react to hazards. Ride within your limits Pushing limits is another major cause of UTV accidents. Never attempt to ride beyond your personal abilities or faster than conditions warrant. Don’t drink and ride Riding after drinking can also cause potentially fatal accidents. Do not operate this vehicle if you have consumed any alcohol.
- Page 5 GUIDELINES FOR SAFE DRIVING 1. Reduce speed when approaching any turns, hills, or bends. Once you have fully turned, gradually increase speed. 2. Be careful when passing any vehicle in front of you. 3. Check the brakes each time you ride to ensure they have not been cut during off-road riding or they are too soft for full stopping capacity.
-
Page 6: Table Of Contents
TABLE OF CONTENTS Introduction…………………………………………………………………… Safety…………………………………………………... …………………… Features and Controls………………………………. ……………………… Operation……………………………………………………………………… Emission Control Systems………………………………………………… Maintenance…………………………………………...……………...……… Specifications………………………………………………………... ……… Troubleshooting……………………………………………………...……… Maintenance Log…………………………………….. ……………..……… Index……………………………………………………. ……………...…… - 6 -... -
Page 7: Introduction
INTRODUCTION INTRODUCTION This manual will provide you with a good basic understanding of the features and operation of this vehicle. It also includes basic maintenance and inspection procedures. If you have any questions regarding the operation or maintenance of your vehicle, please contact your dealer. !WARNING Please read this manual carefully before operating this vehicle. - Page 8 INTRODUCTION IMPORTANT MANUAL INFORMATION FAILURE TO COMPLY WITH THE WARNINGS CONTAINED IN THIS MANUAL CAN RESULT IN SERIOUS INJURY OR DEATH. Particularly important information is distinguished in this manual by the following notations: The Safety Alert Symbol means BECOME ALERT! ATTENTION! YOUR SAFETY IS INVOLVED! Failure to follow WARNING instructions could...
- Page 9 INTRODUCTION IMPORTANT NOTICE ● This vehicle is designed and manufactured for off-road use only. It is prohibited by the law to operate this vehicle on any public street, road, or highway. ● Check the laws and regulations in your state before choosing where to operate this vehicle.
- Page 10 INTRODUCTION Vehicle Identification Numbers Record your vehicle's identification numbers and key number in the spaces provided. Remove the spare key and store it in a safe place. An ignition key can be duplicated only by ordering a Yours key blank and mating it with one of your existing keys.
-
Page 11: Safety
SAFETY SAFETY INFORMATION This off-highway utility vehicle handles differently from other vehicles including other UTVs, ATVs, Dune Buggies, Go Karts, or cars. SEVERE INJURY OR DEATH can happen if you do not follow these instructions: ● Read this manual and all labels carefully and follow ALL operating procedures. - Page 12 SAFETY schedules described in this manual. ● Always keep both hands, arms, feet, and legs inside the vehicle at all times. Keep your feet on the floorboard. Never hold onto the roll cage except when using the handgrip inside the roll cage. Otherwise, your hand could be injured if it is caught between the roll cage and an obstacle outside the vehicle.
- Page 13 SAFETY Always follow proper procedures for going uphill. If you lose momentum and ● cannot continue up a hill, back down the hill with the engine in reverse gear. Use engine braking to help you go slowly. If necessary, use the brakes gradually to help you go slowly.
- Page 14 SAFETY ! WARNING POTENTIAL HAZARD Improper handling of gasoline. WHAT CAN HAPPEN Gasoline can catch fire and you could be burned. HOW TO AVOID THE HAZARD Always turn off the engine when refueling. Do not refuel right after the engine has been running and is still very hot.
- Page 15 SAFETY TIRE PRESSURE IN PSI (KPa): Front: 14 psi (97kPa) Rear: 21 psi (145kPa) MAXIMUM WEIGHT CAPACITY:300 lbs. (136 KG) NCLUDES WEIGHT OF OPERATOR, PASSENGER AND ACCESSORIES. LOCATE AND READ OWNER'S MANUAL. FOLLOW ALL INSTRUCTIONS AND WARNINGS. IF OWNER'S MANUAL IS MISSING, CONTACT A YOURS DEALER FOR A REPLACEMENT.
-
Page 16: Features And Controls
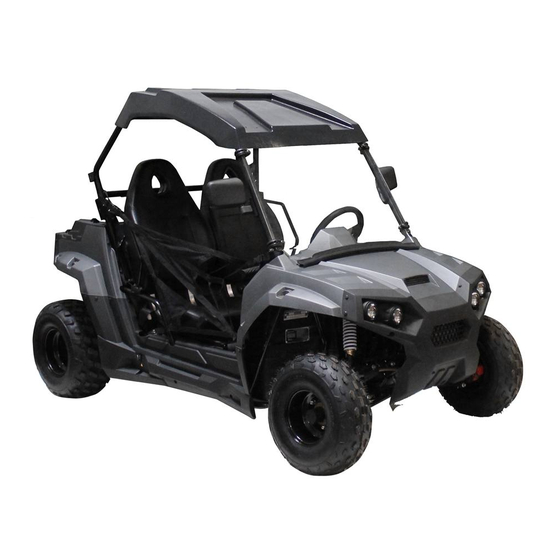
FEATURES AND CONTROLS Component Locations Your vehicle is equipped with cab nets and side guards on both sides of the vehicle. Cab nets and side guards must be used by both operator and passenger at all times. Promptly replace worn or damaged cab nets with new cab nets, available from your authorized Yours dealer. - Page 17 FEATURES AND CONTROLS Component Locations Cab Frame Steering Wheel Running Lights Brush Guard Muffler (Spark Arrestor) Taillight/Brake light - 17 -...
- Page 18 FEATURES AND CONTROLS Seats Driver’s Seat Adjustment 1.Lift the seat latch lever located Seat Latch Lever under the right front edge of the driver's seat. 2. While holding the lever upward, slide the seat forward or rearward to the desired position, then release the lever.
- Page 19 FEATURES AND CONTROLS Adjustment Bolt Steering Wheel The steering Wheel can be adjusted upward or downward for rider preference. 1.Loosen the steering wheel adjustment bolt. 2.Move the steering wheel upward or downward to the desired position. 3.Tighten the bolt to 10 ft. lbs. (13.5 Nm).
- Page 20 FEATURES AND CONTROLS Seat Belts Your vehicle is equipped with three-point lap and diagonal seat belts for the operator and passenger. Always make sure the seat belts are secured for both the operator and passenger before riding. To wear the seat belt properly, follow this procedure: Seat Belt Latches 1.
- Page 21 FEATURES AND CONTROLS Seat Belts Seat Belt Inspection Inspect all belts before operation of each vehicle. 1.Push the latch plate into the buckle until it clicks. The latch plate must slide smoothly into the buckle. A click indicates that it's securely latched.
- Page 22 FEATURES AND CONTROLS Cab Nets/Side Guards Riding in this vehicle without using the cab nets and side guards increases the risk of serious injury or death in the event of an accident or overturn. Adjusters/Latches Screw Cab nets and side guards must be used by both operator and passenger at all times.
- Page 23 FEATURES AND CONTROLS Fuel Cap Never allow a child to refuel or handle gasoline. The fuel lank filler cap is located on the right-hand side of the vehicle near file passenger seat. When refueling always use either leaded or unleaded gasoline with a minimum pump octane number of 87 R+M/2 Fuel Valve Fuel Cap...
- Page 24 FEATURES AND CONTROLS Ignition Switch The ignition switch is a three-position, key-operated switch. Use the ignition switch to start the engine. See page 33 for starting procedures. The key can be removed from the switch when it is in the OFF position. The engine is off.
- Page 25 FEATURES AND CONTROLS The Introductions of the speedometer button. Set metric system short for: Inch Metric Mode, Set tires as diameter short for: Wheel diameter mode; Press the button about 0.5 seconds and then loosen that we called: short press; Press the button about 1.5 seconds and then loosen that we called :long press;...
- Page 26 FEATURES AND CONTROLS Gear Selector Gear Selector F: Forward N: Neutral R: Reverse The gear selector is located between the seats. To change gears, stop the Vehicle, and with the engine idling, move the lever to the desired gear. Do not attempt to shift gears with engine speed above idle or while the vehicle is moving.
- Page 27 FEATURES AND CONTROLS Brake Pedal Depress the brake pedal to slow or stop the vehicle. Apply the brakes while starting the engine. Throttle Pedal Push the pedal down to increase engine speed. Spring pressure returns the pedal to the rest position when released.
- Page 28 FEATURES AND CONTROLS Speed Control System The speed of this vehicle is restricted to 15 MPH (24 km/h) by the Manufacture, The speed limiting device may be adjusted by a certified mechanic. The adjustable throttle limiting screw is located behind the throttle pedal. Use the following procedure to control how far the throttle opens.
-
Page 29: Operation
OPERATION ! WARNING Failure to operate the vehicle properly can result in a collision, loss of control, accident or overturn, which may result in serious injury or death. Read and understand all safety warnings outlined in the safety section of this owner's manual. - Page 30 OPERATION Vehicle Break-in Period Engine and Drivetrain Break-in 1.Fill the tank with gasoline. Always exercise extreme caution. whenever handling gasoline. Never allow a child to handle gasoline. 2.Check the oil level. See page 52. Add the recommended oil as needed to maintain the oil level in the safe operating range.
- Page 31 OPERATION Pre-Ride Inspection Failure to inspect and verify that the vehicle is in safe operating condition before operating increases the risk of an accident. Always inspect the vehicle before each use to make sure it's in safe operating condition. Item Remarks Page Brake system/pedal travel...
- Page 32 OPERATION Safe Operation Practices 1. Complete the New Operator Driving Procedures outlined on pages 35-36. 2. Do lint ride at night or when visibility is poor (rain, fog, dusk). Your vehicle doesn't have lights that are designed for driving in these conditions. 3.
- Page 33 OPERATION Starting the Engine 1. Turn the fuel valve on. 2. Sit in the driver's seat and fasten the seat belt. 3. Secure the cab nets. 4. Place the transmission in neutral. Set the parking brake. 5. Apply the brakes. 6.
- Page 34 OPERATION Stopping the Engine 1. Release the throttle pedal completely and brake to a complete stop. 2. Place the transmission in neutral. 3. Set the parking brake. 4. Stop the engine. 5. Turn the fuel valve off. Braking 1.Release the throttle pedal completely. (When the throttle pedal is released completely and engine speed slows to near idle, the vehicle has engine braking.) 2.
- Page 35 OPERATION New Operator Driving Procedures 1. Read and understand the owner's manual and all warning and instruction labels before operating this vehicle. 2. Watch the instructional video with the supervising adult. 3. Review the section of this owner's manual about starting the engine stopping the engine, braking and parking (pages 33-34).
- Page 36 OPERATION New Operator Driving Procedures Do not carry a passenger until you have at least four hours of driving experience with this vehicle. See page 37. 10. Make sure all cab nets and side guards are properly secured. 11. Set the transmission in neutral. 12.
- Page 37 OPERATION Driving with a Passenger 1. Complete the New Operator Driving Procedures outlined on pages 35-36. 2. Perform the pre-ride inspection. See page 31. 3. Do not carry a passenger until you have at least four hours of driving experience with this vehicle.
- Page 38 OPERATION Driving on Slippery Surfaces When driving on slippery surfaces such as wet trails, loose gravel, sand Or ice, be alert for the possibility of skidding and sliding. Skidding or sliding can cause loss of control or overturn, especially if tires regain traction unexpectedly.
- Page 39 OPERATION Driving Uphill Whenever traveling uphill, follow these precautions: 1. Always check the terrain carefully before ascending a hill. 2. Avoid steep hills (15°maximum). 3. Drive straight uphill. 4. Never climb hills with 15°maximu Excessively slippery or loose surfaces. 5. Drive at a steady rate of speed. Never press the throttle suddenly. 6.
- Page 40 OPERATION Driving on a Side hill (Side hilling) Driving on a side hill is not recommended. Driving on a side hill improperly cause loss of control or overturn. If crossing a hill is unavoidable, follow these precautions: 1. Drive slowly and use extreme caution. 2.
- Page 41 OPERATION Driving Through Water Your vehicle can drive through shallow water. Make sure the water is no deeper than the floor of the vehicle. Follow these precautions when driving through water: 1. Check water depth. Never drive through water that is deeper than the floor level.
- Page 42 OPERATION Driving Over Obstacles Follow these precautions when driving over obstacles: 1. Always check for obstacles before driving in a new area. 2. Look ahead and watch the terrain. Always be alert for hazards such as logs, rocks and low hanging branches. 3.
- Page 43 OPERATION Driving in Reverse Follow these precautions when driving in reverse: 1. Always check for obstacles or people behind the vehicle. 2. Apply the throttle lightly. Never apply the throttle suddenly. 3. Back slowly. 4. Apply the brakes lightly for stopping. 5.
- Page 44 OPERATION Parking on an Incline A rolling vehicle can result in serious injury. Avoid parking on an Incline. If parking on an incline is unavoidable, follow these precautions: 1.Place the transmission in neutral. 2.Set the parking brake. 3.Stop the engine. 4.Turn the fuel valve off.
-
Page 45: Emission Control Systems
EMISSION CONTROL SYSTEMS Noise Emission Control System Do not modify the engine, intake or exhaust components, as doing may affect compliance with U.S.A. EPA noise control requirement, CFR 205) and local noise level requirements. Operation on Public Lands in the U.S.A. Your vehicle has a spark arrestor that was tested and qualified to be in accordance with the USFS standard 5100-1c. -
Page 46: Maintenance
MAINTENACE Periodic Maintenance Chart Careful periodic maintenance will help keep your vehicle in the safest, most reliable condition. Inspection, adjustment and lubrication of important components are explained in the periodic maintenance chart. Inspect, clean, lubricate, adjust and replace parts as necessary. When inspection reveals the need for replacement parts, use genuine your parts available from your dealer. - Page 47 MAINTENANCE Periodic Maintenance Chart ! WARNING Improperly performing the procedures marked with a ■ could result in component failure and lead to serious injury or death. Have an authorized Yours dealer perform these services. Maintenance Chart Key ▲ Perform these operations more often for vehicles subjected to severe use.
- Page 48 MAINTENANCE Periodic Maintenance Chart Perform all services at whichever maintenance interval is reached first. Item Maintenance Interval Remarks (whichever comes first) Hours Calendar Miles (Km) ■ Steering Daily Check each day before driving the vehicle. Make ▲ Front suspension Daily adjustments as needed.
- Page 49 MAINTENANCE Periodic Maintenance Chart Item Maintenance Interval Remarks (whichever comes first) Hours Calendar Miles (Km) ▲ Engine breather Monthly 150 (250) Inspect; replace if necessary ▲ Engine oil change 300 (480) Perform a break-in oil change at one month ▲ General lubrication 500(800) Lubricate all fittings,...
- Page 50 MAINTENANCE Periodic Maintenance Chart Item Maintenance Interval Remarks (whichever comes first) Hours Calendar Miles (Km) ▲ Engine mounts 1000(1600) Inspect Exhaust 1000(1600) Inspect muffler/pipe ■ Ignition timing 1000(1600) Inspect ▲ Wiring 1000(1600) Inspect for wear, routing, security; apply dielectric grease to connectors subjected to water, mud, etc.
- Page 51 MAINTENANCE Lubrication Recommendations Check and lubricate all components at the intervals outlined in the Periodic Maintenance Chart beginning on page 46, or more often under severe use, such as wet or dusty conditions. Items not listed in the chart should be lubricated at the general lubrication interval.
- Page 52 MAINTENANCE Engine Oil Always check and change the engine oil at the intervals outlined in the Periodic Maintenance Chart beginning on page 46. Oil may need to be changed more frequently if your oil is not used. Do not use automotive oil.
- Page 53 MAINTENANCE Engine Oil Oil Change 1. Position the vehicle on a level surface. Set the parking brake. 2. Clean the area around the pre-filter plug. 3. Start the engine. Allow it to idle for two to three minutes. 4. Stop the engine. Hot oil can cause burns to skin.
- Page 54 MAINTENANCE Transmission (Main Gear case) Always check and change the fluid at the intervals outlined in the Periodic Maintenance Chart beginning on page 46. Yours recommends the use of Premium AGL Synthetic Gear case Fluid for this vehicle. Fluid Check Fill Plug The fill plug is located on the rear of the Gear case.
- Page 55 MAINTENANCE Drive Chain Lubrication Lubricate the drive chain with Yours chain spray lube or an approved chain lube at the general lubrication interval specified in the Periodic Maintenance Chart beginning on page 46. Lubricate more often under severe use, such as in dirty or wet conditions.
- Page 56 MAINTENANCE Spark Plugs Spark Plug Gap/Torque Electrode Gap New Plug Torque Used Plug Torque 0.6-0.7 mm 9-11 ft. lbs. (12-15 Nm) 17-20 ft. lbs. (23-27 Nm) NOTICE: Using non-recommended spark plugs can result in serious engine damage. Always use Yours-recommended spark plugs. Refer to the specifications section beginning on page 84.
- Page 57 MAINTENANCE Spark Plugs Spark Plug Gap/Torque Normal Plug The normal insulator tip is gray, tan or light brown. There will be few Combustion deposits. The electrodes are not burned or eroded. This indicates the proper type and heat range for the engine and the service. lip: The tip should not be white.
- Page 58 MAINTENANCE Constant Variable Transmission (CVT) System ! WARNING Failure to comply with the instructions in this warning can result in severe injury or death. Do not modify any component of the CVT system. Doing so may reduce its strength so that a failure may occur at a high speed. The CVT system has been precision balanced.
- Page 59 MAINTENANCE Filter Systems Air Filter Always change the air filter at the intervals outlined in the Periodic Maintenance Chart beginning on page 46. Access the air box through the access cover on the forward surface of the rear body panel. 1.
- Page 60 MAINTENANCE Spark Arrestor ! WARNING Failure to heed the following warnings while servicing the spark arrestor could result in serious injury or death. ●Do not perform service on the spark arrestor while the system is hot. Allow components to cool sufficiently before proceeding. ●Wear eye protection and gloves.
- Page 61 MAINTENANCE Throttle System ! WARNING Failure to check or maintain proper operation of the throttle system can result in an accident and lead to serious injury or death if the throttle pedal sticks during operation. Never start or operate this vehicle if it has a sticking or improperly operating throttle pedal.
- Page 62 MAINTENANCE Throttle System Throttle Freeplay Adjustment Access the throttle cable adjuster through the right front wheel well. 1. Slide the cable adjuster boot off the cable adjuster. 2. Squeeze the end of the rubber boot and slide it far enough to expose the end of the inline cable adjuster.
- Page 63 MAINTENANCE Carburetor Your vehicle is calibrated at the factory for optimal performance at altitudes ranging from zero to 6,000 feet (1800 m) and temperatures of +40 degrees F. (4 degrees C.) or higher. Above 6000 feet (1800 m) the engine air/fuel mixture becomes overly rich and the engine loses approximately 3% of its power for each 1000-foot (304.8 in) increase in elevation.
- Page 64 MAINTENANCE Brakes The front and rear brakes are hydraulic disc type brakes activated by the brake pedal. See page 27. Always check brake pedal travel and the brake fluid reservoir level before each use of the vehicle. When applied, the brake pedal should feel firm. Any sponginess would indicate a possible fluid leak or low brake fluid level, which must be corrected before riding.
- Page 65 MAINTENANCE Brakes Brake Fluid Inspect the level of the brake fluid before each operation. If the fluid level is low add DOT 4 brake fluid only. After opening a bottle of brake fluid, always discard any unused portion. Never store or use a partial bottle. Brake fluid is hygroscopic, meaning it rapidly absorbs moisture from the air.
- Page 66 MAINTENANCE Steering Wheel Inspection Check the steering wheel for specified freeplay and smooth operation at the intervals outlined in the Periodic Maintenance Chart beginning on page 1. Position the vehicle on level ground. 2. Lightly turn the steering wheel left and right. 3.
- Page 67 MAINTENANCE Toe Alignment Use the following procedure to check the toe alignment of the vehicle. The recommended toe alignment is 1/8" to 1/4" (3-6 mm) toe out. WARNING! Severe injury or death can result from improper toe alignment and adjustment. Do not attempt to adjust tie rod alignment. All tie rod adjustments should be performed by an authorized Yours dealer.
- Page 68 MAINTENANCE Tires ! WARNING Operating your vehicle with worn tires will increase the possibility of skidding, loss of control and an accident, which could result in serious injury or death, Always replace tires when the tread depth measures 1/8" (3 mm) or less. Improper tire inflation or the use of non-standard size or type of tires may adversely affect vehicle handling, which could result in vehicle damage or personal injury.
- Page 69 MAINTENANCE Tires Wheel Installation 1. Place the transmission in neutral. 2. Set the parking brake. 3. Place the wheel on the wheel hub with the valve stem toward the outside and the rotation arrows on the tire pointing toward forward rotation. 4.
- Page 70 MAINTENANCE Lights Daytime Running Lights Lamp Replacement If the daytime running lights do not operate, replace the lamps. Yours recommends that you install replacement lamps obtained from your authorized dealer. 1. Disconnect the lights from the harness. 2. Remove the rubber cover from the back of the light assembly. 3.
- Page 71 MAINTENANCE Vehicle Immersion NOTICE: If your vehicle becomes immersed, major engine damage can result if the machine is not thoroughly inspected. Take the vehicle to your dealer before starting the engine. If it's impossible to take your vehicle to a dealer before starting it, follow the steps outlined below.
- Page 72 MAINTENANCE Battery ! WARNING Improperly connecting or disconnecting battery cables can result in an explosion and cause serious injury or death. When removing the battery, always disconnect the negative (black) cable first. When reinstalling the battery, always connect the negative (black) cable last. ! WARNING Battery electrolyte is poisonous.
- Page 73 MAINTENANCE Battery Battery Removal 1. Remove the driver's seat. See page 18. 2. On conventional batteries, remove the battery vent tube (sealed batteries do not have a vent tube). 3. Disconnect the black (negative) battery cable first. 4. Disconnect the red (positive) Battery battery cable last.
- Page 74 MAINTENANCE Battery Battery Installation Using a new battery that has not been fully charged can damage the battery and result in a shorter life. It can also hinder vehicle performance. Follow the battery charging instructions on page 76 before installing the battery. 1.
- Page 75 MAINTENANCE Battery Battery Storage Whenever the vehicle is not used for a period of three months or more, remove the battery from the vehicle, ensure that it's fully charged, and store it out of the sun in a cool, dry place. Check battery voltage each month during storage and recharge as needed to maintain a full charge.
- Page 76 MAINTENANCE Battery Battery Charging (Conventional Battery) 1. Remove the battery from the vehicle to prevent damage from leaking or spilled electrolyte during charging. See page 73. 2. Charge the battery with a charging output no larger than 1/10 of the battery's amp/hr rating.
- Page 77 MAINTENANCE Battery Battery Charging (Sealed Battery) Always verify battery condition before and 1-2 hours after the end of barging. Charge Time State of (Using constant current Voltage Action charge charger @ standard amps specified on top of battery) 100% 12.8-13.0 volts None, check at 3 None required mos.
- Page 78 MAINTENANCE Cleaning and Storage Washing the Vehicle Keeping your Yours vehicle clean will not only improve its appearance but it can also extend the life of various components. Before washing the vehicle, locate the CVT inlet and outlet ducts. The ducts are located under the rear wheel wells.
- Page 79 MAINTENANCE Cleaning and Storage Washing the Vehicle If a high pressure water system is used for cleaning (not recommended), exercise extreme caution. The water may damage components and could remove paint and labels. Avoid directing the water stream at the following items: ●...
- Page 80 MAINTENANCE Cleaning and Storage Chrome Wheel Care (if equipped) Proper maintenance will protect chrome wheels from corrosion, preserve wheel life and ensure a “like new” appearance for many years. Tip: Chrome wheels exposed to road salt (or salt in the air in coastal areas) are more susceptible to corrosion if not properly cleaned.
- Page 81 MAINTENANCE Cleaning and storage Storage Tips NOTICE: Starting the engine during the storage period will disturb the protective film created by fogging and damage could occur. Never start the engine during the storage period. Clean the Exterior Make any necessary repairs and clean the vehicle as recommended. See page 79.
- Page 82 MAINTENANCE Cleaning and Storage Storage Tips Inspect and Lubricate Inspect all cables and lubricate all areas of the vehicle as recommended in the Periodic Maintenance Chart beginning on page 46. Fog the Engine Use Yours Engine Fogging Oil. Follow label directions carefully. Battery Maintenance See pages 75-77 for storage and charging procedures.
- Page 83 MAINTENANCE Transporting the Vehicle Follow these procedures when transporting the vehicle. 1. Place the transmission in neutral. Set the parking brake. 2. Stop the engine. 3. Turn the fuel valve off. 4. Remove the key to prevent loss during transporting. 5.
-
Page 84: Specifications
SPECIFICATIONS UTV 170 /150 Maximum Rider Weight 150 lbs. (68 kg) (each rider) Maximum Weight Capacity 300 lbs. (136 kg) Gross Vehicle Weight 840 lbs. (381 kg) Dry Weight 540 lbs. (245 kg) Fuel Capacity 2.5 gal. (9.5 ltr) Engine Oil Capacity 33 oz. - Page 85 SPECIFICATIONS UTV 170/150 Lubrication System Wet Sump Driving System Type Automatic Constant Variable Transmission Final Drive Chain Shift Type F/N/R Tire Size - Front 19x7-8/22x7-10 Tire Size - Rear 20x10-9/ 22x10-10 Tire Pressure - Front 14 psi (97kPa) Tire Pressure - Rear 21 psi (145kPa) Brakes, Front/Rear Foot Activated, 4-wheel hydraulic disc...
-
Page 86: Troubleshooting
TROUBLESHOOTING Drive Belt Wear/Burn Part cause Solution Driving at low RPM or Drive at a higher speed. ground speed Insufficient warm-up Warm the engine at least 5 minutes. With the at low ambient transmission in neutral, apply small amount of temperatures throttle in short bursts, 5 to 7 times. - Page 87 TROUBLESHOOTING Engine Doesn't Turn Over Possible Cause Solution Low battery voltage Recharge the battery to 12.8 VDC Loose battery connections Check all connections and tighten Loose solenoid connections Check all connections and tighten Engine Turns Over, Fails to Start Possible Cause Solution Out of fuel Turn the fuel valve to reserve, refuel...
- Page 88 TROUBLESHOOTING Engine Pings or Knocks Possible Cause Solution Poor quality or low octane fuel Replace with recommended fuel Incorrect ignition timing See your dealer Incorrect spark plug gap or heat range Set gap to specs or replace plugs Engine Runs Irregularly, Stalls or Misfires Possible Cause Solution Fouled or defective spark plugs...
- Page 89 TROUBLESHOOTING Engine Stops or Loses Power Possible Cause Solution Out of fuel Refuel Kinked or plugged fuel vent line Inspect and replace Overuse of choke Inspect, clean and/or replace spark plugs Water is present in fuel Replace with new fuel Fouled or defective spark plugs Inspect, clean and/or replace spark plug...
-
Page 90: Maintenance Log
MAINTEANCE LOG Use the following chart to record periodic maintenance. MILES (KM) OR DATE TECHNICIAN SERVICE PERFORMED / COMMENTS HOURS - 90 -... -
Page 91: Index
INDEX MILES (KM) OR DATE TECHNICIAN SERVICE PERFORMED / COMMENTS HOURS - 91 -... - Page 92 WARNING Improper vehicle use can result in SEVERE INJURY or DEATH NEVER allow vehicle to be operated: ● without all occupants first viewing and understanding safety video and warning labels. ● with more than one passenger. ● on hills steeper than 15 degrees ∠15°. ●...
Need help?
Do you have a question about the UTV Series and is the answer not in the manual?
Questions and answers