Advertisement
Quick Links
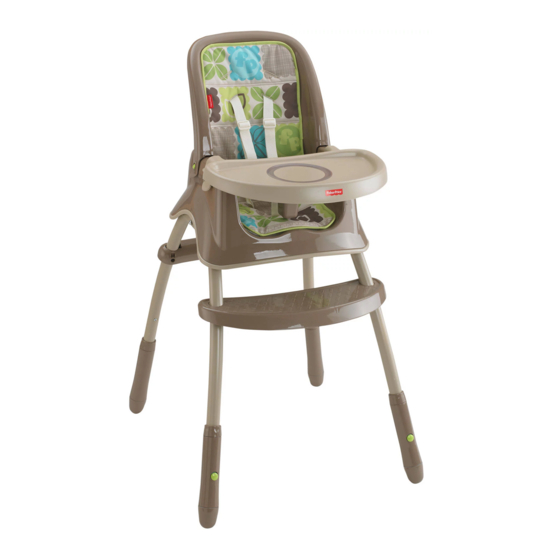
IMPORTANT! Please keep these
instructions for future reference, as they
contain important information.
• Please read these instructions before
assembly and use of this product.
fisher-price.com
¡IMPORTANTE! Guardar estas instrucciones
para futura referencia, ya que contienen
información de importancia acerca de
este producto.
• Leer estas instrucciones antes de
ensamblar y usar este producto.
1
Y8644
Advertisement

Related Manuals for Fisher-Price Y8644


Summary of Contents for Fisher-Price Y8644
- Page 1 Y8644 IMPORTANT! Please keep these ¡IMPORTANTE! Guardar estas instrucciones instructions for future reference, as they para futura referencia, ya que contienen contain important information. información de importancia acerca de • Please read these instructions before este producto. assembly and use of this product.
- Page 2 IMPORTANT! Before assembly and each use, inspect this product for damaged hardware, loose joints, missing parts or sharp edges. DO NOT use if any parts are missing or broken. Contact Fisher-Price ® for replacement parts and instructions if needed. Never substitute parts.
- Page 3 Assembled Parts Piezas ensambladas Tray Bandeja Seat Back Respaldo Seat Bottom Asiento Seat Pad Footrest 4 Feet Almohadilla Reposapiés 4 patas Rear Leg Rear Leg with Cross Brace 2 Front Legs (Left and Right) Pata trasera Pata trasera con barra transversal 2 patas delanteras (izquierda y derecha) #8 x ¾"...
- Page 4 Assembly Montaje Rear Leg with Cross Brace Pata trasera con barra transversal Clavija • Locate the rear leg with cross brace. • Turn the cross brace and then lower it to fit it to the peg on the leg • Ubicar la pata trasera con la barra transversal. •...
- Page 5 Assembly Montaje Rear Leg Pata trasera • Slide the other rear leg down through the hole in the cross brace. • Meter la otra pata trasera por el orificio en la barra transversal. #10-32 x 1¾" (4,4 cm) Screw Tornillo № 10-32 x 4,4 cm •...
- Page 6 Assembly Montaje Footrest Front Legs Reposapiés Patas delanteras • Fit both front legs through the holes in the underside of the footrest. • Ajustar ambas patas delanteras en los orificios de la parte de abajo del reposapiés. #8 x ¾" (1,9 cm) Screws Tornillos №...
- Page 7 Assembly Montaje • Fit the front leg assembly into the sockets in the rear leg frame. • Ajustar la unidad de las patas delanteras en las conexiones de armazón de pata trasera. ¼-20 x 1,85" (4,7 cm) Screws Tornillos ¼-20 x 4,7 cm •...
- Page 8 Assembly Montaje Feet Buttons Botones de las extremidades Button Botón Feet Buttons Botones de las extremidades • With the button on each foot facing out, slide the feet completely onto each leg. • Con el botón de cada extremidad apuntando hacia afuera, meter las extremidades completamente en cada pata.
- Page 9 Assembly Montaje #8 x ¾" (1,9 cm) Screws #8 x ¾" (1,9 cm) Screws Tornillos № 8 x 1,9 cm Tornillos № 8 x 1,9 cm • Turn the seat bottom over. • Fit the frame assembly into the openings in the seat bottom Hint: The frame assembly is designed to fi...
- Page 10 Assembly Montaje BACK VIEW BACK VIEW VISTA DE ATRÁS VISTA DE ATRÁS Seat Back Respaldo Seat Bottom Asiento • Fit the tab on each side of the seat back onto the pegs on each side of the seat bottom • Then, push the lower center of the seat back to “snap” the center tab in place .
- Page 11 Assembly Montaje Elastic Loops (backside of pad) Elastic Loops Elastic Loops Ganchos elásticos (parte trasera Ganchos elásticos Ganchos elásticos de la almohadilla) BOTTOM VIEW VISTA DE ABAJO • Insert the waist and crotch belts up through the lowest slots in the pad. Make sure the belts are not twisted.
- Page 12 Assembly Montaje Lower Shoulder Belt Slots Upper Shoulder Belt Slots Ranuras inferiores de los Ranuras superiores de los cinturones de los hombros cinturones de los hombros • Insert the shoulder belts through the slots in the pad. - Use the lower shoulder belt slots for a smaller child. - Use the upper shoulder belt slots for a larger child.
- Page 13 Assembly Montaje Elastic Loops (backside of pad) Ganchos elásticos (parte trasera de la almohadilla) Elastic Loops Elastic Loops (backside of pad) (backside of pad) BACK VIEW Ganchos elásticos Ganchos elásticos VISTA DE ATRÁS (parte trasera de (parte trasera de la almohadilla) la almohadilla) BOTTOM VIEW VISTA DE ABAJO...
- Page 14 Use Uso WARNING Prevent serious injury or death from falls or sliding out. • The child should be secured in the high chair at all times by the restraint system. The restraint belts must be adjusted to fit your child snugly. The tray is not designed to hold the child in the chair.
- Page 15 Seat Height Adjustment Ajuste de altura de la silla PRESS PRESS PRESIONAR PRESIONAR PRESS PRESIONAR PRESS PRESIONAR • Press the button on a foot and pull the foot up or down until it “clicks” in place. Make sure you hear a “click”. •...
- Page 16 Securing Your Child Sistema de sujeción Shoulder Straps Cinturones de los hombros Waist Belts Cinturones de la cintura Crotch Belt Cinturón de la entrepierna • Place your child in the seat. Position the crotch belt between your child’s legs. • Fit the end of each waist belt through the end of each shoulder belt. •...
- Page 17 Securing Your Child Sistema de sujeción TIGHTEN LOOSEN APRETAR AFLOJAR To tighten the waist belts: • Feed the anchored end of the waist belt up through the buckle to form a loop . Pull the free end of the waist belt To tighten the shoulder belts: •...
- Page 18 Securing Your Child Sistema de sujeción BACK VIEW BACK VIEW VISTA DE ATRÁS VISTA DE ATRÁS To change shoulder belt slots: • From the back of the high chair, push the end of each shoulder belt through the seat back and pad.
- Page 19 Using the Tray Uso de la bandeja Tray Bandeja ATTACH ATTACH CONECTAR CONECTAR REMOVE REMOVE QUITAR QUITAR • The tray can be attached to the seat in two positions. Fit and “snap” the tray onto the buttons on the armrest. •...
- Page 20 Convert to Toddler Chair Convertir en silla para niño pequeño Convertir en silla para niño pe BACK VIEW VISTA DE ATRÁS • Unbuckle the restraint system. • Fit the shoulder straps back through the slots in the pad. • From the back of the seat, unfasten the elastic loops from the tabs on the seat back. •...
- Page 21 Convert to Toddler Chair Convertir en silla para niño pequeño Convertir en silla para niño peque BOTTOM VIEW BOTTOM VIEW VISTA DE ABAJO VISTA DE ABAJO • Unfasten the elastic loops from the pegs on the seat bottom • Pull to remove the pad from the seat bottom •...
- Page 22 Storing Almacenamiento FOLD FOLD OPEN OPEN DOBLAR DOBLAR ABRIR ABRIR • From the front of the seat, pull both storage tabs towards you while lifting the back legs to fold the back legs towards the front legs. Lean against a wall for storage. •...
- Page 23 Care Mantenimiento • The pad is machine washable. Wash in cold water on the gentle cycle. Do not use bleach. • Tumble dry separately on low heat and remove promptly. To remove the pad: • Remove the elastic loops from the tabs on the underside and back of the seat. •...
- Page 24 CONSUMER ASSISTANCE AYUDA AL CONSUMIDOR 1-800-432-5437 (US) Fisher-Price, Inc., 636 Girard Avenue, East Aurora, NY 14052. Hearing-impaired consumers/Clientes con problemas auditivos 1-800-382-7470. Centro de Servicio en México: 59-05-51-00 Ext. 5206 ó 01-800-463-59-89 MÉXICO Importado y distribuido por Mattel de México, S.A. de C.V., Miguel de Cervantes Saavedra No. 193, Pisos 10 y 11, Col.
Need help?
Do you have a question about the Y8644 and is the answer not in the manual?
Questions and answers