Advertisement
Table of Contents
- 1 Introduction
- 2 Warranty
- 3 Table of Contents
- 4 Important Kice Air Power Unit Information
- 5 General Information
- 6 Safety Precautions
- 7 Delivery Inspection
- 8 Storage
- 9 Installation
- 10 Operation and Start-Up Procedure
- 11 Maintenance and Service
- 12 Troubleshooting
- 13 Disassembly of Air Power Unit
- 14 Assembly of Air Power Unit
- 15 Special Tools
- 16 Torque Values for Maintenance and Installation
- Download this manual
Advertisement
Table of Contents

Related Manuals for KICE PD Series

Summary of Contents for KICE PD Series
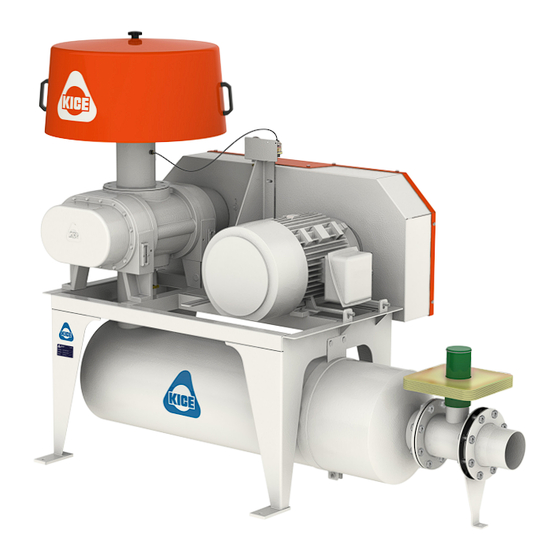
- Page 1 Skilled Air for Industry Kice PD Blower Operators Manual 2014/34/EU II 3D c Kice Industries, Inc. APU-M01-0001 041019...
-
Page 2: Introduction
The range of equipment manufactured by Kice should satisfy nearly every conceivable industrial air-handling need. We are proud of our products and the people at Kice who build them. At Kice, we start in our own foundry and follow the design and manufacturing standards that have proven superior for more than 60 years. -
Page 3: Table Of Contents
Table of Contents 1. Introduction Warranty 2. Important Kice Air Power Unit Information 3. General Information 4. Safety Precautions 5. Delivery Inspection 6. Storage 7. Installation 8. Operation and Start-Up Procedure 9. Maintenance and Service 10. Troubleshooting 11. Disassembly of Air Power Unit 12. -
Page 4: Important Kice Air Power Unit Information
2. Important Kice Air Power Unit Information Important Kice Air Power Unit Information Write down the MODEL and SERIAL NUMBER of the Kice Air Power Unit, along with the same information for the auxiliary equipment. (Airlock valves, fans, speed reducers, motors, and sheaves size, type and any special modifications to standard). -
Page 5: General Information
Photographs and illustrations were current at the time of printing but subsequent production changes may cause your Kice Air Power Unit to vary slightly in detail. Kice Industries, Inc. reserves the right to redesign and change the air power unit as deemed necessary, without notification. If a change has been made to your Kice Air Power Unit that is not reflected in this owner’s manual or the Illustrated... - Page 6 Kice Industries, Inc. from any liability arising from subsequent use of this equipment. Each Kice Air Power Unit is configured to be used in a specific type of system, handling particular types of material. Using a Kice Air Power Unit for any purpose other than that for which it was designed could result in personal injury as well as product or property damage.
-
Page 7: Safety Precautions
The Kice Air Power Unit decals should not be removed, covered, painted or otherwise become illegible. If this occurs they should be replaced immediately. Contact Kice Industries, Inc. Customer Service Department for replacements. The following safety decals will be located on the Kice Air Power Unit. Look for them! Kice Industries, Inc. APU-M01-0001... - Page 8 • Do not abuse, overload, mistreat or misuse the air power unit or attempt to operate the Kice air power unit if it is in need of service, lubrication, maintenance or repair.
- Page 9 Stay clear of the blast from pressure relief valves and suction area of the vacuum relief valves. • Avoid extended exposure in close proximity to machinery with high intensity noise levels. • Hearing protection may be required depending on silencing capabilities. Kice Industries, Inc. APU-M01-0001 041019...
-
Page 10: Delivery Inspection
5. Delivery Inspection The Kice Air Power Unit has been inspected at Kice and should be in excellent condition upon delivery. A thorough customer inspection of the Kice Air Power Unit should be completed upon receipt to verify its condition. - Page 11 6. Store the air power unit in an air-conditioned and heated building if at all possible. At least insure as dry conditions as possible. 7. The pump should be stored with the shaft accessible, so that it can be rotated once or twice every two or three weeks. Kice Industries, Inc. APU-M01-0001 041019...
-
Page 12: Installation
The following instruction are intended to assist the installer with the assembly and installation of their Kice Air Power Unit but should not be considered a step-by-step instruction due to variations in the supplied product and site location. These variations could be due to application, customer specifications, orientations, etc. - Page 13 If the air power unit is twisted or cramped, the lobes may contact the end plates, or the body. Rotating the shaft by hand will confirm if this has happened. Kice Industries, Inc. APU-M01-0001 041019...
- Page 14 Fasten the air power unit securely, if grouting is used, shim the air power unit at least 3/4 inch from the concrete base (see Figure 5). NOTE: This includes anchor leg under the discharge (if supplied). When isolation is used, check the Kice drawing for installation instructions.
- Page 15 3. Adjust the motor on its base to a position closest to the air power unit shaft. Install belts by working each one over the sheave grooves until all are in position. Never pry the belts into place. On Kice air power units, sufficient motor adjustment is provided for easy installation of the proper size belts.
- Page 16 Continued Properly tensioned V-belt Figure 6 Figure 7 Kice Industries, Inc. APU-M01-0001 041019...
- Page 17 Replace with matched belts. Rapid belt wear Drive overloaded Redesign drive. Belt slips Increase tension. Sheaves misaligned Align sheaves. Oil or heat condition Eliminate oil. Ventilate drive. Belts smoking at start Drive turning wrong direction Reverse drive direction. Kice Industries, Inc. APU-M01-0001 041019...
- Page 18 OSHA standards, the National Electrical Code and local codes. Lubrication Every Kice Air Power Unit is factory tested, oil drained, and shipped dry to its installation point. Both independent oil reservoirs (one on each end of the air power unit) must be filled to proper level before operation.
- Page 19 WARNING: Never attempt to change or add oil while air power unit is running. Failure to heed this warning could result in damage to the equipment or personal injury. Filter Replacement Blower Model Kice PD Kice Lube Kit Part Number Fill Points Gear End (oz) Free End (oz)
-
Page 20: Operation And Start-Up Procedure
8. Operation & Start-Up Procedure Operation Characteristics The Kice Air Power Unit is a positive displacement type unit, whose pumping capacity is determined by size, operating speed, and pressure conditions. It employs dual lobe rotors rotating in opposite directions within a housing closed at the ends by end plates. - Page 21 3. Horsepower 4. Blower Speed Kice Air Power Units that are for pressure/vacuum service have been selected to provide proper volume within the pressure, temperature and horsepower range of the machine, to perform as required. The above factors are listed in the following table for Kice Air Power Units.
- Page 22 Operation & Start-Up Procedure Continued Flow Direction by Rotation Kice Air Power Units are standardized top inlet, bottom discharge with left hand shaft location, counter clockwise rotation. Intake Intake Left Drive Right Drive CCW Rotation CW Rotation (Standard) Discharge Discharge...
-
Page 23: Maintenance And Service
Personnel should have a good background with mechanical experience and be thoroughly familiar with these instructions. Major repairs not covered in this manual should be referred to the nearest Kice service representative. Kice Industries, Inc. - Page 24 Note: Over lubrication can be an issue as well as under lubrication. Replacement Parts It is recommended that only Kice supplied replacement parts be used. Kice parts are built to be fully compatible with the original air power unit using specific alloys and tolerances. These parts carry a standard Kice warranty.
-
Page 25: Troubleshooting
Correct oil level. Replace dirty oil. Oil coming out Correct oil level. Replace dirty oil. Improper lubrication of vent ports Symptom Probable Cause Remedies Kice Industries, Inc. APU-M01-0001 041019 Too much or too little Check oil level. oil in gear reservoir... - Page 26 Possible build-up on casing or lobes, or inside lobes. Remove lobes build-up and restore clearances. Driver or blower loose Check mounting and tighten if necessary. Check pipe supports, check resonance of nearby equipment, Piping resonance and check foundation. Kice Industries, Inc. APU-M01-0001 041019...
-
Page 27: Disassembly Of Air Power Unit
(see Figure 12). This gear position is necessary so rotors will clear and not jam. Do not allow the reference marks to change location while the driven gear is being removed 11. Using the gear pullers, pull the driven gear first. Kice Industries, Inc. APU-M01-0001 041019... - Page 28 Timing marks advanced timing marks matched 3 teeth (reference marks aligned) NOTICE: Position of timing marks is for removing or installing the driven gear. To remove the drive gear, advance three teeth in the opposite direction. Kice Industries, Inc. APU-M01-0001 041019...
-
Page 29: Assembly Of Air Power Unit
Be sure they are in place. It is recommended that the gear end rotor shaft bearings be purchased from Kice, as they are specially ground to locate the rotors with correct end clearance relative to the gear end plate. - Page 30 Adjustments can be made later in the assembly process. 19. Insert the gear keys into the rotor shaft keyways. Loose fits are not acceptable. Kice Industries, Inc. APU-M01-0001 041019...
- Page 31 To determine the amount of shim to add or remove, subtract the smaller figure from the larger. If the right side reading is higher than the left side, remove shim. If the right side reading is lower, add shim. Kice Industries, Inc. APU-M01-0001 041019...
- Page 32 36. Coat the OD of the drive shaft seal with sealer, and grease the ID. Install carefully over the keyway and tap into the cover. 37. Install the free end cover with gasket, and secure with cap screws and washers. 38. Install the port fittings, gaskets, and secure with cap screws and washers. Kice Industries, Inc. APU-M01-0001 041019...
- Page 33 0.008 0.008 0.014 0.018 0.009 0.009 0.012 PD-5000 0.004 0.010 0.018 0.003 0.007 0.010 0.008 0.017 0.021 0.009 0.009 0.014 PD-6000 0.004 0.011 0.019 0.003 0.007 0.010 0.008 0.018 0.022 0.009 0.009 0.014 Figure 14 Kice Industries, Inc. APU-M01-0001 041019...
-
Page 34: Special Tools
13. Specials Tools Kice Industries, Inc. APU-M01-0001 041019... -
Page 35: Torque Values For Maintenance And Installation
3300 4300 5900 1-3/4 3000 4100 5000 6800 4500 6100 7500 10000 *Values above are approximations; consult with the manufacturer for torque data. Significant variation may exist within the same grade and size between manufacturers. Kice Industries, Inc. APU-M01-0001 041019... - Page 36 5500 N. Mill Heights Dr. Wichita, KS 67219-2358 (P) 316.744.7151 (F) 316.744.7355 sales@kice.com kice.com Kice Industries, Inc. APU-M01-0001 041019 © 2018 Kice Industries, Inc.
Need help?
Do you have a question about the PD Series and is the answer not in the manual?
Questions and answers