
Related Manuals for Mountain Buggy Protect Capsule Base


Summary of Contents for Mountain Buggy Protect Capsule Base
- Page 1 READ FOR YOUR CHILD'S SAFETY alpha ™ THESE INSTRUCTIONS CAREFULLY protect ™ BEFORE USE Capsule Base Group 0+ Suitable for birth to 13kg child KEEP FOR FUTURE REFERENCE...
- Page 2 The Capsule Base complies with requirements applicable in market of sale For rights & remedies, refer www.philandteds.com/warranty Please register your purchase through our online warranty registration by visiting: www.philandteds.com/register philandteds.com mountainbuggy.com...
- Page 3 Congratulations on choosing your new car seat capsule base! Product Care Safety Warnings Features Instructions...
- Page 4 Product care GENERAL INSTRUCTIONS CLEANING & CARING Check your car seat for cuts & bruises. If your product is Group 0+ damaged in any way, or you’re not sure how to use it, please consult our web support from where you can access a local Suitable for birth to 13kg child.
- Page 5 Product care 4. To replace the cover follow the instructions above in IMPORTANT reverse. Please read thoroughly before commencing installation Cleaning the harness, chest pads and seat: as an incorrect installation could be dangerous. • Sponge clean only. Use hand soap and warm water. •...
- Page 6 Safety Warnings WARNINGS • Do not remove any labels on the child safety seat. Important information is contained on the • PLEASE READ ALL INSTRUCTIONS IN THIS labels. MANUAL AND IN THE VEHICLE OWNER’S • Do not use a child safety seat with damaged or MANUAL RELATED TO CHILD SAFETY SEATS missing parts.
- Page 7 Safety Warnings not become trapped by folding or moveable seat whose history you do not know. passenger seat or in the door of your car. • Do not use this child safety seat in a passenger • Do not use on the vehicle seats that face seat with an active airbag unless the vehicle the sides or rear of the vehicle Use the child manufacturer confirms that it is safe.
- Page 8 Safety Warnings become too hot for the child’s skin. Always base except ones that the manufacturer check surfaces before placing a child in the permits. child seat. • Always make sure all vehicle belts and harness • Do not use any load bearing contact points straps are not twisted before each use.
- Page 9 Safety Warnings • Always make sure the handle is properly locked in the upright carrying position before carrying a child in the child seat. • Never place the car seat or infant carrier near the edge of an elevated surface or on a soft item such as a seat cushion or mattress.
- Page 10 Safety Warnings Do not use on a passenger seat with a front airbag. On outer rear seat On centre rear seat with 3-point belt On a rearward-facing seat On seats facing sidewards On rear seat with lapbelt only Front seat with airbag off...
- Page 11 Safety Warnings CHECKLIST BEFORE USE Inspect Secure Child Properly in Child Restraint • Child restraint free of damage • Correct shoulder strap height • Harness not twisted • Harness low across hips Verify Child within Size Range • Harness secure and tight •...
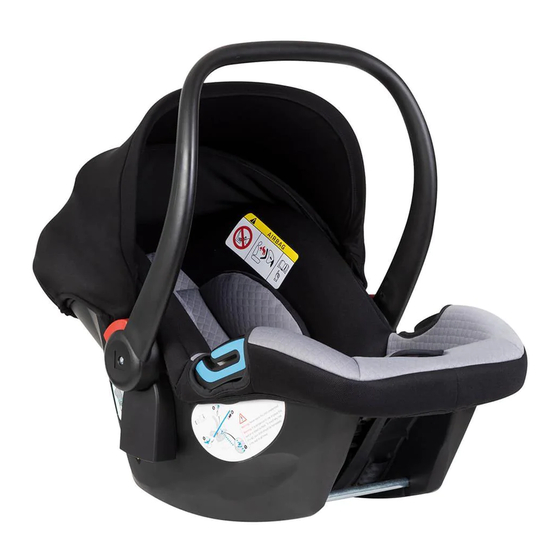
- Page 12 Features Features Handle Harness Adjuster Strap Head Support Buckle Canopy Shoulder Pads Adjuster Button Handle Release Button Infant Pads Crotch Pad Lap Belt Guide...
- Page 13 Features Features Splitter Plate Shell Adapter* (only for some models) Storage for the Manual Lock Off Release Button Support Leg Support Leg Adjustment Button Crotch Belt Crotch Strap Slot Shoulder Belt Guide Harness Slot...
- Page 14 Instructions HARNESS POSITIONING Position the height of harness according to the child’s height. The harness straps should be level with the child’s shoulders. Do not use the child restraint with the harness if the child’s shoulder are above the heightest slots in the backrest or if the child’s weight exceeds 13kg.
- Page 15 Instructions ADJUSTING THE HANDLE There are 4 positions: In vehicle position (A), Carry position (A), Middle position (B,C), and Stationary position(D) To adjust, squeeze handle release buttons on both sides, then rotate the handle, The handle will lock into position. You should hear a click when the handle button is engaged and handle is locked into the upright carrying position.
- Page 16 Instructions ADJUSTING THE HARNESS Adjust the shoulder straps height so they are level with, or just below child shoulders. To adjust the height of shoulder straps, you need to take out the straps from the splitter plate located in the rear of the seat. Pull both straps through the shell and seat cover.
- Page 17 Instructions ADJUSTING THE CROTCH STRAP POSITION The crotch strap adjusts to 2 positions to fit the child’s size. Only move crotch strap position to outer position when the child weighs more than 7kg. Typically this is when the harness is in middle slots. To move the crotch strap, locate the metal plate attached to the crotch strap under the child restraint (4a).
- Page 18 Instructions SECURING THE CHILD IN CHILD RESTRAINT Press the adjuster button on the front center of the seat, and pull on both shoulder straps to loosen the harness. Press the red button on the buckle to release the shoulder straps and move them to the side. Place child’s bottom on the seat and the child’s back flat against the back of the child restraint.
- Page 19 Instructions Align the top and bottom buckle clips to form one clip. Insert into the buckle until you hear a “click”. Make sure the shoulder straps are not twisted. Adjust the shoulder pads over the centre of the child’s shoulders. Pull the harness adjustment strap until shoulder straps are tight against the child.
- Page 20 Instructions APPROVED USES OUTSIDE OF THE VEHICLE • ALWAYS secure the child with the harness when placing the child in the child restraint. • ALWAYS make sure the handle is securely locked before using. For use as an infant carrier, place handle in carrying station (A in 2a).
- Page 21 Instructions INSTALLATION IN THE VEHICLE WITHOUT BASE Place the child restraint rear-facing on the vehicle seat and make sure the handle is in specified position. The child will face the rear of the vehicle. Route the vehicle lap belt through both lap belt guides and buckle the seat belt.
- Page 22 Instructions Adjust the child restraint to the proper recline to ensure maximum protection for the child. A tightly rolled towel under the front edge of the child restraint can be used to achieve the correct recline. WARNING: Do not route the vehicle belt using any other path when using the child seat.
- Page 23 Instructions INSTALLATION IN THE VEHICLE WITH BASE Place the base onto the vehicle seat. Pull out the support leg under the base, put the base flatly on the vehicle seat. Push the base to the back of vehicle seat with anti-rebound bar against the back of vehicle seat. Pull vehicle belt through slot on either side of base.
- Page 24 Instructions Put carrier rear facing on the base, and press the carrier downward. When hearing a “click”, it shows carrier is correctly installed to the base. Try to pull out the carrier to double check carrier is firmly locked to the base.
- Page 25 Instructions REMOVING THE CHILD SAFETY SEAT Pull up the red release handle in front of the base, unlock the carrier from base, at the same time lift up the carrier vertically, then the carrier can be taken out. Attention: When taking the carrier out of the base, please check and confirm the handle is on vertical position to avoid risk of baby falling from the carrier.
- Page 26 Instructions REMOVING THE CANOPY AND COVER 9a / 9b On the side of canopy, pull the tab and detach the canopy frame. 9c / 9d Pull out the cover from shell front.
- Page 27 © Phil and Teds Most Excellent Buggy Company Ltd 2012. We (Phil and Teds Most Excellent Buggy Company Ltd) own the intellectual property rights in our brands, designs and inventions featured in this publication. These include, without limitation, the phil~teds, adapt~survive!, ~, INLINE trade marks and INLINE DOUBLE BUGGY shape. We actively pursue people who infringe our intellectual property.
- Page 28 AU/NZ AU/NZ Mountain Buggy Australasia phil&teds 102-112 Daniell Street 102-112 Daniell Street Newtown, Wellington 6021 Newtown, Wellington 6021 New Zealand / Nouvelle-Zélande. New Zealand / Nouvelle-Zélande. + 64 4 3800 833 + 64 4 3800 833 Mountain Buggy Europe phil&teds Europe BV...
Need help?
Do you have a question about the Protect Capsule Base and is the answer not in the manual?
Questions and answers