Table of Contents
Advertisement
Advertisement
Table of Contents

Subscribe to Our Youtube Channel
Related Manuals for Rexing H2


Summary of Contents for Rexing H2
- Page 1 Rexing H2 Trail Camera USER MANUAL...
-
Page 3: Table Of Contents
TABLE OF CONTENTS Introduction HANDLING THE CAMERA Camera Overview Basic Operation Installation Camera Operation Viewing/Deleting Photos/Videos Wi-Fi Features TROUBLE SHOOTING FAQs Camera Specifications WARRANTY PROTECTION FCC Statement Warranty and Disclaimers... -
Page 4: Introduction
Introduction With its highly sensitive 120° Passive Infra-Red (PIR) sensor, the camera detects the sudden change of exterior temperature caused by the moving subjects in a Region of Interest (ROI), triggers to take pictures/videos, so you won’t miss anything appearing in front of your camera. - Page 5 Introduction Features • Programmable 3, 5, 8, 12 or 16 Mega-pixel • Serial Number setting enables you to mark high-quality resolution. your locations in the photos. This helps multi camera users identify the location when • Infrared night vision LEDs for flash range reviewing the photos.
-
Page 6: Handling The Camera
Handling the Camera... -
Page 7: Camera Overview
Camera Overview 11 12 13 UP Button DOWN Button Infrared LEDs RIGHT Button TF Slot Lens Front Motion Sensor SHOT Button AV Port OK Button USB Port Side Motion Sensor LEFT Button Display Screen MENU Button TEST DC Port REPLAY Button... -
Page 8: Basic Operation
Basic Operations Install batteries Insert a Micro SD Memory Card Switch to TEST Mode Press MENU to enter Setting... - Page 9 Basic Operations Format the Memory Card Reset to Factory Setting Set the Date & Time Switch to ON Mode (Test Device)
-
Page 10: Installation
Installation Power Supply Inserting the SD Card Batteries Installation The camera uses a Micro SD (Secure Digital) memory card to save photos (in .jpg format) and/or videos (in .AVI format). SD and SDHC Open the camera by unlocking two latch first. (High Capacity) cards up to a maximum 32GB The battery compartment is the right part of the capacity are supported. -
Page 11: Camera Operation
Camera Operation Basic Operation Change Setting in TEST Mode There are three basic operation modes: • OFF Mode: Power switch in the OFF position The main purpose of the TEST mode is to allow (LCD screen is off). you to change the settings of the camera so that you trail camera operates exactly the way •... - Page 12 Camera Operation Photo Resolution Shot Lag Set resolution for still photos. We recommend set Set the time period that the camera should wait the resolution to 8MP. before reacting to subsequent activation of the main sensor after the initial recording. During the Options: 1MP, 3MP, 5MP, 8MP, 12MP, 16MP, selected interval, the camera will not record any 20MP.
- Page 13 Camera Operation Target Recording Time Time Lapse Select ON if the camera should only be active Time lapse model disables the PIR sensor; during a certain period of time. In the screen instead, it takes photos or records video clips menu, you can also set the Start and End time automatically at your choice of intervals.
- Page 14 Camera Operation Languages Password Protection You can set English, German, Finnish, Swedish, Select ON if you want to use a password to Danish, French, Italian, Dutch, Spanish, protect the camera from unwanted access, You Portuguese, Japanese or Chinese as the menu can set a 4-digit combination. Once the code language.
- Page 15 Camera Operation Reset to Factory Setting The motion display only lights up when the operating mode selector switch is in the TEST position and one of the motion sensors has Select Yes and press OK to restore all detected movement. During normal operation, parameters to the original factory default settings.
-
Page 16: Viewing/Deleting Photos/Videos
Viewing/Deleting Photos/Videos Reviewing Images on the Deleting Photos/Videos Camera LCD • Make sure the camera is in TEST mode. • Make sure the camera is in TEST mode. • Press the REPLAY button to enter Image • Press the REPLAY button to enter Image Review. - Page 17 Viewing/Deleting Photos/Videos Write Protection This function can be used to protect individual • Select Unlock current file to remove the recordings or all saved recordings from accidental write protection for the selected recording. deletion. • Select “Unlock all files” to remove the write • Select Write-protect current file to protect the protection for all saved recordings. selected recording from accidental deletion.
- Page 18 Viewing/Deleting Photos/Videos Reviewing Images Reviewing Recordings on Directly from the an External Monitor SD Card A TV monitor can also be used to play back pictures (or videos) from the device, Connect a TV This is the most popular method of viewing to the camera using the supplied cable.
-
Page 19: Wi-Fi Features
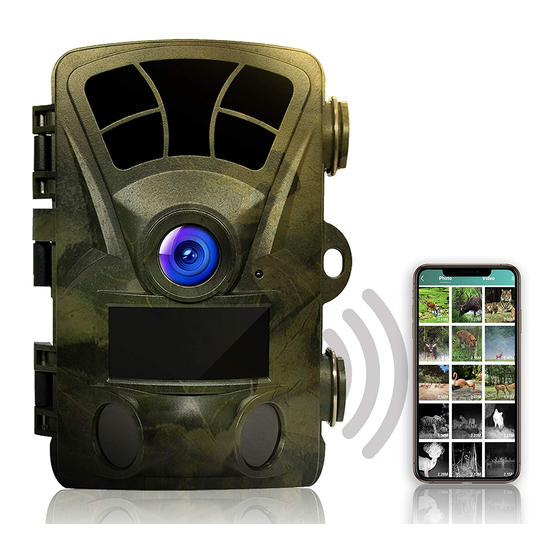
Wi-Fi Feature Wi-Fi Feature Step 1. Download the Trail Cam App from the App Store; Note: Step 2. Change the camera to ON Mode; Step 3. The screen will automatically enter the 1. When connected with Wi-Fi, make Sleep Hunt Mode after 15 seconds (if the device sure to keep the cell phone and the is in Sleep Hunt Mode already, please skip step camera as closer as possible. -
Page 20: Trouble Shooting
Trouble Shooting... -
Page 21: Faqs
FAQs Photos did not capture Camera won’t take any subjects of interest images These are the result of placing the camera in an 1. Please make sure that the SD card is not full. environment where there is motion associated If the card is full, the camera will stop taking with tree branches creating motion or an area images. - Page 22 FAQs Still Photo and/or Video 4. Daytime photos or videos appear too bright Quality Problems Make sure that the camera is not aimed at the 1. Night photos or videos appear sun or other light sources during the day. too dark 5.
- Page 23 Trouble Shooting/FAQ Date/Time Stamp not Camera won’t retain appearing on images settings Doesn’t Flash Make sure that the Time Stamp parameter is set Make sure that you have been saving the changes to ON. to any parameter settings that you made while in TEST mode, by pressing OK after changing the setting.
-
Page 24: Camera Specifications
Camera Specifications IMAGE SENSOR 8MP CMOS sensor 20MP: 5200x3900; 16MP: 4608x3456; 12MP: 4000x3000; 8MP: 3264x2448; 5MP: 2592x1944; 3MP: PHOTO RESOLUTION 2048X1536 3840x2160/10fps; 2688x1520/20fps; 1920x1080/30fps; VIDEO RESOLUTION 1280x720/60fps; 1280x720/30fps; 720x480/30fps; 640x480/30fps; 320x240/30fps FILE FORMAT JPG/AVI LENS f=3.3; F/NO=2.0; FOV=105; Auto IR filter DISPLAY 2.4" TFT LCD EXTERNAL MEMORY SD card up to 256GB INTERNAL MEMORY... - Page 25 Camera Specifications DETECTION ANGLE OF 120° SENSORS PIR SENSITIVITY High/Normal/Low TEMPERATURE COMPENSATION PREP PIR SENSING ANGLE 0n/0ff;120 TRIGGERING TIME 0.5 Second (When using the 4G SD card); 0.2 Second TRIGGER INTERVAL 5sec. - 60min, Programmable SHOOTING NUMBERS EFFECTIVENESS Daytime: 1.5m-infinitive. Night time: 1.5m-20m VIDEO LENGTH 3sec-10Minutes.;...
- Page 26 Camera Specifications TIME STAMP 0n/Off; include serial No, temperature and moon phase TIME LAPSE On/Off; Time Lapse Programmable PERIODIC SHOT Time Laps 1 Second ~ 24 Hours 4-Digit Numbers PSASSWORD BUILD-IN MICROPHONE BUILD IN SPEAKER AUTO-DISTINGUISH Color images in daytime/black & white night images IMAGES In 2 min AUTOMATIC SCREEN SAVER TV-OUT Mini USB 2.0 PC INTERFACE...
- Page 27 Camera Specifications 8 x AA external 6V power supply, at least 2A POWER SUPPLY 6V/1.5A POWER ADAPTER More than 30K photos in daytime, and more than 12K BATTERY LIFE photos in night STANDBY TIME Approx.12 months SPRAY-WATER PROTECTED IP 56 -68°F to 140°F STORAGE TEMPERATURE DIMENSIONS...
-
Page 28: Warranty Protection
Warranty Protection... -
Page 29: Fcc Statement
FCC Statement This equipment has been tested and found to comply with the limits for a Class B digital device, pursuant to part 15 of the FCC Rules. These limits are designed to provide reasonable protection against harmful interference in a residential installation. -
Page 30: Warranty And Disclaimers
We reserve the right to alter the features and handling and installation.In the event warranty contents of this publication,hardware or software service is needed, please contact Rexing at without obligation or advance notice. care@rexingusa.com Warranty does not extend to any accessories used with the camera. - Page 32 www.rexingusa.com...
Need help?
Do you have a question about the H2 and is the answer not in the manual?
Questions and answers