Table of Contents
Advertisement
Quick Links
Advertisement
Table of Contents

Related Manuals for NEFF C17MS22H0


Summary of Contents for NEFF C17MS22H0
- Page 1 BUILT-IN OVEN [en] INSTRUCTION MANUAL C17MS22H0...
-
Page 2: Table Of Contents
Table of contents [ e n ] I N S T R U C T I O N M A N U A L Intended use ......3 Basic settings . -
Page 3: Intended Use
This appliance may be used by children over replacement parts and services can be found at the age of 8 years old and by persons with www.neff-international.com and in the online shop reduced physical, sensory or mental www.neff-eshop.com capabilities or by persons with a lack of... -
Page 4: Important Safety Information
Important safety information Warning – Risk of scalding! ( Important safety The accessible parts become hot during ■ information operation. Never touch the hot parts. Keep children at a safe distance. When you open the appliance door, hot G eneral information Risk of scalding! ■... -
Page 5: Microwave
Important safety information Microwave Warning – Risk of burns! Foods with peel or skin may burst or ■ Warning – Risk of fire! explode during, or even after, heating. Using the appliance for anything other than Never cook eggs in their shells or reheat ■... - Page 6 Important safety information Warning – Risk of scalding! Warning – Risk of serious damage to There is a possibility of delayed boiling health! ■ when a liquid is heated. This means that the The surface of the appliance may become ■...
-
Page 7: Causes Of Damage
Causes of damage Microwave ] Causes of damage Caution! Creation of sparks: Metal – e.g. a spoon in a glass – G eneral information ■ must be kept at least 2 cm from the cooking C a u s e s o f d a m a g e compartment walls and the inside of the door. -
Page 8: Environmental Protection
Environmental protection Open the appliance door as infrequently as possible 7Environmental protection ■ when the appliance is in use. Y our new appliance is particularly energy-efficient. Here E n v i r o n m e n t a l p r o t e c t i o n you can find tips on how to save even more energy when using the appliance, and how to dispose of your appliance properly. -
Page 9: Getting To Know Your Appliance
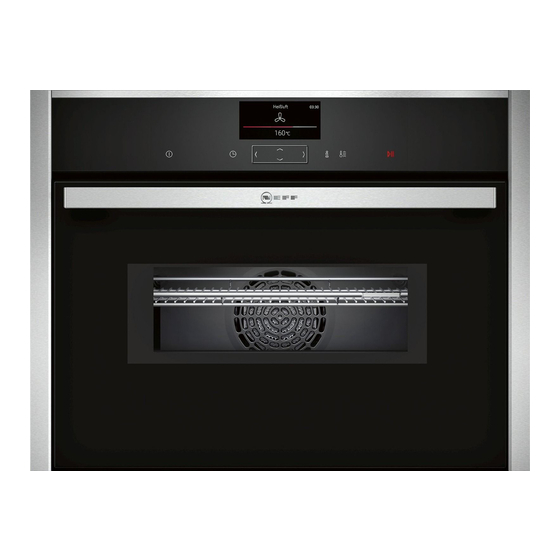
Getting to know your appliance Control panel *Getting to know your You can set your appliance's various functions on the appliance control panel. The current settings are shown in the display. I n this section, we will explain the indicators and G e t t i n g t o k n o w y o u r a p p l i a n c e controls. -
Page 10: Main Menu
Getting to know your appliance Main menu Microwave programmes ± You can use these to prepare food using the Touch the touch button to access the main menu. microwave.~ "Programmes" on page 30 Menu MyProfile Types of heating ¢ Individually adjusting the appliance settings Select the desired heating type and temperature for ~ "Basic settings"... -
Page 11: Cooking Compartment Functions
Accessories Top/bottom heating eco 50–275 °C For gently cooking selected types of food. ‘ Heat is emitted from above and below. This heating function is most effective between 150 and 250 °C. This type of heating is used to measure the energy consumption in the conven- tional mode. -
Page 12: Inserting Accessories
Accessories Inserting accessories Optional accessories The cooking compartment has three shelf positions. You can purchase optional accessories from the after- The shelf positions are counted from the bottom up. sales service and specialist retailers, or on the Internet. You will find a comprehensive range of products for your appliance in our brochures and on the Internet. -
Page 13: Before Using For The First Time
Before using for the first time Cleaning the cooking compartment K Before using for the first To eliminate the new-appliance smell, heat up the time cooking compartment without anything in it and with the oven door closed. B efore you can use your new appliance, you must Remove the accessories from the cooking B e f o r e u s i n g f o r t h e f i r s t t i m e make some settings. -
Page 14: Operating The Appliance
Operating the appliance Use the button to select the type of heating. 1Operating the appliance Use the button to navigate to the next line. & Use the button to select the temperature. Y ou have already learnt about the controls and how O p e r a t i n g t h e a p p l i a n c e they work. -
Page 15: Changing Or Cancelling The Appliance Operation
Time-setting options Changing or cancelling the appliance O Time-setting options operation Changing the appliance operation Y our appliance has different time-setting options. T i m e - s e t t i n g o p t i o n s Use the button to stop the operation. -
Page 16: Setting The Cooking Time
Childproof lock Setting the cooking time AChildproof lock Once the set cooking time has elapsed, the appliance switches off automatically. The function can only be Y our appliance is equipped with a childproof lock so used in combination with a type of heating. C h i l d p r o o f l o c k that children cannot switch it on accidentally or change any settings. -
Page 17: One-Time Childproof Lock
Microwave One-time childproof lock Cookware test Never switch on the microwave unless there is food The control panel is locked so that the appliance cannot inside. The short cookware test is the only exception to be switched on. To switch it on, the one-time childproof this rule. -
Page 18: Setting The Microwave
Microwave Setting the microwave The cooking time has elapsed As soon as the end time has been reached, an audible To achieve optimum results with the microwave, always signal sounds and the appliance ends the microwave insert the wire rack at shelf position 1. operation automatically. -
Page 19: Setting The Microwave To Combi-Mode
Basic settings Setting the microwave to combi-mode Q Basic settings Several types of heating are suitable for combining with the microwave. The microwave output setting can be T here are various settings available to you in order to set to 90 W, 180 W or 360 W. B a s i c s e t t i n g s help use your appliance effectively and simply. -
Page 20: Setting Favourites
Sabbath mode F Sabbath mode Operation after switch-on Main menu Types of heating Y ou can set a time of up to 74 hours using Sabbath Microwave S a b b a t h m o d e mode. The food in the cooking compartment remains Microwave combined operation warm, without you having to switch the appliance on or Baking/roasting assistant... -
Page 21: Home Connect
Home Connect Remote Start o Home Connect In order to start and operate your appliance via the Home Connect app, you must activate remote start. If T his appliance is Wi-Fi-capable and can be remotely remote start has been deactivated, you can only display H o m e C o n n e c t controlled using a mobile device. -
Page 22: Remote Diagnostics
Cleaning Appliance exterior Declaration of Conformity Stainless steel Hot soapy water: Constructa Neff Vertriebs-GmbH hereby declares that front Clean with a dish cloth and then dry with a soft the appliance with functionality meets the basic cloth. requirements and other relevant provisions of Directive Remove flecks of limescale, grease, starch and 2014/53/EU. -
Page 23: Surfaces In The Cooking Compartment
Cleaning agent Notes Door panels Hot soapy water: Slight differences in colour on the front of the ■ Clean with a dish cloth and then dry with a soft appliance are caused by the use of different cloth. materials, such as glass, plastic and metal. Do not use a glass scraper or a stainless steel Shadows on the door panels, which look like ■... -
Page 24: Keeping The Appliance Clean
Cleaning function Cleaning self-cleaning surfaces . Cleaning function The self-cleaning surfaces are coated with a porous, matte ceramic layer. This coating absorbs and dispels T he EasyClean cleaning aid makes it easier to clean splashes from baking and roasting while the appliance C l e a n i n g f u n c t i o n the cooking compartment. -
Page 25: Subsequent Cleaning
Rails Subsequent cleaning Then swing the entire rail outwards and detach it ‚ at the rear (fig. ƒ Open the appliance door and remove the remaining water with an absorbent sponge cloth. Clean the smooth surfaces in the cooking compartment with a dish cloth or a soft brush. Stubborn residues can be removed using a stainless steel scouring pad. -
Page 26: Appliance Door
Appliance door Attaching the rails qAppliance door When hanging the rails, ensure that the sloping edge is at the top of the rail. W ith good care and cleaning, your appliance will retain A p p l i a n c e d o o r its appearance and remain fully functional for a long time to come. -
Page 27: Removing And Fitting The Door Panels
Appliance door Removing and fitting the door panels Warning Risk of injury! To facilitate cleaning, you can remove the glass panels Scratched glass in the appliance door may develop from the appliance door. ■ into a crack. Do not use a glass scraper, sharp or abrasive cleaning aids or detergents. -
Page 28: Trouble Shooting
Trouble shooting 3Trouble shooting Warning – Risk of injury! Incorrect repairs are dangerous. Do not attempt to repair the appliance yourself. Repairs must only be I f a fault occurs, there is often a simple explanation. carried out by one of our trained after-sales engineers. If T r o u b l e s h o o t i n g Before calling the after-sales service, please refer to the the appliance is defective, call the after-sales service. -
Page 29: Cooking Compartment Bulbs
Customer service Cooking compartment bulbs n Baking and roasting To light the interior of your cooking compartment, your assistant appliance has one or more long-life LED bulbs. However, if ever an LED bulb or the bulb's glass cover T he baking and roasting assistant helps you to prepare is defective, call the after-sales service. -
Page 30: Setting The Food
Programmes P Programmes Dishes Chicken, whole Chicken legs Y ou can prepare food very easily using the various P r o g r a m m e s programmes. You select a programme and enter the Goose, whole (3-4 kg) weight of your food. -
Page 31: Selecting A Dish
Tested for you in our cooking studio Selecting a dish Continue cooking The following table shows the corresponding setting Use the button to select "Continue cooking". & values for the listed dishes. If necessary, use the button to change the recommended setting. - Page 32 Tested for you in our cooking studio Baking in combination with a microwave Baking tins Dark- coloured metal baking tins are most suitable. If you bake in combination with a microwave, you can reduce the cooking time considerably. Tinplate baking tins, ceramic dishes and glass dishes extend baking time and mean that the baked item will Always use heat-resistant cookware that is suitable for not brown evenly.
- Page 33 Tested for you in our cooking studio Dish Accessories/cookware Shelf posi- Heating Tempera- MW power in Cooking tion function ture in °C watts time in mins. Cakes in tins Sponge cake, simple Ring tin/cake tin 150-170 55-70 ƒ Sponge cake, simple Ring tin/cake tin 160-180 30-40...
- Page 34 Tested for you in our cooking studio Dish Accessories/cookware Shelf posi- Heating Tempera- MW power in Cooking tion function ture in °C watts time in mins. Plaited loaf, savarin Baking tray 150-160 35-45 ‚ Swiss roll Baking tray 190-210* 10-15 ƒ...
-
Page 35: Bread And Rolls
Tested for you in our cooking studio The cake is generally too light in col- If the shelf position and the cookware are correct, then you should increase the temperature if necessary or our. extend the baking time. The cake is too light on top, and too Bake the cake one level higher in the oven the next time. - Page 36 Tested for you in our cooking studio Note: Baking times cannot be reduced by using higher If you wish to follow one of your own recipes when temperatures. The bread or bread rolls would only be baking, you should use the setting values listed for cooked on the outside, but would not be fully baked in similar baked items in the table as reference.
-
Page 37: Pizza, Quiche And Savoury Cakes
Tested for you in our cooking studio Dish Accessories Shelf posi- Heating Tempera- Cooking tion function ture in °C time in mins. Toast Toast with topping, 4 slices Wire rack 5-15 ‰ Toast with topping, 12 slices Wire rack 5-15 ‡... - Page 38 Tested for you in our cooking studio Preheating is necessary for selected food, and this is Remove unused accessories from the cooking indicated in the table. Do not place your food or compartment. This will ensure that you achieve the best accessories into the cooking compartment until it has possible cooking results and energy savings of up to finished preheating.
-
Page 39: Bakes And Soufflés
Tested for you in our cooking studio Bakes and soufflés Universal pan Slide in the universal pan carefully as far as the limit Your appliance offers a range of heating types for stop, with the bevelled edge facing the appliance door. preparing bakes and soufflés. -
Page 40: Poultry
Tested for you in our cooking studio Dish Accessories/cookware Shelf posi- Type of Tempera- MW power in Cooking tion heating ture in °C watts time in mins. Potato gratin, raw ingredients, Ovenproof dish 170-190 20-25 ‡ 4 cm deep Soufflé Ovenproof dish 160-170* 40-50... - Page 41 Tested for you in our cooking studio Note: Only use greaseproof paper that is suitable for Recommended setting values the selected temperature. Always cut greaseproof In the table, you can find the ideal heating type for the paper to size. kind of poultry you are cooking.
-
Page 42: Meat
Tested for you in our cooking studio Dish Accessories/cookware Shelf posi- Type of Tempera- MW power in Cooking tion heating ture in °C watts time in mins. Turkey Small turkey, 2.5 kg Cookware, uncovered 180-190 70-90 ‡ Small turkey, 2.5 kg Cookware, covered 210-230 45-50... - Page 43 Tested for you in our cooking studio Tip: If you have quantities other than those indicated in Recommended setting values the settings tables, the following basic rule applies: You can find the ideal heating type for many meat double the quantity equates to roughly double the dishes in the table.
- Page 44 Tested for you in our cooking studio Dish Accessories/cookware Shelf posi- Type of Tempera- MW power in Cooking tion heating ture in °C watts time in mins. Smoked pork on the bone, Cookware, covered 210-220 60-80 ‡ 1 kg (with a little added water) Smoked pork on the bone, 1 kg Cookware, uncovered 40-50...
-
Page 45: Fish
Tested for you in our cooking studio Tips on roasting and braising The cooking compartment becomes Prepare your food in an enclosed roaster with higher temperature or use the grill tray. You will achieve the very dirty. best roasting results if you use the grill tray. The grill tray can be bought later as a special accessory. The roast is too dark and the crack- Check the shelf position and temperature. - Page 46 Tested for you in our cooking studio As a general rule: the larger a fish, the lower the Recommended setting values cooking temperature and the longer the cooking time. You can find the ideal heating type for your fish dishes in the table.
-
Page 47: Vegetables And Side Dishes
Tested for you in our cooking studio Vegetables and side dishes Accessories Ensure that you always use suitable accessories and Here, you can find information for preparing grilled that they are placed in the oven the right way around. vegetables, potatoes and frozen potato products. Wire rack Remove unused accessories from the cooking Slide the wire rack in with the embossed "microwave"... - Page 48 Tested for you in our cooking studio Dish Accessories/cookware Shelf posi- Type of Tempera- MW power in Cooking tion heating ture in °C watts time in mins. Vegetable dishes Grilled vegetables Universal pan 10-15 ˆ Potatoes Baked potatoes, halved Universal pan 160-180 45-60 ‚...
-
Page 49: Dessert
Tested for you in our cooking studio Dessert Making rice pudding You can prepare yogurt and various desserts using Weigh the rice and add 4 times as much milk. your appliance. Pour the rice and milk into a tall container which is suitable for microwave use. -
Page 50: Eco Heating Functions
Tested for you in our cooking studio Eco heating functions Universal pan or baking tray Slide the universal pan or the baking tray in carefully as Hot air eco and Top/bottom heating eco are intelligent far as the limit stop with the bevelled edge facing the heating functions that allow you to gently cook meat, appliance door. -
Page 51: Acrylamide In Foodstuffs
Tested for you in our cooking studio Dish Accessories/cookware Shelf posi- Type of Tempera- Cooking tion heating ture in °C time in mins. Small baked items Muffins Muffin tray 160-180 15-30 ž Small cakes Baking tray 150-160 25-35 ž Puff pastry Baking tray 170-190 25-50... -
Page 52: Slow Cook
Tested for you in our cooking studio Slow cook Cookware Use flat cookware, e.g. a glass/porcelain serving dish. Slow cooking is a technique for cooking food over a Place the cookware into the cooking compartment to long period at low temperatures. For this reason, it is preheat it. -
Page 53: Drying
Tested for you in our cooking studio Dish Cookware Shelf posi- Heating Searing time Tempera- Cooking tion function in mins ture in °C time in mins Lamb Saddle of lamb, boneless, 200 g each Cookware, uncovered 30-45 Š Leg of lamb, boned, medium, Cookware, uncovered 120-180 Š... -
Page 54: Preserving
Tested for you in our cooking studio Preserving Vegetables Fill the jars with the vegetables along with hot, boiled You can preserve fruit and vegetables using your water. appliance. Wipe the rims of the jars, as they must be clean. Place a damp rubber ring and a lid on each jar. -
Page 55: Defrosting
Tested for you in our cooking studio Allowing the dough to prove at dough Place the dough into a heat-resistant bowl and place it onto the wire rack. Use the settings indicated in the proving setting table. Yeast dough will prove considerably more quickly using Do not open the appliance door during the proving the "Dough proving"... - Page 56 Tested for you in our cooking studio Dish Accessories/cookware Shelf posi- Type of Temperature MW power in Cooking tion heating in °C watts time in mins. Bread, bread rolls Bread, 500 g Cookware, uncovered • 10-15 Bread rolls Wire rack 140-160 ‚...
-
Page 57: Heating Food In A Microwave
Tested for you in our cooking studio Heating food in a microwave Using the microwave, you can heat food, or defrost and heat it in a single step. Take ready-to-eat meals out of the packaging. The food will heat up more quickly and evenly in cookware that is suitable for microwaves. -
Page 58: Keeping Warm
Tested for you in our cooking studio Dish Cookware Shelf posi- Type of Temperature MW power in Cooking tion heating in °C watts time in mins. Bakes, 400 g, e.g. lasagne, potato gratin Cookware, uncovered 5-10 • Dishes, frozen Plated meal, 1 portion Cookware, covered 11-15 •... - Page 59 Tested for you in our cooking studio Type of heating used: Grilling Full-surface grill ˆ Also slide in the universal pan. The liquid will be caught ■ and the cooking compartment stays cleaner. Dish Accessories Shelf posi- Type of Tempera- Cooking tion heating...
- Page 60 *9001433210* 9001433210 990204...
Need help?
Do you have a question about the C17MS22H0 and is the answer not in the manual?
Questions and answers