Table of Contents
Advertisement
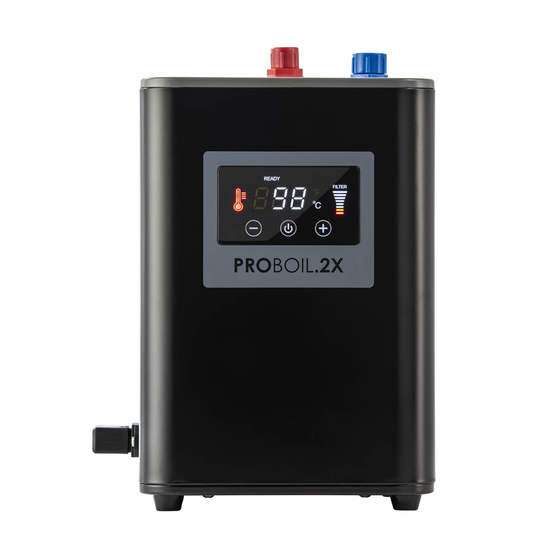
PROBOIL.2X
User & Installation Guide
www.proboil.co.uk
See top of boiler unit for contact details
Please read these instructions carefully before
installation or use and retain for future reference.
You must install the tap and filter before the boiler.
We have a policy of continued product and quality development and improvement.
Accordingly, we reserve the right to amend the specification at any time. All errors and omissions excepted.
PROBOIL.2X user & installation guide v1e-2
1
Advertisement
Table of Contents

Related Manuals for Abode PROBOIL.2X

Summary of Contents for Abode PROBOIL.2X
- Page 1 You must install the tap and filter before the boiler. We have a policy of continued product and quality development and improvement. Accordingly, we reserve the right to amend the specification at any time. All errors and omissions excepted. PROBOIL.2X user & installation guide v1e-2...
-
Page 2: Table Of Contents
Commissioning checklist:................................36 Thank you for choosing PROBOIL.2X. By reading this entire guide you will ensure that the product is installed and used safely and will give its best performance, this guide should be used in conjunction with any additional product guides. -
Page 3: Proboil.2X User Guide
Never use this appliance when your judgement or coordination may be impaired by the use of either alcohol or drugs. ⚠ WARNING Do not open or disconnect the tank until the tank has cooled to a safe temperature. PROBOIL.2X user & installation guide v1e-2... -
Page 4: Electrical Safety
Do not place any water connections directly near or above electrical appliances or connections. ⚠ WARNING This appliance is not intended to be operated by means of an external time or separate remote control system. PROBOIL.2X user & installation guide v1e-2... -
Page 5: Intended Purpose
For safety regulations the plug or means of disconnection must always be accessible after installation. ⚠ Do not use any water jet or steam near this appliance. ⚠ Always ensure an airgap of at least 10mm around the appliance and that any closed cabinet has sufficient airflow. PROBOIL.2X user & installation guide v1e-2... -
Page 6: Day To Day Usage Considerations
Each time the product is used you should flush a small amount of boiled water through before use. This ensures fresh water is dispensed, typically this can be used to preheat your cup. If unused for extended periods, then flush the product for a longer time. PROBOIL.2X user & installation guide v1e-2... -
Page 7: Periods Of Non-Use
You should ensure the boiler is and tap aerator are both free of limescale to ensure continuous safe and energy efficient usage of this product. Advice on sterilisation and descaling are covered separately within this guide. PROBOIL.2X user & installation guide v1e-2... -
Page 8: Using The Product
Displays when the boiler is not in a heating phase indicating the water is at or near the pre-set target temperature. Blue colour, constant illumination when unit not in standby mode or the boiler is heating. PROBOIL.2X user & installation guide v1e-2... - Page 9 3) Troubleshooting error codes: In the event of the boiler self-diagnosing a problem it will display an “E” code to help to diagnose the fault, see troubleshooting section. Blue colour, constantly illuminated when the unit is not in standby mode. PROBOIL.2X user & installation guide v1e-2...
-
Page 10: Filter Replacement Guide
5. Pull the existing filter cartridge from its wall mounting clip, with the blue tubes still connected. 6. Place a bowl (or similar) under the filter cartridge and pipes to catch any retained water in the system. PROBOIL.2X user & installation guide v1e-2... - Page 11 10. Push the “inlet” flexible blue pipe firmly and fully into the new filter cartridge inlet. PROBOIL.2X user & installation guide v1e-2...
- Page 12 Run the water into the bowl until it runs clear of loose carbon. e. Turn the 98° tap handle fully to the “off/closed” (vertical) position. 14. Push the “outlet” flexible blue pipe firmly and fully into the new filter cartridge outlet. PROBOIL.2X user & installation guide v1e-2...
- Page 13 18. Wait for the boiler to show “READY” before use. 19. If the used filter cartridge is applicable for our recycling scheme please leave it upwards in the sink to drain any residual water from inside before packing and returning it as instructed. PROBOIL.2X user & installation guide v1e-2...
-
Page 14: Descaling The Proboil System
8) Reassemble the parts in the reverse order, you must ensure the aerator (2) is firmly pushed into the spouts centre tube (4). Also make sure seal (3) is in place. 9) Press and hold the key for 1.5 seconds to activate, this will turn the boiler back on from “standby” mode. ⏻ PROBOIL.2X user & installation guide v1e-2... -
Page 15: The Water Tank Within The Proboil.2X Boiler
The water tank within the PROBOIL.2X boiler: The filter system provided with PROBOIL will help to prevent of the calcification (scaling) of the boiler. However it will be required from time to time that the PROBOIL will need to be descaled, drained and refilled to ensure the maximum energy efficiency and service life from the product especially in hard water areas. - Page 16 (B) or adaptor (G) then use a cocktail stick (or similar) to remove it. 9. Whilst taking care lift the PROBOIL.2X (A) unit out from the cabinet and place it on the countertop. 10. Each bottle of PROBOIL descaling ...
- Page 17 Change the pre-set water target temperature to 85°C 19. Wait for the PROBOIL.2X unit to display “READY” onscreen 20. Take note of the time and wait for no longer than a further 30 minutes maximum for the descaler liquid to work.
-
Page 18: Cleaning And Sterilising The Proboil System Internal Tank
1.2.4 ⚠ Periodically it is prudent to clean the PROBOIL.2X boiler this might because the boiler has been left switched off for long periods, possible contamination from dirt or debris, unwanted taste. When you clean the boiler we recommend you follow the descaling procedure first. - Page 19 (G) then use a cocktail stick (or similar) to remove it. 9. Whilst taking care lift the PROBOIL.2X (A) unit out from the base unit and place it on the countertop. 10. Tip the boiler upside down so the boilers ...
- Page 20 16. Wait for the PROBOIL.2X unit to display “READY” onscreen 17. Take note of the time and wait for no longer than a further 10 minutes maximum for the sterilising liquid to work. It is normal for an odour to be present during this time.
-
Page 21: Troubleshooting
Follow “Periods of non-use” (1.1.5) guide to ensure water is heated. Water temperature is lower than expected. The centre spout tube in the tap may be disconnected from the aerator, see “descaling-aerator” section for more detail. PROBOIL.2X user & installation guide v1e-2... -
Page 22: Water Dripping From The Spout End When The Handle Is In The Off Position
It is normal for a short delay after the handle is turned off for 98°C water does not stop the instant the 98°C water to stop flow as the pressure remaining in the filter and boiler handle is turned off. tank equalise. PROBOIL.2X user & installation guide v1e-2... - Page 23 Other than as described in the maintenance, care, descaling, troubleshooting and cleaning sections of this user guide, this appliance must not be opened, serviced or repaired by anyone other than an authorised service agent. PROBOIL.2X user & installation guide v1e-2...
-
Page 24: Warranty Terms And Conditions
It is the responsibility of the installer to ensure that your product is fitted in accordance with Local Water Byelaws and in a professional and workmanlike manner. Errors and omissions excepted. Should you find any errors in this guide please inform us to help continually improve any future revisions of our literature. PROBOIL.2X user & installation guide v1e-2... -
Page 25: Proboil.2X Installer Guide
2 PROBOIL.2X installer guide 2.1 About the PROBOIL.2X water heater: 2.1.1 Important technical data: Boiler: Measure: Comments: Model PROBOIL.2X (AQ5001353) Boiler type Vented (unpressurised) displacement system Unit dimensions 325x188x188mm, with connectors attached, without pipes attached Overall weight 6.5 kg (Apx. when full) Ambient operating +5°C to +40°C (indoor use heated space only) -
Page 26: Filter Cartridge
Suitable for water types Use only on a municipally treated water supply, or one of an acceptable bacteriological quality. Filter mesh rating 5 micron nominal rating Primary filter contents Granular activated carbon, Ion exchange resin. PROBOIL.2X user & installation guide v1e-2... -
Page 27: Parts And Contents
Silicone outlet tube (0.75M) ASPT1180-K1 8mm barbed stem x 3/8” male tap connector ASPT1180-L1 Installation and user guide (boiler only, tap supplied separately) registration card www.proboil.co.uk Installation screws and plugs M & N ASPT1180-M1 PROBOIL.2X user & installation guide v1e-2... -
Page 28: Installation
Now you have completed the preparation stage of the installation, complete this checklist as an aid to yourself and your customer, complete or circle the appropriate answers below, if any questions are answered as “no” then you must rectify this before commencing the installation. PROBOIL.2X user & installation guide v1e-2... -
Page 29: About The Product
A domestic hot and cold supply is available with separate isolation valves on both feed pipes The cold mains water is supplied known safe source of drinking water The domestic hot and cold supply is thoroughly flushed before installation PROBOIL.2X user & installation guide v1e-2... -
Page 30: Install The Tap
A inlet hose with a 3/8” female threaded connection, this will be the taps hot water input from the boiler output via a series of connections. PROBOIL.2X user & installation guide v1e-2... -
Page 31: Install The Filter
You must flush the filter for at least 2 litres with cold water or until the water become clear (without black carbon particles) into a bucket or similar before connecting the filter output to the boiler inlet. PROBOIL.2X user & installation guide v1e-2... -
Page 32: Install The Boiler
2 x Wall fixing screws 2 x Wall fixing plugs ½” inlet transport cap 3/8” outlet transport cap 3/8” female flexible (braided/silicone) hose tap connector assembly and fibre seal (supplied with tap) PROBOIL.2X user & installation guide v1e-2... - Page 33 “flat” rubber seal (G) hand tight (do not use a spanner or overtighten) on to the boiler ½” inlet male (B). 7. Push fully and firmly the ¼” x ¼” pushfit connector (F) onto the ½” blue wingnut inlet connector (G). PROBOIL.2X user & installation guide v1e-2...
- Page 34 ⚠ WARNING : You must not directly connect the tap hose (Q) directly to the boiler output (C). You must always use output adaptor (J) and silicone hose (K) to connect the tap. PROBOIL.2X user & installation guide v1e-2...
- Page 35 During the purging of air it is normal for the tap to spit, continue until the stream from the centre channel of the tap aerator is continuous. Depending on the incoming water pressure it will take apx. 2-3 minutes to fill the tank and purge the air. PROBOIL.2X user & installation guide v1e-2...
-
Page 36: Commissioning And Testing
All pluming connections have been adjusted to length to avoid unnecessary dead legs and prevent accidental snagging The boiler is fixed to the cabinet wall to avoid accidental tipping Check valves have been installed as required by local law PROBOIL.2X user & installation guide v1e-2...
Need help?
Do you have a question about the PROBOIL.2X and is the answer not in the manual?
Questions and answers
Why is my proboil 2x not getting hot. I have changed filter and descaled. The red heating light and red temperature light is showing but only showing 17 degrees
Where can I purchase spare parts for my Proboil 2 x as the red 3/8 outlet wing nut connector is broken.