
Subscribe to Our Youtube Channel
Related Manuals for Homeguard HGWOB753


Summary of Contents for Homeguard HGWOB753
- Page 1 GIVES YOU PEACE OF MIND WHEREVER YOU ARE Welcome Thank you for choosing HOMEGUARD. Getting started is easy. HOME OFFICE RETAIL WAREHOUSE...
-
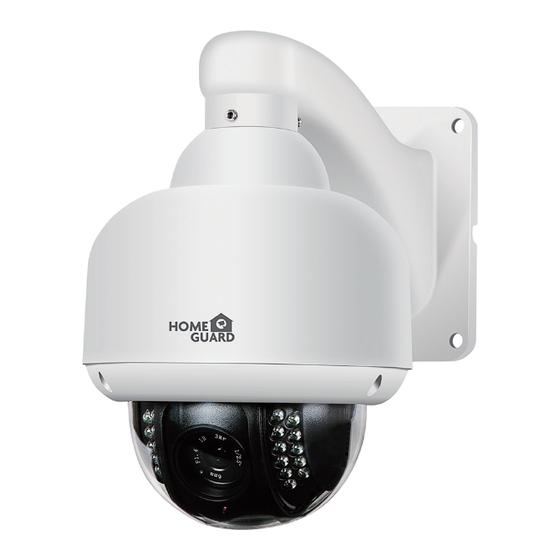
Page 2: What's Included
What’s included Parts & Description Built-in Storage Wireless Transmission The PTZ Dome Camera records footage to the built-in 8GB Micro SD card or via FTP Connect wirelessly to your router so you can view securely on your PC, Smartphone or Tablet from anywhere in the world. - Page 3 Get the App Step 1 Network Connection For the best experience, download the Homeguardcare app for your smartphone by scanning the QR code below or searching for “Homeguardcare” in the app store. Connect the AC adapter to your camera and plug it in. Connect the camera to your Make sure you are within range router using an Ethernet cable.
- Page 4 Step 2 Step 3 Camera Settings Wireless Connection HOMEGUARD IP Camera Part NO.: XXXXXXXX Username: admin Password: 123456 DID: VIEW-000117-LZVZU DDNS: 005mryg.nwsvr1.com Click “add camera” Click “Scan QR Code” Enter the default Click the setting button Click “Advanced Settings” Click “WiFi Setting”...
-
Page 5: You're Done
Run the app and add camera by scan the QR code at the bottom of the camera; Then input the user name and password. Click "More", select "Wi-Fi Config", fill in the Wi-Fi password and click "Configuration". Congratulations! Your HOMEGUARD Camera is set up and ready to go. You can now safely disconnect your Ethernet cable. -
Page 6: Monitoring Options
Live View Monitoring Options Tap the monitoring screen, the video menu action bar will appear. Press Menu to switch between IR LED On/Off & Set or Call Preset (for Pan&Tilt camera). Cruise Vertically Cruise Horizontally Menu Flip IR LED OFF Mirror Auto Exit... -
Page 7: Specifications
View from Mac or Windows PC Specifications Install Homeguardcare software for your Mac or Windows PC from the included CD. Description Item Hardware Features 10/100Mbps RJ45 Port WI-FI Support Power Interface Reset Button Built-in 8G MicroSD Card 22 infrared LED, 20m Night Vision Range IR-CUT Resolution 1280 x 720, 640 x 360, 320 x 180... - Page 8 Quick Start Guide Part No. HGWOB753 © HOMEGUARD 2016 www.homeguardworld.com support@homeguardworld.com HGWOB-753...
Need help?
Do you have a question about the HGWOB753 and is the answer not in the manual?
Questions and answers