Advertisement
Table of Contents
- 1 Table of Contents
- 2 Parameters
- 3 General List
- 4 Device Installation
- 5 Filament Support Installation
- 6 Power Switch Examination
- 7 Screen/Knob Information
- 8 Filament Loading
- 9 Bed Leveling
- 10 Software Installation
- 11 Software Parameter Settings
- 12 Operational Demonstration
- 13 Troubleshooting
- Download this manual
Advertisement
Table of Contents

Related Manuals for SUNLU SL Series


Summary of Contents for SUNLU SL Series
- Page 1 文件编号:3D打印机013B说明书 尺寸:210*148mm(双面印刷) 材质:128克铜版纸...
- Page 2 Guide Book...
- Page 3 SHSH Series 3D Printer SL Series 3D Printer Guide Guide Book 【To make Top-quality 3D Printer】 This guide book is based on 3D printer model SL-0113B. It is also applicable for SL-012B、SL-014B and SL-015B. Please check SD memory card for detailed instruction、...
- Page 4 Dear Value Customers: Thank you for choosing our products. For the best experience, please read the instructions carefully before operating the printer. Our 3D teams are always ready to provide you with assistance. Please contact us via the phone number or e-mail address provided at the end when you meet any problems while using our printer.
-
Page 5: Table Of Contents
Contents 1.Parameters ................3 2. General List ................4 3. Device Installation ..............5 4. Filament Support Installation ..........6 5. Power Switch Examination ............7 6. Screen/Knob Information ............8 7. Filament Loading ..............10 8. Bed Leveling ................11 9. -
Page 6: Parameters
1.Parameters Print Principle Print Size 310×310×400(mm) Print Accuracy ±0.01mm Nozzle QTY Single Nozzle Nozzle Diameter Equipped with 0.4mm、0.3mm & 0.2mm (Optional) Print Speed 20-100mm/s(Recommended: 50mm/s) Recommended Filament 1.75mm PLA, ABS, PETG, HIPS,WOOD, PLA Carbon Fiber 260℃ Nozzle Max Temp Heating Bed Software Cura Input Format... -
Page 7: General List
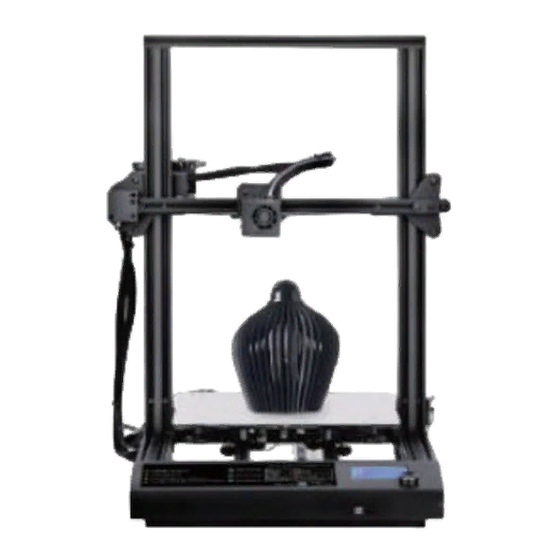
2.General List 1. X Limit Switch 4. Controlling Box 7. Display 10. Z Stepper 13. Extruding Motor 2. Nozzle Kit 5. TF Slot and USB Port 8. Base Frame 11. Power Switch 14. Filament Support 3. Platform 6. Controlling Knob 9. -
Page 8: Device Installation
3.Device Installation Step1:Unwrap the machine and cut off the cable tie.(Pic 1); Step2:Put the square-shaped nuts into the slots of each side of gantry frame(Pic 2&Pic 3). Put up gantry frame and make M5*8 screw through T-shaped fixing block with the nuts of each side of gantry frame(Pic 4). Step3: Put down gantry frame like(Pic 5) and install 4 pcs of M5*25 bolts connecting base frame and gantry frame. -
Page 9: Filament Support Installation
4.Filament Support Installation Step1:Filament support spare parts shows in Pic 7. Step2:Unwrap the support and put the M3 nuts into the slots which is circled(Pic 8). Then connect with other two bigger boards with M3 screws(Pic 9 & Pic 10). Step3:Load filament like Pic 11 and make sure the filament always loading from upside like Pic 12. -
Page 10: Power Switch Examination
5.Power Switch Examination Step1:Select the correct input voltage to match your local mains (230V or 115V)(Pic 13, Pic 14) Damage can occur if voltage is set incorrectly. Voltage Switch Pic13 Pic14... -
Page 11: Screen/Knob Information
6.Screen/Knob Information Knob Information Ok/Enter Sub Menu Push Turn Change Option/Value 1.Current Temp of Nozzle 7.Current Temp OF Heating Bed 2.Print Progress 8.Print Time 3.Current Location of Nozzle 9.Prompt Message 4.Setting Temp of Nozzle 5. Setting Temp of Heating Bed 6. - Page 12 Menu Sub Menu Explanation Info Screen Main Return Move Axis Moving X,Y,Z axis Auto Home Return to the origin Level Bed Leveling bed Prepare Disable Stepper Moving X,Y,Z by hands Preheat PLA Preheat PLA temperature Preheat ABS Preheat ABS temperature Cool Down Cool down the nozzle Control nozzle &...
-
Page 13: Filament Loading
7. Filament Loading Step1: Nozzle preheating(PLA:195℃,ABS:220℃), Menu → Control → Temperature → Nozzle → Setting Temp.(>190℃). Step2:Press and hold the extruder lever then insert the 1.75mm filament through the small hole of the extruder. Continue feeding until you see filament come out the nozzle.(Pic 15, Pic 16). Please make sure that the end point is about 45 degree angle.(Pic 14 ) Pic14 Pic15... -
Page 14: Bed Leveling
8. Bed Leveling Paper is just scratched lightly by nozzle Step1:Menu → Prepare → Level bed → Level bed → Click to begin. Step2: Move the nozzle the front/left leveling screw and adjust the platform height by turning the knob underneath. Use a piece of A4 paper (standard printer paper) to assist with the adjustment, making sure that the nozzle lightly scratches the paper. -
Page 15: Software Installation
9. Software Installation Step1: Double click the Cura icon to install the Cura Slicing Software from SD Car. Please follow below instructions. -
Page 16: Software Parameter Settings
10. Software Parameter Settings Open Cura software,Please follow the below instruction to finish all required settings. -
Page 17: Operational Demonstration
11. Operational Demonstration Step1: Open software Cura and load printing file. Step2: Finish the settings and parameters. Step3: Store the printing file in English. - Page 18 Step4: Apply a layer of solid glue evenly on the glass platform. Step5: Insert SD card → Select Print from SD → Select printing file.
-
Page 19: Troubleshooting
12. Troubleshooting A. The first layer of the model is not sticky platform: 1. Check if the slice parameters are correct. 2. Check if the printed area is coated with special solid glue. 3. Check if the distance between the nozzle and the glass is too large and re-level. 4. - Page 21 Operation Video Contact us Zhuhai Sunlu Industrial Co., Ltd. Add: No.38 Yongtian Road, Xiangzhou District, Zhuhai,Guangdong, China. support@sunlugw.com 0756-3385638-8031 0756-3385637 www.sunlugw.com...
Need help?
Do you have a question about the SL Series and is the answer not in the manual?
Questions and answers