Table of Contents
Advertisement
Available languages
Available languages
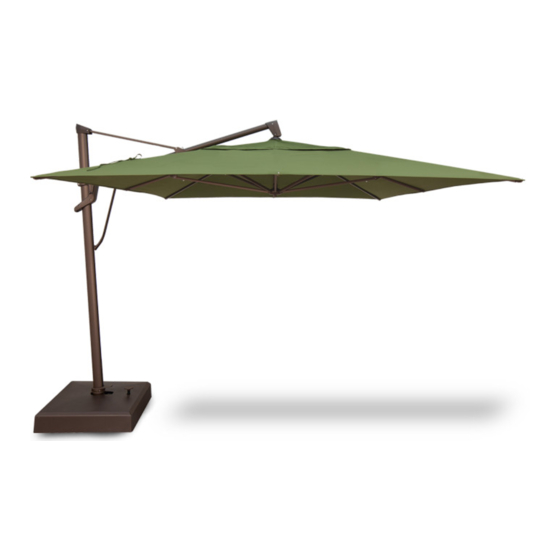
3.04 M / 10 FT Solar LED
Cantilever Umbrella with
Base
Assembly, Care & Use Manual
ITM. / ART. 1900783, 1237211
Model: # UMB-955258
IMPORTANT: RETAIN FOR FUTURE REFERENCE
READ CAREFULLY
For assistance with use, parts, or customer service, please contact:
ATLeisure, LLC
US Toll Free 1-855-880-7205 (English)
Canada Toll Free 1-888-692-1033 (French)
8:00am - 5:00pm, Monday through Friday, Eastern Standard Time
www.atleisure.com · Email: customerservice@atleisure.com
DO NOT RETURN TO STORE
For outdoor domestic use only. Not for commercial use.
Designed in USA
Made in China
E
Advertisement
Chapters
Table of Contents

Related Manuals for Atleisure Seasons Sentry UMB-955258 Series


Summary of Contents for Atleisure Seasons Sentry UMB-955258 Series
- Page 1 US Toll Free 1-855-880-7205 (English) Canada Toll Free 1-888-692-1033 (French) 8:00am - 5:00pm, Monday through Friday, Eastern Standard Time www.atleisure.com · Email: customerservice@atleisure.com DO NOT RETURN TO STORE For outdoor domestic use only. Not for commercial use. Designed in USA...
-
Page 2: Table Of Contents
Contents Preparation . . . . . . . . . . . . . . . . . . . . . . . . . . . . . . . . . . . . 2 Tools Required for Assembly (not included) . -
Page 3: Tools Required For Assembly (Not Included)
Tools Required for Assembly (not included) Picture Description Quantity Adjustable Wrench Hardware Contents Part Picture Description Quantity Outer Hex Bolt M10-1.5x20 A2-70 Flat Washer M10 A2-70 Inner Hex Bolt M8 A2-70 Inner Hexagon Wrench M8 Package Contents Part Description Quantity Blow Molded Base Outside Blow Molded Base Inside Lower Cross Leg... -
Page 4: Assembly Instructions
Assembly Instructions CAUTION: Do not use sharp tools or equipment such as a knife or scissors when removing the protective material, as it may damage the product. Be careful not to throw away small parts such as bolts, washers, etc. that may be wrapped in the protective materials. - Page 5 Assembly Instructions (cont.) Step 4: Insert plug into socket under solar panel as shown above. Step 5. Put solar panel on top of umbrella and hide the plug and wire inside the cavity at top. Then turn the solar panel clockwise.
-
Page 6: Operation Instructions
Assembly Instructions (cont.) CAUTION: An additional person is suggested to assist with inserting the umbrella into the pole holder. Step 7: Insert Umbrella Frame with Canopy (N) onto Holder Pole (F). At the same time, slide holder pole collar onto holder pole. Tighten two Hex Bolts (JJ) into holder pole to secure the umbrella using the hexagon wrench. - Page 7 Operation Instructions (cont.) 360°„ Example of Canopy Movement Using 360˚ Rotation Step 3: The canopy can be rotated 360˚. To rotate umbrella, insert crank handle (E) onto holder pole (F) and turn the crank handle to the desired position. Crank Close Open Glide Handle...
- Page 8 Operation Instructions (cont.) Step 5: To rotate canopy left and right, pull on handle unlocking mechanism and turn to desired angle. Then, put handle back in locked position to secure.
-
Page 9: Lighting Operation & Battery Replacement
Lighting Operation & Battery Replacement (cont.) CAUTION: YOU MUST CHARGE THE BATTERY BEFORE FIRST USE. Please note that battery can lose charge if left unused or uncharged for a long period of time. Failure to charge the battery will result in premature dimming of the lights in your new solar umbrella. Make sure the light switch is in the off position when charging the solar panel. -
Page 10: Disposal
Battery Disposal • Battery should be recycled or disposed of as per state and local guidelines. • Do not open battery or try to replace battery by yourself. • Do not dispose of batteries in fire. • Keep battery (batteries) out of reach of children Care and Maintenance See the enclosed Sunbrella®... -
Page 11: Warranty
Filing a Claim If you are within your warranty, you may file a claim by sending your receipt and pictures of your damaged umbrella and send to ATLeisure at: customerservice@atleisure.com or by mail to: ATLeisure, LLC Customer Service Dept. -
Page 12: Replacement Parts
Replacement Parts For replacement parts, call our customer service department at 1-855-880-7205, 8:00am-5:00pm., EST, Monday-Friday. Part Description Quantity Re-order No. Blow Molded Base Outside BSE-ABMP-11-BWN-T-C2 Blow Molded Base Inside BSE-BBMP-11-BWN-T-C2 Lower Cross Leg CSL-C78RX-BWN-T-C2 Canopy CAN-1108RBS-T-T2-C2 CAN-1108RBS-T-N2-C2 CAN-1108RBS-T-R2-C2 Upper Cross Leg CSL-D78RX-BWN-T-C2 360˚... - Page 13 Minhang District, Shanghai 1899-9900 449-9909 or 02-449-9909 (if cellphone) 044-281-2600 China 201107 www.costco.co.kr www.costco.com.tw www.costco.co.jp +86-21-6257-7065 www.atleisure.com · Email: customerservice@atleisure.com ATLANTA, GEORGIA, USA US Toll Free 1-855-880-7205 (English) Canada Toll Free 1-888-692-1033 (French) 8:00am-5:00pm, Monday to Friday, Eastern Standard Time...
- Page 14 3.04公尺/10呎太陽能LED 懸臂戶外遮陽傘 (附底座) 組裝、維護與使用手冊 商品編號 1900783、1237211 型號:#UMB-955258 內含重要資訊:請保留以供日後參考 請詳閱 需要有關使用、零件或客服的協助時,請聯絡: ATLeisure, LLC 美國免費專線:1-855-880-7205(英語服務) 加拿大免費專線:1-888-692-1033(法語服務) 來電請於東岸標準時間,週一至週五、上午8點至下午5點 www.atleisure.com.電子郵件:customerservice@atleisure.com 請勿將商品退回店家 僅供居家戶外使用。不得作為營業用。 美國設計 中國製造...
-
Page 15: 目錄 準備工作
目錄 ........15 準備工作 ..... 組裝所需的工具(產品未附)... -
Page 16: 組裝所需的工具(產品未附
組裝所需的工具(產品未附) 圖示 內容說明 數量 可調扳手 可調扳手 五金內容物 零件 圖示 內容說明 數量 M10-1.5x20 A2-70 外六角螺栓 M10 A2-70 平墊圈 M8 A2-70 內六角螺栓 內六角扳手 包裝內容物 零件 內容說明 數量 中空成型底座外側 中空成型底座內側 下方橫支架 遮篷(與陽傘架相接) 上方橫支架 360˚曲柄把手 遮篷曲柄把手 固定杆 電池 電源供應器 固定杆套管軸環 固定杆支撐保護罩 中空成型底座蓋 陽傘架(含遮篷) 太陽能板... -
Page 17: 組裝說明
組裝說明 注意:在移除防護材料時,請勿使用刀子或剪刀等尖銳工具或設備,這會使產品 受損。請小心不要將小型零件,例如螺栓、墊圈等物件丟棄,這些零件會包裝在 防護材料內。 步驟1:下方橫支架(C)放在地面,對齊 步驟2:使用螺栓(GG)及墊圈(HH)(裝 凹槽後將上方橫支架(D)放置在下方橫支 在氣泡包裝內)將固定杆(F)與底座安裝 架(C)上。 固定。注意請勿鎖過緊。調整固定杆(F) 以確保其正確地固定在底座上。最後, 以可調扳手或開口扳手(產品未附)將 其鎖緊。 警告:開啟陽傘之前,應依手冊指示完成組裝作業。將底座各部位裝入沙袋。加 入水使沙子濕潤並持續在各部分加水至頂部。以底座蓋將孔洞蓋好。建議上、下 方橫支架應擺放至少91公斤(200磅)的重量以確保穩固性。未作到此項要求會 導致重量不平均而造成陽傘傾斜,使得產品受損以及/或造成人身傷害。 沙子(4袋) 22.75公斤 22.75公斤 50磅 50磅 22.75公斤 22.75公斤 50磅 50磅 91公斤/200磅 步驟3:將沙袋裝入各底座(A與B),再蓋上中空成型底座蓋(M)。把固定杆支撐保 護罩(L)放置固定杆(F)上,再裝設在中空成型底座內側(B)的上方。... - Page 18 組裝說明(接上頁) 步驟4:如上圖所示,將插頭插入太陽能板下方的插座內。 步驟5:把太陽能板安裝在陽傘頂端,並將插頭及電線藏在頂端的孔位內。 接著再以順時針方向轉動固定太陽能板。請勿鎖得過緊。 步驟6:由附加套件內取出電池(G)並放入位在移動把手支柱上的電池座。接 著,在首次使用前先將太陽能遮陽傘放置在陽光可直接照射的戶外,讓太陽 能板進行八小時的充電。 確認陽傘的LED燈為關閉的狀態,以便太陽能板能夠充飽電量。...
-
Page 19: 操作說明
組裝說明(接上頁) 注意:建議由另一名人員協助將陽傘安裝在固定杆。 步驟7:將包含遮篷的陽傘架(N)與固定杆(F)安裝固定。同時,將固定杆軸環安裝在 固定杆。以六角扳手將鎖入固定杆的兩顆六角螺栓(JJ)鎖緊固定。將遮篷曲柄把手 (E2)裝在移動把手上,而360˚曲柄把手(E)則安裝於固定杆。 操作說明 開啟 關閉 Crank 曲柄 Glide Handle 移動把手 Grip 握把 步驟1:鬆開遮篷及杆子周圍的收納束帶。 步驟2:張開陽傘時,同時緊握移動把手以及握把,由杆子向上或向下移動,以調整至 想要的傾斜角度。放開握把即可固定就位。張開遮篷時,順時針轉動曲柄把手直到遮 篷完全張開至圖面所示的狀態。... - Page 20 操作說明(接上頁) PSM œ¢ 遮篷以360˚旋轉移 動之範例 步驟3:可360˚轉動遮篷。轉動遮篷時,將曲柄把手(E)插入固定杆(F)並轉動曲 柄把手直到移至所需的位置。 曲柄 關閉 張開 移動把手 握把 步驟4:關閉陽傘時,逆時針轉動曲柄把手直到遮篷完全閉合。同時緊握移動把 手及握把,接著由杆子向下滑動,鬆開握把即可固定就位。以收納束帶固定好遮 篷以及桿子。...
- Page 21 操作說明(接上頁) 步驟5:需將遮篷向左及向右轉動時,拉動把手將機構解鎖並轉至想要的角度。接 著將把手重新拉回鎖定的位置加以固定。...
-
Page 22: 燈具操作與電池更換
燈具操作與電池更換(接上頁) 注意:首次使用前,電池必須先進行充電。請注意,電池若長時間未使用仍會放電。若未 能進行充電,會造成您新購入的太陽能遮陽傘的燈光過早變暗。太陽能板進行充電時務必 確認燈具開關設定在關閉(off)位置。一般日常使用時,若想在夜間使用太陽能燈,請將 燈具開關設定在開啟(on)位置,使用後應關閉開關。日間時確認燈具開關設定在關閉(OFF) 位置,以便讓太陽能板進行充電。 電池功率計 LED燈具按扭(蜂巢燈和傘骨燈) 電池功率計按鈕 電池電源供應器接口 步驟1:壓下燈具按鈕可開啟及關閉太陽能燈。按壓一次可開啟與關閉傘骨燈。再 按一次可開啟蜂巢燈。按第三次可同時開啟傘骨燈和蜂巢燈。按第四次可關閉所有 燈光。陽傘配備2顆電池。電池耗盡時應將電池由蜂巢處取出。充飽電池後再重新 歸位。太陽能不足時,可在室內使用電源供應器為電池充電。電量多寡可見電池功 率計的燈光顯示。 相關資訊:電池應於室內充電。將電池置於戶外惡劣氣候,會使電池及電池供應器受損。 電池在使用電源供應器充電3-4小時,或是陽光直接照射6-8小時後可充飽電量。 電池在充飽電量時可供電6-8小時。電源供應器僅供室內使用。請勿在戶外使用。 本裝置符合美國聯邦通訊委員會規範的15部分之規定。操作時需遵守以下兩項條件限制: (1)本裝置不致造成有害的干擾,且(2)本裝置必須能承受所接收之任何干擾,包括可 能造成非預期的操作干擾。... -
Page 23: 電池的處置
電池的處置 • 電池應依照州以及當地規範進行回收或處理。 • 請勿打開電池或是自行嘗試更換電池。 • 請勿將電池丟入火中。 • 電池應放在孩童無法取得的地方。 維護與保養 請查看縫製在遮篷內側的Sunbrella 維護與清潔標籤。 ® 警告與注意事項 危險:組裝時應讓孩童遠離組裝區域。 警告:開始前應閱讀所有說明並遵照所列步驟進行組裝。未按照說明進行組裝與安裝可能 導致陽傘翻落,而造成人身傷害以及/或財產損失。 警告:請勿在風大時開啟陽傘,這會使陽傘被吹倒而造成人身傷害或損失。適當地將陽傘 固定,可直接將陽傘插栓在露臺或陽臺,或是為陽傘底座添加適當地重量。風大時應讓陽 傘遠離玻璃桌面以避免破裂。保固並不包含因疏忽、濫用或惡劣氣候所造成的毀損。 注意:在平坦的地面組裝與使用。 注意:在底座裝填重量之前先將底座放置在想要放置的位置。一旦裝填完畢便很難移動。 注意:張開陽傘之前,先將插頭插入太陽能板下方的插座內。把太陽能板安裝在陽傘頂端 ,並將插頭及電線藏在陽傘頂端的槽孔。接著再以順時針方向轉動固定太陽能板。請勿鎖 得過緊。 注意:若在冬季任由底座放置在外數月,建議添加防凍劑以防損壞。若有可能,可將陽傘 在不使用的季節放置在室內。 相關資訊:務必固定並/或是將陽傘底座添加重量。 相關資訊:不使用陽傘時,應收起陽傘並使用遮篷的收納束帶。若陽傘在非使用季節被收 納在箱子內,必須取出太陽能板及電池組以防受損。 相關資訊:手冊中的圖示僅供組裝及操作說明之用。這些圖示可能與陽傘的實際外觀有所 不同。... -
Page 24: 產品保固
產品保固 本產品包含製造商的2年保固,提供產品自購買日起材質與做工零瑕疵保固。本保 固並不包含因疏忽、濫用或氣候相關因素造成的毀損。若需要取得保固的完整資 訊,請寄送電子郵件至customerservice@atleisure.com、撥打免費專線:1-855 -880-7205(英語服務)或1-888-692-1033(法語服務),或是寄送郵件至下方 地址索取: Atleisure, LLC 客服部 1040 Boulevard SE Ste. B Atlanta GA 30312 ÉTATS-UNIS 非保固範圍 本保固並不包含以下事項之擔保:自然災害(即:風、火或冰凍);因不正確的 組裝、意外、災害、誤用、濫用所造成的損壞,或疏忽以及受風吹雨打而導致表 面脫色或褪色。本產品並未設計作為營業使用。本保固給予您特定的權利,而您 也會因各州不同法規而享有其它權利。 澳洲:我們的商品遵照澳洲消費者法,保證並未設排除條款。您有權因商品重大 的缺失要求換貨或退款,以及因可預見的損失及毀損要求合理的賠償金。您也有 權在產品無法達到可接受的品質標準以及在該缺失並未造成重大故障時要求提供 維修及更換處理。 保固要求 若您的產品仍在保固期限便可提出保固要求,請將收據連同陽傘受損照片透過以 下電子郵件寄送給ATLeisure: customerservice@atleisure.com 或是寄送信件至: Atleisure, LLC 客服部 1040 Boulevard SE Ste. B Atlanta GA 30312 ÉTATS-UNIS... -
Page 25: 更換零件
更換零件 若需更換零件,請撥1-855-880-7205與客服部門聯絡。來電請於東岸標準時間, 週一至週五、上午八時至下午五時。 零件 內容說明 數量 重新訂購編號 BSE-ABMP-11-BWN-T-C2 中空成型底座外側 BSE-BBMP-11-BWN-T-C2 中空成型底座內側 CSL-C78RX-BWN-T-C2 下方橫支架 CAN-1108RBS-T-T2-C2 遮篷 CAN-1108RBS-T-N2-C2 CAN-1108RBS-T-R2-C2 CSL-D78RX-BWN-T-C2 上方橫支架 CRK-E78RHP-BWN-T-C2 360˚曲柄把手 HDP-F78RX-BWN-T-C2 固定杆 SOL-G-RBP-11-T-C2 電池 HDW-JJ-T 螺栓 SOL-G1-CC-11-T-C2 電源供應器 HDW-GG-11-T 墊圈 HDW-HH-11-T 六角螺栓 HDP-SLV-F78RX-BWN-T-C2 固定杆套管軸環 BSE-CAP-11-BWN-T-C2 固定杆支撐保護罩 PSC-L78R-BWN-T-C2 中空成型底座蓋 SOL-P11-T-C2 太陽能板... - Page 26 Gwangmyeong-si 統一編號:96972798 Kawasaki-ku, Kawasaki-shi, Unit 109, NO 388, Lian You Road Gyeonggi-do, 14347 , Korea 449-9909 或 02-449-9909(手機撥打加02) Kanagawa 210-0832 Japan Minhang District, Shanghai www.costco.com.tw 1899-9900 044-281-2600 China 201107 www.costco.co.kr www.costco.co.jp +86-21-6257-7065 www.atleisure.com · customerservice@atleisure.com 電子郵件: 美國喬治亞州亞特蘭大 美國免費專線:1-855-880-7205(英語服務) 加拿大免費專線:1-888-692-1033(法語服務) 來電請於東岸標準時間,週一至週五、上午8點至下午5點...
- Page 27 Llamada gratuita en EE.UU.1-855-880-7205 (inglés) Llamada gratuita en Canadá 1-888-692-1033 (francés) de lunes a viernes, de 8:00 a.m. a 5:00 p.m., hora normal del Este www.atleisure.com · customerservice@atleisure.com NO DEVOLVER A LA TIENDA. Para uso doméstico en exteriores solamente. No para uso comercial.
-
Page 28: Preparación
Índice Preparación . . . . . . . . . . . . . . . . . . . . . . . . . . . . . . . . . . . 28 Herramientas necesarias para el montaje (no incluidas) 29 Materiales y contenido del paquete . -
Page 29: Herramientas Necesarias Para El Montaje (No Incluidas)
Herramientas necesarias para el montaje (no incluidas): Imagen Descripción Cantidad Llave inglesa Materiales incluidos Pieza Imagen Descripción Cantidad Exterior pernos hexagonales M10- 1.5x20 A2-70 Arandelas planas M10 A2-70 Interior pernos hexagonales M8 A2-70 Interior llave hexagonal M8 Contenido del paquete Pieza Descripción Cantidad... -
Page 30: Instrucciones De Montaje
Instrucciones de montaje ATENCIÓN: No use herramientas punzantes u objetos como un cuchillo o tijeras para retirar el material protector, porque podría dañar el producto. Tenga cuidado de no desechar las piezas pequeñas como los pernos, arandelas, etc. que podrían estar envueltas en el material protector. - Page 31 Instrucciones de montaje (cont.) Paso 4: Introduzca el enchufe en la toma que se encuentra debajo del panel solar, como se muestra arriba. Paso 5: Coloque el panel solar en la parte superior de la sombrilla e inserte el enchufe y el cable a través del orificio de la parte superior. Gire el panel solar hacia la derecha sin apretar demasiado.
-
Page 32: Instrucciones De Uso
Instrucciones de montaje (cont.) ATENCIÓN: Se recomienda insertar la som-brilla en el soporte del poste entre dos perso-nas. Paso 7: Inserte el marco de la sombrilla con toldo (N) en el poste de sostén (F). Al mismo tiempo, deslice la abrazadera del poste de sostén en el poste de sostén. Usando una llave hexagonal, apriete los dos pernos hexagonales (JJ) en el poste de sostén para afianzar la sombrilla. - Page 33 Instrucciones de uso (cont.) 360°„ Ejemplo de movimien- to del toldo usando la rotación de 360˚ Paso 3: El toldo puede ser girado en 360º. Para girar la sombrilla, inserte la manive- la (E) en el poste de sostén (F) y gírela hasta obtener la posición deseada. Manivela Cerrar Abrir...
- Page 34 Instructions d’utilisation (cont.) Paso 5: Para girar el toldo hacia la izquierda o la derecha, tire del mango del me- canismo de desbloqueo y gire hasta alcanzar el ángulo deseado. Después, devuelva el mango a la posición de bloqueo.
-
Page 35: Operación De Las Luces Y Reemplazo De La Batería
Operación de las luces y reemplazo de la batería (cont.) PRECAUCIÓN: USTED DEBE CARGAR LA BATERÍA ANTES DEL PRIMER USO. Tenga en cuenta que la batería puede descargarse si se deja sin usar o sin cargar durante un largo periodo de tiempo. El no cargar la batería ocasionará la atenuación prematura de las luces en su sombrilla solar nueva. -
Page 36: Eliminación De La Batería
Eliminación de la batería • Deseche la(s) batería(s) de acuerdo a las regulaciones locales y estatales de reciclaje o residuos. • No desarme, aplaste o deseche la(s) batería(s) en el fuego. • No abra la batería. No abra la batería ni la reemplace usted mismo. •... -
Page 37: Garantía
Presentación de una reclamación Para presentar una reclamación respecto a un producto, dentro del periodo de la garantía, usted debe enviar el recibo de compra acompañado de fotos de su sombrilla dañada a ATLeisure: customerservice@atleisure.com o por correo postal a: Atleisure, LLC Customer Service Dept. -
Page 38: Piezas De Repuesto
Piezas de repuesto Para solicitar piezas de repuesto, llame a nuestro servicio de atención al cliente al 1-855-880-7205 (inglés) o al 1-888-692-1033 (francés), de lunes a viernes de 8:00 a.m. a 5:00 p.m. hora del Este. Pieza Descripción Cantidad N.o de referencia Exterior de la base moldeada por soplado BSE-ABMP-11-BWN-T-C2 Interior de la base moldeada por soplado... - Page 39 449-9909 or 02-449-9909 (if cellphone) 044-281-2600 China 201107 www.costco.co.kr www.costco.com.tw www.costco.co.jp +86-21-6257-7065 www.atleisure.com · customerservice@atleisure.com ATLANTA, GEORGIA, ÉTATS-UNIS Llamada gratuita en EE.UU. 1-855-880-7205 (inglés) Llamada gratuita en Canadá 1-888-692-1033 (francés) Lunes a viernes de 8 a.m. a 5 p.m., hora normal del Este...
Need help?
Do you have a question about the Seasons Sentry UMB-955258 Series and is the answer not in the manual?
Questions and answers