Table of Contents
Advertisement
©2019 Lennox Industries Inc. Dallas, Texas, USA
THIS MANUAL MUST BE LEFT WITH THE
OWNER FOR FUTURE REFERENCE
These instructions are intended as a general guide and do
not supersede local codes in any way. Consult authorities
having jurisdiction before installation.
WARNING
Improper installation, adjustment, alteration, ser vice
or maintenance can cause property damage, personal
injury or loss of life.
Installation and service must be performed by a li censed
professional HVAC installer, service agency or the gas
supplier.
Failure to follow safety warnings and these instruc tions
exactly could result in property damage, dan gerous
operation, serious injury, or death.
Any additions, changes, or conversions required in order
for the appliance to satisfactorily meet the ap plication
needs must be made by a licensed profes sional HVAC
installer (or equivalent) using factory-specified parts.
Do not use this system if any part has been under water.
A flood-damaged appliance is extremely dan gerous.
Immediately call a licensed professional HVAC service
technician (or equivalent) to inspect the system and to
replace all controls and electrical parts that have been
wet, or to replace the system, if deemed necessary.
CAUTION
As with any mechanical equipment, contact with sharp
sheet metal edges can result in personal injury. Take
care while handling this equipment and wear gloves and
protective clothing.
To ensure proper system performance and reliability,
Lennox does not recommend operation of VRF sys-
tems during any phase of construction. Construction
debris, low temperatures, harmful vapors, and opera-
tion of the unit with misplaced filters can damage the
units. Failure to follow these guidelines will result in the
warranty being voided.
VRF
1
INSTALLATION
INSTRUCTIONS
VRF SYSTEMS
507906-01
09/2019
Shipping and Packing List
Check the components for shipping damage. If you find
any damage, immediately contact the last carrier.
Package 1 of 1 contains the following:
1 - Assembled AHU Control Kit box
1 - Receiver/Digital Display wiring harness
1 - Receiver/Digital Display box
4 - Temperature sensors (T1, T2, T2A, T2B) and
connection wiring harnesses
T1 - Room return air temperature sensor
T2 - Mid-coil sensor
T2A - Coil inlet sensor (cooling mode)
T2B - Coil outlet sensor (cooling mode)
7 - Plastic zip ties for sensor mounting
4 - ST3.9x25 mounting screws
3 - Temperature sensor mounting sockets
3 - Temperature sensor mounting socket clips
3 - Temperature sensor insulation sleeve
1 - Installation and operation manual
2 - Straight pipe/adaptor pipe
IMPORTANT
The Clean Air Act of 1990 bans the intentional venting
of refrigerant (CFC's and HCFC's) as of July 1, 1992.
Approved methods of recovery, recycling or reclaiming
must be followed. Fines and/or incarceration may be
levied for non-compliance.
Designs with these kits require approval by the
Lennox VRF Applications Team prior to installation.
Advertisement
Table of Contents

Related Manuals for Lennox VPB036H4M


Summary of Contents for Lennox VPB036H4M
- Page 1 To ensure proper system performance and reliability, Lennox does not recommend operation of VRF sys- tems during any phase of construction. Construction debris, low temperatures, harmful vapors, and opera- tion of the unit with misplaced filters can damage the units.
-
Page 2: Model Number Identification
NOTE - Only Lennox VRF indoor units will work with Lennox VRF outdoor units and associated mechanical equipment. Lennox Mini Split indoor units are similar in appearance but must not be connected to a Lennox VRF refrigerant circuit. Please refer to model numbers to confirm compatibility. Model numbers for Lennox VRF units start with a “V”... - Page 3 AHU Control Kits enable Lennox VRF VRB heat recovery in the indoor unit shall be removed, additional modifications and VPB heat pump outdoor units to operate Lennox non- may be needed. Only Lennox VRF wired local controller VRF indoor units and 3rd party non-communicating indoor V0STAT51P-3 is allowed with the AHU Control Kit.
- Page 4 1 - Outdoor Unit or MS Box 2 - AHU Control Kit 3 - Electronic Expansion Valve 4 - N/A 5 - Entering Coil Temperature Sensor (metered side, Downstream of EXV) (T2A) 6 - Mid-Coil Temperature Sensor (T2) 7 - Coil 8 - Suction Line Temperature Sensor (T2B) 9 - Blower...
-
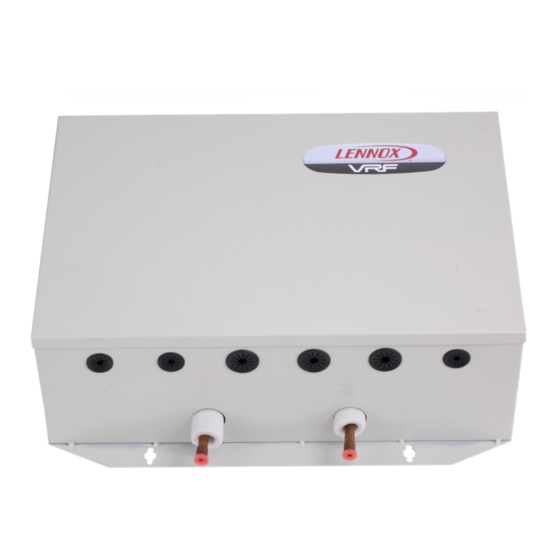
Page 5: Front View
Unit Dimensions - inches (mm) Use 4 ST3.9X25 or other appropriate fixing method to secure the AHU control box. AHU Control Box Top AHU Control Box Front 5/16 (8 mm) 9-7/8 (251 mm) 17-7/8 (454 mm) FRONT VIEW SIDE VIEW AHU Control Box Front Line Voltage Inlet Low Voltage Inlet... - Page 6 Installation Clearances - inches (mm) 1’’ (25 mm) Minimum (305 mm) (305 mm) Minimum Minimum Outlet (to indoor coil) Inlet (from outdoor unit) field-provided swage field-provided swage connection connection (914 mm) 3/8 in. (10 mm) 3/8 in. (10 mm) Minimum Required! Suitably sized access panel required to provide full access to electric panel.
- Page 7 • Verify the cooling capacity, internal volume and air modifications may be needed. Only Lennox VRF flow requirements of each 3rd party indoor unit using Table 2. wired local controller V0STAT51P-3 is allowed with the AHU Control Kit.
- Page 8 Table 2. AHU Control Kit Specifications Indoor From Coil Internal Vol- Rec. Rec. AHU Kits Main Kit Sub-kit 01 Sub-kit 02 Unit ume (in³) Cooling Flow Capacity Rate (ton) (btu/h) (btu/h) Min. Rec. Max. (CFM) (Kbtu/h) 10,800 12,500 V8AHU024-3P 1.25 12,501 15,500 V8AHU024-3P...
- Page 9 VRF Indoor Units than 50% of outdoor capacity. NOTE - Air flow rate shall not exceed 400 CFM/Ton. Designs with these kits require approval by the Lennox VRF Applications Team prior to installation.
- Page 10 • Areas exposed to salt or other corrosive materials or • The AHU control box can only connect to Lennox VRF caustic gasses. VRB heat recovery and VPB heat pump systems as • Areas exposed to extreme voltage variations (such as listed in Table 1.
- Page 11 AHU Control Box Top AHU Control Box Bottom AHU Control Box Bottom FRONT VIEW NOTE - 1. When the EXV is inside of the box, the box is position sensitive. 2. The box must be mounted in a vertical, upright orientation only. 3.
- Page 12 FRONT VIEW FRONT VIEW NOTE - 1. The EXV is position sensitive in or out side of the factory enclosure. 2. The EXV must be mounted in a vertical, upright orientation (+/- 15°) only. Locate the EXV near the indoor unit coil so that connective piping does not exceed 16 ft. (5 m). Figure 8.
- Page 13 Installation WARNING Installation Steps 1. Determine best location and set furnace, coil and Refrigerant leaks are unlikely; however, if a refrigerant outdoor unit. leak occurs, open a door or windows to dilute the 2. Prepare the indoor unit coil for brazing. refrigerant in the room.
- Page 14 Contact VRF Technical Support, 1-844-438-8731, with indoor unit coil. any questions. Designs with these kits require approval by the Lennox VRF Applications Team prior to installation. NOTE - See Refrigerant Pipe Selection Table to size Pipes Liquid Pipe Vapor Pipe...
- Page 15 Prepare Indoor Unit Coil Prepare Indoor Unit Coil 4. Braze the liquid line from the AHU control box (or EXV if removed from the box) to the end of the coil. 1. Remove and discard any metering device (TXV, orifice, piston and cap tube, etc.) from the coil; it will 5.
- Page 16 Prepare to Braze CAUTION Coil sensors shall not be installed prior to brazing as damage to the sensor can occur due to excessive heat. (0°~90°) IMPORTANT The Clean Air Act of 1990 bans the intentional venting of refrigerant (CFC’s and HCFC’s) as of July 1, 1992. Approved methods of recovery, recycling or reclaiming must be followed.
- Page 17 Brazing Refrigerant Lines Refrigerant lines must be connected by a qualified CAUTION technician in accordance with established procedures. Purge low pressure nitrogen [1 to 2 psig (6.0 to 12.8 kPA)] through the refrigerant piping during brazing. This WARNING will help to prevent oxidation and the introduction of Danger of fire.
- Page 18 Wiring Connections System Communication and Control Wiring WARNING NOTE - Two-conductor shielded cable must be used for Isolate the power supply before accessing unit electrical the communication wiring. This is necessary to ensure terminals. proper system communication and operation. Install unit so that unit disconnect is accessible. NOTE - High Voltage Cabling and Low Voltage Commu- Follow all local and national codes, as well as this nication Cabling shall not pass/occupy the same electri-...
-
Page 19: Display Board
XS10 XP10 0-10V Output Voltage PWV(A) ENC4 ENC3 ENC2 (2V Factory Default) (7V Factory Default) (10V Factory Default) XS11 XP11 PWV(B) Low speed Mid. speed High speed To Wire Controller Dial code comm.bus Voltage (V) To Wire Controller Power To Outdoor/MS units comm.bus Main board To Master/Slave EEVKit... - Page 20 208/230V 3Ph 60Hz 208/230V 1Ph 60Hz or 460V 3Ph 60Hz Power supply Power supply L2 L3 Dedicated breaker Outdoor Unit(Sub2 Unit) Outdoor Unit (Main Unit) Outdoor Unit (Sub1 unit) L1 L2 L3 L1 L2 L3 L1 L2 L3 L1 L2 L3 L1 L2 L3 L1 L2 L3 Service...
- Page 21 Outdoor unit Outdoor unit Outdoor unit (main unit) (sub1 unit) (sub2 unit) H1 H2 Outdoor Unit Communication Terminal Block (H1 H2 (H1 H2 (H1 H2 (PQ) (PQ) (PQ) (PQ) MS Box Communication Terminal Block HA HB 12V COM P (PQ) (PQ) Indoor Unit Communication Terminal Block Ground drain wire or...
- Page 22 Connect Sensors Connect Sensors After Brazing 1. Identify the T1, T2, T2A and T2B sensors in the accessory packet. See Figure 17. 2. Secure the T2 sensor to the air handler unit’s coil at the middle of the coil. See Figure 18. 3.
- Page 23 Auxiliary Heat & Alternative Heat • alternative heating mode, when ambient • The relay output at terminal AUXH at connector CN51 temperature T4 drops below the compressor lockout is set up at DIP switch SW1 to control the optional 2nd setpoint Ta (See instructions of ODU LCD module and heat source (besides the primary heat pump heating) ODU main PCB for both VRF and Mini-VRF), heat...
- Page 24 Table 5. Outdoor Unit Compressor Lockout Setpoint Ta Ta Setting in VRF on ODU LCD Ta Setting in Mini-VRF on ODU Module (number and tempera- Control Board (number only) ture °F) 1 - FREE (default) 2 - 7 3 - 10 4 - 15 5 - 20 6 - 25...
- Page 25 Fan Speed Control & Setup Either analog input or 1 of 3 digital input signals is re- The AHU Control Kit has 3 digital inputs, 1 analog input, ceived. Both analog output and 1 of 3 digital outputs are 3 digital outputs and 1 analog output for fan speed con- transmitted.
- Page 26 Configure DIP Switches ECN1 and SW3-1 Capacity Setting Alternate and Auxiliary Heat Control Setting Set the capacity of the AHU Control Kit using SW3-1 and Identify if there is an alternate or auxiliary heat source ENC1. Refer to Table 2 for kit specifications and ECN1 connected to the air handler unit using SW1 on the Main and SW3-1 settings.
- Page 27 Main kit Sub kit 1 Sub kit 2 Sub kit 3 1 2 3 4 1 2 3 4 1 2 3 4 1 2 3 4 11: Quantity of sub-kits is 3 00: Main kit 10: Sub kit 01: Sub kit 11: Sub kit (total quantity of kits is 4) address is 0...
- Page 28 DEH (Dehumidification) Control Logic Setting Air Handling Unit Fan Speed Setting SW3-3 defines the normal open or normal closed status Configure the number of fan speeds using SW5-1 and of dehumidification relay output DEH (dry contact 24V 1A SW5-2. Main kit only. max) at terminal CN51.
- Page 29 Parallel Control Setting AHUK 1 (Main) Identify if there is one AHU Control Kit controlling each coil or if there are multiple parallel AHU Control Kits controlling Coil one coil using SW5-3. AHUK 2 (Sub) There may be single or multiple coils in a large AHU over 8 ton (see Table 2).
- Page 30 Fan Speed Digital & Analog Signals Conversion ENC2, 3 and 4 define low, medium and high speed When digital input is received at Mi, digital output of me- between digital and analog signals for both input and dium speed Mo is closed and analog output Ao is 7VDC. output.
- Page 31 Connect to Coil Branch Pipe Connect to Outdoor Unit Branch NOTE - Observe 24 in. straight pipe requirement on each side of Pipe branch pipe kit. See Figure 25. Figure 23. Four (4) Parallel Kits Connecting One (1) Large Coil Connect to Coil Connect to Coil Connect to Coil...
- Page 32 >24 in. (610 mm) required >36 in. (914 mm) preferred before the first long radius bend or branch pipe connection >24 in. (610 mm) required >36 in. (914 mm) preferred before the first long radius bend or branch pipe connection NOTE - Reference and adhere to branch pipe kit installation instructions requirements for installation/positioning.
- Page 33 1 cooling HP spd, 1 ALT spd (2 of 4 speed choices 1=low=red 2=yellow 3=brown 4=high=black) AHU kit sets ALT for furnace P3 AHU Control Kit 0~250V 1A (X3) 1A (X6) CTON CTON HTON HTON AUXH AUXH 24VAC ML180 Figure 26. Gas Furnace 1-Speed Wiring (Lennox Furnace ML180 1-Speed Connection Shown)
- Page 34 P3 AHU Control Kit 0~250V 1A (X3) 1A (X6) CTON CTON HTON HTON AUXH AUXH H1 H2 W951 W914 W915 24VAC 2 CMP Y1-Y2 R-DS FIELD SUPPLIED EL296UH090XV60C Figure 27. Gas Furnace 2-Speed Wiring (Lennox Furnace EL296UH090XV60C 2-Speed Connection Shown)
- Page 35 P3 AHU Control Kit 0~250V 1A (X3) 1A (X6) CTON CTON HTON HTON AUXH AUXH H1 H2 H3 M1 M2 W951 W914 W915 24VAC 2 CMP R-DS Y1-Y2 FIELD SUPPLIED EL296UH090XV60C Figure 28. Gas Furnace 3-Speed Wiring (Lennox Furnace EL296UH090XV60C 3-Speed Connection Shown)
- Page 36 Example AHU LII CBX27UH, TSA? TPA? TAA? fan speed set at tap #4 P3 AHU Control Kit 0~250V 1A (X3) 1A (X6) CTON CTON HTON HTON AUXH AUXH 24VAC 2 CMP Y1-Y2 CBX27UH Figure 29. Electric Air Handler 1-Speed Wiring (Lennox Air Handler 1-Speed Connection Shown)
- Page 37 P3 AHU Control Kit +12V ON/OFF CN54 INPUT 0~250V 1A (X3) 1A (X6) CTON CTON HTON HTON AUXH AUXH FAULT OUTPUT LII AHU ELA240S4D-1Y VFD MITSUBISHI FR-E700 Figure 30. Electric Air Handler 3-Speed Wiring (Lennox Air Handler 3-Speed Connection Shown)
- Page 38 LII AHU ELA240S4D-1Y VFD MITSUBISHI FR-E700 Figure 31. Electric Air Handler Variable Speed Wiring (Lennox Air Handler Variable Speed Connection Shown) Network Address and Commissioning After the system has been installed, the AHU Control NOTE - The receiver temperature unit display must be Board must be assigned an address as part of the set at the same time as the controller.
-
Page 39: Troubleshooting
Troubleshooting Digital Display Make note of the code (E1, EE, etc.), then reset the display by pressing the ON/OFF button on the unit The AHU Control Kit is equipped with a receiver that has controller. Press the ON/OFF button a second time a digital display that provides an error code. - Page 40 Table 10. Fault Code Display on Sub AHU Control Kit Error Code Description T2 (Middle of evaporator sensor) malfunction T2B (Outlet of evaporator sensor) malfunction T2A (Inlet of evaporator sensor) malfunction Reserved EXV malfunction Capacity setting, EXV Kit or Parallel total capacity incompatibility Fan control input has dry contact and 0~10V input at the same time or ENC2, ENC3, and ENC4 are not set properly.
- Page 41 Spot Check Instructions Use the Spot Check Performance tables below and the information about the AHU Control Box and the indoor Manual button on the unit receiver to view diagnostic unit coil. Table 12. Spot Check Performance Main Kit Content Note Normal display Communication address of indoor unit...
- Page 42 Table 14. Spot Check Performance Menu in Parallel Control Mode 2, SW5-3=1 Content Note Address of Sub Kit Dial code of indoor unit capacity (Total of AHU Control Kits in parallel) The actual evaporator inlet temperature sensor T2 The actual middle evaporator temperature T2A The actual evaporator outlet temperature T2B The actual superheat (SH) (Cooling Mode) The actual subcooling (Heating Mode)
- Page 44 Reference and adhere to the latest revision of the installation instructions. Installation instructions can be downloaded from www.lennoxvrf.com, www.lennoxcommercial.com, www.lennoxpros.com and the Lennox VRF and Mini-Splits app. Download the app from the Apple App Store or the Google Play store.
Need help?
Do you have a question about the VPB036H4M and is the answer not in the manual?
Questions and answers