Advertisement
Quick Links
Advertisement

Subscribe to Our Youtube Channel
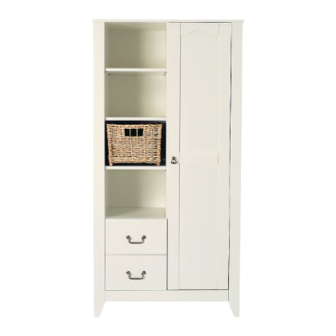
Summary of Contents for mothercare Little Hampton
- Page 1 – read carefully...
- Page 2 introdduccion important notes Please take a few minutes to read this user guide. Lay the parts out and compare to the PARTS CHECKLIST below. Do not discard any packaging until you are sure that you have all the parts. This furniture is provided with an anti-topple device for securing to a wall. Failure to use this could result in the furniture toppling onto a child.
- Page 3 introdduccion parts checklist 5 domed head screws M4 x 25mm 2 washers 1 strap 1 base rail 1 base 1 top 2 sides (left and right) 1 centre panel 1 door 2 back panels...
- Page 4 introdduccion parts checklist 1 bottom shelf 3 shelves 1 1 1 1 1 1 2 hanging rails 4 drawer sides 2 drawer fronts 2 drawer bases 2 drawer backs tools required: 1 allen key (provided) 1 cross head screw driver...
- Page 5 introduction introduccion assembly attaching the hinges and hanging rail brackets Attach the hanging rail brackets to the centre panel and the right hand side using 12, 5.5 x 20mm screws. Attach the hinge plates to the right hand side using 12,7 x 15mm screws. Attach the hinges to the door using 6, 7 x 15mm screws attaching the base rail to the base...
- Page 6 introduction introduccion assembly attaching the center panel to the base and bottom shelf Insert 4, dowels in to the bottom shelf and the center panel Insert 2 cam screws in to the center panel Insert 2 cams in to the bottom shelf Locate the bottom shelf in to the corresponding pre-drilled holes of the center panel and firmly push together.
- Page 7 introduction introduccion assembly attaching the top Insert 6, dowels in to the sides and center panel. Insert 6 cam screws in to the top Insert 6 cams in to the sides and center panel. Locate the top in to the corresponding pre-drilled holes in the sides and center panel.
- Page 8 introduction introduccion assembly attaching the back panels Attach the 2 back panels to the back of the wardrobe using 36, 3 x 16mm cross head screws and the 10 back panel plates attaching the hanging rails Insert the hanging rails in to the hanging rail brackets...
- Page 9 introduction introduccion assembly attaching the door and door handles Attach the wardrobe door by sliding the door hinges on to the hinge plates. Secure the hinges in place by tightening the locating screw on the hinge plate using a cross head screw driver. Picture 10 Attach the door handle to the wardrobe doors using 1, M4 x 25mm domed head...
- Page 10 introduction introduccion assembly assembling the drawers Insert 4, 8 x 36 dowels in to the drawers backs. Insert 2 dowels in to each of the drawer sides. Attach the drawer back to the drawer sides by inserting the dowels in to their pre-drilled holes and pushing firmly together.
-
Page 11: Customer Care
Take care when handling or moving the wardrobe. Careless handling can damage wooden furniture. customer care If you have a problem with this product or require replacement parts, please contact your nearest Mothercare store or telephone the Mothercare customer care line on 08453 30 40 30.


Need help?
Do you have a question about the Little Hampton and is the answer not in the manual?
Questions and answers