LTH Electronics MXD70 Series Manual
Multi-parameter monitor
Hide thumbs
Also See for MXD70 Series:
- User interface manual (30 pages) ,
- Configuration manual (40 pages)
Table of Contents
Advertisement
Quick Links
MXD70 SERIES
MANUALS
MON 1 JUN 2009
09:56
517.2
CH1:
µS/cm
12.3
A: 12.28mA
°C
i)
ii)
9.64
pH
CH2:
25.0
-156mV
°C
ii)
i)
23.3
CH3:
%
28.0
2.15Atm
°C
i)
ii)
CAL
MENU
F1
F5
F2
F4
F3
MARCH 2019
MON 1 JUN 2009
09:56
517.2
µS/cm
CH1:
12.3
°C
A: 12.28mA
i)
ii)
9.64
CH2:
pH
25.0
-156mV
°C
i)
ii)
23.3
%
CH3:
28.0
2.15Atm
°C
i)
ii)
CAL
MENU
F1
F5
F2
F4
F3
Advertisement
Chapters
Table of Contents

Related Manuals for LTH Electronics MXD70 Series


Summary of Contents for LTH Electronics MXD70 Series
- Page 1 MXD70 SERIES MANUALS MON 1 JUN 2009 09:56 517.2 µS/cm CH1: 12.3 °C A: 12.28mA 9.64 CH2: 25.0 -156mV °C 23.3 CH3: MON 1 JUN 2009 09:56 28.0 2.15Atm °C 517.2 MENU CH1: µS/cm 12.3 A: 12.28mA °C 9.64...
- Page 2 - Part No. 6128 Output Option Connector lth.co.uk/index.php/downloads/ or via the adjacent QR code. Seventh Issue February 2019 Copyright LTH Electronics Ltd. NO3 C3 NC3 NO4 C4 NC4 C5 NO5 C6 NO6 Digital Input Connection Details...
- Page 3 Conductivity Input Card Connection Details Electrodeless Conductivity Input Card Connection Details 54E Extension Cable Sensor Input Sensor Input Conventional Conductivity Input Connector Unit Earth Terminal Conventional Conductivity Input Connector Unit Earth Terminal Conventional Conductivity Input Connector Unit Earth Terminal ECS Input Connector Unit Earth Terminal ECS Input Connector Unit Earth Terminal...
- Page 4 - Part No. 6127 NO3 C3 NC3 Eighth Issue February 2019 lth.co.uk/index.php/downloads/ or via the adjacent QR code. Copyright LTH Electronics Ltd. NO2 C2 NC2 NO1 C1 NC1 NO4 C4 NC4 0/4-20 mA MODBUS RS485 &...
- Page 5 Conductivity Input Card Connection Details Electrodeless Conductivity Input Card Connection Details Instrument Earth Stud Instrument Earth Stud 54E Extension Cable Conventional Conductivity Input Connector Instrument Earth Stud Sensor Input Sensor Input Conventional Conductivity Input Connector Conventional Conductivity Input Connector Instrument Earth Stud Instrument Earth Stud Green Green Core...
- Page 6 MXD73 Multi-parameter Monitor Installation Guide...
-
Page 8: Preface
Disclaimer LTH Electronics Ltd reserves the right to make changes to this manual or the instrument without notice, as part of our policy of continued developments and improvements. All care has been taken to ensure accuracy of information contained in this manual. - Page 9 Preface Manufacturing Standards Electromagnetic compatibility This instrument has been designed to comply with the standards and regulations set down by the European EMC Directive 2014/30/EU using BS EN 61326-1: 2013 Safety This instrument has been designed to comply with the standards and regulations set down by the European Low Voltage Directive 2014/35/EU using BS EN 61010-1: 2010 Quality This instrument has been manufactured under the following quality standard:...
- Page 10 Preface Declaration of Conformity MXD73 Installation Guide - 3 -...
- Page 11 Preface Blank MXD73 Installation Guide - 4 -...
-
Page 12: Table Of Contents
Contents Contents Preface ......................... 1 Contents ........................5 Introduction ......................7 MXD73 Instrument Specification ..............9 Installation – Safety & EMC ................11 Noise suppression ....................12 MXD73 Add-in Cards Installation ..............13 Installation –... -
Page 13: Contents
Contents Blank MXD73 Installation Guide - 6 -... -
Page 14: Introduction
Introduction Introduction he MXD73 is a microprocessor controlled multi-parameter instrument that can be installed with a user selected combination of up to 3 Sensor Input Cards. The instrument may be subsequently modified to meet changing requirements by the installation of additional, or different, cards and the attachment of the appropriate sensor(s). - Page 15 Introduction MXD73 Rear Termination Overview MXD73 Installation Guide - 8 -...
-
Page 16: Mxd73 Instrument Specification
Introduction MXD73 Instrument Specification Input Expansion Slots 3 slots, user configurable with any combination of available input add-in cards. Output Expansion Slots 1 slot, user configurable with an additional output option add-in card. Ambient Operating Temperature -20°C to +50°C (-4°F to +122°F) for full specification. Display 3 ¾”... - Page 17 Introduction Setpoint Modes On/Off, Time Proportioning, Pulse Proportioning, Band and Latch. Delay timer adjustable from 00:00 to 59:59 mm:ss. Hysteresis 0 to 9.9%. Dose alarm timer, with supplementary initial charge function. Both adjustable from 00:00 to 59:59 mm:ss. Adjustable cycle time and proportional band in proportional modes.
-
Page 18: Installation - Safety & Emc
LOCAL WIRING AND SAFETY REGULATIONS SHOULD BE STRICTLY ADHERED TO WHEN INSTALLING THIS UNIT. SHOULD THESE REGULATIONS CONFLICT WITH THE FOLLOWING INSTRUCTIONS, CONTACT LTH ELECTRONICS OR AN AUTHORISED LOCAL DISTRIBUTOR FOR ADVICE. To maintain the specified levels of Electro Magnetic Compatibility (EMC, susceptibility to and emission of electrical noise, transients and radio frequency signals) it is essential that the types of cables recommended within these instructions be used. -
Page 19: Noise Suppression
Installation Noise suppression In common with other electronic circuitry, the instrument may be affected by high level, short duration noise spikes arising from electromagnetic interference (EMI) or radio frequency interference (RFI). To minimise the possibility of such problems occurring, the following recommendations should be followed when installing the unit in an environment where such interference could potentially occur. -
Page 20: Mxd73 Add-In Cards Installation
Installation MXD73 Add-in Cards Installation The MXD73 is designed to be expandable by the use of add-in cards; these add-in cards can take the form of either a sensor input add-in card or an output option add-in card. The MXD73 can be fitted with up to 3 sensor input cards and 1 output option card. The sensor input cards are designated Input Card 1, Input Card 2 and Input Card 3. - Page 21 Installation To install the new card into the instrument, first remove all existing connectors from the rear of the instrument. Then remove the four screws shown on the following diagram. Remove the rear cover and the instrument should look like the next figure, note depending on the configuration of the instrument the add-in card slots may already be populated.
- Page 22 Installation The add-in cards are inserted into the instrument with the edge of the card positioned down the middle of guide, and with the green connector towards the rear of the instrument case. Insert the card all the way in until the far connector is fully home. The following figure demonstrates the instrument with all three channel slots and the output option slot occupied.
- Page 23 Installation Then depending upon the options installed affix the accompanying add-in description labels to the rear cover in the locations shown. Finally put the rear cover back on the unit, screw the 4 screws and plug the connectors back in. MXD73 Installation Guide - 16 -...
-
Page 24: Installation - Mxd73
Installation Installation – MXD73 The MXD73 panel mount instrument is designed to be flush mounted and sealed in a square cut-out panel, and is held in place with the four screw clamps provided. MXD73 Overall Dimensions The panel cut-out for the instrument should be 92 mm x 92 mm (+1.0 -0.0) ... - Page 25 Installation Blank MXD73 Installation Guide - 18 -...
-
Page 26: Mxd73 Connections
Connections MXD73 Connections Connections to the MXD73 panel mount instrument are made with up to six plug and socket terminal blocks, accessible to the rear of the unit. The availability of the terminals will vary depending upon which options are installed. MXD73 Connections The bottom connector houses the power input and the basic current and relay outputs. -
Page 27: Supply Voltage Connections
Connections Supply Voltage Connections The MXD73 can be powered from either an AC or DC supply voltage. The unit provides two terminals for each of the input connections (“Live” & “Neutral” for an AC input, or + & - for a DC Input), plus an “Earth”... -
Page 28: Current Output Connections
Connections Current Output Connections The MXD73 can be supplied with up to 6 current outputs designated A to F, which can terminate into a load resistance not exceeding 750. For best noise immunity use a screened twisted pair cable, with the screen connected to Earth at one end. Use a sufficiently large cable to avoid a high resistance in the overall current loop. -
Page 29: Relay Connections
Connections Relay Connections The MXD73 can be supplied with up to 6 relays designated 1 to 6, 1 to 4 are change over relays while 5 to 6 are normally open relays The relay contacts are connected to the terminals only and are electrically isolated from the instrument itself. They must be connected in series with a 5 Amp fuse. -
Page 30: Digital Inputs
Connections Digital Inputs The MXD73 features 8 digital inputs, which can be used to initiate a user configurable instrument operation by use of a volt free link, switch or relay. The instrument can be configured to initiate the appropriate action when the contact either closes or opens. Digital Input Connection Details. -
Page 31: Guarantee And Service
LTH manufacture, which are subject to a separate agreement. All sensors made by LTH Electronics Ltd are thoroughly tested to their published specification before despatch. As LTH have no control over the conditions in which their sensors are used, no further guarantee is given, although any complaints concerning their operation will be carefully investigated. -
Page 32: Index
Index Index C L Connection Label ........16 LCD ............. 7, 9 Connections ..........19 LED ..............9 Current Outputs LVD ..............2 Digital Inputs N MXD73 Noise suppression ........12 Relays O Sensor Output Option Card ........13 Supply Voltage P Current Outputs ......... - Page 33 Notes MXD73 Installation Guide - 26 -...
- Page 35 Chaul End Lane Luton Bedfordshire LU4 8EZ United Kingdom Telephone: +44 (0) 1582 593693 Fax: +44 (0) 1582 598036 Email: sales@lth.co.uk Web: www.lth.co.uk...
- Page 36 MXD75 Multi-parameter Monitor Installation Guide...
- Page 38 Disclaimer LTH Electronics Ltd reserves the right to make changes to this manual or the instrument without notice, as part of our policy of continued developments and improvements. All care has been taken to ensure accuracy of information contained in this manual.
- Page 39 Preface Manufacturing Standards Electromagnetic compatibility This instrument has been designed to comply with the standards and regulations set down by the European EMC Directive 2014/30/EU using BS EN 61326-1: 2013 Safety This instrument has been designed to comply with the standards and regulations set down by the European Low Voltage Directive 2014/35/EU using BS EN 61010-1: 2010 Quality This instrument has been manufactured under the following quality standard:...
- Page 40 Preface Declaration of Conformity MXD75 Installation Guide - 3 -...
- Page 41 Preface Blank - 4 - MXD75 Installation Guide...
- Page 42 Contents Contents Preface ......................... 1 Contents ........................5 Introduction ......................7 MXD75 Instrument Specification ..............9 Installation – Safety & EMC ................11 Noise suppression ....................12 MXD75 Add-in Cards Installation ..............13 Installation –...
-
Page 43: Contents
Contents Blank - 6 - MXD75 Installation Guide... -
Page 44: Introduction
Introduction Introduction The MXD75 is a microprocessor controlled multi-parameter instrument that can be installed with a user selected combination of up to 3 Sensor Input Cards. The instrument may be subsequently modified to meet changing requirements by the installation of additional, or different, cards and the attachment of the appropriate sensor(s). - Page 45 Introduction MXD75 Termination Overview - 8 - MXD75 Installation Guide...
-
Page 46: Mxd75 Instrument Specification
Introduction MXD75 Instrument Specification Input Expansion Slots 3 slots, user configurable with any combination of available input add-in cards. Output Expansion Slots 1 slot, user configurable with an additional output option add-in card. Ambient Operating Temperature -20°C to +50°C (-4°F to +122°F) for full specification. Display 3 ¾”... - Page 47 Introduction Setpoint Modes On/Off, Time Proportioning, Pulse Proportioning, Band and Latch. Delay timer adjustable from 00:00 to 59:59 mm:ss. Hysteresis 0 to 9.9%. Dose alarm timer, with supplementary initial charge function. Both adjustable from 00:00 to 59:59 mm:ss. Adjustable cycle time and proportional band in proportional modes.
-
Page 48: Installation - Safety & Emc
LOCAL WIRING AND SAFETY REGULATIONS SHOULD BE STRICTLY ADHERED TO WHEN INSTALLING THIS UNIT. SHOULD THESE REGULATIONS CONFLICT WITH THE FOLLOWING INSTRUCTIONS, CONTACT LTH ELECTRONICS OR AN AUTHORISED LOCAL DISTRIBUTOR FOR ADVICE. To maintain the specified levels of Electro Magnetic Compatibility (EMC, susceptibility to and emission of electrical noise, transients and radio frequency signals) it is essential that the types of cables recommended within these instructions be used. -
Page 49: Noise Suppression
Installation Noise suppression In common with other electronic circuitry, the instrument may be affected by high level, short duration noise spikes arising from electromagnetic interference (EMI) or radio frequency interference(RFI). To minimise the possibility of such problems occurring, the following recommendations should be followed when installing the unit in an environment where such interference could potentially occur. -
Page 50: Mxd75 Add-In Cards Installation
Installation MXD75 Add-in Cards Installation The MXD75 is designed to be expandable by the use of add-in cards; these add-in cards can take the form of either a sensor input add-in card or an output option add-in card. The MXD75 can be fitted with up to 3 sensor input cards and 1 output option card. The sensor input cards are designated Input Card 1, Input Card 2 and Input Card 3. - Page 51 Installation Input Card 1 & 2 Installation Top View Input card 3 and the output option card are installed via the use of header C and either header D or E depending on the configuration of the output option card. (N.B. header’s C, D and E are not supplied with the standard instrument and must be purchased separately if upgrading the unit after initial purchase).
- Page 52 Installation Input Card 3 & Output Option Card Installation Top View To install the cards and headers into the instrument, first remove the terminal cover. Then remove the two revealed screws at the bottom of the case. MXD75 Installation Guide - 15 -...
- Page 53 Installation Then on the underside of the case remove the remaining seven screws. N.B. Do not lose the o-rings which may come off when removing the screws. The headers with the cards attached must then be inserted into the instrument’s main board connectors.
- Page 54 Installation Once inserted the instrument should look as follows With Input Card 1 and 2 With Input Card 1, 2, 3 and Output Option Card Now attach the supplied connection labels to the terminal area label and inside the terminal cover as shown. Supplied Terminal Label Locations MXD75 Installation Guide - 17 -...
- Page 55 Installation Supplied Terminal Cover Label Locations Next reassemble the instrument case, ensuring all of the o-rings are in place on the back of the case and all of the screws are re-inserted. Connect the power (see Supply Voltage Connections section) and check that all of the new cards have been recognised by the instrument.
-
Page 56: Installation - Mxd75
Installation Installation – MXD75 The MXD75 Surface mount instrument is designed for fixing to a wall or other flat surface. Three 6.5mm diameter holes are provided for this purpose. Note that fasteners are not provided. MXD75 Overall Dimensions LTH Recommends using No. 10 x 1¼... -
Page 57: Pipe Mounting
Installation Pipe Mounting The handrail & pipe-mounting kit is designed for fixing to a vertical or horizontal handrail or pipe, of 25 – 70 mm outside diameter. (Optional – LTH Part No. 7599). The instrument is then clamped using the mounting kit as follows. Note: Care should be taken not to over tighten mounting, as damage may result to enclosure. - Page 58 Installation Horizontal Mounting Vertical Mounting MXD75 Installation Guide - 21 -...
- Page 59 Installation Blank - 22 - MXD75 Installation Guide...
-
Page 60: Mxd75 Basic Connections
Connections MXD75 Basic Connections Having ensured that the main power is isolated from the instrument, remove the terminal cover by releasing the three front screws. (The terminal cover is the small cover at the bottom of the front panel). Once the cover has been removed the following terminal arrangement should be visible. -
Page 61: Supply Voltage Connections
Connections Supply Voltage Connections The MXD75 can be powered from either an AC or DC supply voltage. The unit provides two terminals for each of the input connections (“Live” & “Neutral” for an AC input, or + & - for a DC Input), plus an “Earth”... -
Page 62: Current Output Connections
Connections Current Output Connections The MXD75 can be supplied with up to 6 current outputs designated A to F, which can terminate into a load resistance not exceeding 750. For best noise immunity use a screened twisted pair cable, with the screen connected to Earth at one end. Use a sufficiently large cable to avoid a high resistance in the overall current loop. -
Page 63: Relay Connections
Connections Relay Connections The MXD75 can be supplied with up to 6 relays designated 1 to 6, 1 to 4 are change over relays while 5 to 6 are normally open relays. The relay contacts are connected to the terminals only and are electrically isolated from the instrument itself. They must be connected in series with a 5 Amp fuse. -
Page 64: Digital Inputs
Connections Digital Inputs The MXD75 features 8 digital inputs, which can be used to initiate a user configurable instrument operation by use of a volt free link, switch or relay. The instrument can be configured to initiate the appropriate action when the contact either closes or opens. MXD75 Surface Mount Instrument Digital Inputs Connection Detail. -
Page 65: Sd Card Interface
Connections SD Card Interface The MXD75 features a SD card interface which is compatible with SD, SDHC and SDXC formatted cards (N.B. SDXC cards may need formatting by the MXD75 before use – see user interface guide). The card can be removed whilst the instrument is on but only when the disk icon is not shown at the top of the display. -
Page 66: Guarantee And Service
LTH manufacture, which are subject to a separate agreement. All sensors made by LTH Electronics Ltd are thoroughly tested to their published specification before despatch. As LTH have no control over the conditions in which their sensors are used, no further guarantee is given, although any complaints concerning their operation will be carefully investigated. - Page 67 Notes - 30 - MXD75 Installation Guide...
- Page 68 Notes MXD75 Installation Guide - 31 -...
-
Page 69: Index
Index Mounting ............19 Connections ..........23 Digital Inputs ........27 Noise Suppression ........12 MXD75 ..........23 Relays ..........23, 26 Output Option Card ........14 Sensors ..........24 Supply Voltage ........24 Pipe-Mounting ..........20 Current Outputs ......... 9 Power Supply ..........10 Digital Inputs .......... - Page 71 Chaul End Lane Luton Bedfordshire LU4 8EZ United Kingdom Telephone: +44 (0) 1582 593693 Fax: +44 (0) 1582 598036 Email: sales@lth.co.uk Web: www.lth.co.uk...
- Page 72 MXD70 SERIES Multi-parameter Monitor User Interface & Data Logging Guide...
- Page 74 Preface Product warranty The MXD70 Series has a warranty against defects in materials and workmanship for three years from the date of shipment. During this period LTH will, at its own discretion, either repair or replace products that prove to be defective. The associated software is provided ‘as is’...
- Page 75 Preface Manufacturing Standards Electromagnetic compatibility This instrument has been designed to comply with the standards and regulations set down by the European EMC Directive 2004/108/EC using BS EN 61326-1: 2013 Safety This instrument has been designed to comply with the standards and regulations set down by the European Low Voltage Directive 2006/95/EC using BS EN 61010-1: 2010 Quality This instrument has been manufactured under the following quality standard:...
- Page 76 Contents Contents Preface ........................1 Contents ........................3 User Interface ......................5 The Front Screen .................... 5 The Menu System ................... 6 Security Code Access ..................9 Access Code Management ............... 10 Enter New Code .................... 11 Configuration ...................... 13 Main Menu .....................
-
Page 77: Contents
Contents Blank Page - 4 - User Interface Guide... -
Page 78: User Interface
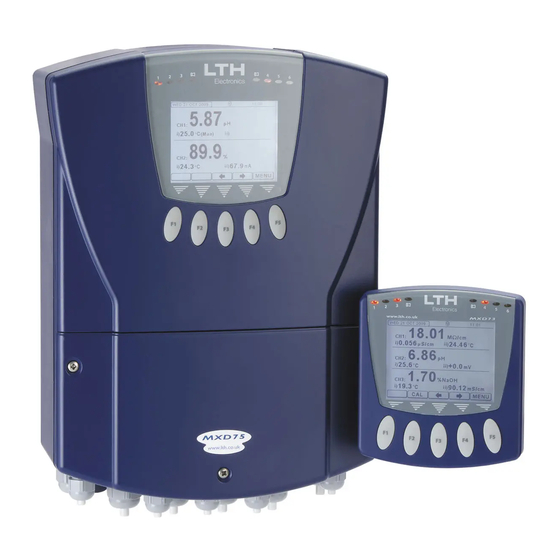
FOLLOWED CORRECTLY. FAILURE TO DO SO MAY RESULT IN AN ELECTRICALLY HAZARDOUS INSTALLATION OR IRREPARABLE DAMAGE TO THE INSTRUMENT. The MXD70 Series uses a high quality backlit 3¾” QVGA LCD to display the channel readings and settings. This is accompanied by 5 control buttons whose function varies depending upon which screen the user is viewing. -
Page 79: The Menu System
User Interface Front Screen Trends Current Output Trends Live Trend (Optional Extra) The Menu System When the instrument is switched on it will complete a configuration check that will take approximately 20 seconds after this it will default to the front screen. The user interface is arranged in two ways, the first is a quick configuration overview which is accessible by scrolling left or right from the front screen as shown below. - Page 80 User Interface The second menu is accessible by pressing the menu button on the front screen. This then brings up the main menu from which the user can access the instruments settings. The main menu is split into two main sections. The top shows the current time & date, the unit status and the instrument’s current readings.
- Page 81 User Interface Blank Page - 8 - User Interface Guide...
-
Page 82: Security Code Access
Security Code Access Security Code Access To protect the instrument setup from unauthorised or accidental tampering, a security access code system is present. This is implemented via the instrument’s menu system which operates in two modes, “locked” as indicated by a padlock symbol and “unlocked”... -
Page 83: Access Code Management
Security Code Access Access Code Management The user can select their own access code in the access code management menu, or alternatively they can disable the security system permanently by changing the access code to 0000. Main Menu From the front screen press the menu button to show the main menu options and select Access Code Management. -
Page 84: Enter New Code
Security Code Access Enter New Code Enter the new security access code NB. Set the new code to 0000 to disable the security access system permanently unlock instrument. – Increase / Decrease Digit / – Select Next Digit EXIT –... - Page 85 Security Code Access Blank Page - 12 - User Interface Guide...
-
Page 86: Configuration
– Select Option / EXIT – Return to Front Screen – Enter Option Language The MXD70 Series has the ability to support multilingual menus. The language of choice can be selected from this menu. – Select Option / EXIT – Cancel –... -
Page 87: Daylight Savings
Configuration Set Time Sets the instruments time. – Increase / Decrease Digit / – Select Next Digit EXIT – Cancel – Save Time Set Date Sets the instruments date. / – Increase / Decrease item – Select Next item EXIT –... -
Page 88: Setup Front Screen
Configuration Setup Front Screen This allows the user to customise the information the front screen displays / – Select Option EXIT – Return to Main Menu – Enter Option Select Front Screen Channel Select which front screen channel you wish to edit –... -
Page 89: Setup Menu Header
Configuration Front Screen Trend If only one channel is displayed on the front screen the user has the ability to show up to two current output trends called 4-20mA Output Slot 1, and 4- 20mA Output Slot 2. Note, that you will only be able to select the current outputs that are associated with the displayed channel. -
Page 90: Service Alarms
Configuration Service Alarms The MXD70 Series has an inbuilt Service Alarm for each channel which will activate when the maintenance engineer’s service interval has expired. Note. By default the alarms are disabled and can only be setup using the service access code which can be obtained from LTH Electronics. - Page 91 Configuration Software Status Provides information about the software version and serial numbers of the instrument. – Select Option / EXIT – Return to Main Menu – Enter Option EXIT – Return to Configuration Menu Format SD Card Allows the users to reformat SD cards which are incompatible with the instrument.
-
Page 92: Update Software
Update Software Update Software The MXD70 Series operating software can be upgraded by saving the latest version from LTH onto a SD card, inserting it into the instrument and following the instructions below. All three files must be present on the SD card for the update to work. All units supplied after 1 October 2012 now support SDHC and SDXC cards using the fat32 format. - Page 93 Update Software Blank Page - 20 - User Interface Guide...
-
Page 94: Optional Software Functions
Optional Software Functions Optional Software Functions The MXD70 series features optional software functions which when purchased will expand the instrument’s capabilities. These functions by default are locked. They can be unlocked by LTH or your local distributor at the time of order. Alternatively the functions may be ordered after purchase by supplying LTH or your local distributor the serial number of your instrument along with the purchase order. - Page 95 Optional Software Functions Unlock Software Upon receipt of the unlock code return to the Configuration menu and select Unlock Software. / – Select Option EXIT – Return to Main Menu – Enter Option Unlock Software Select the optional software function you wish to unlock.
-
Page 96: Data Logging
Data Logging Data Logging The Data logging optional software function expands the capabilities of the MXD70 series by allowing the user to record over time the status of the instrument. It consists of two separate sections, Live Trending and SD Card Data Logging, which together will help the user to analyse and improve the performance of their application. - Page 97 Data Logging Configure Trend Select the number of traces to display. By selecting none the live trend is disabled and no longer visible from the front screen. – Select Option / EXIT – Cancel – Save Selection — Trace 1 ( Select which measurement Trace 1 (left hand side axis) is to be associated with.
- Page 98 Data Logging Trace Max Enter Trace’s maximum displayed value. Adjust in conjunction with the minimum displayed value to increase the measurements displayed resolution. – Increase / Decrease Digit / – Select Next Digit EXIT – Cancel – Save Value Trace 2 (----) Select which measurement Trace 2 (right hand side axis) is to be associated with.
-
Page 99: Live Trend Screen
Data Logging Live Trend Screen Once Configured the Live Trend screens can be found by moving right from the front screen. In addition the live trend screens will not “time out” back to the front screen. The screen operates in two modes “Live Mode”... -
Page 100: Sd Card Data Logging
Data Logging SD Card Data Logging The SD Card Data Logging part of the data logging software enables the user to log over long periods the status of the instrument direct to the SD card. Variables logged include: the primary sensor readings, any secondary readings, the status of the setpoints, the current output readings, the status of the digital inputs and any error messages. - Page 101 Data Logging Channel Log Enables / Disables the SD card data logging of the channel and any setpoints, current outputs, digital inputs and error messages associated with the channel. / – Select Option EXIT – Cancel – Save Selection Range associated measurement currently...
-
Page 102: View Sd Card Data Logging
Data Logging View SD Card Data Logging Main Menu From the front screen press the menu button to show the main menu options and select Data Logging. – Select Option / EXIT – Return to Front Screen – Enter Option Data Logging Select View SD Card Data Logging. - Page 103 Data Logging Configure Graph Select how many traces to show on the graph. / – Select Option EXIT – Cancel – Save Selection Trace Channel Select which channel the trace is assigned to. Available channels depend upon which channels have been recorded in the selected log. –...
- Page 104 Data Logging Trace Max Enter the Trace’s maximum displayed value. Adjust in conjunction with the minimum displayed value to increase the measurements displayed resolution. – Increase / Decrease Digit / – Select Next Digit EXIT – Cancel – Save Value Trace 2 (---) Select which measurement Trace 2 (right hand side axis) is to be associated with.
-
Page 105: Sd Card Data Logging Graph
Data Logging SD Card Data Logging Graph Once Configured the SD card Data Logging Graph starts by showing the closest reading to the one selected by the time and date. The user can then use the cursor to scroll backwards and forwards in time through the log on the SD card. -
Page 106: Viewing The Sd Card Data Log On A Pc
Data Logging Viewing the SD Card Data Log on a PC Before the user removes the card from the instrument they must first stop the SD Card data logging (see page 27) and the SD card active symbol must not be present at the top of the screen. Once removed place the SD card in the card reader connected to the pc. - Page 107 Data Logging Blank Page - 34 - User Interface Guide...
-
Page 108: Error Messages
Error Messages Error Messages If the internal diagnostics have detected an error condition then the error LEDs will illuminate. This is accompanied by an alarm bell either next to the associated channel or in the unit status area. By pressing the left arrow on the front screen or by selecting the errors option in the main menu, the list of currently active errors can be seen. - Page 109 Error Messages Blank Page - 36 - User Interface Guide...
-
Page 110: Save, Restore & Reset
Save, Restore & Reset Save, Restore & Reset The MXD70 Series features the ability to save and restore the current configuration of a channel and its associated setpoints, current outputs, and digital inputs, into either one of two save slots inside the instrument. - Page 111 Save, Restore & Reset Select Location Select either Save A or Save B to access the instruments internal stores. Alternatively if inserted select SD Card A-H to use one of the 8 SD card saves. If a save location is already being used, as indicated by a time - date stamp, then information about that save can be accessed by selecting it and pressing the INFO button.
-
Page 112: Calculation
Calculation Calculation The MXD70 Series features the ability to calculate a measurement from the input of multiple sensor channels. This result can then be used to activate the instruments setpoints / relays and drive the current outputs. The following mathematical functions are supported:... - Page 113 Calculation Enable Calculation Turn the calculation function on or off. – Select Option / EXIT – Cancel – Save Selection Variable X Select which sensor variable is used as the X term in the calculation function. / – Select Option EXIT –...
- Page 114 Calculation Calculation Result Screen Once configured and enabled the result of the calculation can be seen either on the main front screen or if there is not enough room, on the calculation result screen located to the right of the main front screen.
-
Page 115: Index
Index Index Access Code Management ......10 Save ............... 26 Calculation ............39 Trace 1 ............24 Configuration Trace 2 ............25 Channel Label ........... 15 Trend Ineterval .......... 25 Value ............. 26 Contrast ............14 Daylight Savings ........14 LVD ................ - Page 118 MXD70 SERIES Multi-parameter Monitor Conductivity Setup and Operating Guide...
- Page 120 Disclaimer LTH Electronics Ltd reserves the right to make changes to this manual or the instrument without notice, as part of our policy of continued developments and improvements. All care has been taken to ensure accuracy of information contained in this manual.
- Page 121 Preface Manufacturing Standards Electromagnetic compatibility This instrument has been designed to comply with the standards and regulations set down by the European EMC Directive 2004/108/EC using BS EN 61326-1: 2013 Safety This instrument has been designed to comply with the standards and regulations set down by the European Low Voltage Directive 2006/95/EC using BS EN 61010-1: 2010 Quality This instrument has been manufactured under the following quality standard:...
- Page 122 Contents Contents Preface ......................... 1 Contents ........................3 Conductivity Input Card Specification ............5 Range & Sensor Compatibility Tables ............6 Installation and Choice of Conductivity Sensors ........7 Care and Maintenance of Conductivity Sensors ........7 ...
-
Page 123: Contents
Contents Blank MXD70 Conductivity Setup and - 4 - Operating Guide... -
Page 124: Conductivity Input Card Specification
Specification Conductivity Input Card Specification Conductivity Sensor Any LTH conventional conductivity cell. Other manufacturer’s cells can be accommodated. Up to 100 meters of LTH 54D cable. Connection Cable 0-0.999 μS/cm to 0-999.9 mS/cm (K= 0.01 to 10.0). Ranges of Measurement 0-99.99 KΩ/cm to 0-99.99 MΩ/cm (K= 0.01 to 1.0). -
Page 125: Range & Sensor Compatibility Tables
Specification Range & Sensor Compatibility Tables CONDUCTIVITY RANGE NOMINAL CELL CONSTANT 0.010 0.100 1.000 10.00 0 to 9.999 S/cm 0 to 99.99 S/cm 0 to 999.9 S/cm ... -
Page 126: Installation And Choice Of Conductivity Sensors
Installation Installation and Choice of Conductivity Sensors The choice of the correct type of conductivity sensor, how and where to mount it, so that it has a representative sample of solution are probably the two most important considerations when installing a conductivity system. - Page 127 Installation Some of these contaminants do not contribute directly to the measured conductivity, e.g. organics, rust and suspended solids, but may form deposits on the electrode surface. In general these may be cleaned with the bristle brush provided and a weak detergent solution mixed with scouring powder. Problems may occur in hard water areas where the gradual formation of scale will reduce the active area of the electrodes.
-
Page 128: Mxd73 Termination Information
Installation MXD73 Termination Information Conventional Conductivity 54D Cable Connection Details Conventional Conductivity Coax Cable (CMC8/01 & CMC8/10) Connection Details MXD70 Conductivity Setup and - 9 - Operating Guide... - Page 129 Installation Conventional Conductivity Cable (CMC8/001) Connection Details MXD73 Extension Cables CMC8/001 Cable To 54D Extension Cable CMC8/01 or CMC8/10 Cable Connection Details To 54D Extension Cable Connection Details MXD70 Conductivity Setup and - 10 - Operating Guide...
-
Page 130: Mxd75 Termination Information
Installation MXD75 Termination Information Conventional Conductivity 54D Cable Connection Details Conventional Conductivity Coax Cable (CMC8/01 & CMC8/10) Connection Details MXD70 Conductivity Setup and - 11 - Operating Guide... -
Page 131: Mxd75 Extension Cables
Installation Conventional Conductivity Cable (CMC8/001) Connection Details MXD75 Extension Cables CMC8/001 Cable To 54D Extension Cable CMC8/01 or CMC8/10 Cable Connection Details To 54D Extension Cable Connection Details MXD70 Conductivity Setup and - 12 - Operating Guide... -
Page 132: Temperature Sensor Connections
Installation Temperature Sensor Connections 2 Wire RTD Temperature Connection 3 Wire RTD Temperature Connection 4 Wire RTD Temperature Connection MXD70 Conductivity Setup and - 13 - Operating Guide... - Page 133 Installation Blank MXD70 Conductivity Setup and - 14 - Operating Guide...
-
Page 134: Conductivity Input Channel Setup
Channel Setup Conductivity Input Channel Setup The Channels Setup menu contains the basic configurations for the sensor’s input. The default security access code is 1000 Main Menu From the front screen press the menu button to show the main menu options and select Channels. /... -
Page 135: Units
Channel Setup Units The channel can be setup to display conductivity in Siemens/cm, resistivity in Ohms/cm or TDS (Total Dissolved Solids) in ppm. / – Select Option – Cancel EXIT – Save Selection Cell Constant The input channel is designed to use any one of LTH conventional conductivity sensors. -
Page 136: Temperature Input Sensor
Channel Setup TDS Factor When TDS is selected as the operating units the instrument will display the conductivity as “ppm” using a factor which can be adjusted between 0.50 and 0.90. / – Increase / Decrease Digit – Select Next Digit –... -
Page 137: Temperature Compensation
Channel Setup Temperature Compensation Temperature compensation is enabled by setting this to “In”. / – Select Option EXIT – Cancel – Save Selection Temperature Compensation Base Sets the temperature compensation base. See Appendix B - Temperature Coefficient for more information. Only Available if Temperature Compensation is set to in. - Page 138 Channel Setup Manual Temperature Input The fixed temperature value used for manual temperature compensation. Only available when temperature compensation mode is set to “manual”. / – Increase / Decrease Digit – Select Next Digit EXIT – Cancel – Save Value Cable Length Compensation At high conductivities the series resistance in the cell connection cable can have a significant effect on the...
-
Page 139: Simulated Input
Channel Setup Simulated Input See Simulated Channels section of the Setpoints, Current Outputs, Digital Inputs Configuration Guide for more information. / – Select Option EXIT – Return to Main Menu – Enter Option MXD70 Conductivity Setup and - 20 - Operating Guide... -
Page 140: Calibration
Channel Calibration Calibration Best Practice for Fine Tuning the MXD70 Series Conventional Conductivity Input The MXD70 provides a facility for the operator to fine tune the calibration of the conductivity or resistivity measurement, the temperature measurement and the current output. The amount of adjustment is quite small because the factory calibration is accurate and with modern electronics, drift is very low. -
Page 141: Table Of Calibration Resistance Values
Channel Calibration Calibration by Comparison with Another Instrument This can provide the easiest method for in-situ calibrations but has the disadvantage of only being able to check a single measurement point. LTH recommends this method for ALL pure water (<10 μS/cm) calibration checks and has developed a portable system specifically for this purpose. -
Page 142: Calibration Menu
Channel Calibration Calibration Menu The calibration menu provides the facility to adjust the sensor inputs to the system in which it is operating. The default security access code is 1000 Main Menu From the front screen press the menu button to show the main menu options and select Calibration. - Page 143 Channel Calibration Calibration Manual Temperature Input This setting allows a different fixed temperature value to be used when calibrating. Makes it easier to calibrate a standard solution at a different temperature to the process. Only available when the temperature compensation mode has been set to manual in the channel setup menu.
- Page 144 The value will change depending on the result of the temperature offset calibration. Cannot be edited Enter Calibration History The MXD70 series has a calibration history feature which allows the user to review the record of sensor solution calibrations. To enter the calibration history menu press enter.
-
Page 145: Calibration History
Channel Calibration Calibration History The calibration history page provides a record of all sensor solution calibrations carried out. The data includes the date and time of the calibration, the calculated sensor slope and the temperature compensation reading at the time. /... -
Page 146: Calibration Reminder
Channel Calibration Calibration Reminder By enabling the calibration reminder the user can configure a calibration interval, which when expired will activate an alarm and channel message on the front screen. At the end of a sensor solution calibration, if calibration reminder is enabled, the user will be prompted to update the cal due date by the calibration interval and so clearing an alarm if active. -
Page 147: Resetting The User Calibration
Channel Calibration Defer Calibration Date Turns off the alarm and increases the calibration interval by an extra 7 days. Only appears once the calibration interval has expired. – Increase Interval – Cancel Resetting the User Calibration If required the user can reset the user calibrations to their default states. Main Menu From the front screen press the menu button to show the main menu options and select Calibration. - Page 148 Channel Calibration Reset User Calibration Select the required conductivity input channel. / – Select Option – Return to Calibration EXIT – Enter Option Reset Channel User Calibration Select whether to reset the sensor calibration, the temperature calibration or reset all of the channel’s user calibrations.
- Page 149 Channel Calibration Blank MXD70 Conductivity Setup and - 30 - Operating Guide...
-
Page 150: Conductivity Usp Operation
USP Operation Conductivity USP Operation US Pharmacopoeia is used by all pharmaceutical companies as a standard set of procedures to ensure that they will comply with FDA requirements. This is applied to conductivity measurements (Section 645), which are used to determine if the water used as either a washing solution or as part of the product being manufactured meets strict quality standards. - Page 151 USP Operation Setup Setpoint Set “Channel” to the required conductivity input channel and “Trigger” to USP. This causes the setpoint to operate to the USP levels stated. It will also force the selected channel’s units to “Siemens”, the cell constant to “0.01” the display range to “9.999μS”...
-
Page 152: Appendix A - Ultra Pure Water
Appendix Appendix A - Ultra Pure Water UPW cell positioning, flow rate and sampling This summary of ASTM D5391-93, combined with LTH application notes applies to ultra-pure water applications only. These applications are very specific in nature and require great care to avoid errors in measurement. - Page 153 Appendix Resin retainers must be effective and the cell must be installed so that it is accessible for cleaning. If this is a problem with the CMC26/001/PT43 cell use the CMC34/001/PT43 which has wider spaced electrodes of greater than 1.5 mm. This has been found to be less likely to trap such particles. Conductivity cells if subjected to de-mineraliser regeneration reagents require excessive rinse time to obtain satisfactory results, therefore, locate the cell where it will be isolated during regeneration.
-
Page 154: Appendix B - Temperature Coefficient
Calculating the temperature coefficient of a solution If the temperature coefficient of the solution being monitored is not known, the MXD70 series can be used to determine that coefficient. You should set the conductivity input channel to a suitable range and the temperature coefficient to 0.0%. - Page 155 Appendix MXD70 Conductivity Setup and - 36 - Operating Guide...
- Page 156 Setup MXD70 Conductivity Setup and - 37 - Operating Guide...
- Page 157 Setup MXD70 Conductivity Setup and - 38 - Operating Guide...
- Page 158 Setup MXD70 Conductivity Setup and - 39 - Operating Guide...
- Page 159 Setup MXD70 Conductivity Setup and - 40 - Operating Guide...
- Page 160 Setup MXD70 Conductivity Setup and - 41 - Operating Guide...
- Page 161 Setup MXD70 Conductivity Setup and - 42 - Operating Guide...
-
Page 162: Appendix D - Error Messages
Faults Appendix D - Error Messages Internal Error Messages E001 UNIT Processor RAM Read/Write Error Try switching the unit off and then on again. If the message persists, consult with your supplier, as this unit may require to be returned for repair. E002 UNIT External RAM Read/Write Error... - Page 163 Faults Input Channel Errors E030 Input Card Checksum Error Try switching the unit off and then on again. If the message persists, consult with E080 your supplier, as the channel’s input card may require to be returned for repair. E130 E031 Setup Checksum Error E081...
- Page 164 Faults E041 Partial Depletion E091 Large difference between the detectors, i.e. one very dirty. This alarm will come up if there is a difference of 3:1 between the detectors. Remove sensor and clean E141 sensor fingers. The probe sensor units (PSU) will be set to 16000 or 32000 if turbidity.
- Page 165 Faults E053 Temp Sensor Fault The temperature sensor is reading open or closed circuit, due in most cases to a E103 damaged sensing element or incorrect wiring. Check that the temperature sensor E153 is set to the correct type in the channel setup menu. Under this condition, the unit will default to the fixed temperature setting for compensation purposes.
- Page 166 The time since the last calibration was performed on this channel has exceeded the time set in the calibration menu. E168 E069 Planned Service Due The Planned Service interval for this unit has expired. Please contact LTH Electronics E119 at the details below: E169 LTH Electronics ltd...
- Page 167 Faults Setpoint Errors E180 Dose Alarm Error E190 The Setpoint has been dosing for longer than the Dose Alarm time as defined in the setpoint menu. E200 E210 E220 E230 E181 to E184 For Future Use E191 to E194 E201 to E204 E211 to E214 E221 to E224 E231 to E234...
- Page 168 Faults Current Output Errors E240 Current OP Hardware Fault E250 The current output circuit has detected an error in the current output loop; this is most commonly due to either a broken loop or too large a load resistor. E260 E270 E280 E290...
- Page 169 Faults E245 Store A Checksum Error The Store A Save for the channel associated with this current output has become E255 corrupted. Check the current output's settings in the current output menu and E265 then save the settings again in the Channel's Store A in the Save/Restore menu. E275 E285 E295...
- Page 170 Faults Digital Input Errors E301 DIG 1 Store A Checksum Error E306 DIG 2 The Store A Save for the channel associated with this digital input has become corrupted. Check the digital input's settings in the digital input menu and then E311 DIG 3 save the settings again in the Channel's Store A in the Save/Restore menu.
- Page 171 Faults Communication Errors E340 Comms Failure The Channel's Input Card is not responding. Try switching the unit off and then on E342 again. If the message persists, consult with your supplier, as the channel's input E344 card may require to be returned for repair. E341 Comms Error The Channel's Input Card is not Operating Correctly.
- Page 172 Faults Calculation Errors E400 Calculation Over Range The Calculation reading is greater than the specified upper limit, check channel E411 settings, calculation configuration, sensor condition and connections. If the message persists please consult with your supplier. E401 Calculation Under Range The Calculation reading is less than the specified lower limit, check channel E411 settings, calculation configuration, sensor condition and connections.
- Page 173 Faults Modbus Errors E420 UNIT Modbus Setup Checksum The Modbus setup has become corrupted. Check and correct the Modbus settings and turn the unit off and on again. If the message persists please consult with your supplier. E421 UNIT Modbus Store A Checksum The Store A Save for the Modbus Configuration has become corrupted.
-
Page 174: Fault Finding
Check that power is available to the unit. Using a voltmeter, set to AC or DC, check the power supply voltage at the connector. The design of the MXD70 Series allows the unit to accept from 85 to 250V AC or DC, an alternative option allows operation from 18 to 32V AC or DC, check the connection label for voltage specification. - Page 175 Faults Check the Pt1000 RTD temperature sensor connections. If an alternative temperature sensor is being used, say Pt100 or 1K Thermistor, check that this has been selected in the Channel Setup Menu (see page 17). Check that any in-line junction boxes and extension cables have been fitted and wired up correctly. The display reads zero ...
- Page 176 All sensors made by LTH Electronics Ltd are thoroughly tested to their published specification before despatch. As LTH have no control over the conditions in which their sensors are used, no further guarantee is given, although any complaints concerning their operation will be carefully investigated.
- Page 177 Notes MXD70 Conductivity Setup and - 58 - Operating Guide...
- Page 178 Notes MXD70 Conductivity Setup and - 59 - Operating Guide...
- Page 179 Index Index Cable ..............54 Main Menu ............15 Screen ............54 Maintenance ..........7, 53 Cable Length Compensation ....... 19 Manufacturing Standards ........ 2 Calibration ............21, 23 Mode (Online/Offline) ......15, 23 Best Practice ..........21 MXD73 ..............9 Front Access ..........
- Page 182 MXD70 SERIES Multi-parameter Monitor pH / Redox Setup and Operating Guide...
- Page 184 Disclaimer LTH Electronics Ltd reserves the right to make changes to this manual or the instrument without notice, as part of our policy of continued developments and improvements. All care has been taken to ensure accuracy of information contained in this manual.
- Page 185 Preface Manufacturing Standards Electromagnetic compatibility This instrument has been designed to comply with the standards and regulations set down by the European EMC Directive 2014/30/EC using BS EN 61326-1: 2013 Safety This instrument has been designed to comply with the standards and regulations set down by the European Low Voltage Directive 2014/35/EC using BS EN 61010-1: 2010 Quality This instrument has been manufactured under the following quality standard:...
- Page 186 Contents Contents Preface ......................... 1 Contents ........................3 pH / Redox Input Card Specification ............... 5 Installation and Choice of pH / Redox Electrodes ........7 SensorTalk Interface ..................7 Care and Maintenance of pH / Redox Electrodes ......... 8 ...
- Page 187 Contents Fault Finding ......................65 Problems with Cables and Connectors ..........66 Guarantee and Service ..................67 Index ......................... 70 MXD70 pH / Redox - 4 - Setup and Operating Guide...
-
Page 188: Ph / Redox Input Card Specification
Specification pH / Redox Input Card Specification Measurement Input Single ended or differential with solution ground. Up to 100 meters cable. Separate glass and reference electrode pair. Separate Antimony and reference electrode pair. Combination electrode. SensorTalk digital or hybrid electrode. Redox Separate glass and reference electrode pair. - Page 189 Specification ± 50 °C, ± 122 °F or ± 50 K. Operator Adjustment (Temperature) Automatic or manual -20°C to +160°C. Temperature Compensation Type MXD70 pH / Redox - 6 - Setup and Operating Guide...
-
Page 190: Installation And Choice Of Ph / Redox Electrodes
When a new pH electrode is first fitted or changed it must be calibrated (see page 29). Depending on the application it may also need periodic re-calibration, the MXD70 series provides an inbuilt count down timer which will trigger an alarm when calibration interval has expired (see page 36). -
Page 191: Care And Maintenance Of Ph / Redox Electrodes
Installation Care and Maintenance of pH / Redox Electrodes All pH and Redox electrodes contain an electrolyte solution, gel or polymer that has a limited life in both operation and on the shelf. The electrode shelf life depends on its storage conditions, it is recommended that the electrode should be used within six to twelve months after purchase. -
Page 192: Smart Capable Input Card Termination Information
Installation Smart Capable Input Card Termination Information pH / Redox LN10 Coax Cable (No TC) Connection Details S400 ProcessProbe Cable (Solution Ground Not Fitted) Connection Details MXD70 pH / Redox - 9 - Setup and Operating Guide... - Page 193 Installation The Smart pH / Redox input card of the MXD70 Series also provides a differential input method of wiring the pH electrode. This provides better electrical noise immunity and allows the sensor to operate in solutions where flowing electrical currents may cause measurement problems.
- Page 194 Installation VP6 Detachable Cable Connection Details with “Solution Ground” MXD70 pH / Redox - 11 - Setup and Operating Guide...
-
Page 195: Sensortalk Sensors Termination Information
Installation SensorTalk Sensors Termination Information The Smart pH / Redox input card of the MXD70 Series is capable of interfacing with the range of SensorTalk pH / Redox electrodes from Broadley James Corporation. This allows the user to take advantage of the unique calibration functionality these sensors provide. Please note, when unplugging an existing SensorTalk sensor from the instrument please wait for the probe is removed message to appear before attaching a different sensor. -
Page 196: Smart Capable Input Card Lth 54E Extension Cable Connection Information
Installation Smart Capable Input Card LTH 54E Extension Cable Connection Information pH 54E Extension Cable Connection Details (Solution Ground Not Fitted) pH 54E Extension Cable Connection Details (Solution Ground Fitted) MXD70 pH / Redox - 13 - Setup and Operating Guide... - Page 197 Installation S400 ProcessProbe to 54E Extension Cable Connection Details VP6 Detachable Cable to 54E Extension Cable Connection Details MXD70 pH / Redox - 14 - Setup and Operating Guide...
- Page 198 Installation Hybrid SensorTalk 54E Extension Cable Connection Details (Solution Ground Fitted) Hybrid SensorTalk Probe Cable To 54E Extension Cable Connection Details MXD70 pH / Redox - 15 - Setup and Operating Guide...
-
Page 199: Smart Capable Input Card Temperature Sensor Connections
Installation Smart Capable Input Card Temperature Sensor Connections 2 Wire RTD Temperature Connection 3 Wire RTD Temperature Connection 4 Wire RTD Temperature Connection MXD70 pH / Redox - 16 - Setup and Operating Guide... -
Page 200: Previous Generation Input Card Termination Information
Installation Previous Generation Input Card Termination Information pH / Redox LN10 Coax Cable Connection Details DynaProbe & ProcessProbe Cable Connection Details MXD70 pH / Redox - 17 - Setup and Operating Guide... - Page 201 / Redox 54E Cable Connection Details The pH / Redox input card of the MXD70 Series also provides a differential input method of wiring the pH electrode. This provides better electrical noise immunity and allows the sensor to operate in solutions where flowing electrical currents may cause measurement problems.
- Page 202 Installation DynaProbe & ProcessProbe Cable Connection Details with “Solution Ground” VP6 Detachable Cable Connection Details with “Solution Ground” MXD70 pH / Redox - 19 - Setup and Operating Guide...
- Page 203 Installation pH 54E Extension Cable Connection Details with “Solution Ground” S400 ProcessProbe to 54E Extension Cable Connection Details MXD70 pH / Redox - 20 - Setup and Operating Guide...
- Page 204 Installation VP6 Detachable Cable to 54E Extension Cable Connection Details MXD70 pH / Redox - 21 - Setup and Operating Guide...
-
Page 205: Previous Gen. Input Card Temperature Sensor Connections
Installation Previous Gen. Input Card Temperature Sensor Connections 2 Wire RTD Temperature Connection 3 Wire RTD Temperature Connection 4 Wire RTD Temperature Connection MXD70 pH / Redox - 22 - Setup and Operating Guide... -
Page 206: Ph / Redox Input Channel Setup
Channel Setup pH / Redox Input Channel Setup The Channels Setup menu contains the basic configurations for the sensor’s input. The default security access code is 1000 Main Menu From the front screen press the menu button to show the main menu options and select Channels. /... - Page 207 Channel Setup Mode Selecting off-line causes any control setpoints / Relays associated with this channel to de-energise (any active error relays will remain energised). Also causes any current outputs associated to hold their current value, useful for when commissioning or calibrating the instrument.
-
Page 208: Units
Channel Setup Units The channel can be configured as a pH, Redox or an exclusively temperature input. When “pH (XX.XX)” is selected the channel will automatically apply correct temperature compensation and probe type to the electrodes raw mV input to provide a display of pH. Note, the instrument can also display the raw mV as a secondary value on the front screen, see User Interface guide for more details. - Page 209 Channel Setup Temperature Units Sets the temperature units used. Note. Kelvin is only available when units are set to temperature mode. / – Select Option EXIT – Cancel – Save Selection Temperature Compensation Mode To use temperature compensation from a measured input select “Auto”, else select “Manual”...
- Page 210 Channel Setup Input Filtering (Averaging) When very noisy environments are encountered, this function will allow the user to filter the sensor readings by taking a running average over the time period selected (from 10 seconds to 5 minutes). / – Select Option –...
- Page 211 Channel Setup Blank MXD70 pH / Redox - 28 - Setup and Operating Guide...
-
Page 212: Calibration
Buffer solutions should be prepared in accordance with the instructions supplied with them. The MXD70 Series offers two different but simple methods of calibration for pH electrode systems. Auto In Auto calibration the instrument requires that the electrode is first placed in a 4pH buffer and then secondly in a 9pH buffer. - Page 213 Channel Calibration Temperature has an effect on the output from the pH electrode as well, so it is important that the buffer temperature is entered into the Calibration Manual Temperature Input if manual temperature compensation is being employed. Alternatively any automatic temperature compensation element should be placed in the buffer solution with the pH sensor if Auto TC is being used.
-
Page 214: Calibration Menu
Channel Calibration Calibration Menu The calibration menu provides the facility to adjust the sensor inputs to the system in which it is operating. The default security access code is 1000 Main Menu From the front screen press the menu button to show the main menu options and select Calibration. -
Page 215: Calibration Principle
Channel Calibration Calibration Principle This setting defines the operating mode of the pH Electrode calibration. In Auto mode the instrument automatically adjusts the offset and slope. In Manual mode the user manually adjusts the reading to match known values. Only available when units set to pH in the channel setup menu and if available probe type is set to glass. - Page 216 Channel Calibration pH Buffer (Offset) + Slope Calibration Enter the pH Manual Offset and Slope Calibration Routine Only available when units set to pH in the channel setup menu and calibration principle is set to Manual in this menu. See page 41 for more details. /...
- Page 217 Channel Calibration Redox Offset Calibration The Redox Offset calibration enables the user to adjust the sensor reading to match a known input. The current Redox sensor reading can be seen in the pop-up window and is adjusted by pressing the up and down arrows.
-
Page 218: Calibration History
– Return To Calibration Menu – Clear All of the Calibration History CLEAR Sensor Condition The MXD70 Series is capable of analysing the result of the pH electrode offset and slope calibration and indicates to the user the condition the electrode is in. ... -
Page 219: Front Screen Calibration Access
Channel Calibration Front Screen Calibration Access When the calibration access is enabled press the “CAL” button to bring up pop-up to select which channel to calibrate. – Enter Calibrate Channel Select Menu / – Scroll Around Menus – Access Main Menu Menu Select Channel to Calibrate From the pop-up select the channel the user wishes... -
Page 220: Custom Buffer Entry
Channel Calibration Calibration Interval Sets the interval time for the calibration alarm. The Next Cal Date will update to show the date of the next calibration alarm. / – Increase / Decrease Digit – Select Next Digit – Cancel EXIT –... - Page 221 Channel Calibration Custom Buffer Menu The custom buffer menu allows the user to enter in custom buffer solution values at fixed temperatures for the nominated pH values chosen, for use with the pH automatic calibration function. Number of Points – Define the required number of data points to be entered (Maximum 13) Setup Points –...
-
Page 222: Auto Ph Sensor Calibration
Channel Calibration Auto pH Sensor Calibration The Auto pH sensor calibration is a two point offset and slope calibration, which requires the use of two pH buffer solutions chosen by the user. These are nominal values from which the instrument converts to exact buffer values due to temperature variations. - Page 223 Channel Calibration Place Electrode In Nominal pH Buffer 1 Place the electrode in the first nominated pH buffer and press enter to begin sampling. Note. If the electrode is new, pressing the “new” button will reset the existing offset and slope and add a “new electrode”...
-
Page 224: Manual Ph Sensor Calibration
Channel Calibration Manual pH Sensor Calibration When using Manual calibration mode it is possible to do either a single point Buffer (Offset) Cal or a combined two point Buffer and Slope calibration. This is accomplished by using either the pH Buffer (Offset) Cal or pH buffer + Slope Cal menu items. - Page 225 Channel Calibration pH Slope Calibration The pH slope calibration enables the user to adjust the sensor slope until the displayed reading matches the known input. If using the “pH Buffer + Slope Cal” menu, the instrument will automatically progress onto the slope calibration once the Buffer calibration has been done.
- Page 226 Channel Calibration If only a single point calibration is required then use the following pH buffer calibration. pH Buffer (Offset) Calibration The pH buffer calibration enables the user to adjust the sensor buffer until the displayed reading matches the known input. To activate the function select “pH Buffer (Offset) Cal”...
-
Page 227: Buffer Solutions
Channel Calibration Buffer Solutions The following table gives the LTH buffer solution values. NB. Buffer solutions should be prepared and used in accordance with the instructions supplied with them. pH variation against temperature Temperature (C) LTH 4pH Buffer LTH 7pH Buffer LTH 9pH Buffer 4.00 7.07... -
Page 228: Resetting The User Calibration
Channel Calibration Resetting the User Calibration If required the user can reset the user calibrations to their default states. Main Menu From the front screen press the menu button to show the main menu options and select Calibration. / – Select Option –... -
Page 229: Appendix A - Temperature Data
Appendix Appendix A - Temperature Data The table below lists approximate resistance values of temperature sensors that may be used with the MXD70 series. Not all options are available on all input types. Temperature PT1000 PT100 3K Balco ( C ) 1000.0... -
Page 230: Appendix B - Instrument Configuration
Setup Appendix B – Instrument Configuration MXD70 pH / Redox - 47 - Setup and Operating Guide... - Page 231 Setup MXD70 pH / Redox - 48 - Setup and Operating Guide...
- Page 232 Setup MXD70 pH / Redox - 49 - Setup and Operating Guide...
- Page 233 Setup MXD70 pH / Redox - 50 - Setup and Operating Guide...
- Page 234 Setup MXD70 pH / Redox - 51 - Setup and Operating Guide...
- Page 235 Setup MXD70 pH / Redox - 52 - Setup and Operating Guide...
-
Page 236: Appendix C - Error Messages
Faults Appendix C - Error Messages Internal Error Messages E001 UNIT Processor RAM Read/Write Error Try switching the unit off and then on again. If the message persists, consult with your supplier, as this unit may require to be returned for repair. E002 UNIT External RAM Read/Write Error... - Page 237 Faults Input Channel Errors E030 Input Card Checksum Error Try switching the unit off and then on again. If the message persists, consult with E080 your supplier, as the channel’s input card may require to be returned for repair. E130 E031 Setup Checksum Error The current channel’s configuration has for some reason become corrupted.
- Page 238 Faults E041 Partial Depletion Large difference between the detectors, i.e. one very dirty. This alarm will come up E091 if there is a difference of 3:1 between the detectors. Remove sensor and clean E141 sensor fingers. The probe sensor units (PSU) will be set to 16000 or 32000 if turbidity.
- Page 239 Faults E053 Temp Sensor Fault E103 The temperature sensor is reading open or closed circuit, due in most cases to a damaged sensing element or incorrect wiring. Check that the temperature sensor E153 is set to the correct type in the channel setup menu. Under this condition, the unit will default to the fixed temperature setting for compensation purposes.
- Page 240 E069 Planned Service Due The Planned Service interval for this unit has expired. Please contact LTH E119 Electronics at the details below: E169 LTH Electronics ltd Chaul End Lane Luton Beds LU4 8EZ Tel. 0044 (0) 1582 593693 Fax 0044 (0) 1582 598036 Email sales@lth.co.uk...
- Page 241 Faults Setpoint Errors E180 Dose Alarm Error E190 The Setpoint has been dosing for longer than the Dose Alarm time as defined in the setpoint menu. E200 E210 E220 E230 E181 to E184 SP1 For Future Use E191 to E194 SP2 E201 to E204 SP3 E211 to E214 SP4 E221 to E224 SP5...
- Page 242 Faults Current Output Errors E240 Current OP Hardware Fault The current output circuit has detected an error in the current output loop; this is E250 most commonly due to either a broken loop or too large a load resistor. E260 E270 E280 E290...
- Page 243 Faults E245 Store A Checksum Error The Store A Save for the channel associated with this current output has become E255 corrupted. Check the current output's settings in the current output menu and E265 then save the settings again in the Channel's Store A in the Save/Restore menu. E275 E285 E295...
- Page 244 Faults Digital Input Errors E301 DIG 1 Store A Checksum Error E306 DIG 2 The Store A Save for the channel associated with this digital input has become corrupted. Check the digital input's settings in the digital input menu and then E311 DIG 3 save the settings again in the Channel's Store A in the Save/Restore menu.
- Page 245 Faults Communication Errors E340 Comms Failure E342 The Channel's Input Card is not responding. Try switching the unit off and then on again. If the message persists, consult with your supplier, as the channel's input E344 card may require to be returned for repair. E341 Comms Error E343...
- Page 246 Faults Calculation Errors E400 Calculation Over Range The Calculation reading is greater than the specified upper limit, check channel E411 settings, calculation configuration, sensor condition and connections. If the message persists please consult with your supplier. E401 Calculation Under Range The Calculation reading is less than the specified lower limit, check channel E411 settings, calculation configuration, sensor condition and connections.
- Page 247 Faults Modbus Errors E420 UNIT Modbus Setup Checksum The Modbus setup has become corrupted. Check and correct the Modbus settings and turn the unit off and on again. If the message persists please consult with your supplier. E421 UNIT Modbus Store A Checksum The Store A Save for the Modbus Configuration has become corrupted.
- Page 248 Check that power is available to the unit. Using a voltmeter, set to AC or DC, check the power supply voltage at the connector. The design of the MXD70 Series allows the unit to accept from 85 to 250V AC or DC, an alternative option allows operation from 18 to 32V AC or DC, check the connection label for voltage specification.
- Page 249 Faults The Sensor Reading Is Incorrect If reading pH, check that the correct probe type has been selected (see pH / Redox Input Channel Setup, page 23). Check that no error messages are being displayed. Check that the sensor cable has been correctly connected (see Installation Section, Page 7).
- Page 250 All sensors made by LTH Electronics Ltd are thoroughly tested to their published specification before despatch. As LTH have no control over the conditions in which their sensors are used, no further guarantee is given, although any complaints concerning their operation will be carefully investigated.
- Page 251 Notes MXD70 pH / Redox - 68 - Setup and Operating Guide...
- Page 252 Notes MXD70 pH / Redox - 69 - Setup and Operating Guide...
- Page 253 Index Cable Screen ............66 Main Menu ............23 Calibration ............29 Maintenance ............8 Auto ............29, 39 Manufacturing Standards ........ 2 Custom Buffer ........... 37 Mode (Online/Offline) ......24, 31 Front Access ..........36 pH Buffers ............. 29, 44 History ............
- Page 255 Chaul End Lane Luton Bedfordshire LU4 8EZ United Kingdom Telephone: +44 (0) 1582 593693 Fax: +44 (0) 1582 598036 Email: sales@lth.co.uk Web: www.lth.co.uk...
- Page 256 MXD70 SERIES Multi-parameter Monitor Electrodeless Conductivity Setup and Operating Guide...
- Page 258 Disclaimer LTH Electronics Ltd reserves the right to make changes to this manual or the instrument without notice, as part of our policy of continued developments and improvements. All care has been taken to ensure accuracy of information contained in this manual.
- Page 259 Preface Manufacturing Standards Electromagnetic compatibility This instrument has been designed to comply with the standards and regulations set down by the European EMC Directive 2004/108/EC using BS EN 61326-1: 2013 Safety This instrument has been designed to comply with the standards and regulations set down by the European Low Voltage Directive 2006/95/EC using BS EN 61010-1: 2010 Quality This instrument has been manufactured under the following quality standard:...
- Page 260 Contents Contents Preface ......................... 1 Contents ........................3 Electrodeless Conductivity Input Card Specification ........ 5 Installation and Choice of Electrodeless Conductivity Sensors ..... 7 MXD73 – Panel Mount Termination Information ......... 9 MXD75 – Surface Mount Termination Information ......10 ...
-
Page 261: Contents
Contents Blank MXD70 Electrodeless Conductivity - 4 - Setup and Operating Guide... -
Page 262: Electrodeless Conductivity Input Card Specification
Specification Electrodeless Conductivity Input Card Specification ECS20 or ECS40 Series electrodeless conductivity sensor. Measurement Input Up to 100 meters LTH 54E. Connection Cable Ranges of Measurement 0-999.9μS/cm, 0-9.999mS/cm, 0-99.99ms/cm, 0-999.9mS/cm 0-999.9 ppm, 0-9999 ppm, 0-99.99 ppt (parts per thousand). 0 to 16.00% NaOH – Sodium Hydroxide 0 to 30.00% NaCl –... - Page 263 Specification Blank MXD70 Electrodeless Conductivity - 6 - Setup and Operating Guide...
-
Page 264: Installation And Choice Of Electrodeless Conductivity Sensors
Installation Installation and Choice of Electrodeless Conductivity Sensors The choice of the correct type of electrodeless conductivity sensor and how and where to mount the sensor, so that it has a representative sample of solution are probably the two most important considerations when installing a conductivity system. - Page 265 Installation ECS20 SERIES SENSORS ECS40 SERIES SENSORS Sensor Installation Clearance Care should also be taken to ensure to position of the sensor within the flow is correct. Incorrect Best Solution Acceptable Acceptable MXD70 Electrodeless Conductivity - 8 - Setup and Operating Guide...
-
Page 266: Mxd73 - Panel Mount Termination Information
Installation MXD73 – Panel Mount Termination Information Electrodeless Conductivity 54E Cable Connection Details Electrodeless Conductivity 54H Cable Connection Details MXD70 Electrodeless Conductivity - 9 - Setup and Operating Guide... -
Page 267: Mxd75 - Surface Mount Termination Information
Installation Electrodeless Conductivity 54E Extension Cable Connection Details MXD75 – Surface Mount Termination Information Electrodeless Conductivity 54E Cable Connection Details MXD70 Electrodeless Conductivity - 10 - Setup and Operating Guide... - Page 268 Installation Electrodeless Conductivity 54H Cable Connection Details Electrodeless Conductivity 54E Extension Cable Connection Details MXD70 Electrodeless Conductivity - 11 - Setup and Operating Guide...
-
Page 269: Temperature Sensor Connections
Installation Temperature Sensor Connections 2 Wire RTD Temperature Connection 3 Wire RTD Temperature Connection 4 Wire RTD Temperature Connection MXD70 Electrodeless Conductivity - 12 - Setup and Operating Guide... -
Page 270: Extension Cable Arrangement
Installation Extension Cable Arrangement It is strongly recommended that only LTH 54E is used to extend the sensor / instrument distance. When extending the cable a terminal block can be used to connect two lengths of cable. The user should be careful to avoid wiring the positive drive and return signals into adjacent locations on the terminal block. -
Page 271: Electrodeless Conductivity Input Channel Setup
Channel Setup Electrodeless Conductivity Input Channel Setup The Channels Setup menu contains the basic configurations for the sensor’s input. The default security access code is 1000 Main Menu From the front screen press the menu button to show the main menu options and select Channels. /... -
Page 272: Units
Channel Setup Units The channel can be setup to display conductivity in Siemens/cm, TDS (Total Dissolved Solids) in ppm, or Solution. When solution is selected the channel will automatically apply the correct conversion and temperature conversion display concentration as “%” with an indication of the solution type selected (see range selection). - Page 273 Channel Setup Range Select the desired operating range for the input or select auto to let the instrument select the appropriate operating range. If units have been set to solution then the user can select what concentration to display or alternatively if one of the two custom ranges is selected then the user can then use a custom range as defined in the custom range menu (see setup custom range menu...
-
Page 274: Temperature Input Sensor
Channel Setup TDS Factor When TDS is selected as the operating units the instrument will display the conductivity as “ppm” using a factor which can be adjusted between 0.50 and 0.90. / – Increase / Decrease Digit – Select Next Digit –... -
Page 275: Temperature Compensation
Channel Setup Temperature Compensation Temperature compensation is enabled by setting this to “In”. / – Select Option EXIT – Cancel – Save Selection Temperature Compensation Base Sets the temperature compensation base. See Appendix B - Temperature Coefficient for more information. Only Available Temperature... -
Page 276: Simulated Input
Channel Setup Manual Temperature Input The fixed temperature value used for manual temperature compensation. Only available when temperature compensation mode is set to “manual”. / – Increase / Decrease Digit – Select Next Digit EXIT – Cancel – Save Value Simulated Input See Simulated Channels section of the Setpoints, Current Outputs, Digital Inputs Configuration Guide... -
Page 277: Calibration
Channel Calibration Calibration Normal good practices should be observed when calibrating an electrodeless conductivity system. Four Calibration procedures are provided with the electrodeless conductivity input: An initial installation loop calibration that matches the sensor, cable and instrument using loop resistors. -
Page 278: Calibration Menu
Channel Calibration Calibration Menu The calibration menu provides the facility to adjust the sensor inputs to the system in which it is operating. The default security access code is 1000 Main Menu From the front screen press the menu button to show the main menu options and select Calibration. - Page 279 Channel Calibration Calibration Manual Temperature Input This setting allows a different fixed temperature value to be used when calibrating. Makes it easier to calibrate a standard solution at a different temperature to the process. Only available when the temperature compensation mode has been set to manual in the channel setup menu.
- Page 280 Channel Calibration Sensor Slope or Offset Value Depending on the channel’s units, the sensor slope or offset value currently being used. The value will change depending on the result of the sensor solution calibration. Cannot be edited A slope value of 100% indicates that no adjustment has been made to the sensor calibration.
-
Page 281: Calibration History
Channel Calibration Enter Calibration History The MXD70 series has a calibration history feature which allows the user to review the record of sensor solution calibrations. To enter the calibration history menu press enter. – Enter Calibration History Calibration History The calibration history page provides a record of all sensor solution calibrations carried out. -
Page 282: Calibration Reminder
Channel Calibration Select Channel to Calibrate From the pop-up select the channel the user wishes to calibrate. Only channels whose front calibration access has been enabled will appear. / – Select Option EXIT – Cancel – Enter Menu Calibration Reminder By enabling the calibration reminder the user can configure a calibration interval, which when expired will activate an alarm and channel message on the... - Page 283 Channel Calibration Next Calibration Date Sets the exact date of the next calibration alarm. The Calibration Interval will update to show the number of days to the next calibration date. / – Increase / Decrease Digit or Text – Select Next Item –...
-
Page 284: Sensor Loop Calibration
Channel Calibration Sensor Loop Calibration The sensor calibration is a one off configuration calibration, to allow for losses due to cable length and sensor output variations. It must be completed when either a sensor or sensor cable is changed. To complete the calibration the four loop resistors (Black, Glue, Green, Pink) supplied with the input card must be used, once completed do not discard the resistors as they will be required for future calibration and checks. - Page 285 Channel Calibration Insert Blue Loop Remove the previous loop resistor and attach the Blue (500Ω) loop resistor to the sensor as shown previously, then press the enter button. – Go to Previous Calibration Point PREV – Skip to Next Calibration Point SKIP EXIT –...
-
Page 286: Resetting The User Calibration
Channel Calibration Resetting the User Calibration If required the user can reset the user calibrations to their default states. Main Menu From the front screen press the menu button to show the main menu options and select Calibration. / – Select Option –... -
Page 287: Appendix A - Solution Conversion
Appendix Appendix A - Solution Conversion The following table provides some of the data points which have been used in the instrument to make the conversion between conductivity and solution concentration. Temperature Compensated Conductivity ( mS/cm @ 25°C ) % wt / vol NaOH NaCl Salinity... -
Page 288: Appendix B - Temperature Coefficient
% / °C setting will generally give a good first approximation until the true value can be determined by independent means. Temperature Data The table below lists approximate resistance values of temperature sensors that may be used with the MXD70 series. Not all options are available on all models. Temperature PT1000 PT100 1K Therm-istor ( C ) -
Page 289: Appendix C - Instrument Configuration
Setup Appendix C - Instrument Configuration MXD70 Electrodeless Conductivity - 32 - Setup and Operating Guide... - Page 290 Setup MXD70 Electrodeless Conductivity - 33 - Setup and Operating Guide...
- Page 291 Setup MXD70 Electrodeless Conductivity - 34 - Setup and Operating Guide...
- Page 292 Setup MXD70 Electrodeless Conductivity - 35 - Setup and Operating Guide...
- Page 293 Setup MXD70 Electrodeless Conductivity - 36 - Setup and Operating Guide...
- Page 294 Setup MXD70 Electrodeless Conductivity - 37 - Setup and Operating Guide...
-
Page 296: Appendix D - Error Messages
Faults Appendix D - Error Messages Internal Error Messages E001 UNIT Processor RAM Read/Write Error Try switching the unit off and then on again. If the message persists, consult with your supplier, as this unit may require to be returned for repair. E002 UNIT External RAM Read/Write Error... - Page 297 Faults Input Channel Errors E030 Input Card Checksum Error E080 Try switching the unit off and then on again. If the message persists, consult with your supplier, as the channel’s input card may require to be returned for repair. E130 E031 Setup Checksum Error The current channel’s configuration has for some reason become corrupted.
- Page 298 Faults E041 Partial Depletion Large difference between the detectors, i.e. one very dirty. This alarm will come up E091 if there is a difference of 3:1 between the detectors. Remove sensor and clean E141 sensor fingers. The probe sensor units (PSU) will be set to 16000 or 32000 if turbidity.
- Page 299 Faults E053 Temp Sensor Fault E103 The temperature sensor is reading open or closed circuit, due in most cases to a damaged sensing element or incorrect wiring. Check that the temperature sensor E153 is set to the correct type in the channel setup menu. Under this condition, the unit will default to the fixed temperature setting for compensation purposes.
- Page 300 E069 Planned Service Due E119 The Planned Service interval for this unit has expired. Please contact LTH Electronics at the details below: E169 LTH Electronics ltd Chaul End Lane Luton Beds LU4 8EZ Tel. 0044 (0) 1582 593693 Fax 0044 (0) 1582 598036 Email sales@lth.co.uk...
- Page 301 Faults Setpoint Errors E180 Dose Alarm Error E190 The Setpoint has been dosing for longer than the Dose Alarm time as defined in the setpoint menu. E200 E210 E220 E230 E181 to E184 SP1 For Future Use E191 to E194 SP2 E201 to E204 SP3 E211 to E214 SP4 E221 to E224 SP5...
- Page 302 Faults Current Output Errors E240 Current OP Hardware Fault E250 The current output circuit has detected an error in the current output loop; this is most commonly due to either a broken loop or too large a load resistor. E260 E270 E280 E290...
- Page 303 Faults E245 Store A Checksum Error The Store A Save for the channel associated with this current output has become E255 corrupted. Check the current output's settings in the current output menu and E265 then save the settings again in the Channel's Store A in the Save/Restore menu. E275 E285 E295...
- Page 304 Faults Digital Input Errors E301 DIG 1 Store A Checksum Error E306 DIG 2 The Store A Save for the channel associated with this digital input has become corrupted. Check the digital input's settings in the digital input menu and then E311 DIG 3 save the settings again in the Channel's Store A in the Save/Restore menu.
- Page 305 Faults Communication Errors E340 Comms Failure E342 The Channel's Input Card is not responding. Try switching the unit off and then on again. If the message persists, consult with your supplier, as the channel's input E344 card may require to be returned for repair. E341 Comms Error The Channel's Input Card is not Operating Correctly.
- Page 306 Faults Calculation Errors E400 Calculation Over Range E411 The Calculation reading is greater than the specified upper limit, check channel settings, calculation configuration, sensor condition and connections. If the message persists please consult with your supplier. E401 Calculation Under Range E411 The Calculation reading is less than the specified lower limit, check channel settings, calculation configuration, sensor condition and connections.
- Page 307 Faults Modbus Errors E420 UNIT Modbus Setup Checksum The Modbus setup has become corrupted. Check and correct the Modbus settings and turn the unit off and on again. If the message persists please consult with your supplier. E421 UNIT Modbus Store A Checksum The Store A Save for the Modbus Configuration has become corrupted.
-
Page 308: Fault Finding
Check that power is available to the unit. Using a voltmeter, set to AC or DC, check the power supply voltage at the connector. The design of the MXD70 Series allows the unit to accept from 85 to 250V AC or DC, an alternative option allows operation from 18 to 32V AC or DC, check the connection label for voltage specification. - Page 309 Faults The display reads zero Check for open circuit sensor (conductivity or TDS modes) Check for damage to the connecting cable. Check that all input connections are secure. Check the sensor is wired up correctly. Check the sensor is immersed in the correct solution. Instrument display appears to malfunction ...
-
Page 310: Guarantee And Service
All sensors made by LTH Electronics Ltd are thoroughly tested to their published specification before despatch. As LTH have no control over the conditions in which their sensors are used, no further guarantee is given, although any complaints concerning their operation will be carefully investigated. - Page 311 Notes MXD70 Electrodeless Conductivity - 54 - Setup and Operating Guide...
- Page 312 Notes Index Cable ..............50 Instrument Configuration ......32 Screen ............50 LVD ................2 Calibration ............20, 21 Main Menu ............14 Front Access ..........24 Manufacturing Standards ........ 2 History ............24 Mode (Online/Offline) ......14, 21 Offset ............23 MXD73 ..............
- Page 315 MXD70 SERIES Multi-parameter Monitor Dissolved Oxygen Setup and Operating Guide...
- Page 317 Disclaimer LTH Electronics Ltd reserves the right to make changes to this manual or the instrument without notice, as part of our policy of continued developments and improvements. All care has been taken to ensure accuracy of information contained in this manual.
- Page 318 Preface Manufacturing Standards Electromagnetic compatibility This instrument has been designed to comply with the standards and regulations set down by the European EMC Directive 2004/108/EC using BS EN 61326-1: 2013 Safety This instrument has been designed to comply with the standards and regulations set down by the European Low Voltage Directive 2006/95/EC using BS EN 61010-1: 2010 Quality This instrument has been manufactured under the following quality standard:...
- Page 319 Contents Contents Preface ......................... 1 Contents ........................3 Dissolved Oxygen Input Card Specification ..........5 Installation and Choice of Dissolved Oxygen Sensors ......7 MXD73 – Panel Mount Termination Information ......... 8 MXD75 – Surface Mount Termination Information ......10 ...
- Page 320 Contents Blank MXD70 Dissolved Oxygen - 4 - Setup and Operating Guide...
- Page 321 Specification Dissolved Oxygen Input Card Specification Galvanic (Mackereth) – 0 to 4000μA Measurement Input Polargraphic (Clark) – 0 to 500.0nA Sensor Bias Voltage User defined -1.000V to +1.000V, ±1mV Resolution, ±3mV Output Accuracy. User defined 0 to 9999 Membrane Correction Factor Up to 100 meters Sensor Connection Cable Ranges of Measurement...
- Page 322 Specification Blank MXD70 Dissolved Oxygen - 6 - Setup and Operating Guide...
-
Page 323: Installation And Choice Of Dissolved Oxygen Sensors
Installation and Choice of Dissolved Oxygen Sensors The Dissolved Oxygen input of the MXD70 Series has been designed to accept a wide variety of both Galvanic and Polargraphic Dissolved Oxygen sensors. Parameters such as membrane correction, bias voltage and temperature sensor type can be easily programmed into the instrument. -
Page 324: Mxd73 - Panel Mount Termination Information
Installation MXD73 – Panel Mount Termination Information Polargraphic Sensor Galvanic Sensor Broadley James ProcessProbe™ Polargraphic Dissolved Oxygen Sensor Cable Connection Details MXD70 Dissolved Oxygen - 8 - Setup and Operating Guide... - Page 325 LTH OE15 Galvanic Dissolved Oxygen Sensor Cable Connection Details The Dissolved Oxygen input card of the MXD70 Series can also accept a 4-20mA input signal from a pressure transmitter. This can be scaled using the instrument’s user menu and permits active pressure compensation of the dissolved oxygen measurement.
-
Page 326: Mxd75 - Surface Mount Termination Information
Installation MXD75 – Surface Mount Termination Information Polargraphic Sensor Galvanic Sensor Broadley James ProcessProbe™ Galvanic Dissolved Oxygen Sensor Cable Connection Details MXD70 Dissolved Oxygen - 10 - Setup and Operating Guide... - Page 327 LTH OE15 Galvanic Dissolved Oxygen Sensor Cable Connection Details The Dissolved Oxygen input card of the MXD70 Series can also accept a 4-20mA input signal from a pressure transmitter. This can be scaled using the instrument’s user menu and permits active pressure compensation of the dissolved oxygen measurement.
-
Page 328: Lth 54D Extension Cable Connection Information
Installation LTH 54D Extension Cable Connection Information Broadley James ProcessProbe™ Cable To 54D Extension Cable Connection Details 54D Extension Cable Connection Details MXD70 Dissolved Oxygen - 12 - Setup and Operating Guide... -
Page 329: Temperature Sensor Connections
Installation Temperature Sensor Connections 2 Wire RTD Temperature Connection 3 Wire RTD Temperature Connection ProcessProbe 22K Thermistor Connection 4 Wire RTD Temperature Connection MXD70 Dissolved Oxygen - 13 - Setup and Operating Guide... -
Page 330: Dissolved Oxygen Input Channel Setup
Channel Setup Dissolved Oxygen Input Channel Setup The Channels Setup menu contains the basic configurations for the sensor’s input. The default security access code is 1000 Main Menu From the front screen press the menu button to show the main menu options and select Channels. /... -
Page 331: Units
Channel Setup Units The channel can be configured to display the following primary units: % (saturation) ppm (concentration) pO2 (partial pressure of Oxygen) mmHg (millimetres of Mercury) mg/l (milligrams per litre) sensor’s output current. The relationship between these three parameters is determined by several factors including temperature, pressure and the salinity of the solution being... - Page 332 Channel Setup Sensor Type Sets the sensor’s input operating mode to either Polargraphic or Galvanic. Only available when probe type is set to “Custom” / – Select Option – Cancel EXIT – Save Selection Bias Voltage For Polargraphic sensors, the polarising Bias Voltage can be set using this menu.
-
Page 333: Temperature Input Sensor
Channel Setup Temperature Input Sensor Select the input channel’s temperature sensor type for use with the sensor measurement’s automatic temperature compensation. If a temperature sensor is not connected to the input channel then this menu item should be set to disabled, else the temperature input error messages will be shown. -
Page 334: Pressure Compensation
Channel Setup Manual Temperature Input The fixed temperature value used for manual temperature compensation. Only available when temperature compensation mode is set to “manual”. / – Increase / Decrease Digit – Select Next Digit – Cancel EXIT – Save Value Input Salinity The Salinity of the solution has a significant effect when converting % Saturation to... - Page 335 Channel Setup Pressure Mode The input channel has the ability to support both direct 4-20mA and 24V looped powered systems by setting this parameter. NB. When using 24V loop mode a user calibration is recommended (see page 24). Also for direct input configuration the input resistance is 100Ω.
- Page 336 Channel Setup Pressure Damping The facility has been provided to allow the user to dampen the effect of rapid changes in pressure, which might lead to the setpoint relays activating before the sensor has had a chance to react to the change in pressure (which would give a false reading).
- Page 337 Channel Setup Pressure Limit A Defines the Pressure Damping Limit A “From” value. Menu only available when Pressure Damping is set to “Enable”. / – Increase / Decrease Digit – Select Next Digit – Cancel EXIT – Save Value Pressure Limit B Defines the Pressure Damping Limit B “To”...
- Page 338 Channel Setup Simulated Input See Simulated Channels section of the Setpoints, Current Outputs, Digital Inputs Configuration Guide for more information. / – Select Option EXIT – Return to Main Menu – Enter Option Input Filtering (Averaging) When very noisy environments are encountered, this function will allow the user to filter the sensor readings by taking a running average over the time period selected (from 10 seconds to 5 minutes).
- Page 339 Channel Setup Blank MXD70 Dissolved Oxygen - 23 - Setup and Operating Guide...
-
Page 340: Calibration
Channel Calibration Calibration Calibration Procedures Normal good practices should be observed when calibrating DO systems. When the instrument is first connected to the oxygen sensor, i.e. when the unit is first installed, or whenever the oxygen sensor is changed or the membrane replaced, the user should perform a zero check and span calibration of the system using the following procedure. - Page 341 Channel Calibration If the sensor responds quickly enough, check that within another 3 minutes the current reading has fallen to virtually zero. Then press the enter button in the zero calibration menu to calibrate the new zero point. Span Calibration in Free Air ...
-
Page 342: Calibration Menu
Channel Calibration Calibration Menu The calibration menu provides the facility to adjust the sensor inputs to the system in which it is operating. The default security access code is 1000 Main Menu From the front screen press the menu button to show the main menu options and select Calibration. - Page 343 Channel Calibration Calibration Manual Temperature Input This setting allows a different fixed temperature value to be used when calibrating. Makes it easier to calibrate sensor outside process environment. NB. If the manual temperature input is changed in the channel setup menu then the calibration manual temperature is changed to the same value.
- Page 344 Channel Calibration Calibration Manual Pressure Input This setting allows a different fixed pressure value to be used when calibrating. Makes it easier to calibrate a sensor outside of the process environment. NB. If the manual pressure input is changed in the channel setup menu then the calibration manual pressure is changed to the same value.
- Page 345 Channel Calibration Span Calibration Point Set the calibration point that the span calibration is calculated to. / – Increase / Decrease Digit – Select Next Digit – Cancel EXIT – Save Value Sensor Span Calibration To start the dissolved oxygen sensor’s span calibration select the “Sensor Span Cal”...
- Page 346 Channel Calibration Enable Auto Span Cal Span calibration can be initiated by an external digital input if Enable Auto Span Cal function is set to “Yes” When the associated digital input (see Setpoints, Current Outputs and Digital Inputs Configuration Guide) is active the unit will calibrate the selected input channel to the entered span calibration point.
- Page 347 Channel Calibration Pressure Calibration To start the Pressure Sensor’s calibration select the “Pressure Cal” item from the desired channel’s calibration menu and press enter. Menu only available when Pressure Compensation is set to “Auto” in the channel’s setup menu. / –...
-
Page 348: Calibration History
– Return To Calibration Menu – Clear All of the Calibration History CLEAR Sensor Condition The MXD70 Series is capable of analysing the result of the dissolved oxygen sensor’s zero and span calibration and indicates to the user the condition the sensor is in. -
Page 349: Front Screen Calibration Access
Channel Calibration Front Screen Calibration Access Enable When enabled front calibration access allows direct entry into the calibration menu from the front screen. It also disables the security access system within the calibration menu enabling the calibration functions without having to enter the security access code. /... -
Page 350: Calibration Reminder
Channel Calibration Calibration Reminder By enabling the calibration reminder the user can configure a calibration interval, which when expired will activate an alarm and channel message on the front screen. If the interval has expired and the alarm has activated, then on the completion of a successful sensor calibration the next cal date will be automatically incremented by calibration interval. - Page 351 Channel Calibration Defer Calibration Date Turns off the alarm and increases the calibration interval by an extra 7 days. Only appears once the calibration interval has expired. – Increase Interval – Cancel MXD70 Dissolved Oxygen - 35 - Setup and Operating Guide...
-
Page 352: Resetting The User Calibration
Channel Calibration Resetting the User Calibration If required the user can reset the user calibrations to their default states. The default security access code is 1000 Main Menu From the front screen press the menu button to show the main menu options and select Calibration. /... - Page 353 Channel Calibration MXD70 Dissolved Oxygen - 37 - Setup and Operating Guide...
-
Page 354: Appendix A - Do Measurement
Appendix Appendix A - DO Measurement Sensor Interface The output signal from a Dissolved Oxygen sensor is in the form of a constant DC current which is proportional to the partial pressure of the liquid being measured. In a 100% saturated solution at room temperature and pressure, the output from a Galvanic sensor will be of the order of hundreds of micro-amps (10 Amps), whereas the output from a Polargraphic sensor will be of the order of... -
Page 355: Membrane Correction
Appendix Membrane Correction The membrane correction term is defined as follows: A([1/T]-[1/To]) Where: A = Membrane Correction Factor = Temperature (in K) = Temperature at calibration (in K) The membrane correction factor is specific to each make of sensor and characterises the type and thickness of the membrane material in terms of how its permeability to Oxygen varies with temperature. -
Page 356: Partial Pressure Of Oxygen (Po2)
Appendix Partial Pressure of Oxygen (pO2) The concentration of a gas dissolved in a solution at equilibrium is proportional to the partial pressure of the gas in contact with the solution (Henry’s Law). The partial pressure of the gaseous component of the air in contact with the solution remains proportional to the total pressure of the air sample. -
Page 357: Appendix B - Temperature Data
Appendix Appendix B - Temperature Data The table below lists approximate resistance values of temperature sensors that may be used with the MXD70 series. Not all options are available on all input types. Temperature PT1000 PT100 BJ 22K 1K Thermistor ( C ) -
Page 358: Appendix C - Pressure Conversions
Appendix Appendix C - Pressure Conversions The following table provides conversions between all the common pressure units. mm Hg 1.0133 101.33 10.33 14.696 0.987 10.20 14.504 0.00987 0.01 0.102 0.145 7.50 0.0968 0.0981 9.81 1.422 73.36 0.061 0.069 6.895 0.703 51.72 mm Hg 0.00132... - Page 359 Appendix Blank MXD70 Dissolved Oxygen - 43 - Setup and Operating Guide...
- Page 360 Setup MXD70 Dissolved Oxygen - 44 - Setup and Operating Guide...
- Page 361 Setup MXD70 Dissolved Oxygen - 45 - Setup and Operating Guide...
- Page 362 Setup MXD70 Dissolved Oxygen - 46 - Setup and Operating Guide...
- Page 363 Setup MXD70 Dissolved Oxygen - 47 - Setup and Operating Guide...
- Page 364 Setup MXD70 Dissolved Oxygen - 48 - Setup and Operating Guide...
- Page 365 Setup MXD70 Dissolved Oxygen - 49 - Setup and Operating Guide...
-
Page 366: Appendix E - Error Messages
Faults Appendix E - Error Messages Internal Error Messages E001 UNIT Processor RAM Read/Write Error Try switching the unit off and then on again. If the message persists, consult with your supplier, as this unit may require to be returned for repair. E002 UNIT External RAM Read/Write Error... - Page 367 Faults Input Channel Errors E030 Input Card Checksum Error Try switching the unit off and then on again. If the message persists, consult with E080 your supplier, as the channel’s input card may require to be returned for repair. E130 E031 Setup Checksum Error E081...
- Page 368 Faults E041 Partial Depletion E091 Large difference between the detectors, i.e. one very dirty. This alarm will come up if there is a difference of 3:1 between the detectors. Remove sensor and clean E141 sensor fingers. The probe sensor units (PSU) will be set to 16000 or 32000 if turbidity.
- Page 369 Faults E053 Temp Sensor Fault The temperature sensor is reading open or closed circuit, due in most cases to a E103 damaged sensing element or incorrect wiring. Check that the temperature sensor E153 is set to the correct type in the channel setup menu. Under this condition, the unit will default to the fixed temperature setting for compensation purposes.
- Page 370 E069 Planned Service Due The Planned Service interval for this unit has expired. Please contact LTH E119 Electronics at the details below: E169 LTH Electronics ltd Chaul End Lane Luton Beds LU4 8EZ Tel. 0044 (0) 1582 593693 Fax 0044 (0) 1582 598036 Email sales@lth.co.uk...
- Page 371 Faults Setpoint Errors E180 Dose Alarm Error The Setpoint has been dosing for longer than the Dose Alarm time as defined in E190 the setpoint menu. E200 E210 E220 E230 E181 to E184 SP1 For Future Use E191 to E194 SP2 E201 to E204 SP3 E211 to E214 SP4 E221 to E224 SP5...
- Page 372 Faults Current Output Errors E240 Current OP Hardware Fault E250 The current output circuit has detected an error in the current output loop; this is most commonly due to either a broken loop or too large a load resistor. E260 E270 E280 E290...
- Page 373 Faults E245 Store A Checksum Error E255 The Store A Save for the channel associated with this current output has become corrupted. Check the current output's settings in the current output menu and E265 then save the settings again in the Channel's Store A in the Save/Restore menu. E275 E285 E295...
- Page 374 Faults Digital Input Errors E301 DIG 1 Store A Checksum Error E306 DIG 2 The Store A Save for the channel associated with this digital input has become corrupted. Check the digital input's settings in the digital input menu and then E311 DIG 3 save the settings again in the Channel's Store A in the Save/Restore menu.
- Page 375 Faults Communication Errors E340 Comms Failure E342 The Channel's Input Card is not responding. Try switching the unit off and then on again. If the message persists, consult with your supplier, as the channel's input E344 card may require to be returned for repair. E341 Comms Error The Channel's Input Card is not Operating Correctly.
- Page 376 Faults Calculation Errors E400 Calculation Over Range E411 The Calculation reading is greater than the specified upper limit, check channel settings, calculation configuration, sensor condition and connections. If the message persists please consult with your supplier. E401 Calculation Under Range E411 The Calculation reading is less than the specified lower limit, check channel settings, calculation configuration, sensor condition and connections.
- Page 377 Faults Modbus Errors E420 UNIT Modbus Setup Checksum The Modbus setup has become corrupted. Check and correct the Modbus settings and turn the unit off and on again. If the message persists please consult with your supplier. E421 UNIT Modbus Store A Checksum The Store A Save for the Modbus Configuration has become corrupted.
-
Page 378: Fault Finding
Check that power is available to the unit. Using a voltmeter, set to AC or DC, check the power supply voltage at the connector. The design of the MXD70 Series allows the unit to accept from 85 to 250V AC or DC, an alternative option allows operation from 18 to 32V AC or DC, check the connection label for voltage specification. - Page 379 Faults The Sensor Condition Is Showing “Fault” The “Fault” setting on the sensor condition is caused by the sensor output current being too high when a zero calibration was performed. Check for the following possible causes: Wiring fault. Disconnect the sensor from the instrument and confirm that the reading goes to zero. ...
-
Page 380: Guarantee And Service
All sensors made by LTH Electronics Ltd are thoroughly tested to their published specification before despatch. As LTH have no control over the conditions in which their sensors are used, no further guarantee is given, although any complaints concerning their operation will be carefully investigated. - Page 381 Notes MXD70 Dissolved Oxygen - 65 - Setup and Operating Guide...
- Page 382 Notes MXD70 Dissolved Oxygen - 66 - Setup and Operating Guide...
- Page 383 Notes Index Bias Voltage ............16 Mode (Online/Offline) ......14, 26 Calibration ............24, 26 MXD73 ..............8 Front Access ..........33 MXD75 ..............10 History ............32 Pressure Pressure............31 Compensation ........... 18 Reminder ............ 34 Pressure Conversions ......42 Resetting .............
- Page 386 MXD70 SERIES Multi-parameter Monitor Auxiliary mA Input Setup and Operating Guide...
- Page 388 Disclaimer LTH Electronics Ltd reserves the right to make changes to this manual or the instrument without notice, as part of our policy of continued developments and improvements. All care has been taken to ensure accuracy of information contained in this manual.
- Page 389 Preface Manufacturing Standards Electromagnetic compatibility This instrument has been designed to comply with the standards and regulations set down by the European EMC Directive 2004/108/EC using BS EN 61326-1: 2013 Safety This instrument has been designed to comply with the standards and regulations set down by the European Low Voltage Directive 2006/95/EC using BS EN 61010-1: 2010 Quality This instrument has been manufactured under the following quality standard:...
- Page 390 Contents Contents Preface ......................... 1 Contents ........................3 Auxiliary mA Input Card Specification ............5 Installation ......................... 7 MXD73 – Panel Mount Termination Information ......... 8 MXD75 – Surface Mount Termination Information ......10 Auxiliary mA Input Channel Setup ..............
- Page 391 Contents Blank MXD70 Auxiliary mA Input - 4 - Setup and Operating Guide...
- Page 392 Specification Auxiliary mA Input Card Specification Measurement Input 0 to 24mA input, fully isolated from instrument supply. mA Input – Standard mA input from transmitter, 100Ω input Loop Modes impedance, max loop voltage 35V. Loop Powered – The input card will supply 24V to power the current loop.
- Page 393 Specification Blank MXD70 Auxiliary mA Input - 6 - Setup and Operating Guide...
-
Page 394: Installation
Installation Installation The MXD70 series Auxiliary mA Input Card allows the user to read the current output of a variety of loop powered and self powered transmitters. Self Powered Transmitters For self powered transmitters the current input of the input card is isolated from the instrument‘s power supply thus allowing the input to be connected in series with other devices on the loop if the loop is fed from a single ended transmitter. -
Page 395: Mxd73 - Panel Mount Termination Information
Installation MXD73 – Panel Mount Termination Information Auxiliary mA Input Connection Details Locally Powered Transmitter Loop Connection Details Loop Mode Set to “mA Input” MXD70 Auxiliary mA Input - 8 - Setup and Operating Guide... - Page 396 Installation Internally Powered Loop Connection Details Loop Mode Set to “24V Loop” (MXD70 powers the loop with 24V) Externally Powered Loop Connection Details Loop Mode Set to “mA Input” MXD70 Auxiliary mA Input - 9 - Setup and Operating Guide...
-
Page 397: Mxd75 - Surface Mount Termination Information
Installation 3 Wire Transmitter Loop Connection Details (NB. The 24V Can Supply 30mA Max) Loop Mode Set to “mA Input” MXD75 – Surface Mount Termination Information Auxiliary mA Input Connection Details MXD70 Auxiliary mA Input - 10 - Setup and Operating Guide... - Page 398 Installation Self Powered Transmitter Loop Connection Details Loop Mode Set to “mA Input” Internally Powered Loop Connection Details Loop Mode Set to “24V Loop” (MXD70 powers the loop with 24V) MXD70 Auxiliary mA Input - 11 - Setup and Operating Guide...
- Page 399 Installation Externally Powered Loop Connection Details Loop Mode Set to “mA Input” 3 Wire Transmitter Loop Connection Details (NB. The 24V Can Supply 30mA Max) Loop Mode Set to “mA Input” MXD70 Auxiliary mA Input - 12 - Setup and Operating Guide...
-
Page 400: Auxiliary Ma Input Channel Setup
Channel Setup Auxiliary mA Input Channel Setup The Channels Setup menu contains the basic configurations for the sensor’s input. The default security access code is 1000 Main Menu From the front screen press the menu button to show the main menu options and select Channels. /... -
Page 401: Description
Channel Setup Description Change the menu description of the Auxiliary mA Input Card. Improves the ease of use throughout the instrument. Limited to 15 characters, though in some menus only the first 5 characters will be displayed. / – Change Character ... -
Page 402: Range
Channel Setup Range Select the operating range over which the input is scaled. Note only the “9999” range allows signed values. / – Select Option EXIT – Cancel – Save Selection Loop Mode The input channel has the ability to support both direct mA input and 24V looped powered systems by setting this parameter. - Page 403 Channel Setup Set 0mA Input Enter the displayed value equivalent to a 0mA input. Note. Only available when input mode is set to 0mA – 20mA input. / – Increase / Decrease Digit – Select Next Digit – Cancel EXIT –...
-
Page 404: Setup Custom Curve
Channel Setup Setup Custom Curve The Auxiliary mA input provides the user with the facility to enter a custom relationship between the incoming mA measurement and the displayed value. To enter the relationship, first set the input mode to “Curve A”, or “Curve B”. Then select the “Setup Curve X”... - Page 405 Channel Setup BLANK MXD70 Auxiliary mA Input - 18 - Setup and Operating Guide...
-
Page 406: Calibration
Channel Calibration Calibration Calibration Procedures The user is provided with two methods of calibrating the Auxiliary mA Input Card. 2 Point Calibration – Selected by entering the “Aux mA Input Cal” menu item in the calibration menu. This allows the user to calibrate a fixed mA input of 0mA, 4mA, or 20mA against a known current source. -
Page 407: Auxiliary Ma Input Calibration
Channel Calibration Mode Selecting off-line causes any setpoints associated with this channel to de-energise. Also causes any current outputs associated to hold their current value, useful for when commissioning or calibrating the instrument. When the unit is placed in an off-line state “off-line” will appear in the channel messages section on the front screen. - Page 408 Channel Calibration 4 mA Input Calibration Set the known current input to 4mA and press enter to initiate a calibration. Only available when the input mode is set to 4 – 20mA in the channel setup menu. – Go to Previous Calibration Point PREV SKIP –...
-
Page 409: Front Screen Calibration Access
Channel Calibration Sensor Offset Value Displays the Sensor Offset currently being used by the instrument. Cannot be edited. Changed by using sensor solution calibration. Front Screen Calibration Access Enable When enabled front calibration access allows direct entry into the calibration menu from the front screen. It also disables the security access system within the calibration menu enabling the calibration functions without having to enter the security access code. -
Page 410: Calibration Reminder
Channel Calibration Calibration Reminder By enabling the calibration reminder the user can configure a calibration interval, which when expired will activate an alarm and channel message on the front screen. If the interval has expired and the alarm has activated, then on the completion of a successful sensor calibration the next cal date will be automatically incremented by calibration interval. - Page 411 Channel Calibration Defer Calibration Date Turns off the alarm and increases the calibration interval by an extra 7 days. Only appears once the calibration interval has expired. – Increase Interval – Cancel MXD70 Auxiliary mA Input - 24 - Setup and Operating Guide...
-
Page 412: Resetting The User Calibration
Channel Calibration Resetting the User Calibration If required the user can reset the user calibrations to their default states. Main Menu From the front screen press the menu button to show the main menu options and select Calibration. / – Select Option –... - Page 413 Channel Calibration Blank MXD70 Auxiliary mA Input - 26 - Setup and Operating Guide...
-
Page 414: Appendix A - Instrument Configuration
Setup Appendix A - Instrument Configuration MXD70 Auxiliary mA Input - 27 - Setup and Operating Guide... - Page 415 Setup MXD70 Auxiliary mA Input - 28 - Setup and Operating Guide...
- Page 416 Setup MXD70 Auxiliary mA Input - 29 - Setup and Operating Guide...
- Page 417 Setup MXD70 Auxiliary mA Input - 30 - Setup and Operating Guide...
- Page 418 Setup MXD70 Auxiliary mA Input - 31 - Setup and Operating Guide...
- Page 419 Setup MXD70 Auxiliary mA Input - 32 - Setup and Operating Guide...
-
Page 420: Appendix B - Error Messages
Faults Appendix B - Error Messages Internal Error Messages E001 UNIT Processor RAM Read/Write Error Try switching the unit off and then on again. If the message persists, consult with your supplier, as this unit may require to be returned for repair. E002 UNIT External RAM Read/Write Error... - Page 421 Faults Input Channel Errors E030 Input Card Checksum Error E080 Try switching the unit off and then on again. If the message persists, consult with your supplier, as the channel’s input card may require to be returned for repair. E130 E031 Setup Checksum Error The current channel’s configuration has for some reason become corrupted.
- Page 422 Faults E041 Partial Depletion Large difference between the detectors, i.e. one very dirty. This alarm will come up E091 if there is a difference of 3:1 between the detectors. Remove sensor and clean E141 sensor fingers. The probe sensor units (PSU) will be set to 16000 or 32000 if turbidity.
- Page 423 Faults E053 Temp Sensor Fault The temperature sensor is reading open or closed circuit, due in most cases to a E103 damaged sensing element or incorrect wiring. Check that the temperature sensor E153 is set to the correct type in the channel setup menu. Under this condition, the unit will default to the fixed temperature setting for compensation purposes.
- Page 424 E069 Planned Service Due The Planned Service interval for this unit has expired. Please contact LTH E119 Electronics at the details below: E169 LTH Electronics ltd Chaul End Lane Luton Beds LU4 8EZ Tel. 0044 (0) 1582 593693 Fax 0044 (0) 1582 598036 Email sales@lth.co.uk...
- Page 425 Faults Setpoint Errors E180 Dose Alarm Error E190 The Setpoint has been dosing for longer than the Dose Alarm time as defined in the setpoint menu. E200 E210 E220 E230 E181 to E184 SP1 For Future Use E191 to E194 SP2 E201 to E204 SP3 E211 to E214 SP4 E221 to E224 SP5...
- Page 426 Faults Current Output Errors E240 Current OP Hardware Fault E250 The current output circuit has detected an error in the current output loop; this is most commonly due to either a broken loop or too large a load resistor. E260 E270 E280 E290...
- Page 427 Faults E245 Store A Checksum Error E255 The Store A Save for the channel associated with this current output has become corrupted. Check the current output's settings in the current output menu and E265 then save the settings again in the Channel's Store A in the Save/Restore menu. E275 E285 E295...
- Page 428 Faults Digital Input Errors E301 DIG 1 Store A Checksum Error The Store A Save for the channel associated with this digital input has become E306 DIG 2 corrupted. Check the digital input's settings in the digital input menu and then E311 DIG 3 save the settings again in the Channel's Store A in the Save/Restore menu.
- Page 429 Faults Communication Errors E340 Comms Failure E342 The Channel's Input Card is not responding. Try switching the unit off and then on again. If the message persists, consult with your supplier, as the channel's input E344 card may require to be returned for repair. E341 Comms Error The Channel's Input Card is not Operating Correctly.
- Page 430 Faults Calculation Errors E400 Calculation Over Range E410 The Calculation reading is greater than the specified upper limit, check channel settings, calculation configuration, sensor condition and connections. If the message persists please consult with your supplier. E401 Calculation Under Range The Calculation reading is less than the specified lower limit, check channel E411 settings, calculation configuration, sensor condition and connections.
- Page 431 Faults Modbus Errors E420 UNIT Modbus Setup Checksum The Modbus setup has become corrupted. Check and correct the Modbus settings and turn the unit off and on again. If the message persists please consult with your supplier. E421 UNIT Modbus Store A Checksum The Store A Save for the Modbus Configuration has become corrupted.
-
Page 432: Fault Finding
Check that power is available to the unit. Using a voltmeter, set to AC or DC, check the power supply voltage at the connector. The design of the MXD70 Series allows the unit to accept from 85 to 250V AC or DC, an alternative option allows operation from 18 to 32V AC or DC, check the connection label for voltage specification. -
Page 433: Guarantee And Service
Check that the instrument input cables are not picking up excessive noise. Guarantee and Service Products manufactured by LTH Electronics Ltd are guaranteed against faulty workmanship and materials for a period of three years from the date of despatch, except for finished goods not of LTH manufacture, which are subject to a separate agreement. - Page 434 Notes MXD70 Auxiliary mA Input - 47 - Setup and Operating Guide...
-
Page 435: Index
Index Index Cable Screen ............42 Installation ............7 Calibration ............17 Loop Mode............15 Front Access ..........20 LVD ................2 mA Input Calibration ......18 Main Menu ............13 Reminder ............ 21 Manufacturing Standards ........ 2 Resetting ............. 23 Mode (Online/Offline) ...... - Page 438 MXD70 SERIES Multi-parameter Monitor Suspended Solids / Turbidity Setup and Operating Guide...
- Page 440 Disclaimer LTH Electronics Ltd reserves the right to make changes to this manual or the instrument without notice, as part of our policy of continued developments and improvements. All care has been taken to ensure accuracy of information contained in this manual.
- Page 441 Preface Manufacturing Standards Electromagnetic compatibility This instrument has been designed to comply with the standards and regulations set down by the European EMC Directive 2004/108/EC using BS EN 613-1: 2013 Safety This instrument has been designed to comply with the standards and regulations set down by the European Low Voltage Directive 2006/95/EC using BS EN 61010-1: 2010 Quality This instrument has been manufactured under the following quality standard:...
- Page 442 Contents Contents Preface ......................... 1 Contents ........................3 Suspended Solids Input Card Specification ..........5 Turbidity Input Card Specification ..............5 Installation and Choice of Suspended Solids / Turbidity Sensors ..7 MXD73 – Panel Mount Termination Information ......... 8 MXD75 –...
- Page 443 Contents Blank MXD70 Suspended Solids / Turbidity - 4 - Setup and Operating Guide...
-
Page 444: Turbidity Input Card Specification
Specification Suspended Solids Input Card Specification Quadbeam S Series. Supported Sensor Types Sensor Input Proportional probe signal from 0 to 16000 The incoming probe signal can be converted to standard Linearization engineering units using one of two user definable linearization curves consisting of up to 10 points. Up to 100 meters Sensor Cable Length Display Units... - Page 445 Specification Blank MXD70 Suspended Solids / Turbidity - 6 - Setup and Operating Guide...
-
Page 446: Installation And Choice Of Suspended Solids / Turbidity Sensors
Channel Setup Installation and Choice of Suspended Solids / Turbidity Sensors Quadbeam Sensors incorporate engineering improvements to eliminate water ingress and also withstand the rapid temperature cycling (from 100C to 800C) which occurs during CIP cleaning cycles. By design, Quadbeam sensors automatically compensate for component ageing, sensor fouling and daylight interference. -
Page 447: Mxd73 - Panel Mount Termination Information
Channel Setup MXD73 – Panel Mount Termination Information Suspended Solids Input Connection Details Turbidity Input Connection Details MXD70 Suspended Solids / Turbidity - 8 - Setup and Operating Guide... -
Page 448: Mxd75 - Surface Mount Termination Information
Channel Setup MXD75 – Surface Mount Termination Information Suspended Solids Input Connection Details Turbidity Input Connection Details MXD70 Suspended Solids / Turbidity - 9 - Setup and Operating Guide... -
Page 449: Suspended Solids / Turbidity Input Channel Setup
Channel Setup Suspended Solids / Turbidity Input Channel Setup The Channels Setup menu contains the basic configurations for the sensor’s input. The default security access code is 1000 Main Menu From the front screen press the menu button to show the main menu options and select Channels. /... -
Page 450: Units
Channel Setup Mode Selecting off-line causes any setpoints associated with this channel to de-energise. Also causes any current outputs associated to hold their current value, useful for when commissioning or calibrating the instrument. When the unit is placed in an off-line state “off-line” will appear in the channel messages section on the front screen. -
Page 451: Range
Channel Setup Range The range for the display can be set by selecting the decimal point position giving 9.999, 99.99, 999.9 and 9999. These again are for display and setpoint / current output purposes only. Note. The ranges for the “%” units also include 100.0 and 10.00. -
Page 452: Cip Input
– Save Selection CIP Input When assigned to a suspended solids channel the MXD70 series digital inputs feature a CIP function. This CIP input indicates to the instrument that a CIP event is in progress so that the sensor can be disabled so not to cause overstressing of the probe. -
Page 453: Linearisation Curve Setup
Channel Setup Linearisation Curve Setup With many solutions the rate of infra-red absorption is non linear as the solids concentration increases. The purpose of this function is to take the probe signal values from several samples and convert this non-linearity to a straight line output. In many cases this is the only calibration procedure required. It is recommended that the user should first prepare or obtain from the process a sample, which is as close as possible to the maximum range of suspended solids for which the instrument is to be configured. - Page 454 Channel Setup Setup Curve Point Enter the equivalent engineering value for this point. Units and scale depend upon the settings in the channel setup menu. The sensor must be placed in the required sample before pressing the enter button. / –...
- Page 455 Channel Setup Manual Curve Entry Manual Curve Entry also allows the user to set the number of points used in the curve. Then for each point the user can define the engineering value and then equate it to a known probe reading previously obtained.
-
Page 456: Calibration
Channel Calibration Calibration Calibration Procedures When trying to calibrate an instrument to measure suspended solids it is often difficult to keep the solids in suspension long enough for an accurate calibration to be made. The use of a magnetic stirrer in many cases will improve this. -
Page 457: Sensor Zero Adjustment
Channel Calibration Mode Selecting off-line causes any setpoints associated with this channel to de-energise. Also causes any current outputs associated to hold their current value, useful for when commissioning or calibrating the instrument. When the unit is placed in an off-line state “off-line” will appear in the channel messages section on the front screen. -
Page 458: Sensor Span Adjustment
– Cancel EXIT – Save Adjustment Enter Calibration History The MXD70 series has a calibration history feature which allows the user to review the record of sensor calibrations. To enter the calibration history menu press enter. – Enter Calibration History... -
Page 459: Front Screen Calibration Access
Channel Calibration Front Screen Calibration Access Enable When enabled front calibration access allows direct entry into the calibration menu from the front screen. It also disables the security access system within the calibration menu enabling the calibration functions without having to enter the security access code. /... -
Page 460: Calibration Reminder
Channel Calibration Calibration Reminder By enabling the calibration reminder the user can configure a calibration interval, which when expired will activate an alarm and channel message on the front screen. If the interval has expired and the alarm has activated, then on the completion of a successful sensor calibration, the alarm will clear and the next cal date will be automatically incremented by calibration interval. -
Page 461: Resetting The User Calibration
Channel Calibration Defer Calibration Date Turns off the alarm and increases the calibration interval by an extra 7 days. Only appears once the calibration interval has expired. – Increase Interval – Cancel Resetting the User Calibration If required the user can reset the user calibrations to their default states. Main Menu From the front screen press the menu button to show the main menu options and select Calibration. - Page 462 Channel Calibration Reset Channel User Calibration Select to reset the channels user calibration. / – Select Option – Return to Reset User Calibration EXIT – Enter Option MXD70 Suspended Solids / Turbidity - 23 - Setup and Operating Guide...
- Page 463 Channel Calibration Blank MXD70 Suspended Solids / Turbidity - 24 - Setup and Operating Guide...
-
Page 464: Appendix A - Example Dairy Readings
Appendix Appendix A – Example Dairy Readings The table below lists example sensor readings when immersed in milk and cream. These are only guidelines and it is recommended that you enter values using samples from your own process. Example No.1: Whole Milk (4% Fat) using a S20 series sensor 100% Water Probe Signal = 1535 1% Milk... - Page 465 Appendix Blank MXD70 Suspended Solids / Turbidity - 26 - Setup and Operating Guide...
-
Page 466: Appendix B - Instrument Configuration
Setup Appendix B – Instrument Configuration MXD70 Suspended Solids / Turbidity - 27 - Setup and Operating Guide... - Page 467 Setup MXD70 Suspended Solids / Turbidity - 28 - Setup and Operating Guide...
- Page 468 Setup MXD70 Suspended Solids / Turbidity - 29 - Setup and Operating Guide...
- Page 469 Setup MXD70 Suspended Solids / Turbidity - 30 - Setup and Operating Guide...
- Page 470 Setup MXD70 Suspended Solids / Turbidity - 31 - Setup and Operating Guide...
- Page 471 Setup MXD70 Suspended Solids / Turbidity - 32 - Setup and Operating Guide...
-
Page 472: Appendix C - Error Messages
Faults Appendix C – Error Messages Internal Error Messages E001 UNIT Processor RAM Read/Write Error Try switching the unit off and then on again. If the message persists, consult with your supplier, as this unit may require to be returned for repair. E002 UNIT External RAM Read/Write Error... - Page 473 Faults Input Channel Errors E030 Input Card Checksum Error E080 Try switching the unit off and then on again. If the message persists, consult with your supplier, as the channel’s input card may require to be returned for repair. E130 E031 Setup Checksum Error The current channel’s configuration has for some reason become corrupted.
- Page 474 Faults E041 Partial Depletion Large difference between the detectors, i.e. one very dirty. This alarm will come up E091 if there is a difference of 3:1 between the detectors. Remove sensor and clean E141 sensor fingers. The probe sensor units (PSU) will be set to 16000 or 32000 if turbidity.
- Page 475 Faults E053 Temp Sensor Fault The temperature sensor is reading open or closed circuit, due in most cases to a E103 damaged sensing element or incorrect wiring. Check that the temperature sensor E153 is set to the correct type in the channel setup menu. Under this condition, the unit will default to the fixed temperature setting for compensation purposes.
- Page 476 E069 Planned Service Due The Planned Service interval for this unit has expired. Please contact LTH E119 Electronics at the details below: E169 LTH Electronics ltd Chaul End Lane Luton Beds LU4 8EZ Tel. 0044 (0) 1582 593693 Fax 0044 (0) 1582 598036 Email sales@lth.co.uk...
- Page 477 Faults Setpoint Errors E180 Dose Alarm Error The Setpoint has been dosing for longer than the Dose Alarm time as defined in E190 the setpoint menu. E200 E210 E220 E230 E181 to E184 SP1 For Future Use E191 to E194 SP2 E201 to E204 SP3 E211 to E214 SP4 E221 to E224 SP5...
- Page 478 Faults Current Output Errors E240 Current OP Hardware Fault The current output circuit has detected an error in the current output loop; this is E250 most commonly due to either a broken loop or too large a load resistor. E260 E270 E280 E290...
- Page 479 Faults E245 Store A Checksum Error E255 The Store A Save for the channel associated with this current output has become corrupted. Check the current output's settings in the current output menu and E265 then save the settings again in the Channel's Store A in the Save/Restore menu. E275 E285 E295...
- Page 480 Faults Digital Input Errors E301 DIG 1 Store A Checksum Error E306 DIG 2 The Store A Save for the channel associated with this digital input has become corrupted. Check the digital input's settings in the digital input menu and then E311 DIG 3 save the settings again in the Channel's Store A in the Save/Restore menu.
- Page 481 Faults Communication Errors E340 Comms Failure E342 The Channel's Input Card is not responding. Try switching the unit off and then on again. If the message persists, consult with your supplier, as the channel's input E344 card may require to be returned for repair. E341 Comms Error The Channel's Input Card is not Operating Correctly.
- Page 482 Faults Calculation Errors E400 Calculation Over Range E411 The Calculation reading is greater than the specified upper limit, check channel settings, calculation configuration, sensor condition and connections. If the message persists please consult with your supplier. E401 Calculation Under Range E411 The Calculation reading is less than the specified lower limit, check channel settings, calculation configuration, sensor condition and connections.
- Page 483 Faults Modbus Errors E420 UNIT Modbus Setup Checksum The Modbus setup has become corrupted. Check and correct the Modbus settings and turn the unit off and on again. If the message persists please consult with your supplier. E421 UNIT Modbus Store A Checksum The Store A Save for the Modbus Configuration has become corrupted.
-
Page 484: Fault Finding
Check that power is available to the unit. Using a voltmeter, set to AC or DC, check the power supply voltage at the connector. The design of the MXD70 Series allows the unit to accept from 85 to 250V AC or DC;... -
Page 485: Guarantee And Service
Check that the instrument input cables are not picking up excessive noise. Guarantee and Service Products manufactured by LTH Electronics Ltd are guaranteed against faulty workmanship and materials for a period of three years from the date of despatch, except for finished goods not of LTH manufacture, which are subject to a separate agreement. - Page 486 Notes MXD70 Suspended Solids / Turbidity - 47 - Setup and Operating Guide...
-
Page 487: Index
Index Index Access Code ............10 Input Filter ............13 Cable Screen ............ 8, 9 Installation ............7 Calibration ............17 Linearisation Curve Setup ......14 Defer Cal Date ........... 22 Automatic Curve Entry ......14 Front Access ..........20 Manual Curve Entry ......... - Page 490 MXD70 SERIES Multi-parameter Monitor Setpoints, Current Outputs, And Digital Inputs Configuration Guide...
- Page 492 Preface Product warranty The MXD70 Series has a warranty against defects in materials and workmanship for three years from the date of shipment. During this period LTH will, at its own discretion, either repair or replace products that prove to be defective. The associated software is provided ‘as is’...
- Page 493 Preface Manufacturing Standards Electromagnetic compatibility This instrument has been designed to comply with the standards and regulations set down by the European EMC Directive 2004/108/EC using BS EN 61326-1: 2013 Safety This instrument has been designed to comply with the standards and regulations set down by the European Low Voltage Directive 2006/95/EC using BS EN 61010-1: 2010 Quality This instrument has been manufactured under the following quality standard:...
- Page 494 Contents Contents Preface ......................... 1 Contents ........................3 Setpoints ........................5 Input Source......................6 Trigger ........................6 Mode ........................9 Hysteresis ......................10 Setpoint Dose Alarm ..................11 Setpoint Proportional Mode ..............14 Setpoint Alarm Mode ................... 16 Setpoint Cleaning Mode ................17 Current Outputs ....................
- Page 495 Contents Blank MXD70 Setpoints, Current Outputs, and - 4 - Digital Inputs Configuration Guide...
- Page 496 Setpoints Setpoints The MXD70 Series can be fitted with up to six setpoint relays designated 1 – 6. Setpoints 1 – 4 are “Change Over” relays while 5 – 6 are “Normally Open” relays. Each individual setpoint can be assigned to any one of the Sensor Input Channels.
-
Page 497: Input Source
Setpoints Input Source The input source for the selected setpoint. Available options vary depending on whether the appropriate source is enabled in the channel’s setup menu. Alarm option – see the setpoint alarm mode section. Cleaning option – see the setpoint cleaning mode section (not available on all input card types.) /... - Page 498 Setpoints High The setpoint will activate when the associated Sensor Input Channel’s input becomes greater than the setpoint level. The setpoint will activate when the associated Sensor Input Channel’s input becomes less than the setpoint level. Band The setpoint will activate when the associated Sensor Input Channel’s input is either greater than the setpoint high level or less than the setpoint low level.
- Page 499 Setpoints Latch Low The setpoint will activate when the associated Sensor Input Channel’s input is less than the setpoint low level and will remain active until the input rises above the setpoint high level. It will then remain inactive until the input level falls below the setpoint low level.
-
Page 500: Mode
Setpoints Mode The Setpoints can operate in one of three modes. On/Off Mode – The setpoint energises when the setpoint is activated and de-energises when the setpoint is de-activated. Pulse Proportional – See Setpoint proportional Mode Section. Time Proportional – See Setpoint proportional Mode Section. -
Page 501: Hysteresis
Setpoints Hysteresis A facility to apply hysteresis to the setpoint level allows the user to avoid setpoint “Chatter” when the sensor input level approaches the setpoint level. “Chatter” is caused when the sensor input is sufficiently close to the set point value and noise on the signal repeatedly crosses the set point level, thus causing the relay to switch on and off rapidly. -
Page 502: Setpoint Dose Alarm
Setpoints Setpoint Dose Alarm The dose alarm timer can be used to prevent overdosing under many different fault conditions, such as sensor failure or application problems. Dose Alarm Enable the dose alarm for the selected setpoint. / – Select Option EXIT –... - Page 503 Setpoints Dose Alarm Acknowledge To cancel the dose alarm and reactivate the setpoint, select the required setpoint from the shown list and press enter. Note – If, once reset, the setpoint again remains energised for the length of the dose alarm timer then the dose alarm will once again activate.
- Page 504 Setpoints Initial Charge Access Enabling this allows the user to initialise the initial charge by means of a menu on the front screen. / – Select Option EXIT – Cancel – Save Selection Front Screen Initial Charge Enter the Initial Charge Menu by means of the INIT button.
-
Page 505: Setpoint Proportional Mode
Setpoints Setpoint Proportional Mode In addition to On/Off mode the MXD70 Series also provides two forms of pseudo proportional control, which can be used to control the levels to a defined value when used in conjunction with a pump or valve. - Page 506 Setpoints Cycle Time Sets the cycle time (sum of both On and Off periods). Note – Time Proportional mode only. / – Increase / Decrease Digit – Select Next Digit – Cancel EXIT – Save Value Proportional Band Enter the size of the proportional band in measurement units.
-
Page 507: Setpoint Alarm Mode
Setpoints Setpoint Alarm Mode By Selecting Alarm in the setpoints input source the setpoint can be configured as an alarm output triggered by one of a number of events. When a sensor related error is detected on the associated sensor input Sensor Error –... -
Page 508: Setpoint Cleaning Mode
Setpoints Setpoint Cleaning Mode The Setpoints can be configured to operate a jet spray wash or rotary electrode cleaning system on a timed cycle. Its purpose is to prevent accumulation of particulate matter on the active surfaces of the sensor. Note that cleaning is not available on all sensor input types. Input Source If available select cleaning from the list of options. - Page 509 Setpoints Time Remaining Shows the time remaining till the next clean operation. Note – Cannot be edited. Clean Mode Associated sensor input channel state when cleaning. It is recommended that off-line is selected. This will automatically take the associated sensor input channel offline, de-energise associated setpoints and hold associated current outputs, during a clean operation.
- Page 510 Setpoints Clean Delay If enabled this causes the clean cycle to wait if any other control setpoints associated with the sensor input channel are active. This is shown by a clean delayed message on the front screen. / – Select Option EXIT –...
- Page 511 Setpoints MXD70 Setpoints, Current Outputs, and - 20 - Digital Inputs Configuration Guide...
-
Page 512: Current Outputs
Current Outputs Current Outputs The MXD70 Series can be fitted with up to six current outputs designated A – F. Each individual current output can be assigned to any one of the Sensor Input Channels. The current output menu contains all of the necessary setup functions to configure the current output sources. - Page 513 Current Outputs Input Source The input source for the selected current output. Available options vary depending on whether the appropriate source is enabled in the channel’s setup menu. / – Select Option EXIT – Cancel – Save Selection Output The current output can be scaled across either 4 – 20mA or 0 –...
- Page 514 Current Outputs Zero (0/4mA) Enter the desired sensor value to be represented by 0mA or 4mA (depends on current output scaling). An inverse relationship can be achieved by setting the Zero greater than the Span. If the sensor reading falls outside this and the span value an error / alarm will be activated.
-
Page 515: Current Output Calibration
Current Outputs Current Output Calibration The user is provided with an opportunity to adjust the current output to calibrate any equipment that may be being used to monitor the current output signal. Main Menu From the front screen press the menu button to show the main menu options and select Calibration. - Page 516 Current Outputs Adjust 0mA Output Using the and buttons adjust the current output until it reads the desired value on your current meter. Please keep in mind that the current output cannot go below 0mA. / – Adjust Output –...
-
Page 517: Resetting The Current Output User Calibration
Current Outputs Resetting the current Output user Calibration If required the user can reset the current output user calibration back to factory settings. Main Menu From the front screen press the menu button to show the main menu options and select Calibration. /... - Page 518 Current Outputs 4-20mA Outputs Reset Select the required 4-20mA Output to Reset its user calibration back to factory settings. / – Select Option – Return to Reset User Calibration EXIT – Enter Option MXD70 Setpoints, Current Outputs, - 27 - and Digital Inputs Configuration Guide...
- Page 519 Current Outputs Blank MXD70 Setpoints, Current Outputs, and - 28 - Digital Inputs Configuration Guide...
-
Page 520: Digital Inputs
Digital Inputs The MXD70 Series is fitted with eight digital inputs designated 1 – 8. Each individual digital input can be assigned to any one of the Sensor Input Channels or to the instrument as a whole. The digital input menu contains all of the necessary setup functions to configure the digital input sources. -
Page 521: Offline
Digital Inputs Function The digital input can be configured to operate in the following ways: Offline Interlock Flow Switch Input Tank Level Switch Clean Range Changing Switch Setup Calibration / – Select Option –... - Page 522 Digital Inputs Clean If the selected Input Sensor Channel has a setpoint configured for a cleaning operation, a external cleaning cycle can be initiated using this function. / – Select Option – Cancel EXIT – Save Selection Range Changing The digital input is used to change the displayed range of the selected sensor input channel.
-
Page 523: Calibration
Digital Inputs Calibration Initialise a dissolved oxygen span calibration. See Dissolved Oxygen input card manual for more information. The CIP input indicates to the associated sensor channel that a CIP event is in progress so that the sensor can be disabled, to prevent overstressing the probe. -
Page 524: Simulate Channels
Simulate Channels Simulate Channels The facility exists within the MXD70 series to simulate the input sensor levels to test the setpoint and current output operation. This function allows the user to cycle up and down through the sensor range whilst displaying the current output level, and with the relays responding accordingly. - Page 525 Notes MXD70 Setpoints, Current Outputs, and - 34 - Digital Inputs Configuration Guide...
- Page 526 Notes MXD70 Setpoints, Current Outputs, - 35 - and Digital Inputs Configuration Guide...
-
Page 527: Index
Index Index Calibration LVD ................2 Current Output ......... 24 Manual Clean ............. 19 Resetting ............. 26 Manufacturing Standards ........ 2 Current Output ..........21 Pulse Proportional Mode ....... 14 Calibration ..........24 Quality ..............2 Channel ............21 Safety ..............2 Error .............. - Page 530 MXD70 Series Multi-parameter Monitor Modbus RS485 Interface Operating Guide...
- Page 532 Preface Product warranty The MXD70 Series has a warranty against defects in materials and workmanship for three years from the date of shipment. During this period LTH will, at its own discretion, either repair or replace products that prove to be defective. The associated software is provided ‘as is’...
- Page 533 Preface Manufacturing Standards Electromagnetic compatibility This instrument has been designed to comply with the standards and regulations set down by the European EMC Directive 2004/108/EC using BS EN 61326-1: 2013 Safety This instrument has been designed to comply with the standards and regulations set down by the European Low Voltage Directive 2006/95/EC using BS EN 61010-1: 2010 Quality This instrument has been manufactured under the following quality standard:...
- Page 534 Contents Contents Preface .......................... 1 Contents ........................3 Modbus RS485 ......................5 Modbus RS485 Connection Details ..............9 Modbus Setup ......................11 Standard Value Tables ..................13 Modbus RS485 Registers ..................17 Base instrument configuration ................ 17 ...
-
Page 535: Contents
Contents BLANK Modbus RS485 Interface - 4 - Operating Guide... -
Page 536: Modbus Rs485
The slave response telegram consists of telegram fields which contain the requested data or which confirm that the action requested by the master has been executed. It also contains a check sum. MXD70 Series Modbus communications is indicated in the top of the screen by the following symbol: Supported Modbus Function Codes... - Page 537 Note, on completion the function will automatically move to the Off state. Write Single Register Write a single MXD70 Series register with a new value. Application: For configuring a single parameter in the instrument. ! Note. Registers whose address space consume more than one register i.e.
- Page 538 Modbus RS485 Response Times - The time it takes the instrument to respond to a request telegram from the MODBUS master is typically 25 to 50 milliseconds. It may take longer for a command to be executed in the instrument. Thus the data is not updated until the command has been executed. Write commands especially are affected by this.
- Page 539 Modbus RS485 BLANK Modbus RS485 Interface - 8 - Operating Guide...
-
Page 540: Modbus Rs485 Connection Details
Each segment is terminated at either end with a 120 Ω terminating resistor (not supplied). The bus length or the number of devices can be increased by introducing a repeater. The MXD70 Series provides a Modbus interface via an Optional Output Card MXD73 Modbus RS485 Output Card Connection Details Modbus RS485 Interface... - Page 541 Modbus RS485 Connection Details MXD75 Modbus RS485 Output Card Connection Details Modbus RS485 Interface - 10 - Operating Guide...
-
Page 542: Modbus Setup
Modbus Setup Modbus Setup Main Menu From the front screen press the menu button to show main menu options select Configuration. / – Select Option – Return to Front Screen EXIT – Enter Option Mode Set the Modbus communication mode format to either RTU or ASCII. - Page 543 Modbus Setup Parity Set the error parity bit. / – Select Option – Cancel EXIT – Save Selection Modbus RS485 Interface - 12 - Operating Guide...
- Page 544 Tables Standard Value Tables Commonly used values throughout the Modbus registers. Table 1 – Supported ASCII Character Set (for use with labels): A = 65 B = 66 C = 67 D = 68 E = 69 F = 70 G = 71 H = 72 I = 73...
- Page 545 Tables Table 4 – Data Logging Live Trend / Calculation Variables: Value Sensor/Type Variable Channel 1 Channel 2 Channel 3 Auxiliary mA Reading 1591 1629 1667 Input Input Current 1592 1630 1668 Conventional Conductivity 1572 1610 1648 Conductivity Resistivity 1573 1611 1649 1574...
- Page 546 Tables Table 5 – Units Sensor/Type Units Value Auxiliary mA Custom Units 1000 Input 1001 Conventional μS/cm Conductivity mS/cm kΩ/cm MΩ/cm 1028 Dissolved Saturation (%) 1099 Oxygen Concentration (ppm) 1100 1101 Mercury (mmHg) 1102 Concentration (mg/l) 1103 Pressure (Atm) 1110 Pressure (Bar) 1111 Pressure (kpa)
- Page 547 Tables Table 6 – Menu Header / Front Screen Secondary Reading Options Value Sensor/Type Variable Channel 1 Channel 2 Channel 3 Clear (do not show anything) 1327 1327 1327 Readingˆ 1328 1329 1330 Temperature 1331 1332 1333 Manual Temperature 1334 1335 1336 Auxiliary mA...
-
Page 548: Modbus Rs485 Registers
Registers Modbus RS485 Registers Base instrument configuration Note. The availability of some of the registers depends upon the configuration of the unit. Register Access Channel Name Data Description of Semantics of Values Rule Format Attribute Instrument Information 2000 Company Company Name 2001 Instrument Type Type Of Instrument... - Page 549 Registers Instrument Configuration Continued 2019 Get/Set Daylight Savings Start Day Day on which Daylight = Monday Savings should Start = Tuesday = Wednesday = Thursday = Friday = Saturday = Sunday 2020 Get/Set Daylight Savings Start Month in which Daylight = January Month Savings starts...
- Page 550 Registers Instrument Configuration Continued 2026 Get/Set Daylight Savings End Month INT Month In which = January Daylight Savings should = February = March = April = May = June = July = August = September = October = November = December 2027 Get/Set Daylight Savings End Hours INT Hour Element Of...
- Page 551 Registers Output Card Information 2050 Output Card Type of Output Card 1409 = Output Card Not installed Setup 1410 = Output Card Not Present 1411 = 1 Current Output, 2 Relays 1412 = 3 Current Output, 0 Relays 1413 = 3 Current Output, 4 Relays 1414 = 5 Current Output, 2 Relays...
-
Page 552: Sensor Readings
Registers Sensor Readings Register Access Channel Name Data Description of Semantics of Values Rule Format Attribute Auxiliary mA Input Readings 2100 Channel 1 Auxiliary FLOAT Reading Value depends upon Reading channel range 2400 Channel 2 2700 Channel 3 2102 Channel 1 First Custom Character Of Custom ASCII Character... - Page 553 Registers Conventional Conductivity Readings Continued 2158 Channel 1 TDS Units* TDS Reading Units = ppm *(only available when 2458 Channel 2 1028 = ppt units set to TDS) 2758 Channel 3 2159 Channel 1 Temperature FLOAT Temperature Reading -50°C to +150°C or Reading -58°F to +320°F 2459...
- Page 554 Registers Dissolved Oxygen Readings Continued 2218 Channel 1 Pressure Units Pressure Reading Units 1110 = Atm 2518 Channel 2 1111 = Bar 2818 Channel 3 1112 = Kpa 1113 = mH20 1114 = Psi 1115 = mmHg Electrodeless Conductivity Readings 2250 Channel 1 Conductivity...
- Page 555 Registers Electrodeless Conducitvity Readings Continued 2263 Channel 1 Custom Curve Custom Curve Refer To Table1 Units Units 5 Custom 2563 Channel 2 Character Character 2863 Channel 3 2264 Channel 1 Custom Curve Custom Curve Units Units 6 Custom 2564 Channel 2 Character Character 2864...
- Page 556 Registers Calculation Readings 3000 Calc 1 Calculation FLOAT Calculation Result Depending upon Result Calculation Function 3005 Calc 2 3002 Calc 1 Calculation Calculation Result Units Refer to table 5 Units 3007 Calc 2 Modbus RS485 Interface - 25 - Operating Guide...
-
Page 557: Setpoint / Relay Status
Registers Setpoint / Relay Status Register Access Channel Name Data Description of Semantics of Values Rule Format Attribute Setpoint Status 3100 Setpoint 1 Setpoint State Current State Of = Setpoint Not Setpoint Active 3150 Setpoint 2 3200 Setpoint 3 = Setpoint Active 3250 Setpoint 4 = Setpoint Initial... - Page 558 Registers Setpoint Status Continued 3107 Setpoint 1 Setpoint Initial Minutes remaining for 0 to 59 Charge Minutes the Setpoint Initial 3157 Setpoint 2 Charge 3207 Setpoint 3 3257 Setpoint 4 3307 Setpoint 5 3357 Setpoint 6 3108 Setpoint 1 Setpoint Initial Seconds remaining for 0 to 59 Charge Seconds...
-
Page 559: Current Output Readings
Registers Current Output Readings Register Access Channel Name Data Description of Semantics of Values Rule Format Attribute Current Output Readings 4000 Current 1 Current Output FLOAT Current Output Reading 0 to 20.00ma (in mA) 4002 Current 2 4004 Current 3 4006 Current 4 4008... -
Page 560: Sensor Input Configuration
Registers Sensor Input Configuration Register Access Channel Name Data Description of Semantics of Values Rule Format Attribute Input Card Serial Number 4500 Card 1 Serial Number LONG The Serial Number of 0 to 9999999 the input card 5090 Card 2 5680 Card 3 Auxiliary mA Input Configuration... - Page 561 Registers Auxiliary mA Input Configuration Continued 4524 Get/Set Channel 1 20mA Input FLOAT 20mA Input Value Value depends upon channel range 5114 Channel 2 5704 Channel 3 4526 Get/Set Channel 1 Input Filter Input Filter 1050 = Filter Out 5116 Channel 2 1051 = 10 Seconds 5706...
- Page 562 Registers Auxiliary mA Input Configuration Continued 4540 Get/Set Channel 1 Fourteenth Character of Refer To Table 1 Label Description Label 5130 Channel 2 5720 Channel 3 4541 Get/Set Channel 1 Fifteenth Label INT Character of Description Label 5131 Channel 2 5721 Channel 3 7700...
- Page 563 Registers Auxiliary mA Input Configuration Continued 7717 Get/Set Channel 1 Curve A mA FLOAT Curve A mA Input Value 0 to 20.00ma Input Value Point 5 7807 Channel 2 Point 5 *(Not Available when 7897 Channel 3 input mode set to 4-20mA or 0-20mA) 7719 Get/Set Channel 1...
- Page 564 Registers Auxiliary mA Input Configuration Continued 7737 Get/Set Channel 1 Curve A mA FLOAT Curve A mA Input Value 0 to 20.00ma Input Point 10 Point 10 7827 Channel 2 *(Not Available when 7917 Channel 3 input mode set to 4-20mA or 0-20mA) 7739 Get/Set Channel 1...
- Page 565 Registers Auxiliary mA Input Configuration Continued 7756 Get/Set Channel 1 Curve B FLOAT Curve B Auxiliary mA Value depends upon Auxiliary mA Input Value Point 4 channel range 7846 Channel 2 Input Point 4 *(Not Available when 7936 Channel 3 input mode set to 4-20mA or 0-20mA) 7758...
- Page 566 Registers Auxiliary mA Input Configuration Continued 7776 Get/Set Channel 1 Curve B FLOAT Curve B Auxiliary mA Value depends upon Auxiliary mA Input Value Point 9 channel range 7866 Channel 2 Input Point 9 *(Not Available when 7956 Channel 3 input mode set to 4-20mA or 0-20mA) 7778...
- Page 567 Registers Conventional Conductivity Input Configuration Conventional Conductivity Configuration 4580 Get/Set Channel 1 Mode Input Mode Setting 1080 = Online 5170 Channel 2 1081 = Offline 5770 Channel 3 4581 Get/Set Channel 1 Units Units 1005 = Siemens (S/cm) 5171 Channel 2 1006 = Resistivity (Ω/cm) 5771 Channel 3...
- Page 568 Registers Conductivity Configuration Continued 4591 Get/Set Channel 1 Compensation FLOAT Temperature 0 to 9.99%°C Slope* Compensation Slope 5181 Channel 2 Value 5781 Channel 3 *(only available when temperature compensation set to in) 4593 Get/Set Channel 1 Temperature Manual Temperature 1046 = Auto Mode* Mode 5183...
- Page 569 Registers Dissolved Oxygen Input Configuration Dissolved Oxygen Configuration 4650 Get/Set Channel 1 Mode Input Mode Setting 1080 = Online 5240 Channel 2 1081 = Offline 5840 Channel 3 4651 Get/Set Channel 1 Units Units 1099 = Saturation (%) 5241 Channel 2 1100 = Concentration (ppm) 5841...
- Page 570 Registers Dissolved Oxygen Configuration Continued 4660 Get/Set Channel 1 Temperature Temperature 1046 = Auto Compensation Compensation 5250 Channel 2 1047 = Manual Mode 5850 Channel 3 4661 Get/Set Channel 1 Manual FLOAT Manual Temperature -20.0 °C to 150.0 °C Temperature Compensation Input 5251 Channel 2...
- Page 571 Registers Dissolved Oxygen Configuration Continued 4675 Get/Set Channel 1 Pressure FLOAT Pressure Damping Limit Atm: 0 to 99.99 Damping Limit B Value 5265 Channel 2 Bar: 0 to 99.99 *(Only available when 5865 Channel 3 Kpa: 0 to 9999 pressure damping set to mH20: 0 to 999.9 enable) Psi:...
- Page 572 Registers Electrodeless Conductivity Input Configuration Electrodeless Conductivity Configuration 4730 Get/Set Channel 1 Mode Input Mode Setting 1080 = Online 5320 Channel 2 1081 = Offline 5920 Channel 3 4731 Get/Set Channel 1 Units Units 1005 = Siemens 5321 Channel 2 1007 = TDS (ppm) 5921 Channel 3...
- Page 573 Registers Electrodeless Conductivity Configuration Continued 4740 Get/Set Channel 1 Custom Curve 1 Character of Custom Refer To Table 1 Third Units Curve 1 Units 5330 Channel 2 5930 Channel 3 4741 Get/Set Channel 1 Custom Curve 1 Character of Custom Fourth Units Curve 1 Units 5331...
- Page 574 Registers Electrodeless Conductivity Configuration Continued 4765 Get/Set Channel 1 Custom Curve 1 FLOAT Custom Curve 1 Value Dependant on Conductivity Conductivity Point 6 Custom Curve 1 5355 Channel 2 Point 6 Value Conductivity Range 5955 Channel 3 4767 Get/Set Channel 1 Custom Curve 1 FLOAT Electrodeless Custom...
- Page 575 Registers Electrodeless Conductivity Configuration Continued 4789 Get/Set Channel 1 Custom Curve 2 Custom Solution Curve 1567 = 0-9.999 Solution Range 2 Solution Operating 5379 Channel 2 1568 = 0-99.99 Range 5979 Channel 3 1569 = 0-999.9 1570 = 0-9999 4790 Get/Set Channel 1 Custom Curve 2 FLOAT...
- Page 576 Registers Electrodeless Configuration Continued 4818 Get/Set Channel 1 Custom Curve 2 FLOAT Custom Curve 2 Value Dependant on Conductivity Conductivity Point 8 Custom Curve 2 5408 Channel 2 Point 8 Value Conductivity Range 6008 Channel 3 4820 Get/Set Channel 1 Custom Curve 2 FLOAT Electrodeless Custom...
- Page 577 Registers Electrodeless Conductivity Configuration Continued 4837 Get/Set Channel 1 Input Filter Electrodeless Input Filter 1050 = Filter Out 5427 Channel 2 1051 = 10 Seconds 6027 Channel 3 1052 = 20 Seconds 1053 = 40 Seconds 1054 = 1 Minutes 1055 = 3 Minutes 1056 = 5 Minutes Modbus RS485 Interface...
- Page 578 Registers pH / Redox Input Configuration pH / Redox Configuration 4890 Get/Set Channel 1 Mode Input Mode Setting 1080 = Online 5480 Channel 2 1081 = Offline 6080 Channel 3 4891 Get/Set Channel 1 Units Units 1065 = pH (XX.XX) 5481 Channel 2 1066 = Redox(mV)
- Page 579 Registers Suspended Solids / Turbidity Input Configuration Suspended Solids / Turbidity Configuration 4950 Get/Set Channel 1 Mode Input Mode Setting 1080 = Online 5540 Channel 2 1081 = Offline 6140 Channel 3 4951 Get/Set Channel 1 Units Units 1520 = NTU 5541 Channel 2 1521 = FTU...
- Page 580 Registers Suspended Solids / Turbidity Configuration Continued 4963 Get/Set Channel 1 Curve A Point FLOAT Curve A Point 3 Value Value Dependant On *(Not Available when Range 5553 Channel 2 Units Set to PS) 6153 Channel 3 4965 Get/Set Channel 1 Curve A Sensor FLOAT Curve A Sensor Point 3...
- Page 581 Registers Suspended Solids / Turbidity Configuration Continued 4987 Get/Set Channel 1 Curve A Point FLOAT Curve A Point 9 Value Value Dependant On *(Not Available when Range 5577 Channel 2 Units Set to PS) 6177 Channel 3 4989 Get/Set Channel 1 Curve A Sensor FLOAT Curve A Sensor Point 9...
- Page 582 Registers Suspended Solids / Turbidity Configuration Continued 5012 Get/Set Channel 1 Curve B Point FLOAT Curve B Point 5 Value Value Dependant On *(Not Available when Range 5602 Channel 2 Units Set to PS) 6202 Channel 3 5014 Get/Set Channel 1 Curve B Sensor FLOAT Curve B Sensor Point 5...
- Page 583 Registers Calculation Configuration Calculation Configuration 6280 Get/Set Calc 1 Mode Calculation On or Off 1305 = Off 6300 Calc 2 1306 = On 6281 Get/Set Calc 1 Variable X Calculation Variable X Refer To Table 4 * Available options depends 6301 Calc 2 on Sensors installed in...
-
Page 584: Sensor Calibration
Registers Sensor Calibration Register Access Channel Name Data Description of Semantics of Values Rule Format Attribute Auxiliary mA Input Calibration Auxiliary mA Input Calibration 6500 Get/Set Channel 1 Calibration Front screen Calibration 1076 = Yes Access Access 6880 Channel 2 1077 = No 7260 Channel 3... - Page 585 Registers Conventional Conductivity Input Calibration Conventional Conductivity Input Calibration 6550 Get/Set Channel 1 Cal Access Front Screen Calibration 1076 = Yes Access 6930 Channel 2 1077 = No 7310 Channel 3 6551 Get/Set Channel 1 Cal Manual FLOAT Calibration Manual -20.0°C to 150.0°C Temperature Temperature Input...
- Page 586 Registers Dissolved Oxygen Input Calibration Dissolved Oxygen Input Calibration 6600 Get/Set Channel 1 Cal Manual FLOAT Calibration Manual -20.0°C to 150.0°C Temperature Temperature Input 6980 Channel 2 -4.0°F to 302.0°F Input* *(Only available when 7360 Channel 3 Temp Compensation Mode is set to Manual) 6602 Get/Set Channel 1 Cal Units...
- Page 587 Registers Dissolved Oxygen Input Calibration Continued 6616 Get/Set Channel 1 Calibration Calibration Alarm 1 to 12 Month Alarm Month* Month Value 6996 Channel 2 *(Only available when 7376 Channel 3 Calibration Reminder set to yes) 6617 Get/Set Channel 1 Calibration Dissolved Oxygen Max 2099 Year Alarm Year*...
- Page 588 Registers Electrodeless Conductivity Input Calibration Electrodeless Conductivity Input Calibration 6650 Get/Set Channel 1 Cal Manual FLOAT Calibration Manual -20.0°C to 150.0°C Temperature Temperature Input 7030 Channel 2 -4.0°F to 302.0°F Input* *(Only available when 7410 Channel 3 Temperature compensation Mode is set to Manual) 6652 Channel 1...
- Page 589 Registers pH / Redox Input Calibration pH / Redox Input Calibration 6700 Get/Set Channel 1 Calibration Calibration Principle 1438 = Auto Mode 7080 Channel 2 1439 = Manual 7460 Channel 3 6701 Get/Set Channel 1 Manual FLOAT Manual Temperature -20.0°C to 150.0°C Temperature Input 7081...
- Page 590 Registers pH / Redox Input Calibration Continued 6718 Get/Set Channel 1 Calibration Calibration Alarm Year Max 2099 Year Alarm Year* *(Only available when 7098 Channel 2 Calibration Reminder set 7478 Channel 3 to yes) 6719 Get/Set Channel 1 Custom Input Number of Custom 1 to 13 buffer points Points*...
- Page 591 Registers pH / Redox Input Calibration Continued 6744 Get/Set Channel 1 Buffer A point FLOAT Custom Buffer A Point 5 0 to 14.00 pH *(Only available when 7124 Channel 2 Units is set to pH) 7504 Channel 3 6746 Get/Set Channel 1 Buffer B point FLOAT Custom Buffer B Point 5...
- Page 592 Registers pH / Redox Input Calibration Continued 6774 Get/Set Channel 1 Buffer A point FLOAT Custom Buffer A Point 0 to 14.00 pH 7154 Channel 2 *(Only available when 7534 Channel 3 Units is set to pH) 6776 Get/Set Channel 1 Buffer B point FLOAT Custom Buffer B Point...
- Page 593 Registers pH / Redox Input Calibration Continued 6798 Get/Set Channel 1 Nominal pH FLOAT Custom Nominal pH 0.00 to 14.00 pH Buffer 1 Buffer 1 7178 Channel 2 7558 Channel 3 6800 Get/Set Channel 1 Nominal pH FLOAT Custom Nominal pH 0.00 to 14.00 pH Buffer 2 Buffer 2...
- Page 594 Registers Suspended Solids / Turbidity Input Calibration Suspended Solids / Turbidity Input Calibration 6830 Channel 1 Offset Zero FLOAT Zero Offset Value 7210 Channel 2 7590 Channel 3 6832 Channel 1 Offset Span FLOAT Span Offset Value 7212 Channel 2 7592 Channel 3 6834...
-
Page 595: Setpoint Configuration
Registers Setpoint Configuration Register Access Setpoint Name Data Description of Semantics of Values Rule Format Attribute Setpoint Configuration 8000 Get/Set Setpoint 1 Channel Assigned Input Channel 1159 = Disabled 8080 Setpoint 2 1160 = Channel 1 8160 Setpoint 3 1161 = Channel 2 8240 Setpoint 4 1162 = Channel 3... - Page 596 Registers Setpoint Configuration Continued 8008 Get/Set Setpoint 1 Low Value* FLOAT Trigger Low Value Value depends on input *(Not available when channel assigned to 8088 Setpoint 2 Trigger is set to High) 8168 Setpoint 3 8248 Setpoint 4 8328 Setpoint 5 8418 Setpoint 6 8010...
- Page 597 Registers Setpoint Configuration Continued 8018 Get/Set Setpoint 1 Hysteresis* FLOAT Setpoint Hysteresis 0 to 99.99% Value 8098 Setpoint 2 *(Only available when 8178 Setpoint 3 Mode is set to On/Off) 8258 Setpoint 4 8338 Setpoint 5 8428 Setpoint 6 8025 Get/Set Setpoint 1 Dose Alarm Dose Alarm 1076 = Yes...
- Page 598 Registers Setpoint Configuration Continued 8035 Get/Set Setpoint 1 Channel Alarm Alarm mode 1137 = Disabled Condition* *(Only Available when 8115 Setpoint 2 1138 = Sensor Error Input Source is set to 8195 Setpoint 3 1139 = Dose Alarm Alarm) 8275 Setpoint 4 1140 = Calibration 8355...
- Page 599 Registers Setpoint Configuration Continued 8046 Get/Set Setpoint 1 Cleaning Seconds element for 0 to 59 minutes Recovery – Cleaning Recovery Time 8126 Setpoint 2 Seconds *(Only available when 8206 Setpoint 3 Cleaning Mode set to 8286 Setpoint 4 Offline) 8366 Setpoint 5 8456 Setpoint 6...
-
Page 600: Current Output Configuration
Registers Current Output Configuration Register Access Current Name Data Description of Semantics of Values Rule Output Format Attribute Current Output Configuration 9100 Get/Set Output A Channel Assigned Input Channel 1159 = Disabled 9150 Output B 1160 = Channel 1 9200 Output C 1161 = Channel 2 9250... - Page 601 Registers Current Output Configuration Continued 9109 Output A Units Current Output Value Refer to Table 5 Units 9159 Output B 9209 Output C 9259 Output D 9309 Output E 9359 Output F Modbus RS485 Interface - 70 - Operating Guide...
-
Page 602: Digital Input Configuration
Registers Digital Input Configuration Register Access Current Name Data Description of Semantics of Values Rule Output Format Attribute Digital Input Configuration 9500 Get/Set Digital IP 1 Channel Assigned Input Channel 1159 = Disabled 9520 Digital IP 2 1160 = Channel 1 9540 Digital IP 3 1161 = Channel 2... - Page 603 Registers Digital Input Configuration Continued 9505 Get/Set Digital IP 1 Current Output Digital Input Offline 1130 = No Action Level Current Output Drive 9525 Digital IP 2 1131 = Drive To 0mA Level 9545 Digital IP 3 1132 = Drive To 22mA *(Not available when 9565 Digital IP 4...
-
Page 604: Display Configuration
Registers Display Configuration Register Access Channel Name Data Description of Semantics of Values Rule Format Attribute Front Screen Configuration 9700 Get/Set Channel 1 Channel Shown INT Channel Shown 1402 = Channel 1 Yes 1405 = Channel 1 No 9850 Channel 2 1403 = Channel 2 Yes 1405 = Channel 2 No 10000... - Page 605 Registers Conventional Conductivity Front Screen Secondary Reading Configuration 9730 Get/Set Channel 1 Secondary Secondary reading 1 Refer To Table 6 reading 1 9880 Channel 2 10030 Channel 3 9731 Get/Set Channel 1 Secondary Secondary reading 2 reading 2 9881 Channel 2 10031 Channel 3 Dissolved Oxygen Front Screen Secondary Reading Configuration...
- Page 606 Registers Suspended Solids Front Screen Secondary Reading Configuration 9770 Get/Set Channel 1 Secondary Secondary reading 1 Refer To Table 6 reading 1 9920 Channel 2 10070 Channel 3 9771 Get/Set Channel 1 Secondary Secondary reading 2 reading 2 9921 Channel 2 10071 Channel 3 Front Screen Calculation Configuration...
- Page 607 Registers Menu Header Configuration 10400 Get/Set Header 1 Menu Header Menu Header Refer To Table 6 configuration 10401 Header 2 10402 Header 3 10403 Header 4 10404 Header 5 10405 Header 6 Modbus RS485 Interface - 76 - Operating Guide...
-
Page 608: Data Logging Configuration
Registers Data Logging Configuration Register Access Name Data Description of Semantics of Values Rule Format Attribute SD Card Data logging Configuration 10500 Status Data logging Status 1076 = Logging Data 1077 = Not Logging Data 10501 Get/Set Interval Hours Data logging Interval 0 to 23 Hours (Hours) 10502... - Page 609 Registers Data logging Live Trend Configuration 10520 Get/Set Trend 1 Traces Traces Configuration 1690 = None 10545 Trend 2 1691 = 1 Trace 10570 Trend 3 1692 = 2 Traces 10521 Get/Set Trend 1 Interval Hours Trend Interval Minutes 0 to 23 Hours 10546 Trend 2 10571...
-
Page 610: Service Configuration
Registers Service Configuration Register Access Channel Name Data Description of Semantics of Values Rule Format Attribute Service Reminder 10700 Channel 1 Service Service Reminder 1076 = Yes reminder 10701 Channel 2 1077 = No 10702 Channel 3 Auxiliary mA Input Service Alarm Configuration 10710 Channel 1 Service... - Page 611 Registers Dissolved Oxygen Service Alarm Configuration 10730 Channel 1 Service FLOAT Service Interval Value 0 to 999 Days Interval* *(Only available when 10800 Channel 2 Service Reminder set to 10870 Channel 3 yes) 10732 Channel 1 Service Alarm Service Alarm Date 1 to 31 Day Date* Value...
- Page 612 Registers pH / Redox Input Service Alarm Configuration 10750 Channel 1 Service FLOAT Service Interval Value 0 to 999 Days Interval* *(Only available when 10820 Channel 2 Service Reminder set to 10890 Channel 3 yes) 10752 Channel 1 Service Alarm Service Alarm Date 1 to 31 Day Date*...
-
Page 613: Modbus Rs485 Coils
Coils Modbus RS485 Coils Note. The availability of some of the coils depends upon the configuration of the instrument. Type# Function Channel# Coil# Write Value# Calibration Resets Auxiliary mA Reset Sensor Calibration Channel 1 0 = N/A Input Channel 2 1 = Activate Channel 3 Reset Solution Calibration... - Page 614 Coils Calibration Resets Continued pH / Redox Reset Sensor Calibration Channel 1 0 = N/A Channel 2 1 = Activate Channel 3 Reset Temperature Calibration Channel 1 Channel 2 Channel 3 Reset Entire Calibration Channel 1 Channel 2 Channel 3 Reset pH Custom Buffer Channel 1 Channel 2...
- Page 615 Coils Delete Setup Channel Delete Setup In Slot A Channel 1 0 = N/A Channel 2 1 = Activate Channel 3 Delete Setup In Slot B Channel 1 Channel 2 Channel 3 Unit Delete Entire Unit Setup In Slot A Delete Entire Unit Setup In Slot B Reset Setup Channel...
- Page 616 Coils Reset Custom Ranges Auxiliary mA Reset Auxiliary mA Input Custom Curve A Channel 1 0 = N/A Input Channel 2 1 = Activate Channel 3 Reset Auxiliary mA Input Custom Curve B Channel 1 Channel 2 Channel 3 Elect Cond Reset Electrodeless Custom 1 Range Channel 1 Channel 2...
-
Page 617: Modbus Rs485 Discretes
Discretes Modbus RS485 Discretes Note. The availability of some of the discrete depends upon the configuration of the instrument Discrete Channel Name Semantics of Values Digital Input Status Digital Inputs Digital Input 1 Digital Input State = Inactive Digital Input 2 = Active Digital Input 3 Digital Input 4... - Page 618 Discretes Dissolved Oxygen Channel 1 Digital Input Switch Setup State = Switch Setup Inactive Channel 2 = Switch Setup Active Channel 3 Channel 1 Sensor simulation State = Sensor Not Simulating Channel 2 = Sensor Simulating Channel 3 Channel 1 Pressure simulation State = Pressure Not Simulating...
- Page 619 Discretes pH / Redox Channel 1 Digital Input Switch Setup State = Switch Setup Inactive Channel 2 = Switch Setup Active Channel 3 Channel 1 Sensor simulation State = Sensor Not Simulating Channel 2 = Sensor Simulating Channel 3 Channel 1 Temperature simulation State = Temperature Not Simulating...
-
Page 620: Instrument Error Status
Discretes Instrument Error Status Discrete Channel Error Name Semantics of Values /type Code Internal Errors Internal Errors 1001 E001 Processor RAM Read/Write Error 0 = Inactive 1002 E002 External RAM Read/Write Error 1 = Active 1003 E003 Internal Setup Checksum Error 1004 E004 Output Card Setup Checksum Error... - Page 621 Discretes Input Channel Errors Continued 1038 Channel 1 E038 Sensor Span Cal Out of Spec 0 = Inactive 1088 Channel 2 E088 1 = Active 1138 Channel 3 E138 1039 Channel 1 E039 No Signal 1089 Channel 2 E089 1139 Channel 3 E139 1040...
- Page 622 Discretes Input Channel Errors Continued 1054 Channel 1 E054 Temperature Input Over Range 0 = Inactive 1104 Channel 2 E104 1 = Active 1154 Channel 3 E154 1055 Channel 1 E055 Temperature Input Under Range 1105 Channel 2 E105 1155 Channel 3 E155 1056...
- Page 623 Discretes Input Channel Errors Continued 1070 Channel 1 E070 SD Card Checksum Error 0 = Inactive 1120 Channel 2 E120 1 = Active 1170 Channel 3 E170 1071 Channel 1 E071 Gain Error 1121 Channel 2 E121 1171 Channel 3 E171 1072 Channel 1...
- Page 624 Discretes Setpoint Errors Setpoint Errors 1180 Setpoint 1 E180 Dose Alarm Error 0 = Inactive 1190 Setpoint 2 E190 1 = Active 1200 Setpoint 3 E200 1210 Setpoint 4 E210 1220 Setpoint 5 E220 1230 Setpoint 6 E230 1185 Setpoint 1 E185 Store A Checksum Error 1195...
- Page 625 Discretes Current Output Errors Current Output Errors 1240 Current Op A E240 4-20mA Output Hardware Fault 0 = Inactive 1250 Current Op B E250 1 = Active 1260 Current Op C E260 1270 Current Op D E270 1280 Current Op E E280 1290 Current Op F...
- Page 626 Discretes Digital Input Errors Digital Input Errors 1301 Digital IP 1 E301 Store A Checksum Error 0 = Inactive 1306 Digital IP 2 E306 1 = Active 1311 Digital IP 3 E311 1316 Digital IP 4 E316 1321 Digital IP 5 E321 1326 Digital IP 6...
- Page 627 Discretes Data Logging Errors Data logging Errors 1350 E350 Data logging Setup Checksum Error 0 = Inactive 1351 E351 Data logging Store A Checksum Error 1 = Active 1352 E352 Data logging Store B Checksum Error 1353 E353 Data logging SD Card Checksum Error Calculation Errors Calculation Errors 1400...
- Page 628 Notes Modbus RS485 Interface - 97 - Operating Guide...
- Page 629 Notes Modbus RS485 Interface - 98 - Operating Guide...
- Page 631 Chaul End Lane Luton Bedfordshire LU4 8EZ United Kingdom Telephone: +44 (0) 1582 593693 Fax: +44 (0) 1582 598036 Email: sales@lth.co.uk Web: www.lth.co.uk...
Need help?
Do you have a question about the MXD70 Series and is the answer not in the manual?
Questions and answers