Advertisement
GENERAL INFORMATION
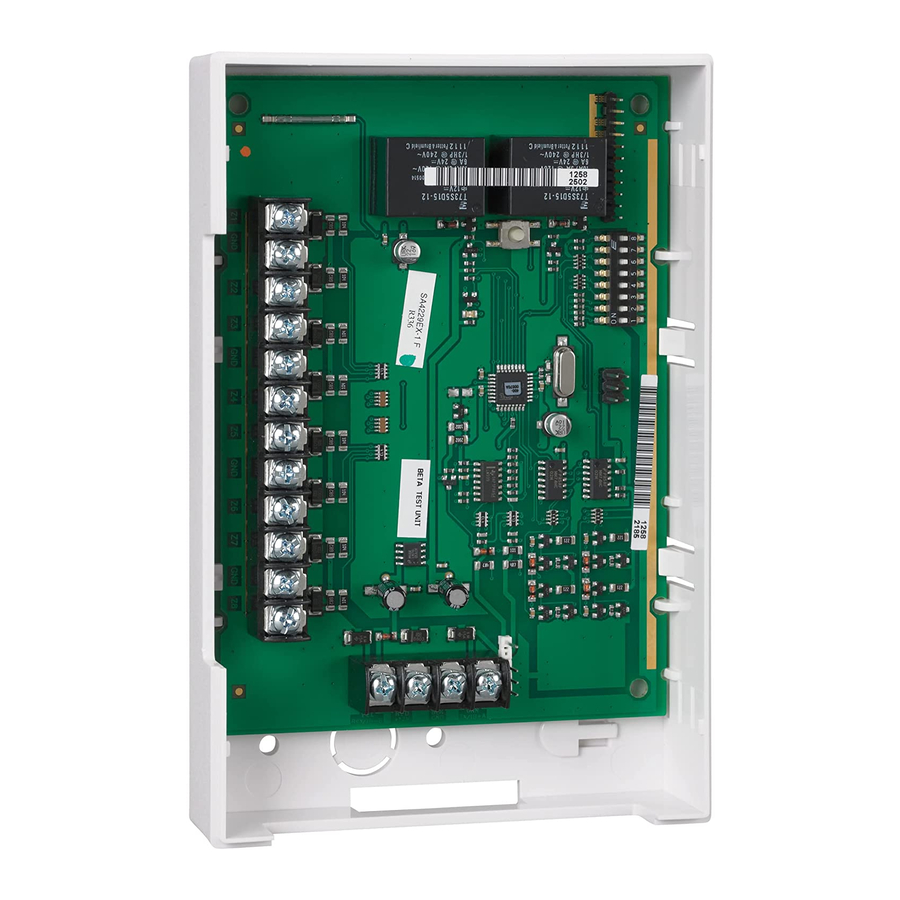
The ADEMCO 4229 Wired Zone Expander/Relay Module
adds up to eight end-of-line resistor supervised zones and
two dry form C (SPDT) relay outputs to compatible control
communicators via the control's keypad wiring.
The module may be mounted within the control's cabinet (if
room permits), or remotely. If mounted remotely, there are
provisions to tamper-protect the unit. Communication to the
module is supervised so that it cannot be disconnected from
the keypad wiring without detection by the control. If the
wiring is cut, a tamper or alarm signal will result, to indicate
that this device (and possibly other similarly connected
devices) has become inoperative.
INSTALLATION
When the module is to be mounted inside the control's
cabinet , it should be mounted horizontally.
tapping screws (provided) in two adjacent raised tabs at the
back of the cabinet. Leave the heads projecting 1/8". Hang
the module on the screw heads via two of the slotted holes
on the back of its housing. In this case, the module's cover
need not be tamper protected. If the tamper jumper (see the
diagram) is placed in its upper position, the module's cover
can be left off. See the control's instructions for additional
information.
When the module is to be mounted remotely , holes on its
back permit it to be mounted horizontally or vertically. Wires
can exit from the side or the breakout on the back of its
housing. The tamper jumper should be put into its lower
position and, when the installation is completed, the
module's cover put on. A magnet in the cover, positioned
near a reed switch in the unit, will cause a tamper signal to
be sent to the control if the cover is removed.
Affix the connections label that accompanies the unit to the
inside of the module's cover (if the cover is to be used)) or to
the inside of the control's cover
CONNECTIONS AND SETTINGS
See the table below and the diagram on the reverse side.
Make protection zone connections to 12-position terminal
block TB1. Each zone that is used must have a 1000 ohm
end-of-line resistor connected across the end of its loop , as
shown.
OFF
ON
This manual downloaded from http://www.manualowl.com
WIRED ZONE EXPANDER/RELAY MODULE
INSTALLATION AND SETUP GUIDE
Insert self-
DIP SWITCH SETTINGS
W I R E D Z O N E E X PA N D E R / R E L AY A D D R E S S S E T T I N G S
SWITCH
NUMBER
0
1
2
3
4
2
ON
—
ON
—
ON
3
ON
ON
—
—
ON
4
ON
ON
ON
ON
—
5
ON
ON
ON
ON
ON
ADEMCO 4229
If a zone is not programmed, the resistor need not be used.
The method of programming each zone for type of alarm
and reporting code to the central monitoring station varies
with the control to which the module is connected. Refer to
the installation instructions for that control unit.
Set the DIP switch to one of 16 addresses, as shown in the
table below , so the control can identify the module and
communicate with it properly.
determined by the particular control to be used, and the
control's installation instructions must be consulted.
shipped, the DIP switch is set for an address of "0".
Zone A can be set for a fast response time of 10ms to an
open circuit, if desired, by setting position 1 of the DIP
switch to "OFF". As shipped, it is set to "ON" for a response
time of 300ms, as shown in the table below. All of the
module's other protection zones have a nominal response
time of 300ms.
Connections to the module's two relays are made via the 7-
conductor cord provided. Refer to the control's installation
instructions for specific information on how to program the
control's various activation options for the relays.
Connections to the control's keypad wiring points can be
made via 4-position terminal block TB2, the 4-pin plug, or
both (wire color connections are the same)
SPECIFICATIONS
Physical
6-7/16"W x 4-1/4"H x 1-1/4"D
(163mm x 108mm x 32mm)
Electrical
Input Voltage:
12VDC (from control's remote keypad
connection points)
Input Current:
30mA (relays off)
100mA (relays on)
Relay Contact
Rating:
2A max. at 28VDC/AC
("—" means "OFF")
5
6
7
8
9
10
11
—
ON
—
ON
—
ON
—
ON
—
—
ON
ON
—
—
—
—
—
ON
ON
ON
ON
ON
ON
ON
—
—
—
—
N8910 9/97 Rev. B
The address to be set is
12
13
14
15
ON
—
ON
—
ON
ON
—
—
—
—
—
—
—
—
—
—
As
Advertisement
Table of Contents

Subscribe to Our Youtube Channel
Related Manuals for Honeywell ADEMCO 4229


Summary of Contents for Honeywell ADEMCO 4229
- Page 1 If a zone is not programmed, the resistor need not be used. The method of programming each zone for type of alarm The ADEMCO 4229 Wired Zone Expander/Relay Module and reporting code to the central monitoring station varies adds up to eight end-of-line resistor supervised zones and with the control to which the module is connected.
- Page 2 Honeywell factory service. Connection of any device(s) to a communicating bus of a Honeywell security system (e.g., keypad bus, polling loop) other than those manufactured or approved by Honeywell shall void this warranty.
Need help?
Do you have a question about the ADEMCO 4229 and is the answer not in the manual?
Questions and answers